Page 53 of 184

The presence and operation of the warn")
��������
�������� � ��������� � ����� � ����� ����
X65 - CLIOC:\Documentum\Checkout_47\Nu607-8gb_T1.WIN 12/10/2000 16:22-page53
1.45
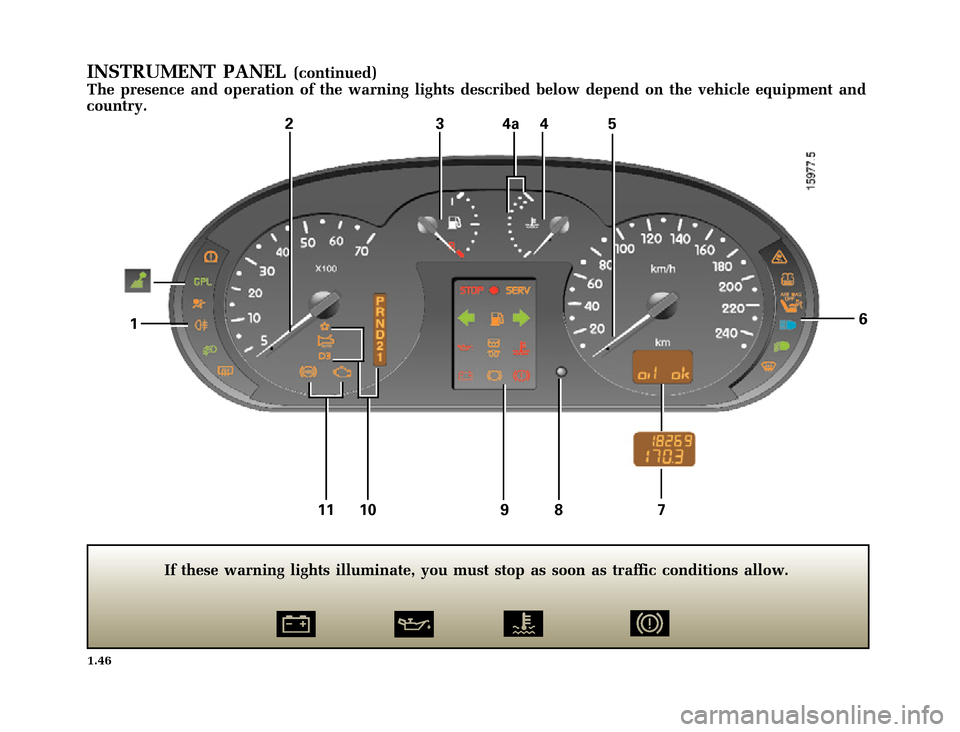
INSTRUMENT PANEL(continued)
The presence and operation of the warning lights described below depend on the vehicle equipment and
country.
7Multifunction display
• Oil level display function
The vehicle must be parked on
level ground and the engine
should have been switched off
forsometimetoobtainan
accurate level reading.
When ignition has been
switched on for approximately
30 seconds:
-if the level is correct,the
display will show “oil OK”
(Togainamoreprecise
indication of the level, press
the trip milometer reset
button or the information
scroll button on the onboard
computer for vehicles fitted
with this function. The
squares which appear on the
display indicate the level.
The number of squares
displayed reduces as the oil
level drops and they are
replaced by a dash.
To move to onboard
computer reading, press the
button again).
-if the level is at its minimum,
the word “OK” will not
appear on the display, the
dashes and the word “oil”
will flash and the SERV
warning light will illuminate.
It is vital to top up the oil as
soon as possible.7• Total mileage and trip
mileage recorder
Canbereadapproximately
30 seconds after the ignition
is switched on.
or
• On board computer display
After 30 seconds, the display
will toggle depending on the
onboard computer: see the
“onboard computer” para-
graph in section 1.
8Multifunction key
• Display selection
Press briefly to move from
the total mileage to the trip
mileage and vice versa.
•Trip mileage reset button
Once the display of the the
trip mileage is selected, press
the button and hold it down.
9STOP light
It extinguishes as soon
as the engine starts.
This illuminates together with
one of the warning lights:9Engine immobiliser
warning light
This light has several
functions.
Refer to the information on the
engine immobiliser in section 1.
SERVICE warning light
This light illuminates
when the ignition is
switched on and then
extinguishes within 3 seconds.
If it illuminates when the
vehicle is being driven, it is
advisable to stop at a Renault
Dealer soon.
It illuminates together with one
of the warning lights:
Indicator light for
left-hand direction
indicator
Page 54 of 184
234a45
11 10 9 8 7
16
��������
�������� � ��������� � ������ � ����� ����
X65 - CLIOC:\Documentum\Checkout_47\Nu607-8gb_T1.WIN 12/10/2000 16:22-page54
1.46
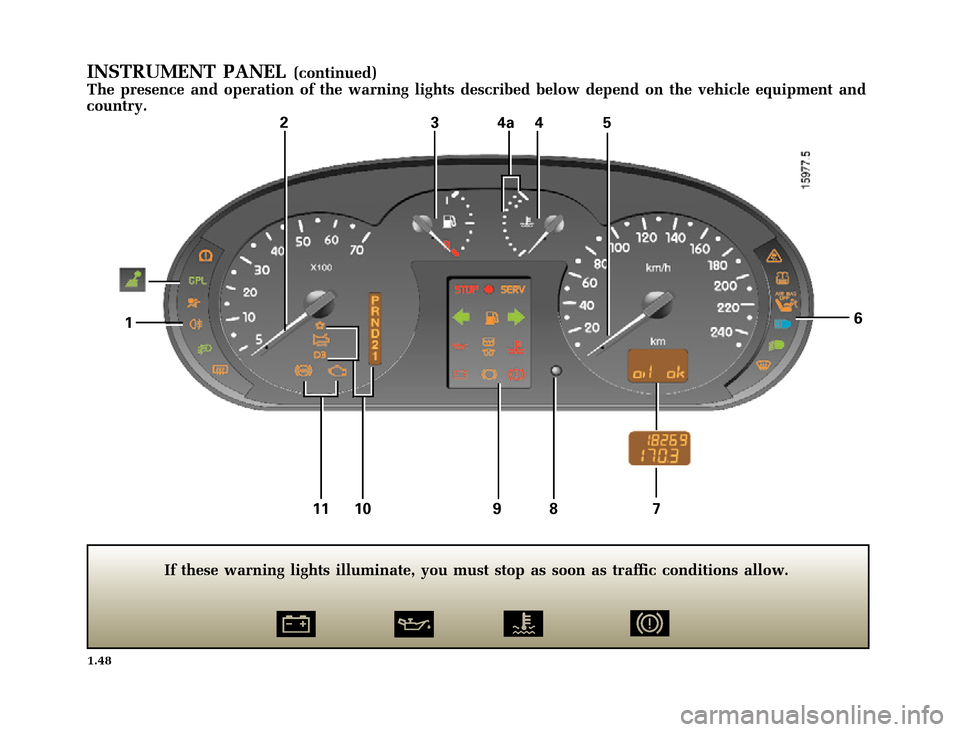
INSTRUMENT PANEL(continued)
The presence and operation of the warning lights described below depend on the vehicle equipment and
country.
If these warning lights illuminate, you must stop as soon as traffic conditions allow.
Page 55 of 184

The presence and operation of the war")
��������
�������� � ��������� � ������ � ����� ����
X65 - CLIOC:\Documentum\Checkout_47\Nu607-8gb_T1.WIN 12/10/2000 16:22-page55
1.47
INSTRUMENT PANEL(continued)
The presence and operation of the warning lights described below depend on the vehicle equipment and
country.
9Low fuel-level warning
light
It extinguishes as soon
as the engine starts.
If it illuminates or remains
illuminated, fill up with fuel as
soon as possible.
Tell-tale light for
right-hand direction
indicators
Oil pressure warning
light
It should extinguish as
soon as the engine starts; if it
illuminates when you are
driving, stop at once, switch off
the ignition and check the oil
level. If this is normal, call for
the assistance of a Renault
Dealer.9Heater plugs “on”(on
diesel version)and
electronic incident
warning light(on petrol
and diesel versions).
• Heater plugs “on”
(on diesel version)
With the ignition key in
position M, this light should
illuminate. It indicates that
the heater plugs are switched
on. It goes out as soon as
preheating is sufficient and
the engine may be started.
•Electronic incident warning
light(on petrol and diesel
versions)
If it illuminates when you are
driving, it indicates an
electric or electronic fault.
Consult your Renault Dealer
as soon as possible.9Coolant temperature
warning light
It extinguishes as
soon as the engine starts. If it
illuminates when you are
driving, stop and let the engine
idle for a minute or two. The
temperature should drop. If it
does not, stop the engine and
check the coolant level (having
let the engine cool down). Call
for the assistance of a Renault
Dealer if necessary.
Battery charging
warning light
It should extinguish
as soon as the engine starts.
If it illuminates when you are
driving, it indicates that the
circuit is overcharging or
discharged. Stop and have the
circuit checked.
Page 56 of 184
234a45
11 10 9 8 7
16
��������
�������� � ��������� � ������ � ����� ����
X65 - CLIOC:\Documentum\Checkout_47\Nu607-8gb_T1.WIN 12/10/2000 16:22-page56
1.48
INSTRUMENT PANEL(continued)
The presence and operation of the warning lights described below depend on the vehicle equipment and
country.
If these warning lights illuminate, you must stop as soon as traffic conditions allow.
Page 57 of 184

The presence and operation of the war")
��������
�������� � ��������� � ������ � ����� ����
X65 - CLIOC:\Documentum\Checkout_47\Nu607-8gb_T1.WIN 12/10/2000 16:22-page57
1.49
INSTRUMENT PANEL(continued)
The presence and operation of the warning lights described below depend on the vehicle equipment and
country.
9Not used
Handbrake “on”
warning light and fault
sensor indicator light
on the brake circuit.
If it illuminates when the
brakes are applied, it indicates
that the fluid level in the circuit
is low. It may be dangerous to
continue driving. Call for the
assistance of a Renault Dealer.
10Lights linked to the function
and/or failure of the automatic
gearbox.
Refertotheinformationonthe
proactive automatic gearbox in
section 2.11Warning light for
monitoring exhaust gas
For vehicles equipped
with this option, the light
illuminates when the ignition
is switched on and
extinguishes within 3 seconds.
•Ifitilluminates
continuously, consult your
Renault Dealer as soon as
possible.
• If it flashes, reduce the
engine speed until the light
stops flashing. Consult your
Renault Dealer as soon as
possible.
Refer to the information on
anti-pollution, fuel economy
and driving in section 2.11Anti-lock brake
warning light
This illuminates when
the ignition is switched on and
extinguishes within 3 seconds.
If it illuminates when you are
driving, it indicates an fault in
the anti-lock braking system.
Braking will then occur
normally, without the anti-lock
system.
Consult your Renault Dealer as
soon as possible.
Page 63 of 184

1
2
1
3
��������
�������� � ��������� � ������ � ����� ����
X65 - CLIOC:\Documentum\Checkout_47\Nu607-8gb_T1.WIN 12/10/2000 16:22-page63
1.55
EXTERNAL LIGHTING AND SIGNALS
Side lights
Turn the end of stalk1to
align the symbol opposite the mark3.
The instrument panel illuminates.
The brightness of the lights can be
modified by turning wheel2,ifthis
feature is fitted to the vehicle.
Dipped headlights
Turn the end of stalk1to
align the symbol opposite the mark3.
A warning light illuminates on the
instrument panel.
Before driving at night:
check that the electrical
equipment is in good condition
and adjust the headlight beam (if
your vehicle is not carrying its
normal load).
Main beam headlights
With stalk1in the dipped
beam headlight position, move the
stalk towards you.
When the main beam headlights are
on, a warning light illuminates on
the instrument panel.
To return to the dipped beam
headlight position, move the stalk
towards you once more.
Turning the lights off
Return stalk1to its initial
position.
Lights on reminder buzzer
If the driver’s door is opened, a
buzzer will sound to indicate that
the lights have been left on after the
ignition has been switched off (to
prevent discharge of the battery
etc.).
Page 64 of 184
445
��������
�������� � ��������� � ������ � ����� ����
X65 - CLIOC:\Documentum\Checkout_47\Nu607-8gb_T1.WIN 12/10/2000 16:22-page64
1.56
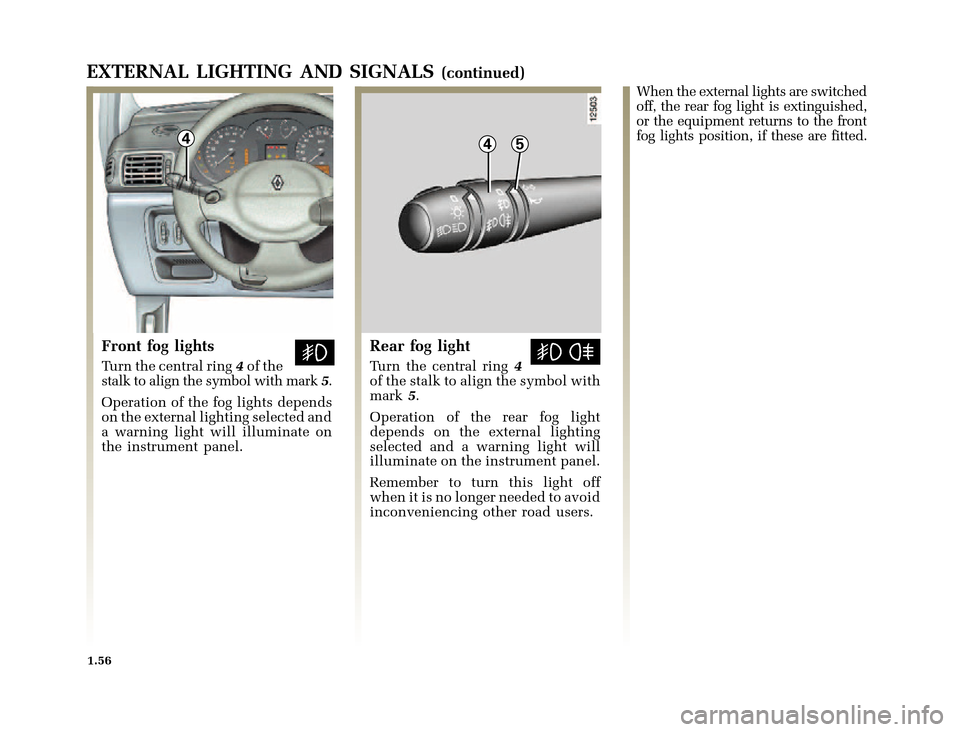
EXTERNAL LIGHTING AND SIGNALS(continued)
Front fog lights
Turn the central ring4of the
stalk to align the symbol with mark5.
Operation of the fog lights depends
on the external lighting selected and
a warning light will illuminate on
the instrument panel.
Rear fog light
Turn the central ring4
of the stalk to align the symbol with
mark5.
Operation of the rear fog light
depends on the external lighting
selected and a warning light will
illuminate on the instrument panel.
Remember to turn this light off
when it is no longer needed to avoid
inconveniencing other road users.When the external lights are switched
off, the rear fog light is extinguished,
or the equipment returns to the front
fog lights position, if these are fitted.
Page 69 of 184
1
2
��������
�������� � ��������� � ������ � ����� ����
X65 - CLIOC:\Documentum\Checkout_47\Nu607-8gb_T1.WIN 12/10/2000 16:22-page69
1.61
DE-ICING / DEMISTING
Heated rear screen
With the engine running,
press button1(the warning light
illuminates on the instrument panel).
This function ensures the de-icing
and demisting of the rear screen and
the heated external rear view mirrors
(if the vehicle is fitted with them).
Thefunctionisstopped:
- automatically after 15 minutes
operation,
- by pressing button1again (the
warning light extinguishes).
Demisting the windscreen
Move control2: to position .
To improve efficiency, close the
dashboard vents.
All the air flow is now directed to
the windscreen demisting outlets
and the front side window demisters.