2000 NISSAN XTERRA check oil
[x] Cancel search: check oilPage 50 of 263
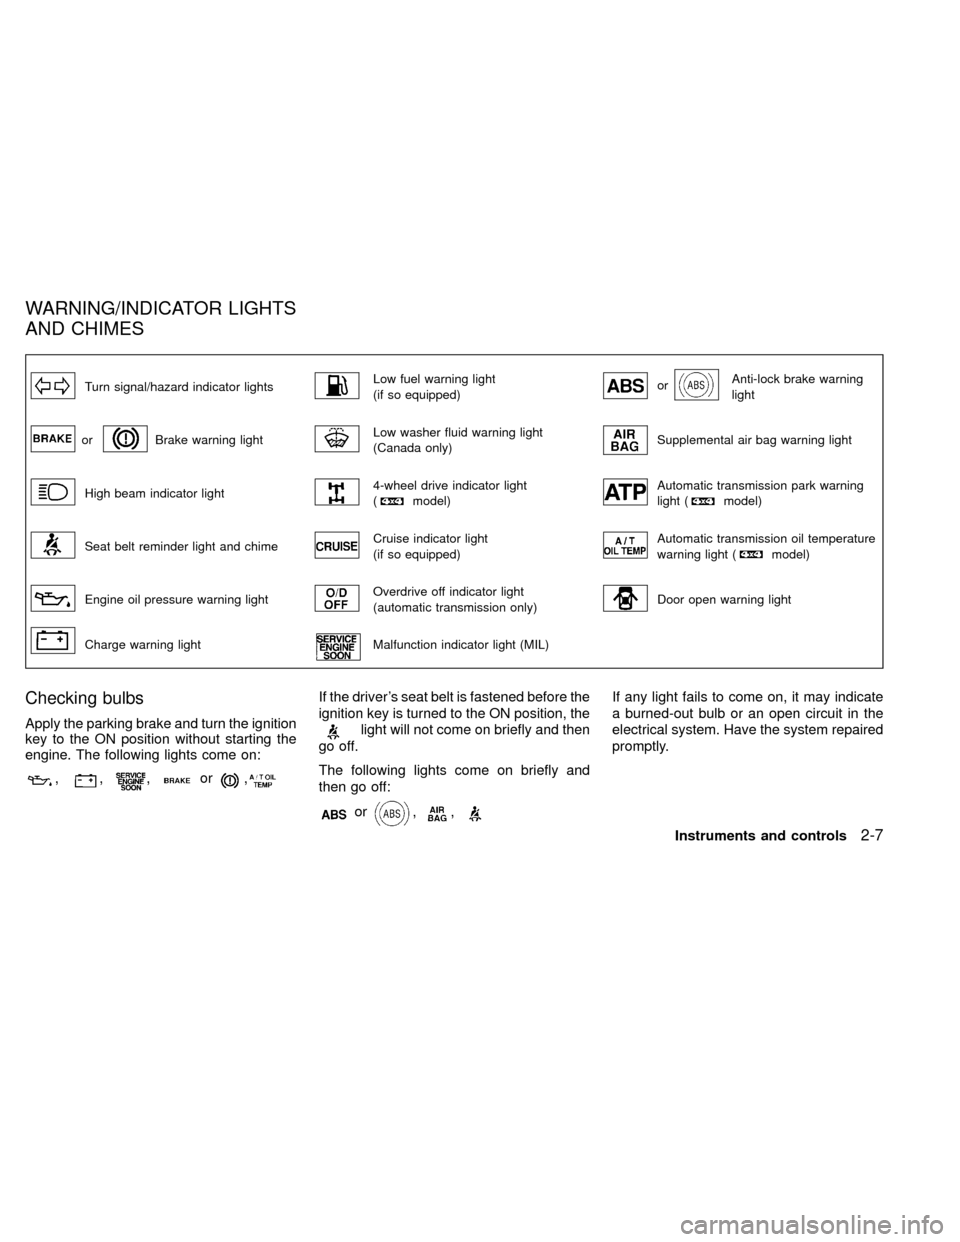
Turn signal/hazard indicator lightsLow fuel warning light
(if so equipped)orAnti-lock brake warning
light
orBrake warning lightLow washer fluid warning light
(Canada only)Supplemental air bag warning light
High beam indicator light4-wheel drive indicator light
(model)Automatic transmission park warning
light (model)
Seat belt reminder light and chimeCruise indicator light
(if so equipped)Automatic transmission oil temperature
warning light (model)
Engine oil pressure warning lightOverdrive off indicator light
(automatic transmission only)Door open warning light
Charge warning lightMalfunction indicator light (MIL)
Checking bulbs
Apply the parking brake and turn the ignition
key to the ON position without starting the
engine. The following lights come on:
,,,or,
If the driver's seat belt is fastened before the
ignition key is turned to the ON position, the
light will not come on briefly and then
go off.
The following lights come on briefly and
then go off:
or,,
If any light fails to come on, it may indicate
a burned-out bulb or an open circuit in the
electrical system. Have the system repaired
promptly.
WARNING/INDICATOR LIGHTS
AND CHIMES
Instruments and controls2-7
ZX
Page 52 of 263
OThe supplemental air bag warning light
flashes intermittently.
OThe supplemental air bag warning light
does not come on at all.
Unless checked and repaired, the supplemen-
tal restraint system may not function properly.
For additional details on the supplemental
restraint system (supplemental air bag sys-
tem), see the ``Seats, Restraints and Supple-
mental Air Bag Systems'' section of this
manual
WARNING
If the supplemental air bag warning
light is on, it could mean that the air
bag will not operate in an accident.
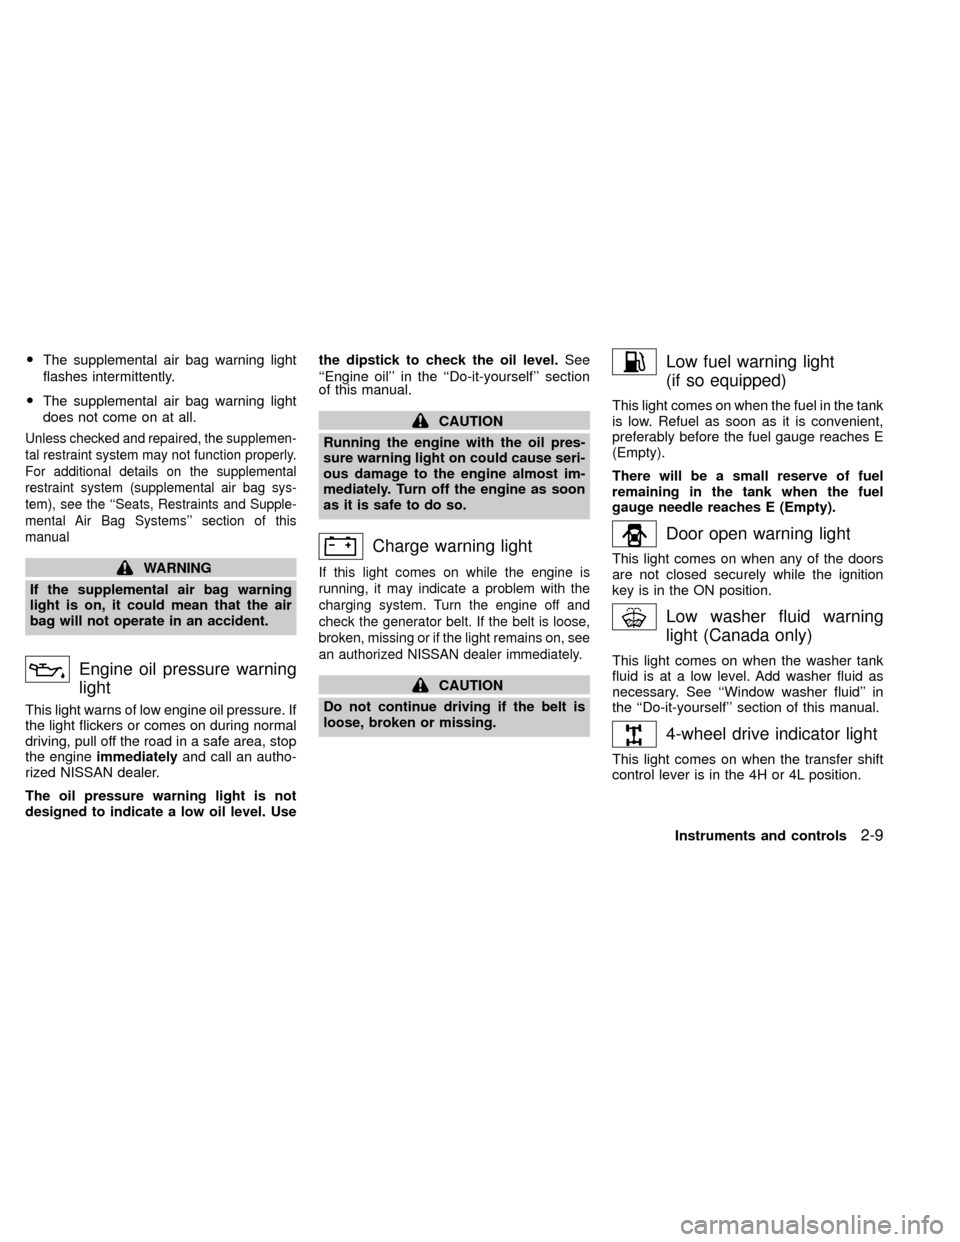
Engine oil pressure warning
light
This light warns of low engine oil pressure. If
the light flickers or comes on during normal
driving, pull off the road in a safe area, stop
the engineimmediatelyand call an autho-
rized NISSAN dealer.
The oil pressure warning light is not
designed to indicate a low oil level. Usethe dipstick to check the oil level.See
``Engine oil'' in the ``Do-it-yourself'' section
of this manual.
CAUTION
Running the engine with the oil pres-
sure warning light on could cause seri-
ous damage to the engine almost im-
mediately. Turn off the engine as soon
as it is safe to do so.
Charge warning light
If this light comes on while the engine is
running, it may indicate a problem with the
charging system. Turn the engine off and
check the generator belt. If the belt is loose,
broken, missing or if the light remains on, see
an authorized NISSAN dealer immediately.
CAUTION
Do not continue driving if the belt is
loose, broken or missing.
Low fuel warning light
(if so equipped)
This light comes on when the fuel in the tank
is low. Refuel as soon as it is convenient,
preferably before the fuel gauge reaches E
(Empty).
There will be a small reserve of fuel
remaining in the tank when the fuel
gauge needle reaches E (Empty).
Door open warning light
This light comes on when any of the doors
are not closed securely while the ignition
key is in the ON position.
Low washer fluid warning
light (Canada only)
This light comes on when the washer tank
fluid is at a low level. Add washer fluid as
necessary. See ``Window washer fluid'' in
the ``Do-it-yourself'' section of this manual.
4-wheel drive indicator light
This light comes on when the transfer shift
control lever is in the 4H or 4L position.
Instruments and controls
2-9
ZX
Page 53 of 263
WARNING
OWhen parking always make sure the
transfer control lever is in the 2H, 4H
or 4L position and the parking brake
is applied.
OFailure to engage the transfer con-
trol lever in 2H, 4H or 4L could result
in the vehicle moving unexpectedly,
which could cause serious personal
injury or property damage.
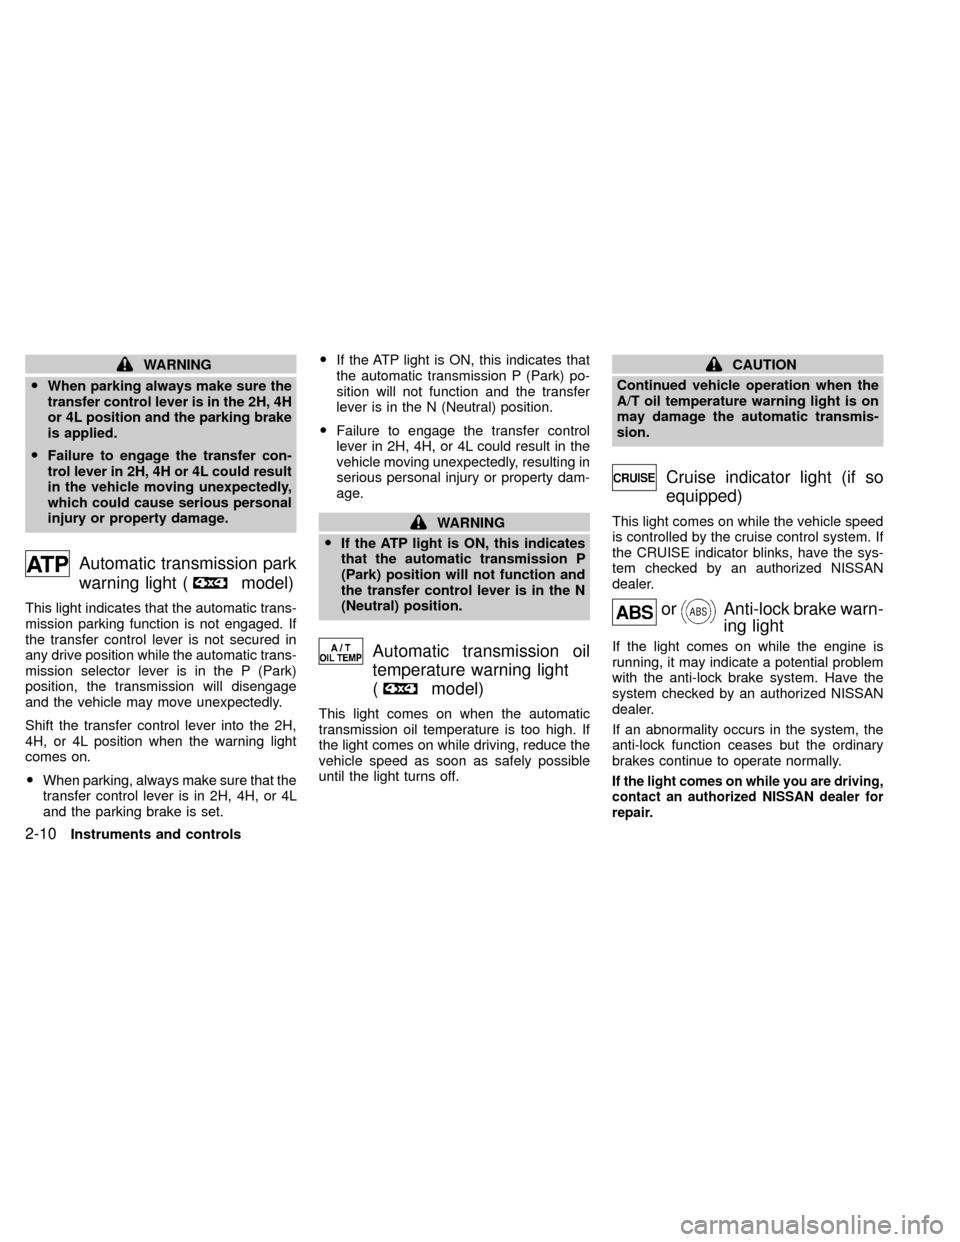
Automatic transmission park
warning light (
model)
This light indicates that the automatic trans-
mission parking function is not engaged. If
the transfer control lever is not secured in
any drive position while the automatic trans-
mission selector lever is in the P (Park)
position, the transmission will disengage
and the vehicle may move unexpectedly.
Shift the transfer control lever into the 2H,
4H, or 4L position when the warning light
comes on.
OWhen parking, always make sure that the
transfer control lever is in 2H, 4H, or 4L
and the parking brake is set.OIf the ATP light is ON, this indicates that
the automatic transmission P (Park) po-
sition will not function and the transfer
lever is in the N (Neutral) position.
OFailure to engage the transfer control
lever in 2H, 4H, or 4L could result in the
vehicle moving unexpectedly, resulting in
serious personal injury or property dam-
age.
WARNING
OIf the ATP light is ON, this indicates
that the automatic transmission P
(Park) position will not function and
the transfer control lever is in the N
(Neutral) position.
Automatic transmission oil
temperature warning light
(
model)
This light comes on when the automatic
transmission oil temperature is too high. If
the light comes on while driving, reduce the
vehicle speed as soon as safely possible
until the light turns off.
CAUTION
Continued vehicle operation when the
A/T oil temperature warning light is on
may damage the automatic transmis-
sion.
Cruise indicator light (if so
equipped)
This light comes on while the vehicle speed
is controlled by the cruise control system. If
the CRUISE indicator blinks, have the sys-
tem checked by an authorized NISSAN
dealer.
orAnti-lock brake warn-
ing light
If the light comes on while the engine is
running, it may indicate a potential problem
with the anti-lock brake system. Have the
system checked by an authorized NISSAN
dealer.
If an abnormality occurs in the system, the
anti-lock function ceases but the ordinary
brakes continue to operate normally.
If the light comes on while you are driving,
contact an authorized NISSAN dealer for
repair.
2-10Instruments and controls
ZX
Page 133 of 263
ignition switch is in ACC position.
ON (Normal operating position) (3)
This position turns on the ignition system
and electrical accessories.
START (4)
This position starts the engine. As soon as
the engine has started, release the key. It
automatically returns to the ON position.OMake sure the area around the vehicle is
clear.
OCheck fluid levels such as engine oil,
coolant, brake and clutch fluid, and win-
dow washer fluid as frequently as pos-
sible, at least whenever you refuel.
OCheck that all windows and lights are
clean.
OVisually inspect tires for their appearance
and condition. Also check tires for proper
inflation.
OLock all doors.
OPosition seat and adjust head restraints.
OAdjust inside and outside mirrors.
OFasten seat belts and ask all passengers
to do likewise.
OCheck the operation of warning lights
when key is turned to the ON (3) position.
See9Warning/Indicator lights and
chimes9in the9Instruments and controls9
section.WARNING
ODo not depress the accelerator pedal
while shifting from P (Park) or N
(Neutral) to R (Reverse), D (Drive), 2
or 1. Always depress the brake pedal
until shifting is completed. Failure to
do so could cause you to lose con-
trol and have an accident.
OCold engine idle speed is high, so
use caution when shifting into a for-
ward or reverse gear before the en-
gine has warmed up.
ONever shift to P (Park) or R (Reverse)
while the vehicle is moving. This
could cause an accident.
CAUTION
OWhen stopping the vehicle on an
uphill grade, do not hold the vehicle
by depressing the accelerator pedal.
The foot brake should be used for
this purpose.
OOn slippery roads, do not downshift.
This may cause a loss of control.
BEFORE STARTING THE
ENGINEDRIVING WITH AUTOMATIC
TRANSMISSION (if so
equipped)
5-8Starting and driving
ZX
Page 170 of 263
you in choosing the proper product.
OWax your vehicle only after a thorough
washing. Follow the instructions supplied
with the wax.
ODo not use a wax containing any abra-
sives, cutting compounds or cleaners
that may damage the vehicle finish.
OIf the surface does not polish easily, use
a ``road tar'' remover and wax again.
Machine compounding or aggressive pol-
ishing on a base coat/clear coat paint finish
may dull the finish or leave swirl marks.
Removing spots
Remove tar and oil spots, industrial dust,
insects and tree sap as quickly as possible
from the surface of the paint to avoid per-
manent damage or staining. Special clean-
ing products are available at an authorized
NISSAN dealer or any automotive accesso-
ries store.
Underbody
In areas where road salt is used in winter, it
is necessary to clean the underbody regu-
larly in order to prevent dirt and salt from
building up and causing corrosion on theunderbody and suspension. Before the win-
ter period and again in the spring, the
underseal must be checked and, if neces-
sary, retreated.
Cleaning glass
Use glass cleaner to remove smoke and
dust film from the glass surfaces. It is nor-
mal for glass to be coated with a film after
the vehicle is parked in the hot sun. Glass
cleaner and a soft cloth easily remove this
film.
CAUTION
When cleaning the inside of the win-
dow, do not use sharp-edged tools or
abrasive cleaners or chlorine-based
disinfectant cleaners. They could dam-
age the electrical conductors, radio an-
tenna elements or rear window defog-
ger elements.
Cleaning aluminum alloy wheels
Wash regularly, especially during winter
months in areas where road salt is used.
Salt could discolor the wheel if not removed.
Chrome parts
Clean all chrome parts regularly with a
non-abrasive chrome polish to maintain the
finish.
Cleaning interior
Occasionally remove loose dust from the
interior trim, plastic parts and seats using a
vacuum cleaner or soft brush. Wipe the
vinyl and leather surfaces with a clean, soft
cloth dampened in mild soap solution, then
wipe clean with a dry soft cloth. Before
using any fabric protector, read the manu-
facturer's recommendations. Some fabric
protectors contain chemicals that stain or
bleach the seat material. Use a cloth damp-
ened only with water, to clean the meter and
gauge lens.
CAUTION
ONever use benzine, thinner or any
similar material.
ONever use fabric protectors unless
recommended by the manufacturer.
ODo not use glass or plastic cleaner
on meter or gauge lens covers. It
may damage the lens cover.
Appearance and care
7-3
ZX
Page 174 of 263

8 Do-it-yourself
Maintenance precautions .......................................8-2
Engine compartment check locations ....................8-3
Engine cooling system ...........................................8-5
Checking engine coolant level ...............................8-5
Changing engine coolant .......................................8-6
Engine oil ...............................................................8-9
Checking engine oil level .......................................8-9
Changing engine oil .............................................8-10
Changing engine oil filter .....................................8-12
Automatic transmission fluid (ATF) ......................8-13
Temperature conditions for checking ATF............8-13
Power steering fluid..............................................8-14
Brake and clutch fluid...........................................8-15
Window washer fluid ............................................8-16
Battery ..................................................................8-16
Jump starting ........................................................8-17
Drive belts ............................................................8-18Spark plug replacement .......................................8-19
Air cleaner housing filter ......................................8-20
Wiper blades ........................................................8-22
Parking brake check.............................................8-24
Brake pedal ..........................................................8-24
Brake booster .......................................................8-25
Clutch pedal .........................................................8-26
Fuses ....................................................................8-27
Multi-remote controller battery replacement ........8-28
Light bulbs ............................................................8-29
Headlights ............................................................8-29
Bulb replacement .................................................8-30
Front fog light bulb replacement
(if so equipped) ....................................................8-33
Wheels and tires ..................................................8-34
Four-wheel drive models ......................................8-37
ZX
Page 182 of 263

11. Check the drain valve on the radiator
and drain plugs on the engine block for
any sign of leakage.CHECKING ENGINE OIL LEVEL
1. Park the vehicle on a level surface and
apply the parking brake.
2. Start the engine and let it idle until it
reaches operating temperature.
3. Turn off the engine.Wait a few minutes
for the oil to drain back into the oil
pan.4. Remove the dipstick and wipe it clean.
Reinsert it all the way.
ADI1058ADI1059ADI1060
ENGINE OIL
Do-it-yourself8-9
ZX
Page 183 of 263
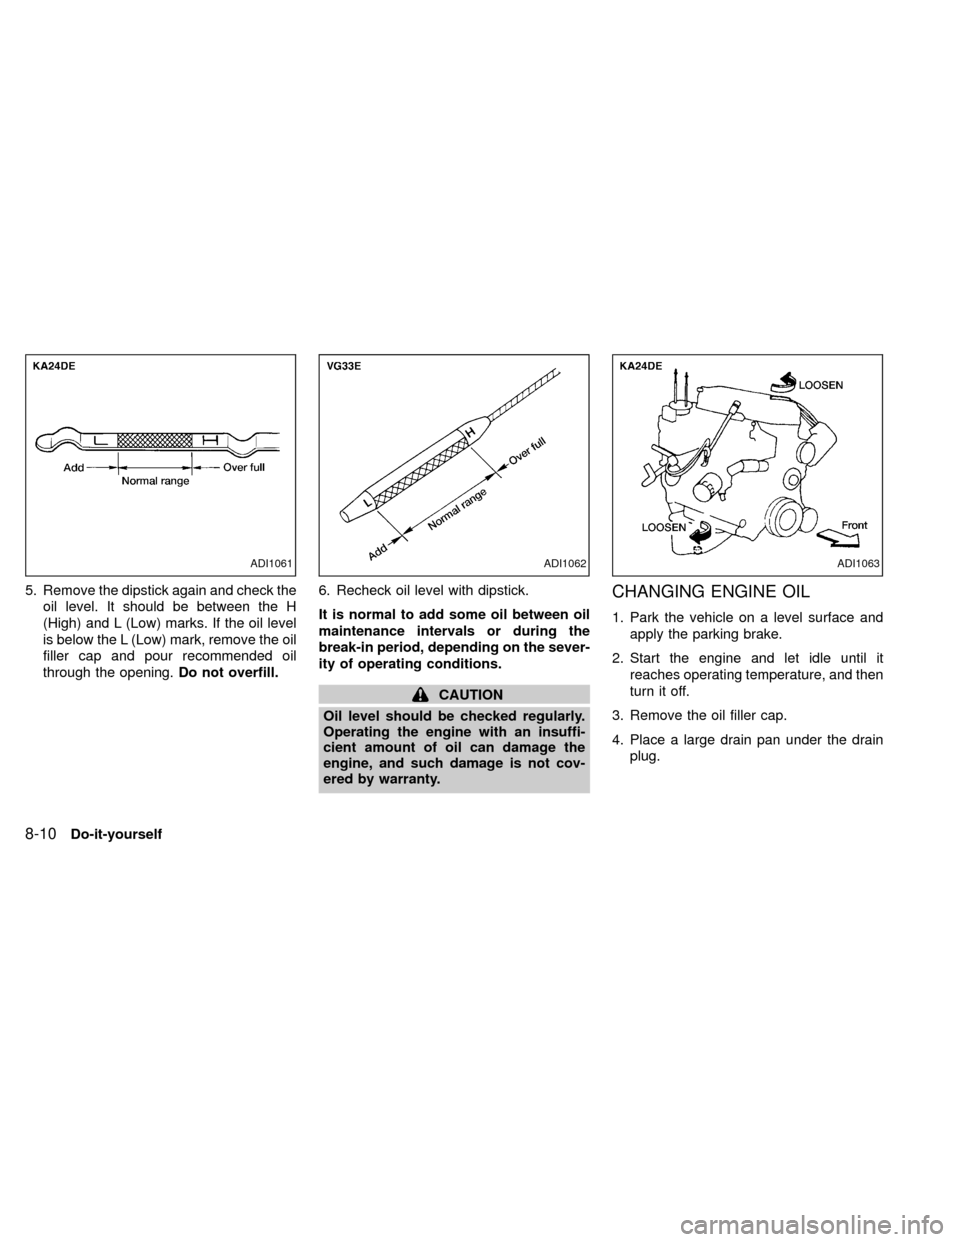
5. Remove the dipstick again and check the
oil level. It should be between the H
(High) and L (Low) marks. If the oil level
is below the L (Low) mark, remove the oil
filler cap and pour recommended oil
through the opening.Do not overfill.6. Recheck oil level with dipstick.
It is normal to add some oil between oil
maintenance intervals or during the
break-in period, depending on the sever-
ity of operating conditions.
CAUTION
Oil level should be checked regularly.
Operating the engine with an insuffi-
cient amount of oil can damage the
engine, and such damage is not cov-
ered by warranty.
CHANGING ENGINE OIL
1. Park the vehicle on a level surface and
apply the parking brake.
2. Start the engine and let idle until it
reaches operating temperature, and then
turn it off.
3. Remove the oil filler cap.
4. Place a large drain pan under the drain
plug.
ADI1061ADI1062ADI1063
8-10Do-it-yourself
ZX