2000 NISSAN XTERRA child lock
[x] Cancel search: child lockPage 40 of 263
OThe three-point seat belt in your ve-
hicle is equipped with an automatic
locking mode retractor which must
be used when installing a child re-
straint.
OFailure to use the retractor's locking
mode will result in the child restraint
not being properly secured. The re-
straint could tip over or otherwise be
unsecured and cause injury to the
child in a sudden stop or collision.
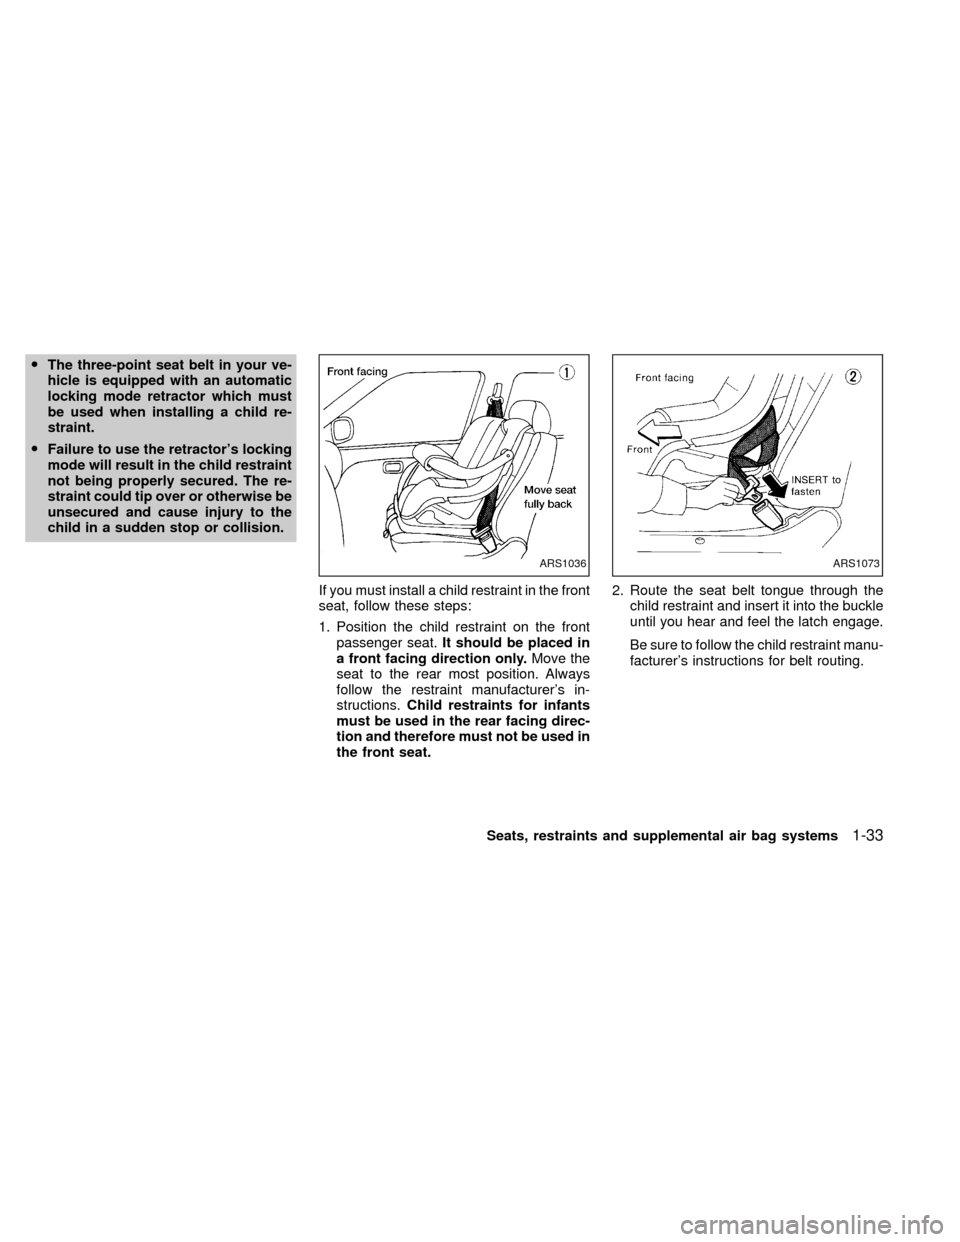
If you must install a child restraint in the front
seat, follow these steps:
1. Position the child restraint on the front
passenger seat.It should be placed in
a front facing direction only.Move the
seat to the rear most position. Always
follow the restraint manufacturer's in-
structions.Child restraints for infants
must be used in the rear facing direc-
tion and therefore must not be used in
the front seat.2. Route the seat belt tongue through the
child restraint and insert it into the buckle
until you hear and feel the latch engage.
Be sure to follow the child restraint manu-
facturer's instructions for belt routing.
ARS1036ARS1073
Seats, restraints and supplemental air bag systems1-33
ZX
Page 41 of 263

3. Pull on the shoulder belt until all of the
belt is fully extended. At this time, the belt
retractor is in the automatic locking mode
(child restraint mode). It reverts back to
emergency locking mode when the belt is
fully retracted.4. Allow the seat belt to retract slightly. Pull
up on the seat belt to remove any slack in
the belt.5. Before placing the child in the child re-
straint, use force to tilt the child restraint
from side to side, and tug it forward to
make sure it is securely held in place.
6.
Check that the retractor is in the automatic
locking mode by trying to pull more seat
belt out of the retractor. If you cannot pull
any more seat belt webbing out of the
retractor, the retractor is in the automatic
locking mode.
7. Check to make sure the child restraint is
properly secured prior to each use. If the
seat belt is not locked, repeat steps 3
through 6.
ARS1034ARS1074ARS1079
1-34Seats, restraints and supplemental air bag systems
ZX
Page 42 of 263

After the child restraint is removed and the
seat belt is fully retracted, the automatic
locking mode (child restraint mode) is can-
celed.
Seats, restraints and supplemental air bag systems
1-35
ZX
Page 68 of 263
The interior lights illuminate when a front,
rear or the back door is opened. Once the
doors are closed, these lights turn off in 30
seconds or turn off immediately when the
key is turned to the ON position.
Battery saver
If the vehicle doors are not fully closed and
the interior lights remain illuminated, they
eventually turn off automatically to prevent
the battery from becoming discharged. Inte-
rior lights that illuminate when doors are
opened turn off after approximately 30 min-
utes.
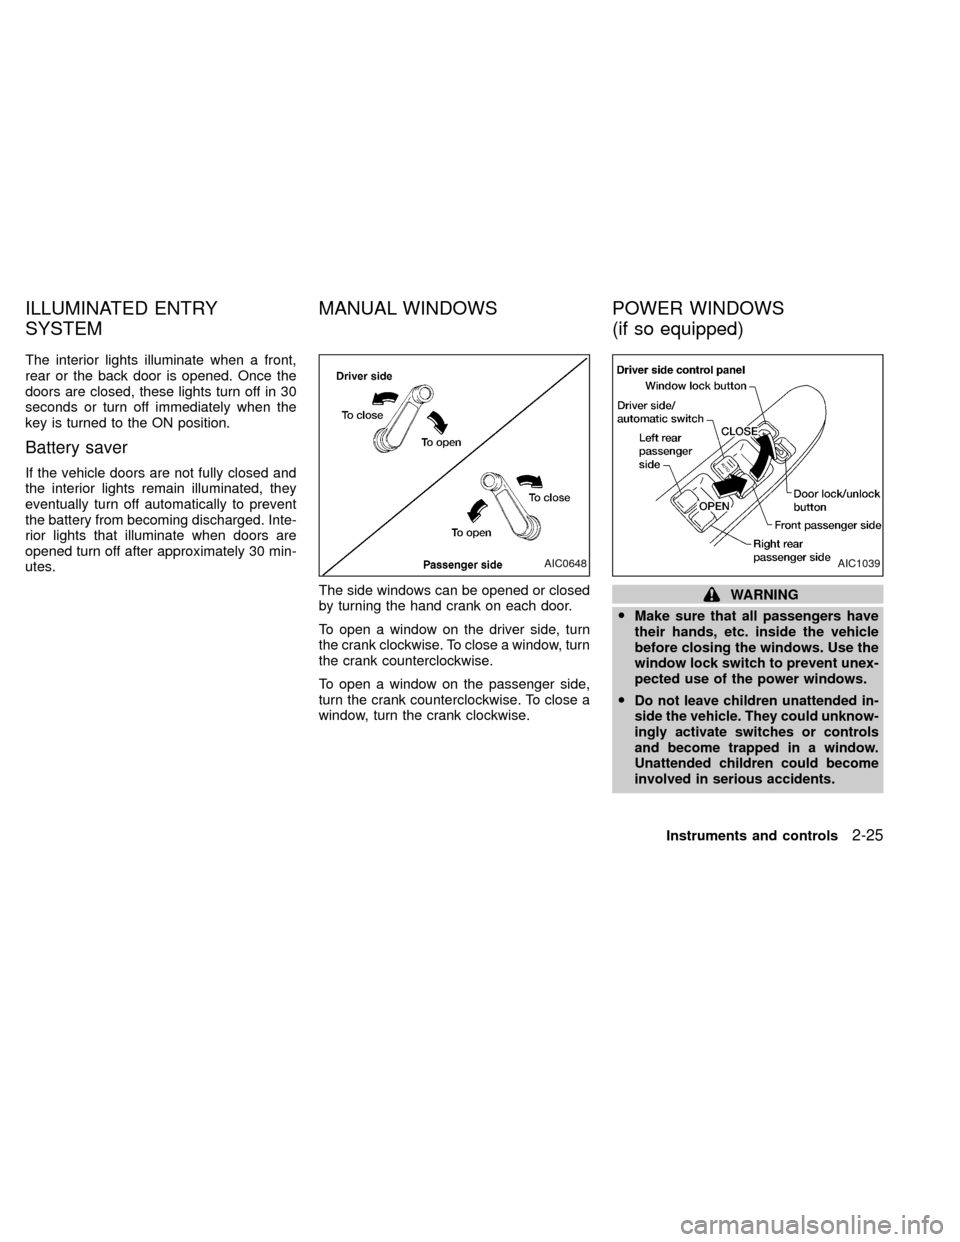
The side windows can be opened or closed
by turning the hand crank on each door.
To open a window on the driver side, turn
the crank clockwise. To close a window, turn
the crank counterclockwise.
To open a window on the passenger side,
turn the crank counterclockwise. To close a
window, turn the crank clockwise.
WARNING
OMake sure that all passengers have
their hands, etc. inside the vehicle
before closing the windows. Use the
window lock switch to prevent unex-
pected use of the power windows.
O
Do not leave children unattended in-
side the vehicle. They could unknow-
ingly activate switches or controls
and become trapped in a window.
Unattended children could become
involved in serious accidents.
AIC0648AIC1039
ILLUMINATED ENTRY
SYSTEMMANUAL WINDOWS POWER WINDOWS
(if so equipped)
Instruments and controls2-25
ZX
Page 72 of 263

3 Pre-driving checks and adjustments
Key .........................................................................3-2
Door locks ..............................................................3-2
Power door locks (if so equipped) .........................3-3
Child safety rear door lock .....................................3-4
Multi-remote control system (if so equipped).........3-4
Battery replacement ...............................................3-7
Illuminated entry system ........................................3-8
Hood release ..........................................................3-9
Glove box ...............................................................3-9Back door lock......................................................3-10
Roof rack with gear basket (if so equipped) ........ 3-11
Step rail ................................................................3-13
Fuel filler cap ........................................................3-14
Tilting steering wheel (if so equipped) .................3-15
Outside mirror remote control (if so equipped) ....3-15
Outside mirrors .....................................................3-16
Inside mirror .........................................................3-17
Vanity mirror (if so equipped) ...............................3-17
ZX
Page 73 of 263
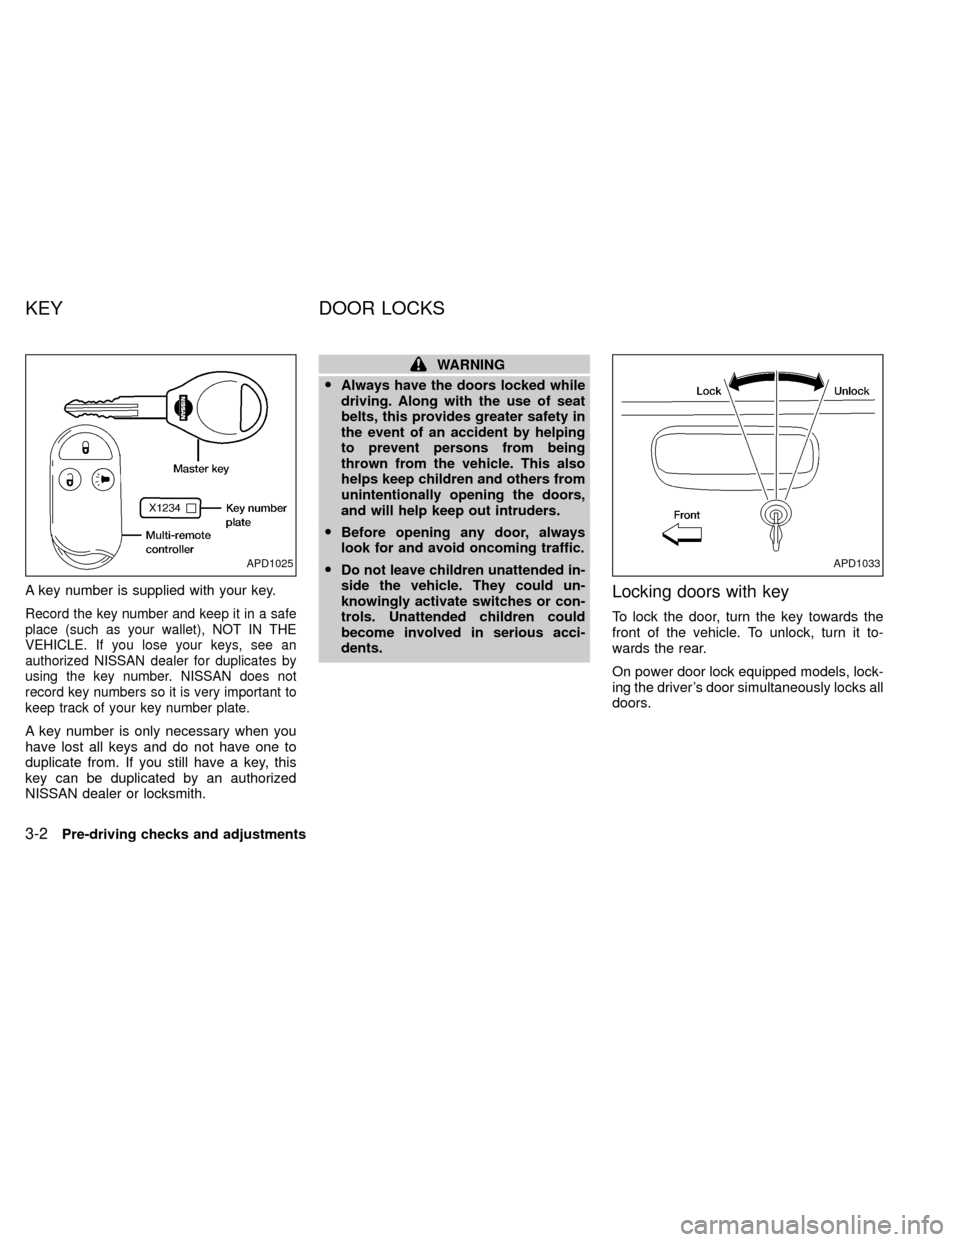
A key number is supplied with your key.
Record the key number and keep it in a safe
place (such as your wallet), NOT IN THE
VEHICLE. If you lose your keys, see an
authorized NISSAN dealer for duplicates by
using the key number. NISSAN does not
record key numbers so it is very important to
keep track of your key number plate.
A key number is only necessary when you
have lost all keys and do not have one to
duplicate from. If you still have a key, this
key can be duplicated by an authorized
NISSAN dealer or locksmith.
WARNING
OAlways have the doors locked while
driving. Along with the use of seat
belts, this provides greater safety in
the event of an accident by helping
to prevent persons from being
thrown from the vehicle. This also
helps keep children and others from
unintentionally opening the doors,
and will help keep out intruders.
OBefore opening any door, always
look for and avoid oncoming traffic.
ODo not leave children unattended in-
side the vehicle. They could un-
knowingly activate switches or con-
trols. Unattended children could
become involved in serious acci-
dents.
Locking doors with key
To lock the door, turn the key towards the
front of the vehicle. To unlock, turn it to-
wards the rear.
On power door lock equipped models, lock-
ing the driver's door simultaneously locks all
doors.
APD1025APD1033
KEY DOOR LOCKS
3-2Pre-driving checks and adjustments
ZX
Page 75 of 263
CHILD SAFETY REAR DOOR
LOCK
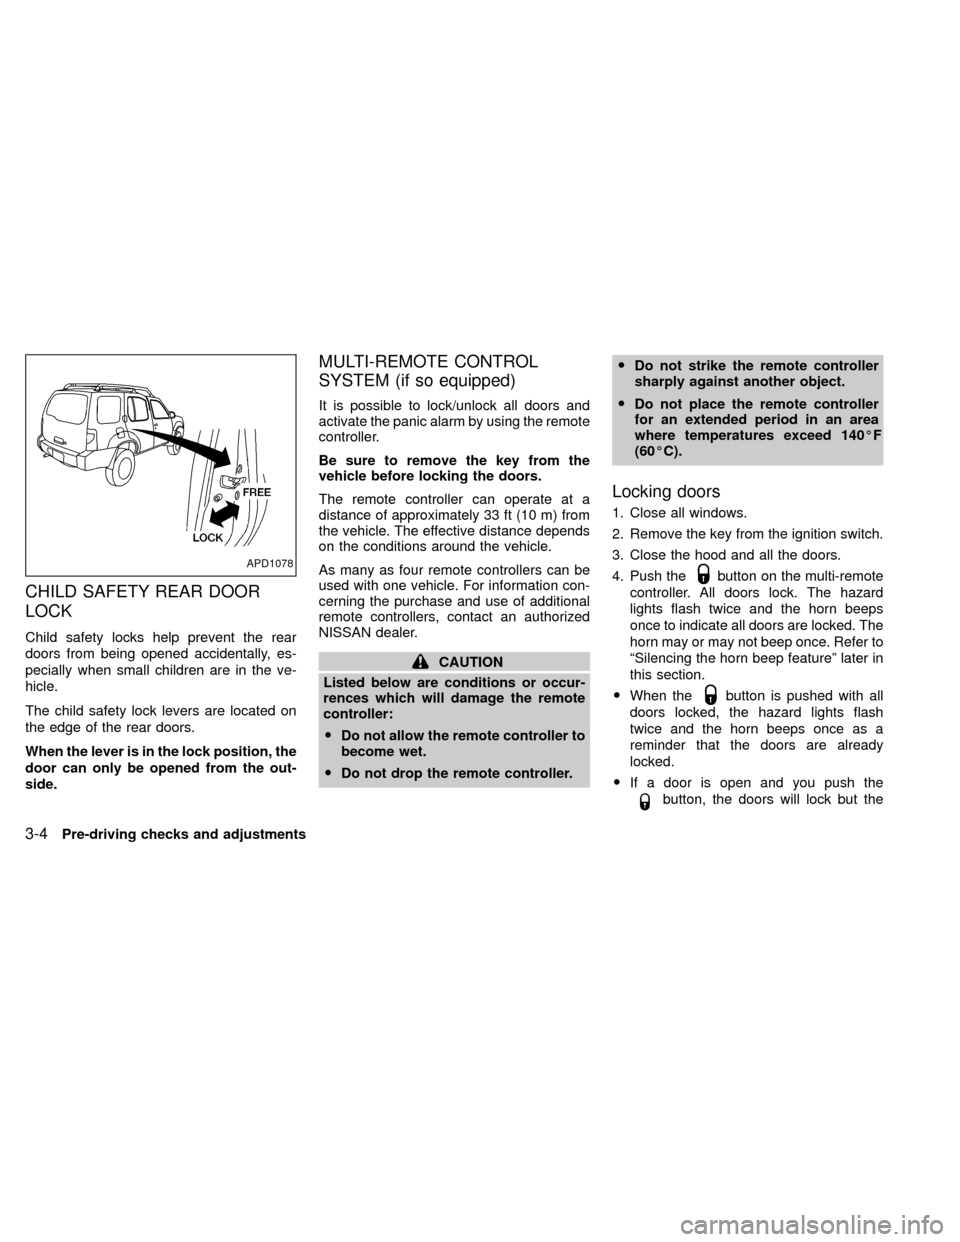
Child safety locks help prevent the rear
doors from being opened accidentally, es-
pecially when small children are in the ve-
hicle.
The child safety lock levers are located on
the edge of the rear doors.
When the lever is in the lock position, the
door can only be opened from the out-
side.
MULTI-REMOTE CONTROL
SYSTEM (if so equipped)
It is possible to lock/unlock all doors and
activate the panic alarm by using the remote
controller.
Be sure to remove the key from the
vehicle before locking the doors.
The remote controller can operate at a
distance of approximately 33 ft (10 m) from
the vehicle. The effective distance depends
on the conditions around the vehicle.
As many as four remote controllers can be
used with one vehicle. For information con-
cerning the purchase and use of additional
remote controllers, contact an authorized
NISSAN dealer.
CAUTION
Listed below are conditions or occur-
rences which will damage the remote
controller:
ODo not allow the remote controller to
become wet.
ODo not drop the remote controller.ODo not strike the remote controller
sharply against another object.
ODo not place the remote controller
for an extended period in an area
where temperatures exceed 140ÉF
(60ÉC).
Locking doors
1. Close all windows.
2. Remove the key from the ignition switch.
3. Close the hood and all the doors.
4. Push the
button on the multi-remote
controller. All doors lock. The hazard
lights flash twice and the horn beeps
once to indicate all doors are locked. The
horn may or may not beep once. Refer to
ªSilencing the horn beep featureº later in
this section.
OWhen the
button is pushed with all
doors locked, the hazard lights flash
twice and the horn beeps once as a
reminder that the doors are already
locked.
OIf a door is open and you push the
button, the doors will lock but the
APD1078
3-4Pre-driving checks and adjustments
ZX
Page 256 of 263
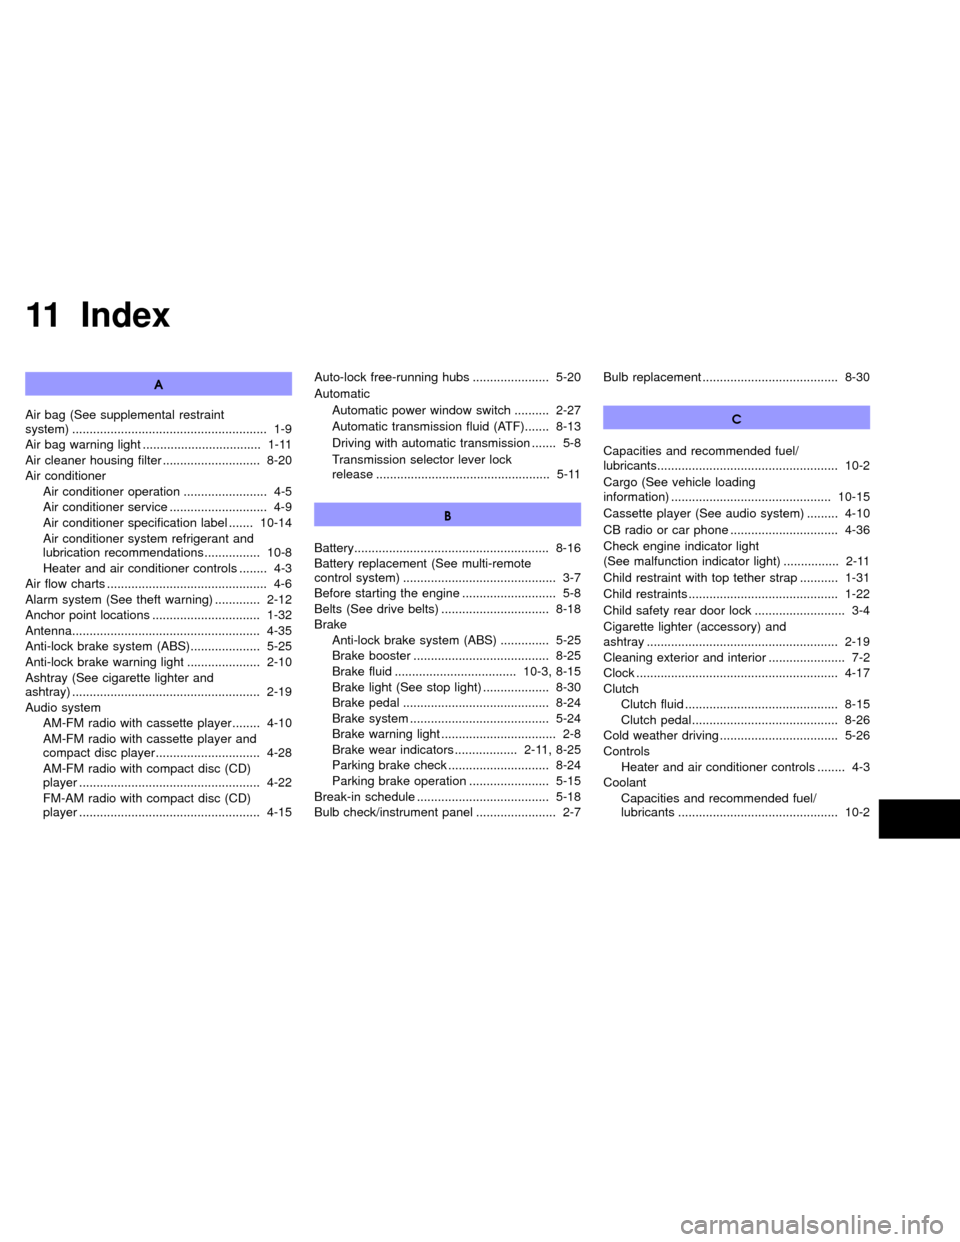
11 Index
A
Air bag (See supplemental restraint
system) ........................................................ 1-9
Air bag warning light .................................. 1-11
Air cleaner housing filter ............................ 8-20
Air conditioner
Air conditioner operation ........................ 4-5
Air conditioner service ............................ 4-9
Air conditioner specification label ....... 10-14
Air conditioner system refrigerant and
lubrication recommendations ................ 10-8
Heater and air conditioner controls ........ 4-3
Air flow charts .............................................. 4-6
Alarm system (See theft warning) ............. 2-12
Anchor point locations ............................... 1-32
Antenna...................................................... 4-35
Anti-lock brake system (ABS).................... 5-25
Anti-lock brake warning light ..................... 2-10
Ashtray (See cigarette lighter and
ashtray) ...................................................... 2-19
Audio system
AM-FM radio with cassette player ........ 4-10
AM-FM radio with cassette player and
compact disc player.............................. 4-28
AM-FM radio with compact disc (CD)
player .................................................... 4-22
FM-AM radio with compact disc (CD)
player .................................................... 4-15Auto-lock free-running hubs ...................... 5-20
Automatic
Automatic power window switch .......... 2-27
Automatic transmission fluid (ATF)....... 8-13
Driving with automatic transmission ....... 5-8
Transmission selector lever lock
release .................................................. 5-11
B
Battery........................................................ 8-16
Battery replacement (See multi-remote
control system) ............................................ 3-7
Before starting the engine ........................... 5-8
Belts (See drive belts) ............................... 8-18
Brake
Anti-lock brake system (ABS) .............. 5-25
Brake booster ....................................... 8-25
Brake fluid ................................... 10-3, 8-15
Brake light (See stop light) ................... 8-30
Brake pedal .......................................... 8-24
Brake system ........................................ 5-24
Brake warning light ................................. 2-8
Brake wear indicators .................. 2-11, 8-25
Parking brake check ............................. 8-24
Parking brake operation ....................... 5-15
Break-in schedule ...................................... 5-18
Bulb check/instrument panel ....................... 2-7Bulb replacement ....................................... 8-30
C
Capacities and recommended fuel/
lubricants.................................................... 10-2
Cargo (See vehicle loading
information) .............................................. 10-15
Cassette player (See audio system) ......... 4-10
CB radio or car phone ............................... 4-36
Check engine indicator light
(See malfunction indicator light) ................ 2-11
Child restraint with top tether strap ........... 1-31
Child restraints ........................................... 1-22
Child safety rear door lock .......................... 3-4
Cigarette lighter (accessory) and
ashtray ....................................................... 2-19
Cleaning exterior and interior ...................... 7-2
Clock .......................................................... 4-17
Clutch
Clutch fluid ............................................ 8-15
Clutch pedal.......................................... 8-26
Cold weather driving .................................. 5-26
Controls
Heater and air conditioner controls ........ 4-3
Coolant
Capacities and recommended fuel/
lubricants .............................................. 10-2
ZX