2000 NISSAN QUEST door lock
[x] Cancel search: door lockPage 136 of 292

FUEL FILLER LID OPENER OP-
ERATION
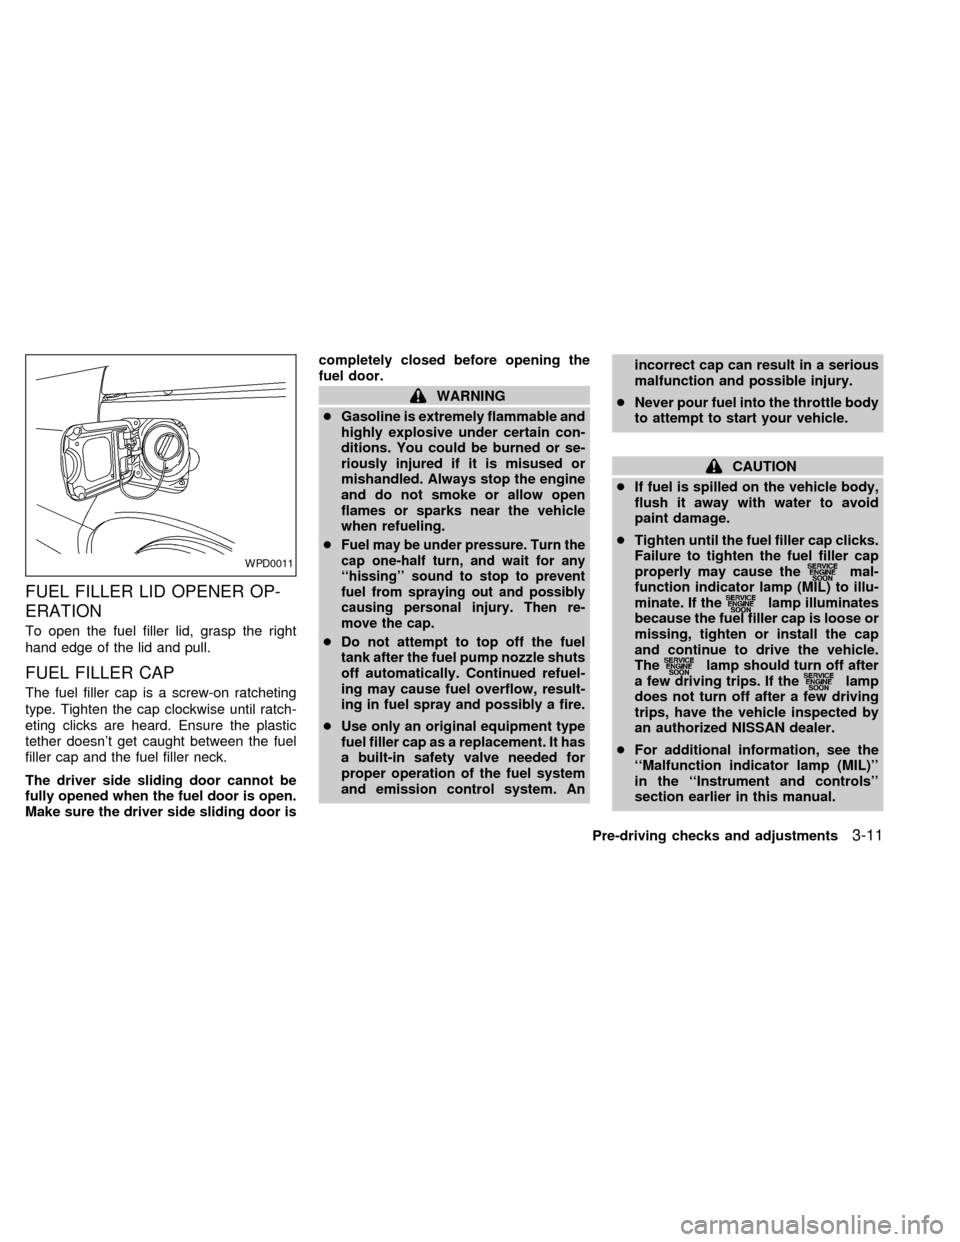
To open the fuel filler lid, grasp the right
hand edge of the lid and pull.
FUEL FILLER CAP
The fuel filler cap is a screw-on ratcheting
type. Tighten the cap clockwise until ratch-
eting clicks are heard. Ensure the plastic
tether doesn't get caught between the fuel
filler cap and the fuel filler neck.
The driver side sliding door cannot be
fully opened when the fuel door is open.
Make sure the driver side sliding door iscompletely closed before opening the
fuel door.
WARNING
cGasoline is extremely flammable and
highly explosive under certain con-
ditions. You could be burned or se-
riously injured if it is misused or
mishandled. Always stop the engine
and do not smoke or allow open
flames or sparks near the vehicle
when refueling.
c
Fuel may be under pressure. Turn the
cap one-half turn, and wait for any
``hissing'' sound to stop to prevent
fuel from spraying out and possibly
causing personal injury. Then re-
move the cap.
cDo not attempt to top off the fuel
tank after the fuel pump nozzle shuts
off automatically. Continued refuel-
ing may cause fuel overflow, result-
ing in fuel spray and possibly a fire.
cUse only an original equipment type
fuel filler cap as a replacement. It has
a built-in safety valve needed for
proper operation of the fuel system
and emission control system. Anincorrect cap can result in a serious
malfunction and possible injury.
cNever pour fuel into the throttle body
to attempt to start your vehicle.
CAUTION
cIf fuel is spilled on the vehicle body,
flush it away with water to avoid
paint damage.
cTighten until the fuel filler cap clicks.
Failure to tighten the fuel filler cap
properly may cause the
mal-
function indicator lamp (MIL) to illu-
minate. If the
lamp illuminates
because the fuel filler cap is loose or
missing, tighten or install the cap
and continue to drive the vehicle.
The
lamp should turn off after
a few driving trips. If thelamp
does not turn off after a few driving
trips, have the vehicle inspected by
an authorized NISSAN dealer.
cFor additional information, see the
``Malfunction indicator lamp (MIL)''
in the ``Instrument and controls''
section earlier in this manual.
WPD0011
Pre-driving checks and adjustments3-11
ZX
Page 137 of 292

TILT OPERATION
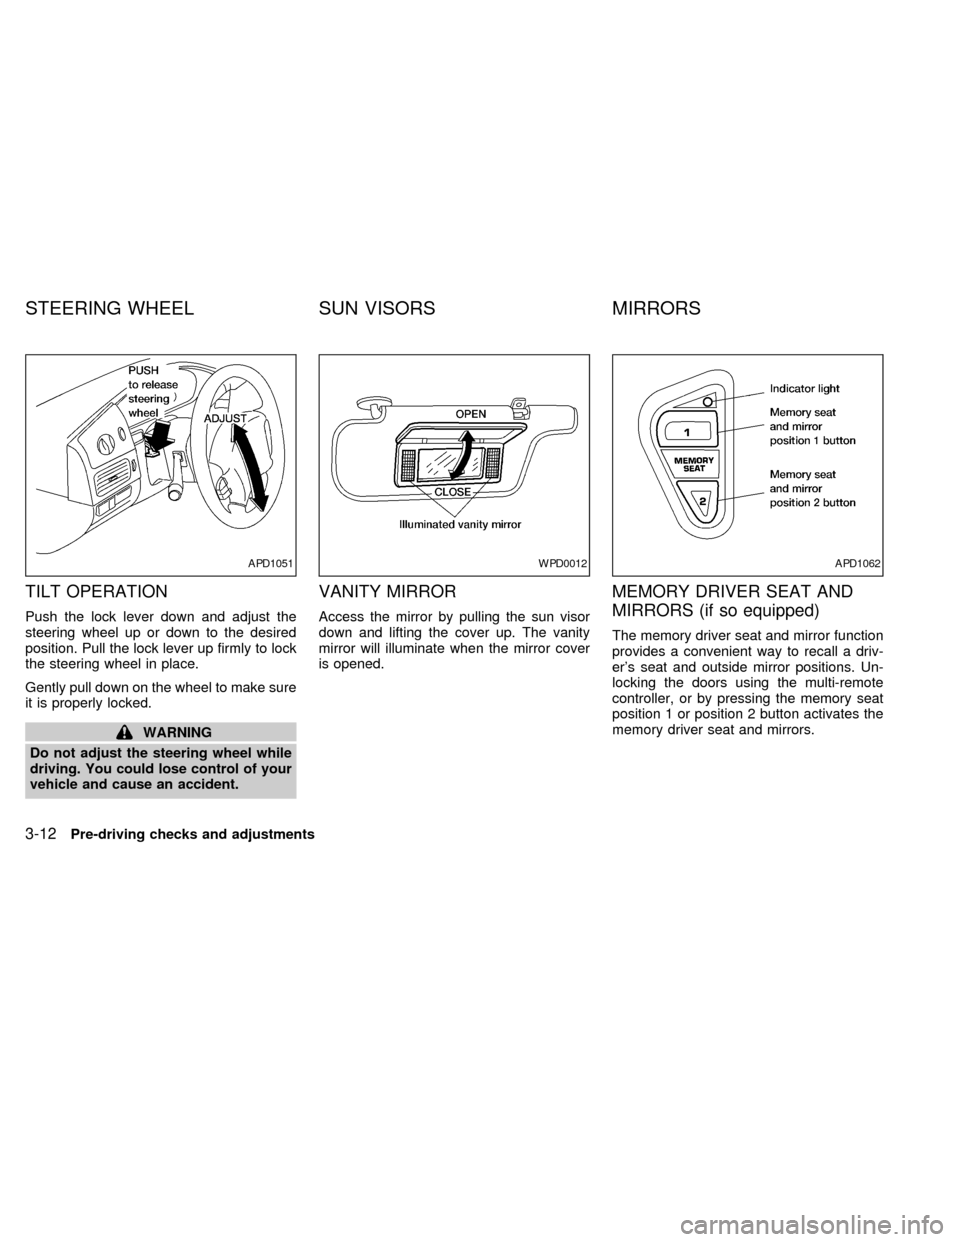
Push the lock lever down and adjust the
steering wheel up or down to the desired
position. Pull the lock lever up firmly to lock
the steering wheel in place.
Gently pull down on the wheel to make sure
it is properly locked.
WARNING
Do not adjust the steering wheel while
driving. You could lose control of your
vehicle and cause an accident.
VANITY MIRROR
Access the mirror by pulling the sun visor
down and lifting the cover up. The vanity
mirror will illuminate when the mirror cover
is opened.
MEMORY DRIVER SEAT AND
MIRRORS (if so equipped)
The memory driver seat and mirror function
provides a convenient way to recall a driv-
er's seat and outside mirror positions. Un-
locking the doors using the multi-remote
controller, or by pressing the memory seat
position 1 or position 2 button activates the
memory driver seat and mirrors.
APD1051WPD0012APD1062
STEERING WHEEL SUN VISORS MIRRORS
3-12Pre-driving checks and adjustments
ZX
Page 138 of 292

Multi-remote controller system entry
Pressing thebutton on the multi-
remote controller unlocks the driver's door,
and recalls the memory settings for both
outside mirrors and driver's seat for that
memory position. Two multi-remote control-
lers are delivered with the vehicle. They can
be programmed with the same memory
driver's seat and mirror positions, or each
one can be programmed separately. One
multi-remote controller can be programmed
for memory driver's seat and mirror position
1, and the other for memory driver's seat
and mirror position 2.
Memory Driver Seat and Mirror But-
tons
The memory seat and mirror buttons are
located on the driver door. Pressing the
memory driver seat and mirror position 1 or
position 2 button will recall the memory set-
tings for both outside mirrors and driver seat
for that memory seat position, provided the
vehicle is in P (Park) or N (Neutral). For easy
vehicle exit, press memory driver seat and
mirror position 1 and position 2 buttons to-
gether to move the driver seat fully rearward
and fully downward. This function is preset
and cannot be changed.
Programming Memory Positions
1. Move the driver seat and outside mirrors
to the desired position using the manual
controls.
2. Push and hold the memory seat and
mirror position 1 or position 2 button for
at least 3 seconds.
cThe indicator light will illuminate and re-
main illuminated until the position is pro-
grammed.cAfter the position has been programmed
the indicator light will flash to indicate the
position is set.
The driver seat and/or outside mirrors must
be adjusted before programming position 1
or position 2.
Programming a multi-remote con-
troller
1. Move the driver seat and outside mirrors
by pressing the desired position 1 or
position 2 button.
2. Press and hold the same (position 1 or
position 2) button.
3. Within 10 seconds press the
button on
the multi-remote controller.
The controller is now programmed for that
(position 1 or position 2) button.
After the multi-remote controller has been
programmed, the memory seat and mirror
button indicator light will flash to indicate the
controller is programmed. If the memory
seat button is pressed and held the indicator
light will remain illuminated for as long as
the button is held or 10 seconds which ever
is shorter.
APD1063
Pre-driving checks and adjustments3-13
ZX
Page 178 of 292

5 Starting and driving
Precautions when starting and driving ...................5-2
Exhaust gas (carbon monoxide) ............................5-2
Three way catalyst .................................................5-2
Avoiding collision and rollover................................5-3
Drinking alcohol/drugs and driving .........................5-3
Ignition switch .........................................................5-4
Key positions ..........................................................5-4
Before starting the engine ......................................5-5
Starting the engine .................................................5-5
Driving the vehicle ..................................................5-6
Parking brake .........................................................5-9
Cruise control .........................................................5-9
Break-in schedule ................................................5-11
Increasing fuel economy ......................................5-12Parking/parking on hills ........................................5-13
Power steering .....................................................5-14
Brake system........................................................5-14
Braking precautions .............................................5-14
Anti-lock brake system (ABS) ..............................5-15
Cold weather driving ............................................5-16
Freeing a frozen door lock ...................................5-16
Anti-freeze ............................................................5-16
Battery ..................................................................5-16
Draining of coolant water .....................................5-16
Tire equipment .....................................................5-16
Special winter equipment .....................................5-17
Driving on snow or ice .........................................5-17
Engine block heater (if so equipped) ...................5-18
ZX
Page 182 of 292

cMake sure the area around the vehicle is
clear.
cMaintenance items listed here should be
checked periodically (for example, each
time you check engine oil).
cCheck that all windows and lights are
clean.
cVisually inspect tires for their appearance
and condition. Also check tires for proper
inflation.
cLock all doors.
cPosition seat and adjust head restraints.
cAdjust inside and outside mirrors.
cFasten seat belts and ask all passengers
to do likewise.
cCheck the operation of warning lights
when key is turned to the ON position.
See ``Warning/Indicator lights and chimes''
in the ``Instrument and controls'' section.
1. Apply the parking brake.
2. Move the selector lever to P (Park) or N
(Neutral) (P is recommended).
The shift selector lever cannot be
moved out of P and into any of the
other gear positions under the follow-
ing conditions:
cThe ignition key is turned to the
LOCK position.
cThe ignition key is turned to the ON
position without depressing the
foot brake pedal.
The starter will not operate if the shift
selector lever is in one of the driving
positions.
3. Crank the enginewith your foot off the
accelerator pedalby turning the ignition
key to START. Release the key when the
engine starts. If the engine starts, but
fails to run, repeat the above procedure.
Ð If the engine is very hard to start in
extremely cold or hot weather, de-
press the accelerator pedal to the
floor and hold it to help start the
engine.Ð In the summer, when restarting the
engine within 30 minutes after it has
been stopped, keep the accelerator
pedal slightly depressed while start-
ing.
CAUTION
Do not operate the starter for more than
15 seconds at a time. If the engine does
not start, turn the key off and wait 10
seconds before cranking again, other-
wise the starter could be damaged.
4. Warm-up
Allow the engine to idle for at least 30
seconds after starting. Drive at moderate
speeds for a short distance first, espe-
cially in cold weather.
BEFORE STARTING THE
ENGINESTARTING THE ENGINE
Starting and driving5-5
ZX
Page 193 of 292

cWhen installing a spare tire, make
sure it is the proper size and type as
specified on the tire placard. For tire
placard location information, refer to
``Tire placard'' in the ªTechnical and
consumer informationº section of
this manual.
cFor additional information, refer to
``Wheels and tires'' in the ``Do-it-
yourself'' section of this manual.FREEING A FROZEN DOOR
LOCK
To prevent a door lock from freezing, apply
de-icer or glycerin through the key hole. If
the lock becomes frozen, heat the key be-
fore inserting it in the key hole.
ANTI-FREEZE
In the winter, when it is anticipated that the
temperature will drop below 32ÉF (0ÉC),
check the anti-freeze (ethylene glycol base)
to assure proper winter protection. For de-
tails, see ``Engine cooling system'' in the
``Do-it-yourself'' section of this manual.
BATTERY
If the battery is not fully charged during
extremely cold weather conditions, the bat-
tery fluid may freeze and damage the bat-
tery. To maintain maximum efficiency, the
battery should be checked regularly. For
details, see ``Battery'' in the ``Do-it-yourself''
section of this manual.
DRAINING OF COOLANT WATER
If the vehicle is to be left outside without
anti-freeze, drain the cooling system by
opening the drain valves located under theradiator and on the engine block. Refill
before operating the vehicle. See ``Chang-
ing engine coolant'' in the ``Do-it-yourself''
section of this manual.
TIRE EQUIPMENT
1. SUMMER tires are of a tread design to
provide superior performance on dry
pavement. However, the performance of
these tires is substantially reduced in
snowy and icy conditions. If you operate
your vehicle on snowy or icy roads, NIS-
SAN recommends using MUD & SNOW
or ALL SEASON tires on all four wheels.
Please consult your NISSAN dealer for
the tire type, size, speed rating and avail-
ability information.
2.
For additional traction on icy roads, stud-
ded tires may be used. However, some
Canadian provinces and U.S. states pro-
hibit their use. Check local, state and pro-
vincial laws before installing studded tires.
Skid and traction capabilities of studded
snow tires, on wet or dry surfaces, may
be poorer than that of non-studded snow
tires.
3. Tire chains may be used. Make sure they
are of proper size for the tires on your
vehicle and are installed according to the
COLD WEATHER DRIVING
5-16Starting and driving
ZX
Page 252 of 292

cluding the spare, and adjust to the speci-
fied pressure if necessary. Check carefully
for damage, cuts or excessive wear.
Wheel nuts*Ð When checking the tires,
make sure no wheel nuts are missing, and
check for any loose wheel nuts. Tighten if
necessary.
Tire rotation*Ð Tires should be rotated
every 7,500 miles (12,000 km).
Wheel alignment and balanceÐIfthe
vehicle should pull to either side while driv-
ing on a straight and level road, or if you
detect uneven or abnormal tire wear, there
may be a need for a wheel alignment.
If the steering wheel or seat vibrates at
normal highway speeds, wheel balancing
may be needed.
Windshield wiper blades*Ð Check for
cracks or wear if they do not wipe properly.
Doors and hoodÐ Check that all doors
and the hood operate properly. Also ensure
that all latches lock securely. Lubricate
hinges, latches, rollers and links if neces-
sary. Make sure the secondary latch keeps
the hood from opening when the primary
latch is released.When driving in areas using road salt or
other corrosive materials, check lubrication
frequently.
INTERIOR MAINTENANCE
The maintenance items listed here should
be checked on a regular basis, such as
when performing periodic maintenance,
cleaning the vehicle, etc.
Additional information on the following
items with an ``*'' is found in the ``Do-it-
yourself'' section of this manual.
Lights*Ð Make sure the headlights, stop
lights, tail lights, turn signal lights, and other
lights are all operating properly and installed
securely. Also check headlight aim.
Warning lights and buzzers/chimesÐ
Make sure all warning lights and
buzzers/chimes are operating properly.
Windshield wiper and washer*Ð Check
that the wipers and washer operate properly
and that the wipers do not streak.
Windshield defrosterÐ Check that the air
comes out of the defroster outlets properly
and in sufficient quantity when operating the
heater or air conditioner.Steering wheelÐ Check for changes in
the steering conditions, such as excessive
freeplay, hard steering or strange noises.
SeatsÐ Check seat position controls such
as seat adjusters, seatback recliner, etc. to
ensure they operate smoothly and all
latches lock securely in every position.
Check that the head restraints move up and
down smoothly and the locks hold securely
in all latched positions. Check that the seat
leg latches lock securely in every anchor
position for the folding down rear seat and
detachable rear seat (if so equipped).
Seat beltsÐ Check that all parts of the seat
belt system (e.g. buckles, anchors, adjust-
ers and retractors) operate properly and
smoothly, and are installed securely. Check
the belt webbing for cuts, fraying, wear or
damage.
Accelerator pedalÐ Check the pedal for
smooth operation and make sure the pedal
does not catch or require uneven effort.
Keep the floor mat away from the pedal.
BrakesÐ Check that the brakes do not pull
the vehicle to one side when applied.
Brake pedal and booster*Ð Check the
pedal for smooth operation and make sure it
Maintenance
9-3
ZX
Page 286 of 292

11 Index
A
Accident
Interia fuel shut-off switch .................... 6-11
After an accident........................................ 6-11
Air bag (See supplemental restraint
system) ...................................................... 1-31
Air bag warning light .................................. 1-37
Air cleaner housing filter ............................ 8-13
Air conditioner
Air conditioner operation ........................ 4-5
Air conditioner service .......................... 4-15
Air conditioner specification label ....... 10-12
Air conditioner system refrigerant and
lubrication recommendations ................ 10-6
Heater and air conditioner (automatic)
(if so equipped)..................................... 4-11
Heater and air conditioner (manual)....... 4-3
Rear seat air conditioner ...................... 4-14
Air filter
Cabin air filter ....................................... 8-14
Air flow charts .............................................. 4-7
Alarm system (See theft warning) ............. 2-10
Anti-lock brake system (ABS).................... 5-15
Anti-lock brake warning light ....................... 2-8
Armrests..................................................... 1-11
Ashtray (See cigarette lighter and
ashtray) ...................................................... 2-19Audio system
Compact disc (CD) player ........... 4-28, 4-30
FM-AM radio with cassette player ........ 4-16
FM-AM radio with cassette player and
compact disc (CD) player ..................... 4-22
Autolamp switch......................................... 2-15
Automatic
Automatic power window switch .......... 2-28
Automatic transmission fluid (ATF) ........ 8-8
Driving with automatic transmission ....... 5-6
Transmission selector lever lock
release .................................................... 5-6
B
Battery........................................................ 8-10
Battery replacement (See multi-remote
control system) ............................................ 3-8
Before starting the engine ........................... 5-5
Brake
Anti-lock brake system (ABS) .............. 5-15
Brake booster ....................................... 8-20
Brake fluid ..................................... 10-2, 8-9
Brake light (See stop light) ................... 8-24
Brake pedal .......................................... 8-19
Brake system ........................................ 5-14
Brake warning light ................................. 2-7
Brake wear indicators ........................... 2-10Parking brake check ............................. 8-19
Parking brake operation ......................... 5-9
Self-adjusting brakes ............................ 8-19
Break-in schedule ...................................... 5-11
Bulb check/instrument panel ....................... 2-6
Bulb replacement ....................................... 8-24
C
Cabin air filter ............................................ 8-14
Capacities and recommended fuel/
lubricants.................................................... 10-2
Car phone or CB radio .............................. 4-35
Cargo net ................................................... 2-24
Cargo (See vehicle loading
information) .............................................. 10-13
Check engine indicator light
(See malfunction indicator light) .................. 2-9
Child restraint with top tether strap ........... 1-67
Child restraints ........................................... 1-54
Child safety sliding door lock....................... 3-5
Cigarette lighter (accessory)
and ashtray ................................................ 2-19
Cleaning exterior and interior ...................... 7-2
Clock................................................. 4-18, 4-24
Cold weather driving .................................. 5-16
Compact disc (CD) player ................ 4-28, 4-30
ZX