2000 NISSAN QUEST coolant
[x] Cancel search: coolantPage 87 of 292

2 Instruments and controls
Meters and gauges ................................................2-3
Speedometer and odometer ..................................2-4
Tachometer ............................................................2-4
Engine coolant temperature gauge........................2-4
Fuel gauge .............................................................2-5
Warning/indicator lights and chimes ......................2-6
Checking bulbs .......................................................2-6
Warning lights.........................................................2-6
Indicator lights ........................................................2-8
Chimes .................................................................2-10
Theft warning (if so equipped) .............................2-10
Windshield wiper and washer switch ...................2-12
Rear window wiper and washer switches ............2-13
Rear window defogger switch ..............................2-14
Headlight control switch .......................................2-14
Autolamp switch (if so equipped) .........................2-15
Turn signal switch .............................................2-16
Cornering light ......................................................2-17
Hazard warning flasher switch .............................2-17
Horn ......................................................................2-18
Rear power socket ...............................................2-18
Cigarette lighter and ashtray (accessory) ............2-19Storage .................................................................2-20
Map pockets .........................................................2-20
Conversation mirror ..............................................2-20
Cup holders ..........................................................2-21
Glove box .............................................................2-22
Front seat convenience net (if so equipped) .......2-23
Cargo net..............................................................2-24
Parcel shelf (if so equipped) ................................2-25
Luggage rack .......................................................2-27
Windows ...............................................................2-27
Power windows ....................................................2-27
Power vent windows (if so equipped) ..................2-29
Manual vent windows ...........................................2-29
Sunroof (if so equipped).......................................2-30
Interior lights .........................................................2-31
Luggage ...............................................................2-31
Personal reading light ..........................................2-31
Map lights .............................................................2-32
Illuminated entry system ......................................2-32
Integrated HomeLinkTuniversal transceiver
(if so equipped) ....................................................2-32
Programming HomeLinkT.....................................2-33
ZX
Page 91 of 292

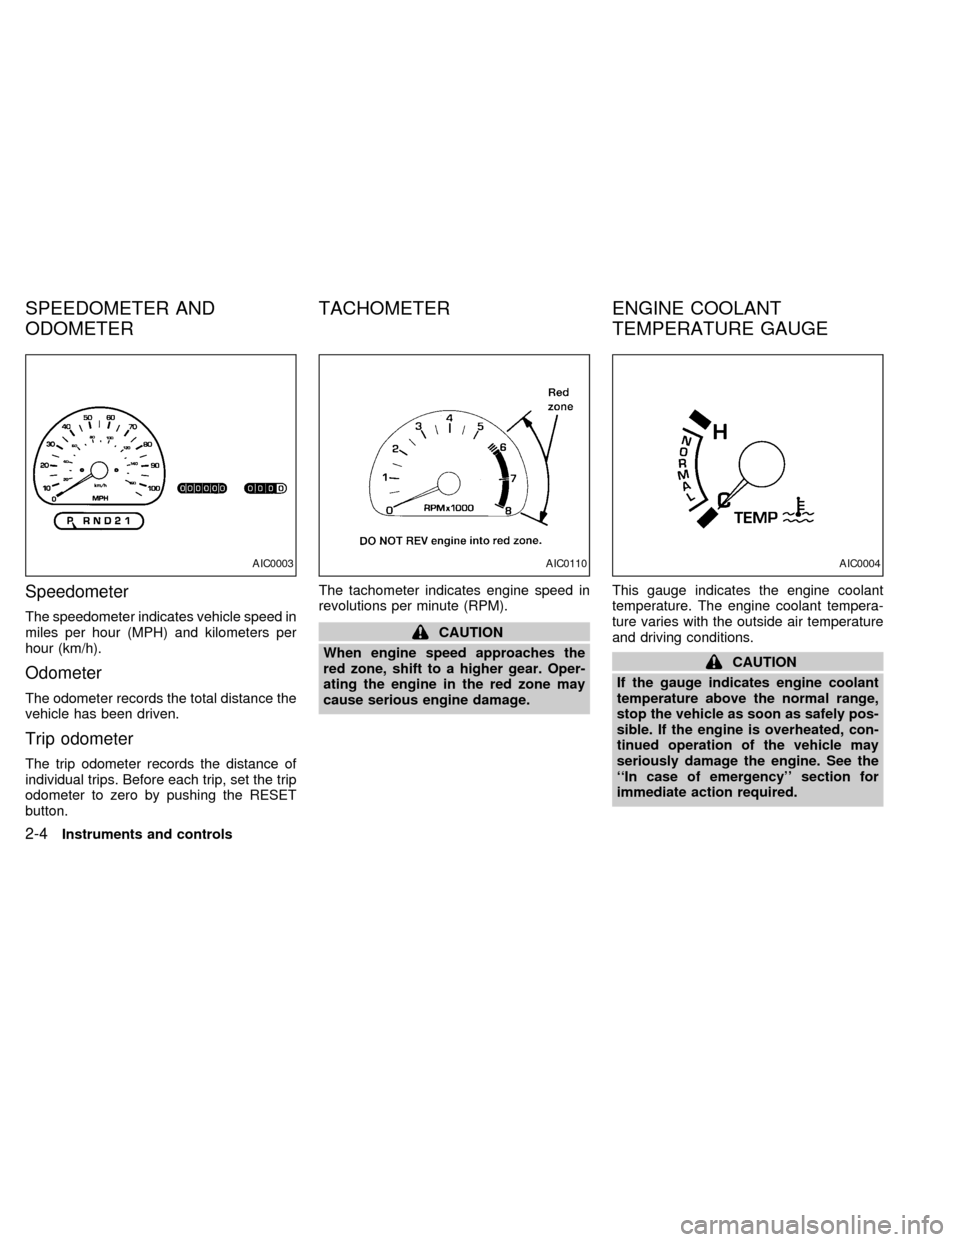
Speedometer
The speedometer indicates vehicle speed in
miles per hour (MPH) and kilometers per
hour (km/h).
Odometer
The odometer records the total distance the
vehicle has been driven.
Trip odometer
The trip odometer records the distance of
individual trips. Before each trip, set the trip
odometer to zero by pushing the RESET
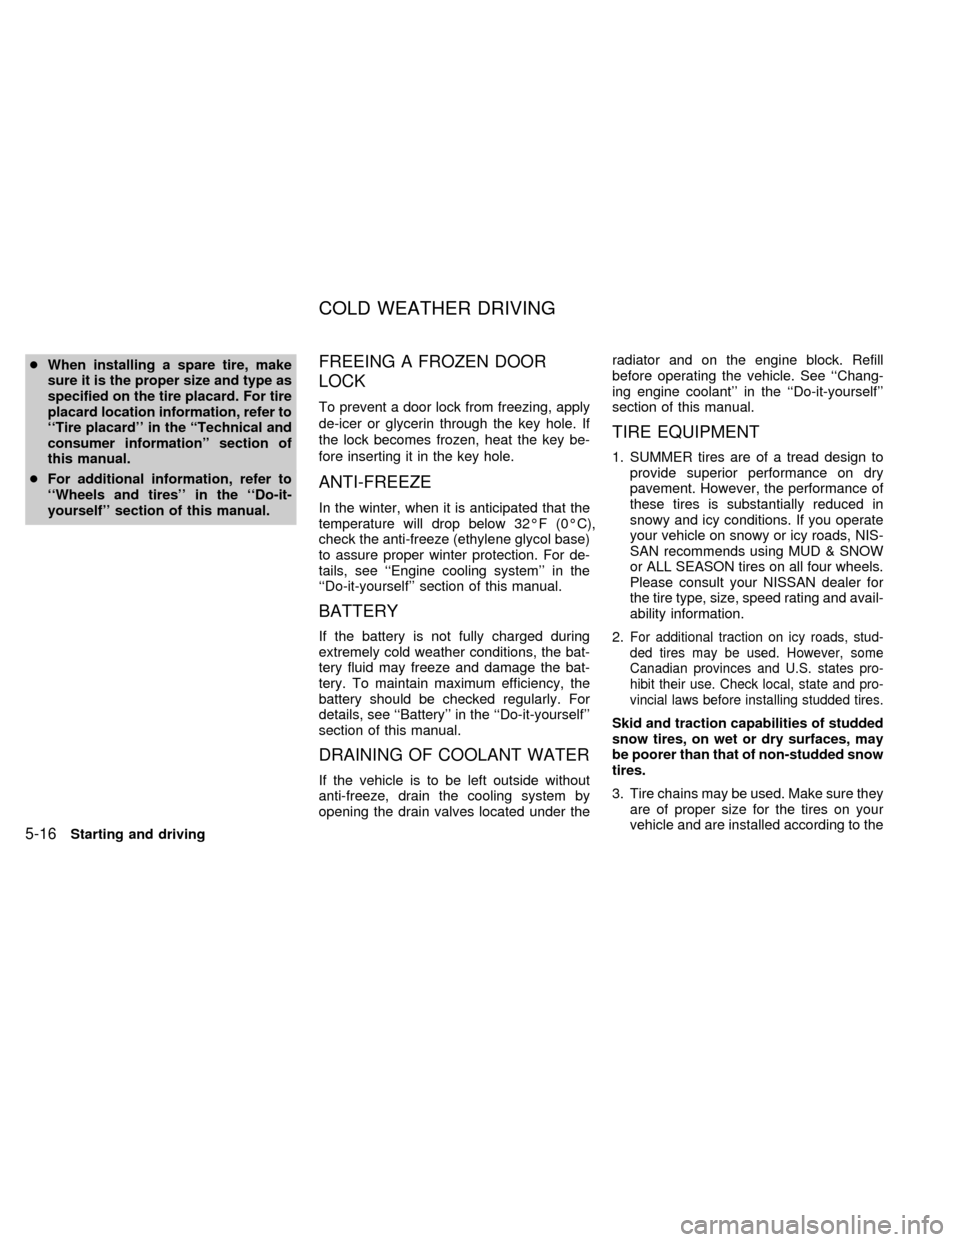
button.The tachometer indicates engine speed in
revolutions per minute (RPM).
CAUTION
When engine speed approaches the
red zone, shift to a higher gear. Oper-
ating the engine in the red zone may
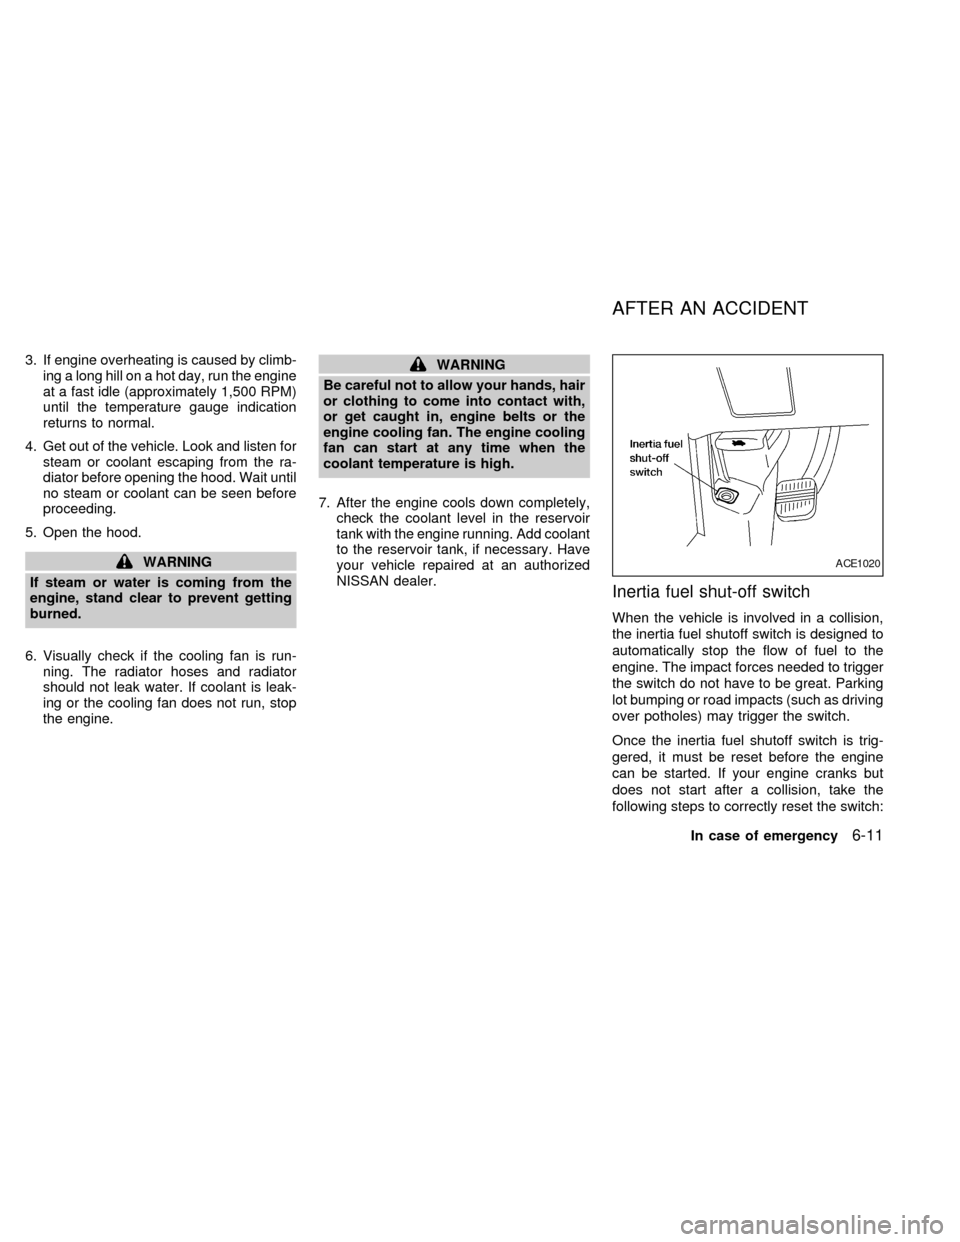
cause serious engine damage.This gauge indicates the engine coolant
temperature. The engine coolant tempera-
ture varies with the outside air temperature
and driving conditions.
CAUTION
If the gauge indicates engine coolant
temperature above the normal range,
stop the vehicle as soon as safely pos-
sible. If the engine is overheated, con-
tinued operation of the vehicle may
seriously damage the engine. See the
``In case of emergency'' section for
immediate action required.
AIC0003AIC0110AIC0004
SPEEDOMETER AND
ODOMETERTACHOMETER ENGINE COOLANT
TEMPERATURE GAUGE
2-4Instruments and controls
ZX
Page 147 of 292

NOTE: When switching air flow outlets, the
A/C system remains activated unless the
A/C button is pressed to the OFF position.
The indicator light on the A/C button re-
mains illuminated unless the button is
pressed to the OFF position, or the OFF air
control position is selected.
Cooling
This mode is used to cool and dehumidify.
1. Move the air control dial to the
po-
sition.
2. Turn the fan control dial to select speed.
3. Push the air conditioner button. The indi-
cator light comes on.
4. Move the temperature control dial to the
desired position.
cFor quick cooling when the outside tem-
perature is high, move the air control dial
to the MAX A/C position. Be sure to
return the air control dial to the
po-
sition for normal cooling.
cOpening the windows helps to vent heat
buildup when parked in the sun.
Dehumidified heating
This mode is used to heat and dehumidify.
1. Move the air control dial to the
po-
sition.
2. Turn the fan control dial to select speed.
3. Push the air conditioner button. The indi-
cator light comes on.
4. Move the temperature control dial to the
desired position.
Dehumidified defogging
This mode is used to defog the windows
and dehumidify.
1. Move the air control dial to the
po-
sition.
2. Turn the fan control dial to the desired
speed.
3. Move the temperature control dial to the
desired position.
When the
position is selected, the
air conditioner automatically turns on
(however, the indicator light will not illu-
minate) if the outside temperature is
more than 45ÉF (7ÉC). This dehumidifies
the air which helps defog the windshield.The air recirculation mode automatically
turns off, allowing outside air to be drawn
into the passenger compartment which
helps defog the windshield.
Operating tips
cKeep windows and sun roof closed while
the air conditioner is in operation.
cAfter parking in the sun, drive for two or
three minutes with the windows open to
vent hot air from the passenger compart-
ment. Then, close the windows. This
allows the air conditioner to cool the
interior more quickly.
cThe air conditioning system should be
operated for about ten minutes at
least once a month. This helps pre-
vent damage to the system due to lack
of lubrication.
cIf the engine coolant temperature gauge
exceeds the H (hot) position, turn the air
conditioner off. See ``If your vehicle over-
heats'' in the ``In case of emergency''
section for additional information.
4-6Heater, air conditioner and audio systems
ZX
Page 153 of 292

AUTOMATIC OPERATION
Push the AUTOMATIC button and select the
desired temperature. The selected tempera-
ture and AUTO show in the display window.
The EATC heats or cools to achieve the set
temperature.
When in AUTOMATIC and weather conditions
require heat, air is sent to the floor. However,
a feature is included in the EATC to prevent
blowing cold air to the floor if the engine
coolant is not warm enough to allow heating.
In three or four minutes the fan speed gradu-
ally increases and airflow changes to the floor.
If unique conditions exist, such as window
fogging, the five override buttons allow spe-
cific airflow selection. The thumbwheel al-
lows you to adjust the fan speed to suit your
needs.
Temperature selection
TheTEMPbutton on the left side of
the control panel is for temperature selec-
tion. The
side lowers the set tempera-
ture, and theside raises the set tem-
perature. Press and hold either side of the
button to rapidly change the temperature
setting in one degree increments to either
65ÉF (18ÉC) or 85ÉF (29ÉC). If you wantcontinuous maximum cooling, push the
side of the TEMP button until 60ÉF
(16ÉC) shows in the display window. The
EATC cools at maximum and disregards the
60ÉF (16ÉC) setting until a warmer tempera-
ture is selected. If you want continuous
maximum heating, push the
side of the
TEMP button until 90ÉF (32ÉC) shows in the
display window. The EATC provides maxi-
mum heat regardless of the 90ÉF (32ÉC)
setting until a cooler temperature is se-
lected.
Fan speed and thumbwheel
Your EATC automatically adjusts the fan
speed to the existing conditions. To control
the fan speed yourself, use the thumbwheel
located at the extreme right side of the
EATC control panel. Using the thumbwheel
cancels the automatic fan speed control,
and causes a
to appear in the display
window. Rotate the thumbwheel up for HI
speeds and down for LO speeds.
To return to auto fan control, press the
AUTOMATIC button.
Air flow control
Your EATC has five buttons which allow you
to make special selections. The buttons aregrouped in the middle of the EATC panel
and allow you to determine airflow location.
Pressing any of the air control buttons
changes airflow location only, and does not
affect the ability of the system to control
temperature or fan speed. Return to fully
automatic operation by pushing the AUTO-
MATIC button.
Push this button for airflow to the front and
rear floor outlets and windshield at the same
time. The
indicator light comes on,
and the display window shows the set tem-
perature.
Push this button to obtain maximum airflow
to the windshield. Adjust the temperature
setting as required for defrosting. The
indicator light comes on, and the
display window shows the set temperature.
When the outside temperature is about
45ÉF (7ÉC) or above, the air is dehumidified
to prevent window fogging.
Push this button to select airflow through
4-12Heater, air conditioner and audio systems
ZX
Page 178 of 292

5 Starting and driving
Precautions when starting and driving ...................5-2
Exhaust gas (carbon monoxide) ............................5-2
Three way catalyst .................................................5-2
Avoiding collision and rollover................................5-3
Drinking alcohol/drugs and driving .........................5-3
Ignition switch .........................................................5-4
Key positions ..........................................................5-4
Before starting the engine ......................................5-5
Starting the engine .................................................5-5
Driving the vehicle ..................................................5-6
Parking brake .........................................................5-9
Cruise control .........................................................5-9
Break-in schedule ................................................5-11
Increasing fuel economy ......................................5-12Parking/parking on hills ........................................5-13
Power steering .....................................................5-14
Brake system........................................................5-14
Braking precautions .............................................5-14
Anti-lock brake system (ABS) ..............................5-15
Cold weather driving ............................................5-16
Freeing a frozen door lock ...................................5-16
Anti-freeze ............................................................5-16
Battery ..................................................................5-16
Draining of coolant water .....................................5-16
Tire equipment .....................................................5-16
Special winter equipment .....................................5-17
Driving on snow or ice .........................................5-17
Engine block heater (if so equipped) ...................5-18
ZX
Page 193 of 292

cWhen installing a spare tire, make
sure it is the proper size and type as
specified on the tire placard. For tire
placard location information, refer to
``Tire placard'' in the ªTechnical and
consumer informationº section of
this manual.
cFor additional information, refer to
``Wheels and tires'' in the ``Do-it-
yourself'' section of this manual.FREEING A FROZEN DOOR
LOCK
To prevent a door lock from freezing, apply
de-icer or glycerin through the key hole. If
the lock becomes frozen, heat the key be-
fore inserting it in the key hole.
ANTI-FREEZE
In the winter, when it is anticipated that the
temperature will drop below 32ÉF (0ÉC),
check the anti-freeze (ethylene glycol base)
to assure proper winter protection. For de-
tails, see ``Engine cooling system'' in the
``Do-it-yourself'' section of this manual.
BATTERY
If the battery is not fully charged during
extremely cold weather conditions, the bat-
tery fluid may freeze and damage the bat-
tery. To maintain maximum efficiency, the
battery should be checked regularly. For
details, see ``Battery'' in the ``Do-it-yourself''
section of this manual.
DRAINING OF COOLANT WATER
If the vehicle is to be left outside without
anti-freeze, drain the cooling system by
opening the drain valves located under theradiator and on the engine block. Refill
before operating the vehicle. See ``Chang-
ing engine coolant'' in the ``Do-it-yourself''
section of this manual.
TIRE EQUIPMENT
1. SUMMER tires are of a tread design to
provide superior performance on dry
pavement. However, the performance of
these tires is substantially reduced in
snowy and icy conditions. If you operate
your vehicle on snowy or icy roads, NIS-
SAN recommends using MUD & SNOW
or ALL SEASON tires on all four wheels.
Please consult your NISSAN dealer for
the tire type, size, speed rating and avail-
ability information.
2.
For additional traction on icy roads, stud-
ded tires may be used. However, some
Canadian provinces and U.S. states pro-
hibit their use. Check local, state and pro-
vincial laws before installing studded tires.
Skid and traction capabilities of studded
snow tires, on wet or dry surfaces, may
be poorer than that of non-studded snow
tires.
3. Tire chains may be used. Make sure they
are of proper size for the tires on your
vehicle and are installed according to the
COLD WEATHER DRIVING
5-16Starting and driving
ZX
Page 206 of 292

3. If engine overheating is caused by climb-
ing a long hill on a hot day, run the engine
at a fast idle (approximately 1,500 RPM)
until the temperature gauge indication
returns to normal.
4. Get out of the vehicle. Look and listen for
steam or coolant escaping from the ra-
diator before opening the hood. Wait until
no steam or coolant can be seen before
proceeding.
5. Open the hood.
WARNING
If steam or water is coming from the
engine, stand clear to prevent getting
burned.
6. Visually check if the cooling fan is run-
ning. The radiator hoses and radiator
should not leak water. If coolant is leak-
ing or the cooling fan does not run, stop
the engine.
WARNING
Be careful not to allow your hands, hair
or clothing to come into contact with,
or get caught in, engine belts or the
engine cooling fan. The engine cooling
fan can start at any time when the
coolant temperature is high.
7. After the engine cools down completely,
check the coolant level in the reservoir
tank with the engine running. Add coolant
to the reservoir tank, if necessary. Have
your vehicle repaired at an authorized
NISSAN dealer.
Inertia fuel shut-off switch
When the vehicle is involved in a collision,
the inertia fuel shutoff switch is designed to
automatically stop the flow of fuel to the
engine. The impact forces needed to trigger
the switch do not have to be great. Parking
lot bumping or road impacts (such as driving
over potholes) may trigger the switch.
Once the inertia fuel shutoff switch is trig-
gered, it must be reset before the engine
can be started. If your engine cranks but
does not start after a collision, take the
following steps to correctly reset the switch:
ACE1020
AFTER AN ACCIDENT
In case of emergency6-11
ZX
Page 216 of 292

8 Do-it-yourself
Maintenance precautions .......................................8-2
Engine compartment check locations ....................8-3
Engine cooling system ...........................................8-4
Checking engine coolant level ...............................8-4
Changing engine coolant .......................................8-5
Engine oil ...............................................................8-5
Checking engine oil level .......................................8-5
Changing engine oil ...............................................8-6
Changing engine oil filter .......................................8-7
Automatic transmission fluid ..................................8-8
Temperature conditions for checking .....................8-8
Power steering fluid................................................8-9
Brake fluid ..............................................................8-9
Window washer fluid ............................................8-10
Battery ..................................................................8-10
Jump starting ........................................................8-11
Drive belts ............................................................8-12
Spark plugs ..........................................................8-12
Replacing spark plugs ..........................................8-12
Air cleaner ............................................................8-13Cabin air filter .......................................................8-14
Windshield wiper blades ......................................8-17
Cleaning ...............................................................8-17
Replacing .............................................................8-17
Parking brake and brake pedal ............................8-19..........................................8-19
Checking parking brake .......................................8-19
Checking brake pedal ..........................................8-19
Brake booster .......................................................8-20
Fuses ....................................................................8-20
Engine compartment ............................................8-20
Passenger compartment ......................................8-21
Multi-remote controller battery replacement ........8-22
Lights ....................................................................8-23
Headlights ............................................................8-23
Exterior and interior lights ....................................8-24
Wheels and tires ..................................................8-28
Tire pressure ........................................................8-28
Types of tires........................................................8-29
Tire chains ............................................................8-30
Changing tires and wheels...................................8-30
ZX