Page 21 of 292

Removing second row bucket seats
WARNING
cDo not remove or install seats while
the vehicle is moving.
cAfter adjustment, gently rock in the
seat to make sure it is securely
locked.
cDo not ride in a moving vehicle when
the seatback is reclined. This can be
dangerous. The shoulder belt will
not be against your body. In an acci-
dent you could be thrown into it and
receive neck or other serious inju-
ries. You could also slide under the
lap belt and receive serious internal
injuries.
c
For most effective protection when
the vehicle is in motion, the seat
should be upright. Always sit well
back in the seat and adjust the seat
belt properly. See ``Precautions on
seat belt usage'' later in this section.cWhen adjusting or moving any of the
seats in your vehicle, do not use any
of the seat belt buckles, tongues, or
webbing to carry or move the seats.
Lifting the seats by any of the seat
belts could damage them. Damaged
seat belts should be replaced at your
NISSAN dealer. Failure to follow
these instructions could increase the
chance and/or severity of injury in an
accident.
CAUTION
cThe seats are heavy. Two people
should remove or install them.
cDo not sit in seats that have been
removed from the vehicle. They may
tip over and you could be injured.
1-14Seats, restraints and supplemental air bag systems
ZX
Page 51 of 292

Unfastening the seat belts
To unfasten the seat belt, press the button
on the buckle. The seat belt automatically
retracts.
Checking seat belt operation
Seat belt retractors are designed to lock
seat belt movement:
1) when the seat belt is pulled quickly from
the retractor, and
2) when the vehicle slows down rapidly.
To increase your confidence in the seat
belts, check their operation as follows.cGrasp the shoulder belt and pull quickly
forward. The retractor should lock and
restrict further belt movement.
If the retractor does not lock during this
check or if you have any questions about
belt operation, see an authorized NISSAN
dealer.
Shoulder belt height adjustment (for
front seats)
The shoulder belt anchor height should be
adjusted to the position best for you (See
``Precautions on seat belt usage'' earlier in
this section.). To adjust, press the release
button and move the shoulder belt anchor to
the desired position so the belt passes over
the center of the shoulder. The belt should
be away from your face and neck, but not
falling off your shoulder. Release the button
to lock the shoulder belt anchor into position.
ARS1054APD0831
1-44Seats, restraints and supplemental air bag systems
ZX
Page 52 of 292

WARNING
cAfter adjustment, release the adjust-
ment button and try to move the
shoulder belt anchor up and down to
make sure it is securely fixed in
position.
cThe shoulder belt anchor height
should be adjusted to the position
best for you. Failure to do so may
reduce the effectiveness of the en-
tire restraint system and increase
the chance or severity of injury in an
accident.
THREE-POINT TYPE SEAT BELT
WITH RETRACTOR FOR SECOND
ROW BUCKET SEATS
WARNING
cEvery person who drives or rides in
this vehicle should use a seat belt at
all times.
cDo not ride in a moving vehicle when
the seatback is reclined. This can be
dangerous. The shoulder belt willnot be against your body. In an acci-
dent you could be thrown into it and
receive neck or other serious inju-
ries. You could also slide under the
lap belt and receive serious internal
injuries.
cFor most effective protection when
the vehicle is in motion, the seat
should be upright. Always sit well
back in the seat and adjust the seat
belt properly.
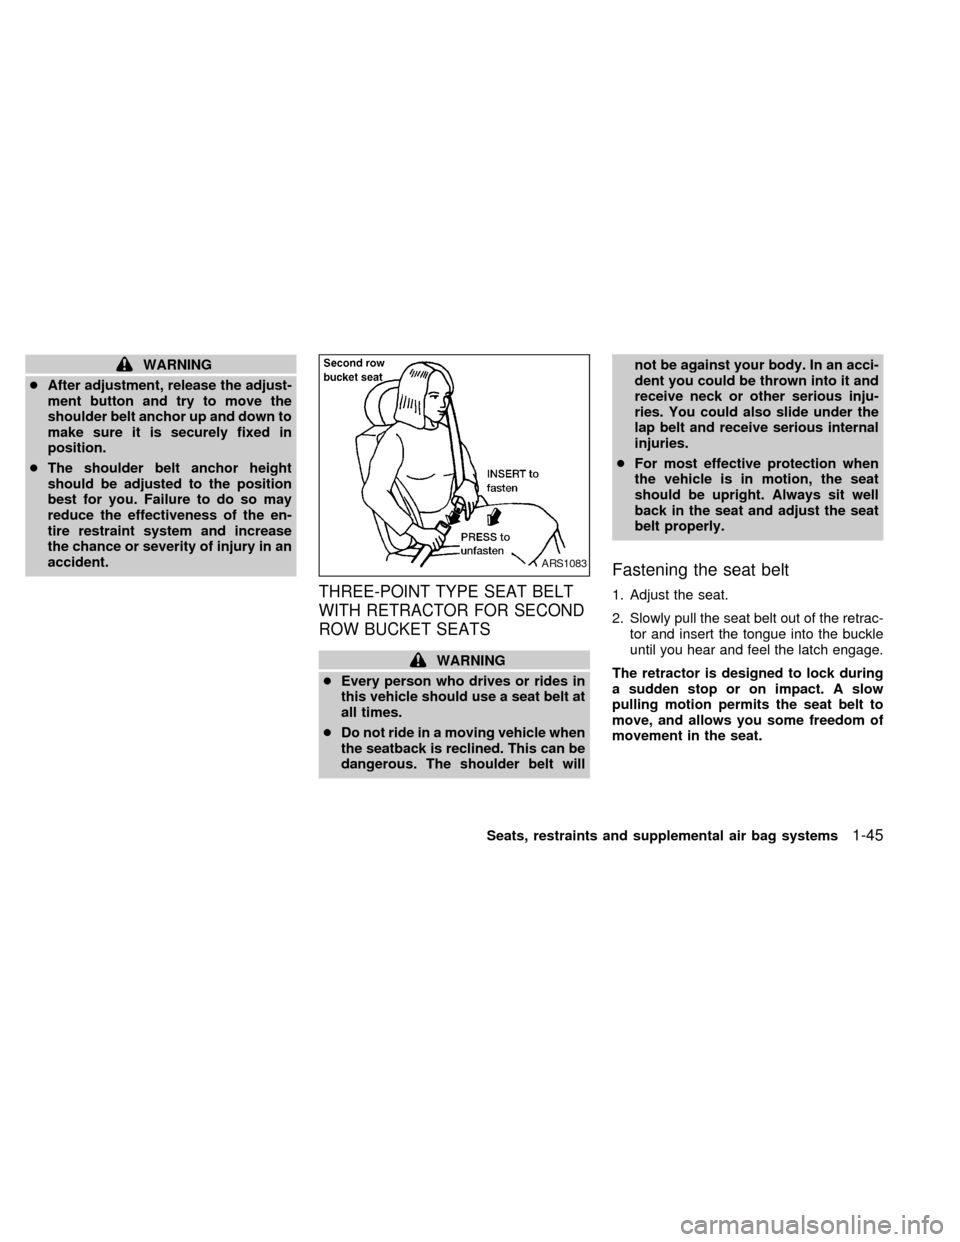
Fastening the seat belt
1. Adjust the seat.
2. Slowly pull the seat belt out of the retrac-
tor and insert the tongue into the buckle
until you hear and feel the latch engage.
The retractor is designed to lock during
a sudden stop or on impact. A slow
pulling motion permits the seat belt to
move, and allows you some freedom of
movement in the seat.
ARS1083
Seats, restraints and supplemental air bag systems1-45
ZX
Page 64 of 292
3. Remove all slack in the lap belt for a very
tight fit by pulling forcefully on the lap belt
adjustment.4. Before placing the child in the child re-
straint, use force to tilt the child restraint
from side to side, and tug it forward to
make sure it is securely in place.
5. If it is not secure, try to tighten the seat
belt again, or put the restraint in another
seat.
6. Check to make sure the child restraint is
properly secured prior to each use.Rear facing
When you install a child restraint in a rear
center seat, follow these steps:
1. Position the child restraint on the seat as
illustrated. Always follow the restraint
manufacturer's instructions.
ARS1170ARS1171ARS1172
Seats, restraints and supplemental air bag systems1-57
ZX
Page 65 of 292
2. Route the seat belt tongue through the
child restraint and insert it into the buckle
until you hear and feel the latch engage.
Be sure to follow the child restraint manu-
facturer's instructions for belt routing.3. Remove all slack in the lap belt for a very
tight fit by pulling forcefully on the lap belt
adjustment.4. Before placing the child in the child re-
straint, use force to tilt the child restraint
from side to side, and tug it forward to
make sure it is securely in place.
5. If it is not secure, try to tighten the seat
belt again, or put the restraint in another
seat.
6. Check to make sure the child restraint is
properly secured prior to each use.
ARS1173ARS1174ARS1175
1-58Seats, restraints and supplemental air bag systems
ZX
Page 126 of 292

3 Pre-driving checks and adjustments
Keys .......................................................................3-2
Doors ......................................................................3-2
Locking with key .....................................................3-3
Locking with inside lock knob ................................3-3
Locking with power door lock switch .....................3-4
Child safety sliding door locks ...............................3-5
Multi-remote control system ...................................3-6
How to use multi-remote control system ...............3-6
Battery replacement ...............................................3-8
Illuminated entry system ........................................3-9
Hood .......................................................................3-9
Rear door .............................................................3-10Fuel filler lid opener operation .............................3-11
Fuel filler cap ........................................................3-11
Steering wheel .....................................................3-12
Tilt operation.........................................................3-12
Sun visors.............................................................3-12
Vanity mirror .........................................................3-12
Mirrors ..................................................................3-12
Memory driver seat and mirrors
(if so equipped) ....................................................3-12
Inside mirror .........................................................3-14
Outside mirrors .....................................................3-14
ZX
Page 127 of 292

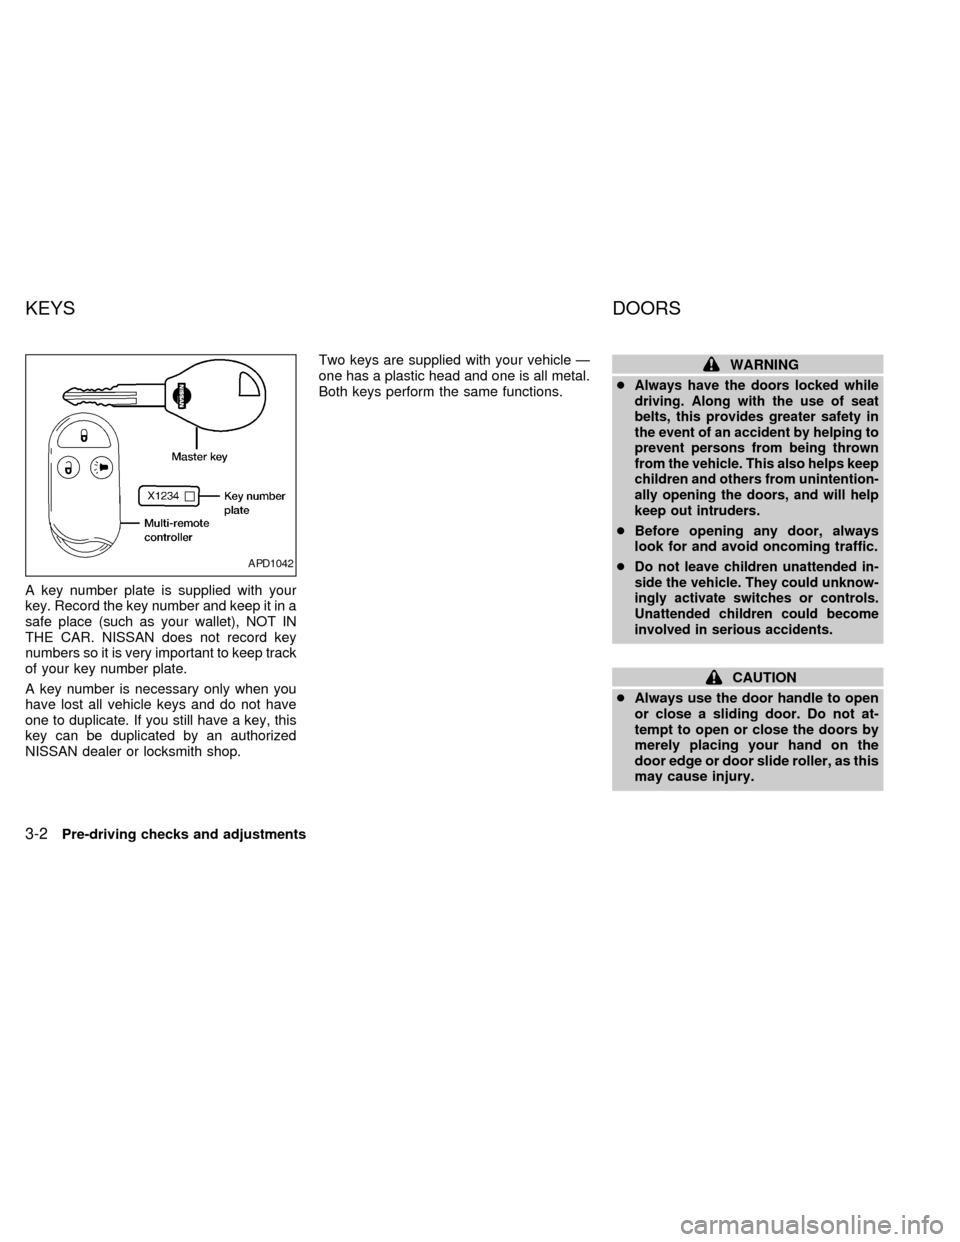
A key number plate is supplied with your
key. Record the key number and keep it in a
safe place (such as your wallet), NOT IN
THE CAR. NISSAN does not record key
numbers so it is very important to keep track
of your key number plate.
A key number is necessary only when you
have lost all vehicle keys and do not have
one to duplicate. If you still have a key, this
key can be duplicated by an authorized
NISSAN dealer or locksmith shop.Two keys are supplied with your vehicle Ð
one has a plastic head and one is all metal.
Both keys perform the same functions.
WARNING
c
Always have the doors locked while
driving. Along with the use of seat
belts, this provides greater safety in
the event of an accident by helping to
prevent persons from being thrown
from the vehicle. This also helps keep
children and others from unintention-
ally opening the doors, and will help
keep out intruders.
cBefore opening any door, always
look for and avoid oncoming traffic.
c
Do not leave children unattended in-
side the vehicle. They could unknow-
ingly activate switches or controls.
Unattended children could become
involved in serious accidents.
CAUTION
cAlways use the door handle to open
or close a sliding door. Do not at-
tempt to open or close the doors by
merely placing your hand on the
door edge or door slide roller, as this
may cause injury.
APD1042
KEYS DOORS
3-2Pre-driving checks and adjustments
ZX
Page 131 of 292

It is possible to lock/unlock all doors, turn
the interior lights on or off, and activate the
panic alarm by using the remote controller
from outside the vehicle.
Be sure to remove the key from the
vehicle before locking the doors and
leaving it.
The remote controller can operate at a
distance of approximately 30 ft (10 m) from
the vehicle. The effective distance depends
on the conditions around the vehicle.
As many as four remote controllers can be
used with one vehicle. For more information
concerning the purchase and use of addi-
tional remote controllers, contact an autho-
rized NISSAN dealer.
CAUTION
Listed below are conditions or occur-
rences which will damage the remote
controller:
cDo not allow the remote controller to
become wet.
cDo not drop the remote controller.
cDo not strike the remote controller
sharply against another object.cDo not place the remote controller
for an extended period in an area
where temperatures exceed 140ÉF
(60ÉC).
HOW TO USE MULTI-REMOTE
CONTROL SYSTEM
Locking doors
1. Close all doors.
2. Push the
button on the multi-remote
controller.
3. All doors lock.
4. The parking lights flash twice and the
horn chirps once to verify all doors are
locked.
Unlocking doors
For memory seat and mirror information
see ``Memory driver seat and mirrors'' later
in this section.
1. Push the
button on the multi-remote
controller. Only the driver door unlocks.
Parking lights flash once.2. The interior lights come on and stay on
for 30 seconds.
3. Push the
button on the multi-remote
controller again within five seconds. The
passenger door, sliding doors, and the
rear door unlock.
The interior lights can be turned off without
waiting 30 seconds by either turning the
ignition to ON or locking the doors with the
multi-remote controller.
Using the panic alarm
If you are near your vehicle and feel threat-
ened, you may activate the panic alarm to
call attention as follows:
1. Push and hold the
button on the
remote controller for at least one full
second.
2. The theft warning alarm (horn) sounds
and the headlights and tail lights flash for
30 seconds.
3. The panic alarm stops when:
cit has run for 30 seconds, or
cthe
or thebutton is pressed, or
c
thebutton is released and re-pushed.
MULTI-REMOTE CONTROL
SYSTEM
3-6Pre-driving checks and adjustments
ZX