2000 NISSAN FRONTIER spare tire
[x] Cancel search: spare tirePage 156 of 269
CAUTION
Always use tires of the same type, size,
brand, construction (bias, bias-belted
or radial), and tread pattern on all four
wheels. Failure to do so may result in a
circumference difference between tires
on the front and rear axles which will
cause excessive tire wear and may
damage the transmission, transfer
case and differential gears.
If excessive tire wear is found, it is recom-
mended that all four tires be replaced with
tires of the same size, brand, construction
and tread pattern. The tire pressure and
wheel alignment should also be checked
and corrected as necessary. Contact an
authorized NISSAN dealer.
Snow tires
If you install snow tires, they must also be
the same size, brand, construction and
tread pattern on all four wheels.
Tire inflation pressure
Periodically check the pressure in all tires,
including the spare, with a gauge. Adjust to
the specified pressure if necessary. Tirepressures are shown on the tire placard
affixed to the glove box.
Tire chain
Tire chains must be installed only on the
rear wheels and not on the front wheels.
Do not drive with tire chains on paved roads
which are clear of snow. Driving with chains
in such conditions can cause damage to the
various mechanisms of the vehicle due to
some overstress. When driving on clear
paved roads, be sure to change to 2WD.
TIRES OF FOUR-WHEEL
DRIVE
5-26Starting and driving
ZX
Page 160 of 269
Using the system (2 wheel Rear
ABS)
Depress the brake pedal and hold it down.
With the rear anti-lock brake system, the
front wheels can still lock. If this happens,
release the brake pedal slightly and then
reapply pressure.
WARNING
The anti-lock brake system is a sophis-
ticated device, but it cannot prevent
accidents resulting from careless or
dangerous driving techniques. It can
help maintain vehicle control during
braking on slippery surfaces, but re-
member that the stopping distance on
slippery surfaces will be longer than on
normal surfaces even with the anti-lock
brake system. Stopping distances may
also be longer on rough, gravel, or
snow covered roads, or if you are using
tire chains. Always maintain a safe dis-
tance from the vehicle in front of you.
Ultimately, the responsibility for safety
of self and others rests in the hands of
the driver.Tire type and condition may also affect
braking effectiveness.
IWhen replacing tires, install the
specified size of tires on all four
wheels.
IWhen installing a spare tire, make
sure it is the proper size and type as
specified on the tire placard. For tire
placard location information, refer to
``Tire placard'' in the ``Technical and
consumer information'' section of
this manual.
For additional information, refer to²Wheels
and Tires²in the²Do-it-yourself²section of
this manual.
Freeing a frozen door lock
To prevent a door lock from freezing, apply
de-icer or glycerin through the key hole. If
the lock becomes frozen, heat the key be-
fore inserting it in the key hole.
Anti-freeze
In the winter when it is anticipated that the
temperature will drop below 32ÉF (0ÉC),
check anti-freeze (ethylene glycol base) to
assure proper winter protection. For details,
see ``Engine cooling system'' in the ``Do-it-
yourself'' section of this manual.
Battery
If the battery is not fully charged during
extremely cold weather conditions, the bat-
tery fluid may freeze and damage the bat-
tery. To maintain maximum efficiency, the
battery should be checked regularly. For
details, see ``Battery'' in the ``Do-it-yourself''
section of this manual.
Draining of coolant water
If the vehicle is to be left outside without
anti-freeze, drain the cooling system by
opening the drain valves located under the
radiator and on the engine block. Refill
COLD WEATHER DRIVING
5-30Starting and driving
ZX
Page 161 of 269
before operating the vehicle. For details,
see ``Changing engine coolant'' in the ``Do-
it-yourself'' section of this manual.
Tire equipment
1. SUMMER tires have a tread designed to
provide superior performance on dry
pavement. However, the performance of
these tires will be substantially reduced
in snowy and icy conditions. If you oper-
ate your vehicle on snowy or icy roads,
NISSAN recommends the use on all four
wheels of MUD & SNOW or ALL SEA-
SON tires. Please consult your NISSAN
dealer for the tire type, size, speed rating
and availability information.
2. For additional traction on icy roads, stud-
ded tires may be used. However, some
U.S. states and Canadian provinces pro-
hibit their use. Check local, state and
provincial laws before installing studded
tires.
Skid and traction capabilities of studded
snow tires on wet or dry surfaces may be
poorer than that of non-studded snow
tires.
3. Tire chains may be used. Use of tire
chains may be prohibited according tolocation. Check the local laws before
installing tire chains. When installing tire
chains, make sure they are of proper size
for the tires on your vehicle and are
installed according to the chain manufac-
turer's suggestions.Use only SAE
Class ``S'' chains.Other types may
damage your vehicle. Use chain tension-
ers when recommended by the tire chain
manufacturer to ensure a tight fit. Loose
end links of the tire chain must be se-
cured or removed to prevent the possi-
bility of whipping action damage to the
fenders or undercarriage. If possible,
avoid fully loading your vehicle when
using tire chains. In addition, drive at a
reduced speed, otherwise, your vehicle
may be damaged and/or vehicle handling
and performance may be adversely af-
fected. Never install tire chains on a
TEMPORARY USE ONLY spare tire. Do
not use tire chains on dry roads.
Special winter equipment
It is recommended that the following items
be carried in the vehicle during winter:
1. A scraper and stiff-bristled brush to re-
move ice and snow from the windows
and wiper blades.2. A sturdy, flat board to be placed under
the jack to give it firm support.
3. A shovel to dig the vehicle out of snow-
drifts.
4. Extra window washer fluid to refill the
reservoir tank.
Driving on snow or ice
WARNING
IWet ice (32ÉF, 0ÉC and freezing rain),
very cold snow, or ice can be slick
and very hard to drive on. The ve-
hicle will have much less traction or
``grip'' under these conditions. Try to
avoid driving on wet ice until the
road is salted or sanded.
IWhatever the condition, drive with
caution. Accelerate and slow down
with care. If accelerating or down-
shifting too fast, the drive wheels
will lose even more traction.
I
Allow more stopping distance under
these conditions. Braking should be
started sooner than on dry pavement.
IAllow greater following distances on
slippery roads.
Starting and driving
5-31
ZX
Page 165 of 269

Getting the spare tire and tools
1.For Standard cab models:
a. Move the bench seat back fully for-
ward.
b. Remove the jack, jack rod, and wheel
nut wrench from behind the driver's
side of the bench seat.For King cab models:
a. Move the driver's seat back fully forward.
b. Remove the jack and wheel nut wrench
from the tool case from behind the driv-
er's seat.
c. Remove the jack rod from behind the
driver's seat.For Crew cab models:
a. Tilt the rear bench seat forward
b. Remove the jack, jack rod, and tool case
from behind the rear bench seat.
2. Fit the square end of the jack rod into the
square hole of the wheel nut wrench to
form a handle.
3. Find the oval shaped opening under the
middle of the tailgate. Pass the T-shaped
end of the jack rod through the opening
and direct it towards the spare tire winch,
located directly above the spare tire.
ACE1010ACE1017ACE1039
In case of emergency6-3
ZX
Page 166 of 269
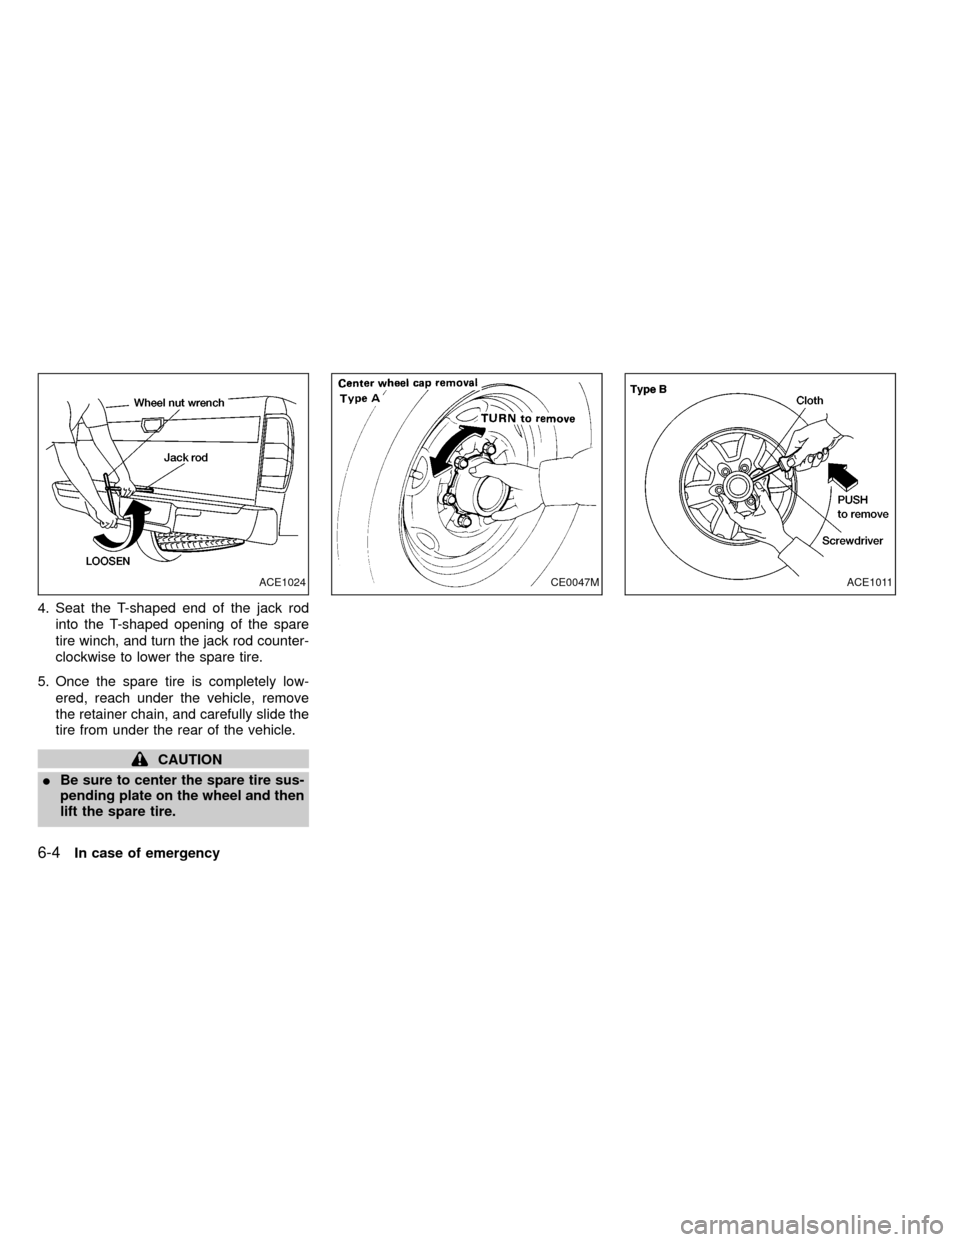
4. Seat the T-shaped end of the jack rod
into the T-shaped opening of the spare
tire winch, and turn the jack rod counter-
clockwise to lower the spare tire.
5. Once the spare tire is completely low-
ered, reach under the vehicle, remove
the retainer chain, and carefully slide the
tire from under the rear of the vehicle.
CAUTION
IBe sure to center the spare tire sus-
pending plate on the wheel and then
lift the spare tire.
ACE1024CE0047MACE1011
6-4In case of emergency
ZX
Page 168 of 269
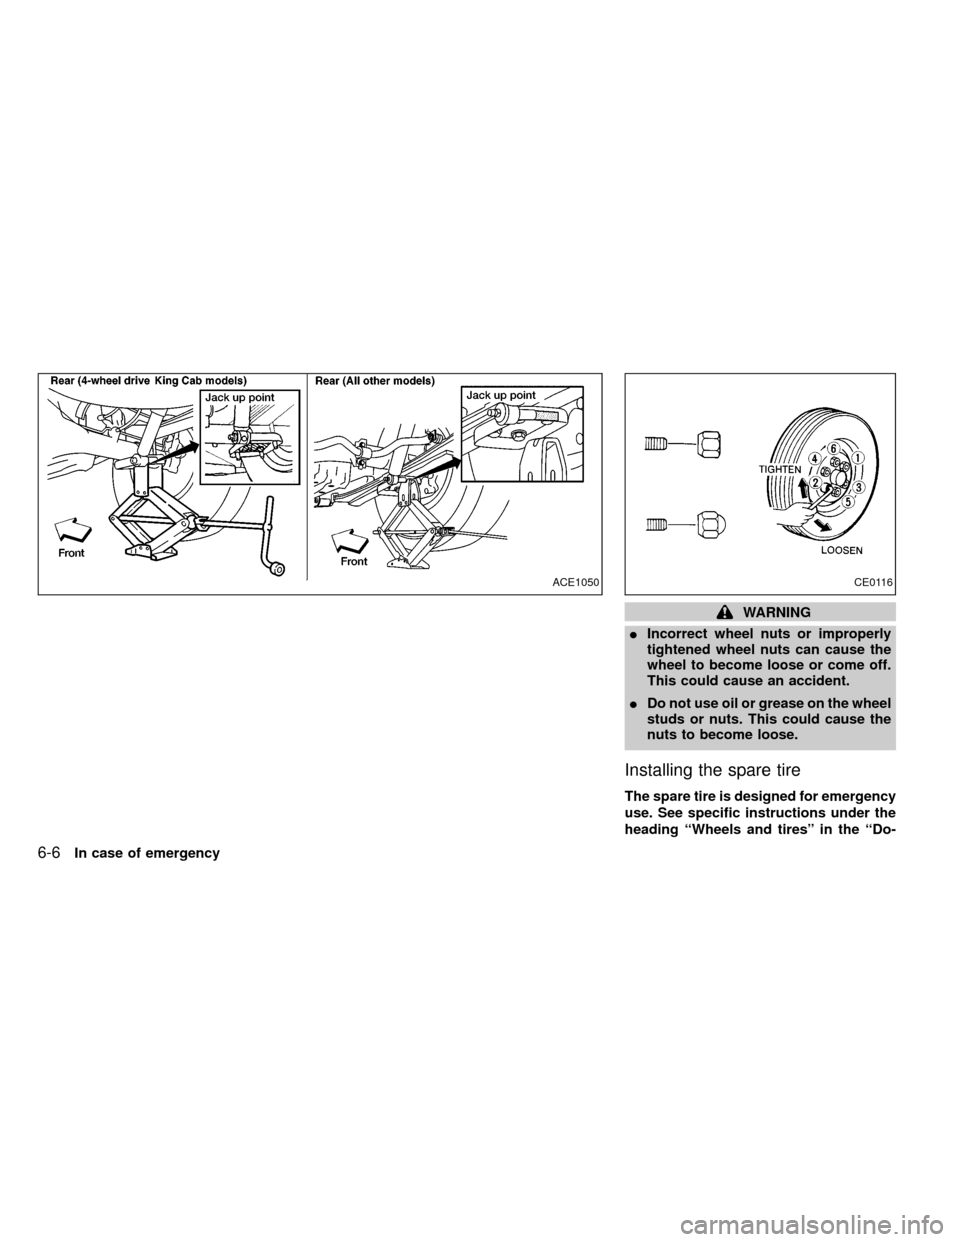
WARNING
IIncorrect wheel nuts or improperly
tightened wheel nuts can cause the
wheel to become loose or come off.
This could cause an accident.
IDo not use oil or grease on the wheel
studs or nuts. This could cause the
nuts to become loose.
Installing the spare tire
The spare tire is designed for emergency
use. See specific instructions under the
heading ``Wheels and tires'' in the ``Do-
ACE1050CE0116
6-6In case of emergency
ZX
Page 169 of 269
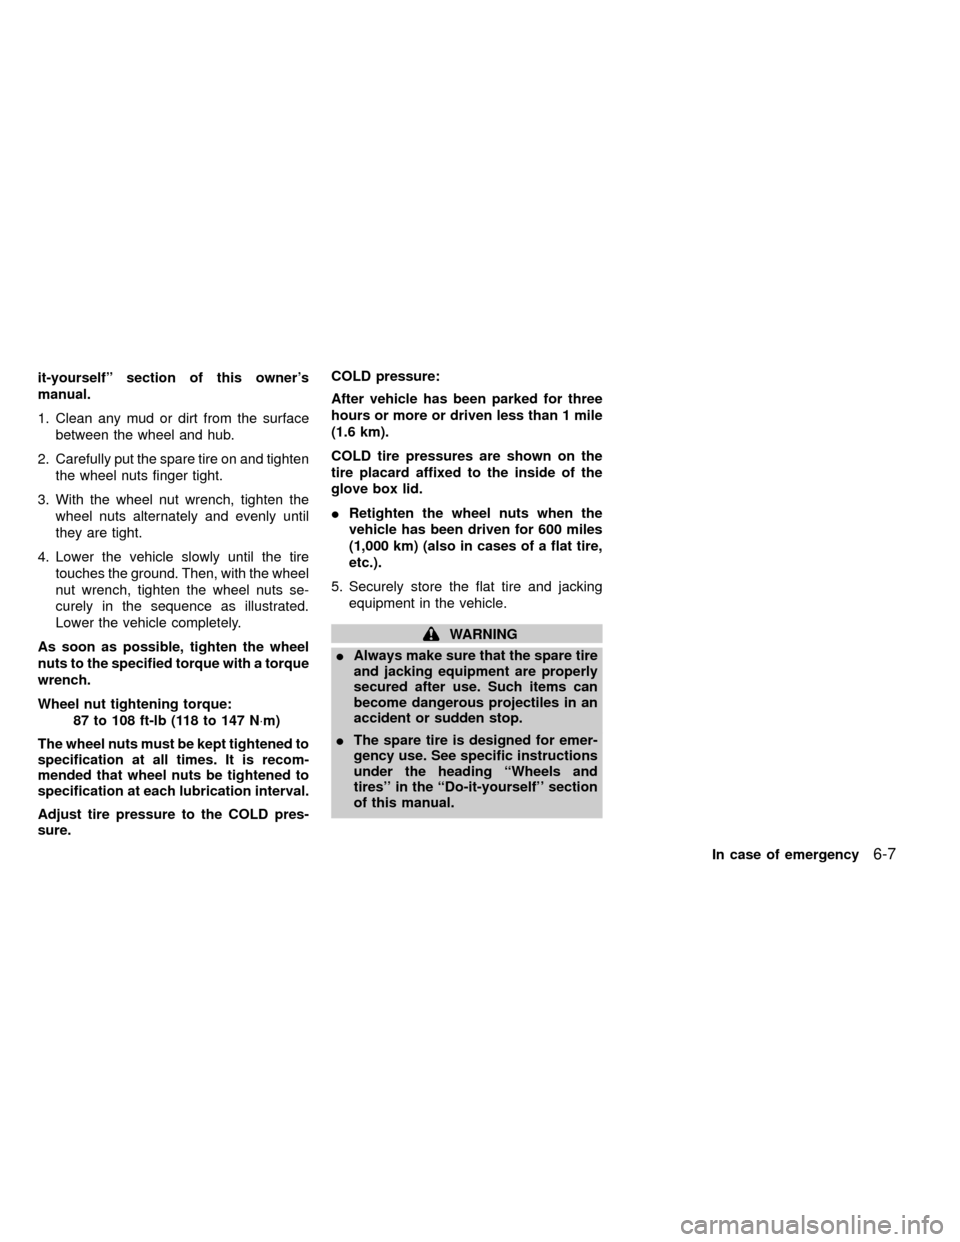
it-yourself'' section of this owner's
manual.
1. Clean any mud or dirt from the surface
between the wheel and hub.
2. Carefully put the spare tire on and tighten
the wheel nuts finger tight.
3. With the wheel nut wrench, tighten the
wheel nuts alternately and evenly until
they are tight.
4. Lower the vehicle slowly until the tire
touches the ground. Then, with the wheel
nut wrench, tighten the wheel nuts se-
curely in the sequence as illustrated.
Lower the vehicle completely.
As soon as possible, tighten the wheel
nuts to the specified torque with a torque
wrench.
Wheel nut tightening torque:
87 to 108 ft-lb (118 to 147 N×m)
The wheel nuts must be kept tightened to
specification at all times. It is recom-
mended that wheel nuts be tightened to
specification at each lubrication interval.
Adjust tire pressure to the COLD pres-
sure.COLD pressure:
After vehicle has been parked for three
hours or more or driven less than 1 mile
(1.6 km).
COLD tire pressures are shown on the
tire placard affixed to the inside of the
glove box lid.
IRetighten the wheel nuts when the
vehicle has been driven for 600 miles
(1,000 km) (also in cases of a flat tire,
etc.).
5. Securely store the flat tire and jacking
equipment in the vehicle.
WARNING
IAlways make sure that the spare tire
and jacking equipment are properly
secured after use. Such items can
become dangerous projectiles in an
accident or sudden stop.
IThe spare tire is designed for emer-
gency use. See specific instructions
under the heading ``Wheels and
tires'' in the ``Do-it-yourself'' section
of this manual.
In case of emergency
6-7
ZX
Page 215 of 269
If you have a flat tire, see the ``In case of
emergency'' section of this manual.
Maximum inflation pressure
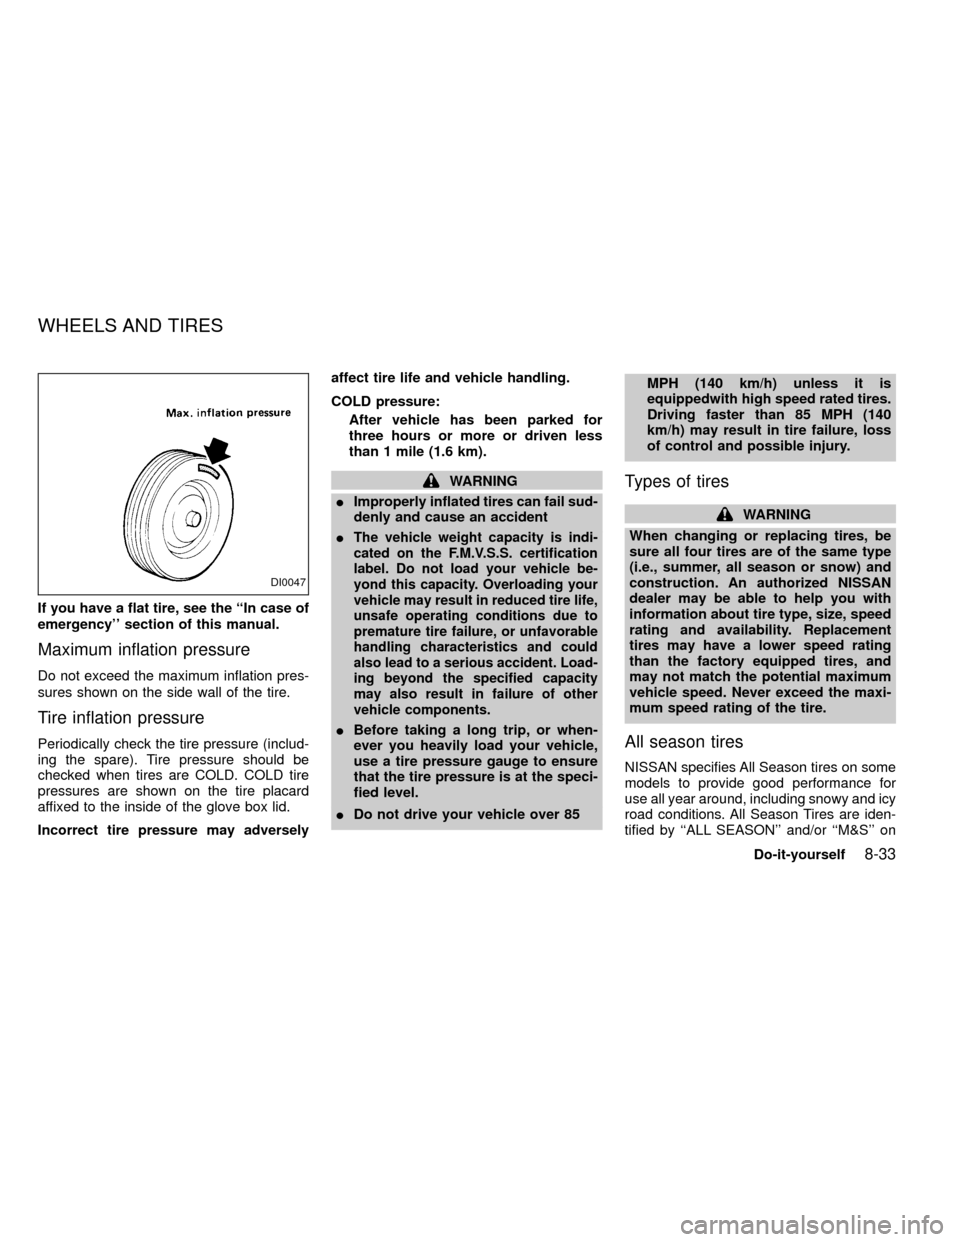
Do not exceed the maximum inflation pres-
sures shown on the side wall of the tire.
Tire inflation pressure
Periodically check the tire pressure (includ-
ing the spare). Tire pressure should be
checked when tires are COLD. COLD tire
pressures are shown on the tire placard
affixed to the inside of the glove box lid.
Incorrect tire pressure may adverselyaffect tire life and vehicle handling.
COLD pressure:
After vehicle has been parked for
three hours or more or driven less
than 1 mile (1.6 km).
WARNING
IImproperly inflated tires can fail sud-
denly and cause an accident
I
The vehicle weight capacity is indi-
cated on the F.M.V.S.S. certification
label. Do not load your vehicle be-
yond this capacity. Overloading your
vehicle may result in reduced tire life,
unsafe operating conditions due to
premature tire failure, or unfavorable
handling characteristics and could
also lead to a serious accident. Load-
ing beyond the specified capacity
may also result in failure of other
vehicle components.
IBefore taking a long trip, or when-
ever you heavily load your vehicle,
use a tire pressure gauge to ensure
that the tire pressure is at the speci-
fied level.
IDo not drive your vehicle over 85MPH (140 km/h) unless it is
equippedwith high speed rated tires.
Driving faster than 85 MPH (140
km/h) may result in tire failure, loss
of control and possible injury.
Types of tires
WARNING
When changing or replacing tires, be
sure all four tires are of the same type
(i.e., summer, all season or snow) and
construction. An authorized NISSAN
dealer may be able to help you with
information about tire type, size, speed
rating and availability. Replacement
tires may have a lower speed rating
than the factory equipped tires, and
may not match the potential maximum
vehicle speed. Never exceed the maxi-
mum speed rating of the tire.
All season tires
NISSAN specifies All Season tires on some
models to provide good performance for
use all year around, including snowy and icy
road conditions. All Season Tires are iden-
tified by ``ALL SEASON'' and/or ``M&S'' on
DI0047
WHEELS AND TIRES
Do-it-yourself8-33
ZX