Page 16 of 269
TILTING FRONT BENCH SEAT
The bench seat can be tilted forward to
make it easier to remove the jacking tools
from the storage area.To tilt the seatback, push the tilting lever
down, then pull the seatback forward.
WARNING
After adjustment, gently rock in the
seat to make sure it is securely locked.
TILTING REAR BENCH SEAT
(Crew Cab models only)
The rear bench seat can be tilted to remove
the jacking tools from the storage area.
To tilt the seat back, pull the strap up and
push the seat back forward.
WARNING
Never allow anyone to ride in the cargo
area or on the rear seat when it is in the
fold-down position. Use of these areas
by passengers without proper re-
straints could result in serious injury in
an accident or sudden stop.
APD0703
ARS1233
1-8Seats, restraints and supplemental air bag systems
ZX
Page 167 of 269

Removing wheel cover
CAUTION
Do not use your hands to pry off wheel
caps or wheel covers. Doing so could
result in personal injury.
Use caution not to scratch the wheel cover
or wheel surface.
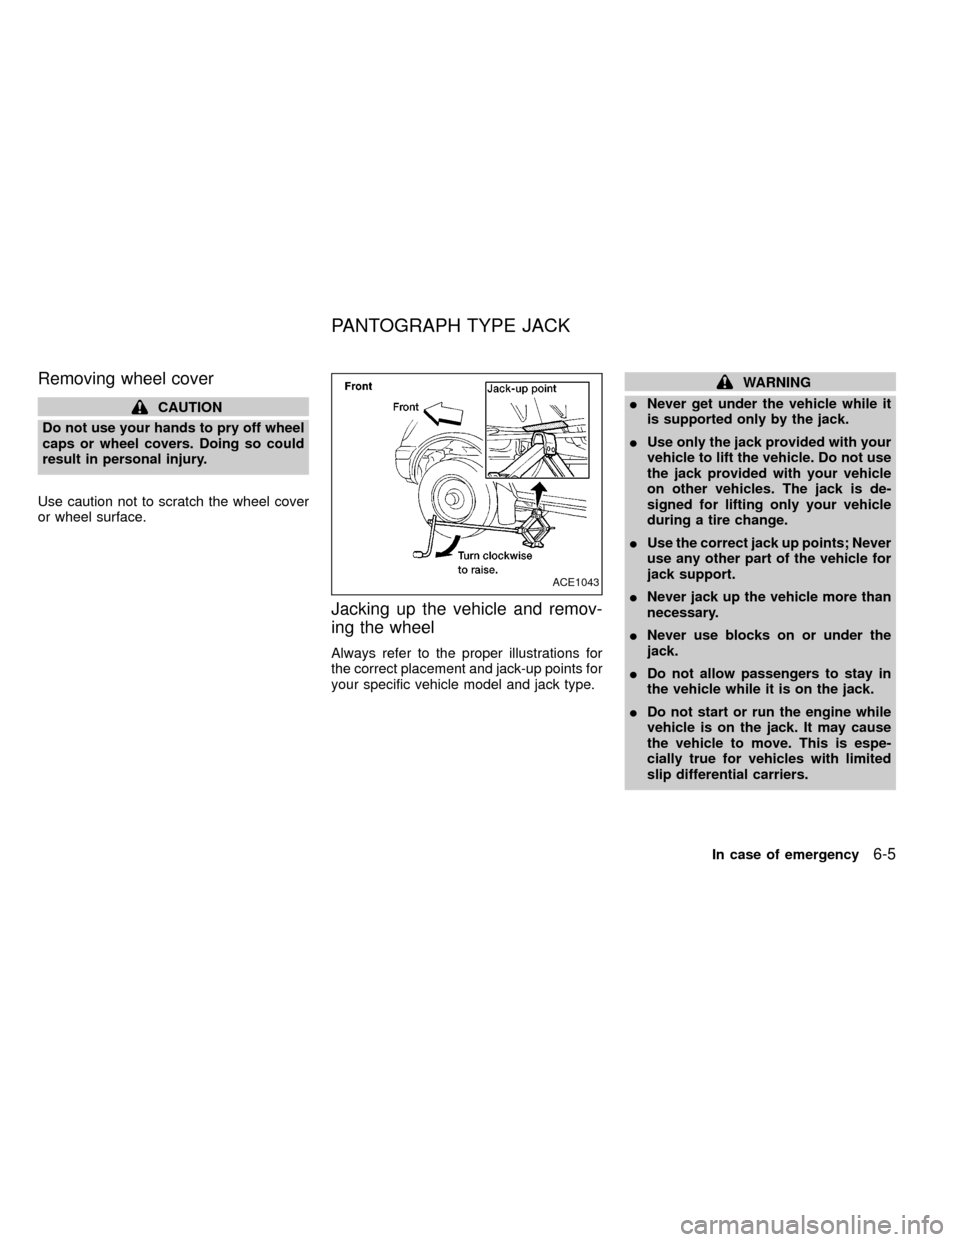
Jacking up the vehicle and remov-
ing the wheel
Always refer to the proper illustrations for
the correct placement and jack-up points for
your specific vehicle model and jack type.
WARNING
INever get under the vehicle while it
is supported only by the jack.
IUse only the jack provided with your
vehicle to lift the vehicle. Do not use
the jack provided with your vehicle
on other vehicles. The jack is de-
signed for lifting only your vehicle
during a tire change.
IUse the correct jack up points; Never
use any other part of the vehicle for
jack support.
INever jack up the vehicle more than
necessary.
INever use blocks on or under the
jack.
IDo not allow passengers to stay in
the vehicle while it is on the jack.
IDo not start or run the engine while
vehicle is on the jack. It may cause
the vehicle to move. This is espe-
cially true for vehicles with limited
slip differential carriers.
ACE1043
PANTOGRAPH TYPE JACK
In case of emergency6-5
ZX
Page 169 of 269

it-yourself'' section of this owner's
manual.
1. Clean any mud or dirt from the surface
between the wheel and hub.
2. Carefully put the spare tire on and tighten
the wheel nuts finger tight.
3. With the wheel nut wrench, tighten the
wheel nuts alternately and evenly until
they are tight.
4. Lower the vehicle slowly until the tire
touches the ground. Then, with the wheel
nut wrench, tighten the wheel nuts se-
curely in the sequence as illustrated.
Lower the vehicle completely.
As soon as possible, tighten the wheel
nuts to the specified torque with a torque
wrench.
Wheel nut tightening torque:
87 to 108 ft-lb (118 to 147 N×m)
The wheel nuts must be kept tightened to
specification at all times. It is recom-
mended that wheel nuts be tightened to
specification at each lubrication interval.
Adjust tire pressure to the COLD pres-
sure.COLD pressure:
After vehicle has been parked for three
hours or more or driven less than 1 mile
(1.6 km).
COLD tire pressures are shown on the
tire placard affixed to the inside of the
glove box lid.
IRetighten the wheel nuts when the
vehicle has been driven for 600 miles
(1,000 km) (also in cases of a flat tire,
etc.).
5. Securely store the flat tire and jacking
equipment in the vehicle.
WARNING
IAlways make sure that the spare tire
and jacking equipment are properly
secured after use. Such items can
become dangerous projectiles in an
accident or sudden stop.
IThe spare tire is designed for emer-
gency use. See specific instructions
under the heading ``Wheels and
tires'' in the ``Do-it-yourself'' section
of this manual.
In case of emergency
6-7
ZX