2000 NISSAN FRONTIER glove box
[x] Cancel search: glove boxPage 83 of 269

3 Pre-driving checks and adjustments
Key .........................................................................3-2
Door locks ..............................................................3-2
Power door locks (if so equipped) .........................3-3
Child safety rear door lock ................................... 3-4
Multi-remote control system (if so equipped).........3-4
Battery replacement ...............................................3-7
Hood release ..........................................................3-8
Glove box ...............................................................3-9
Roof rack (if so equipped)......................................3-9
Step rail (if so equipped) ...................................... 3-11Fuel filler cap ........................................................ 3-11
Tailgate latch ........................................................3-13
Tie down hooks ....................................................3-14
Tilting steering wheel (if so equipped) .................3-15
Outside mirror remote control (if so equipped) ....3-15
Outside mirrors .....................................................3-16
Inside mirror .........................................................3-16
Vanity mirror (if so equipped)...............................3-17
ZX
Page 91 of 269
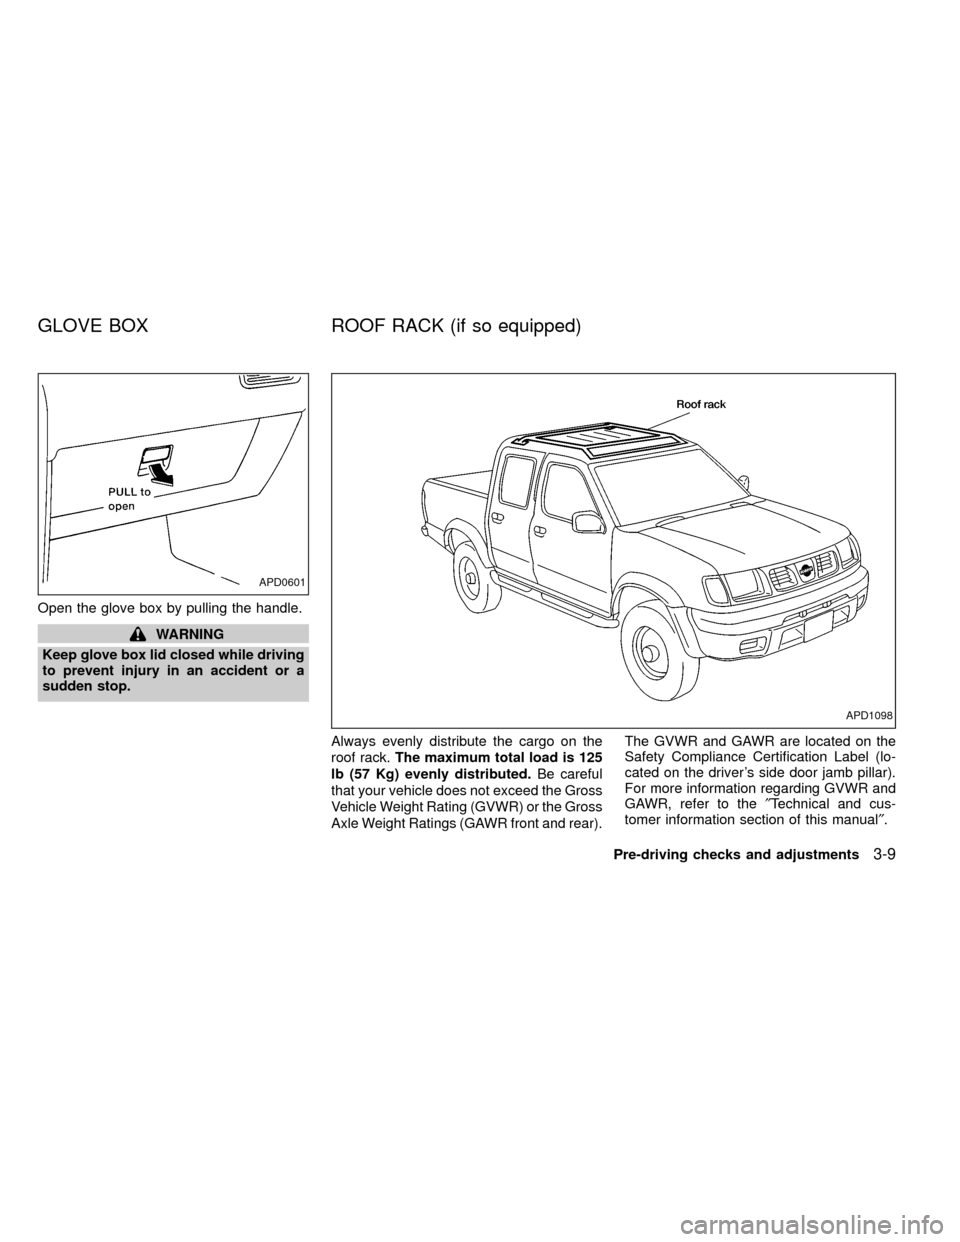
Open the glove box by pulling the handle.
WARNING
Keep glove box lid closed while driving
to prevent injury in an accident or a
sudden stop.
Always evenly distribute the cargo on the
roof rack.The maximum total load is 125
lb (57 Kg) evenly distributed.Be careful
that your vehicle does not exceed the Gross
Vehicle Weight Rating (GVWR) or the Gross
Axle Weight Ratings (GAWR front and rear).The GVWR and GAWR are located on the
Safety Compliance Certification Label (lo-
cated on the driver's side door jamb pillar).
For more information regarding GVWR and
GAWR, refer to the²Technical and cus-
tomer information section of this manual².
APD0601
APD1098
GLOVE BOX ROOF RACK (if so equipped)
Pre-driving checks and adjustments3-9
ZX
Page 156 of 269
CAUTION
Always use tires of the same type, size,
brand, construction (bias, bias-belted
or radial), and tread pattern on all four
wheels. Failure to do so may result in a
circumference difference between tires
on the front and rear axles which will
cause excessive tire wear and may
damage the transmission, transfer
case and differential gears.
If excessive tire wear is found, it is recom-
mended that all four tires be replaced with
tires of the same size, brand, construction
and tread pattern. The tire pressure and
wheel alignment should also be checked
and corrected as necessary. Contact an
authorized NISSAN dealer.
Snow tires
If you install snow tires, they must also be
the same size, brand, construction and
tread pattern on all four wheels.
Tire inflation pressure
Periodically check the pressure in all tires,
including the spare, with a gauge. Adjust to
the specified pressure if necessary. Tirepressures are shown on the tire placard
affixed to the glove box.
Tire chain
Tire chains must be installed only on the
rear wheels and not on the front wheels.
Do not drive with tire chains on paved roads
which are clear of snow. Driving with chains
in such conditions can cause damage to the
various mechanisms of the vehicle due to
some overstress. When driving on clear
paved roads, be sure to change to 2WD.
TIRES OF FOUR-WHEEL
DRIVE
5-26Starting and driving
ZX
Page 169 of 269
it-yourself'' section of this owner's
manual.
1. Clean any mud or dirt from the surface
between the wheel and hub.
2. Carefully put the spare tire on and tighten
the wheel nuts finger tight.
3. With the wheel nut wrench, tighten the
wheel nuts alternately and evenly until
they are tight.
4. Lower the vehicle slowly until the tire
touches the ground. Then, with the wheel
nut wrench, tighten the wheel nuts se-
curely in the sequence as illustrated.
Lower the vehicle completely.
As soon as possible, tighten the wheel
nuts to the specified torque with a torque
wrench.
Wheel nut tightening torque:
87 to 108 ft-lb (118 to 147 N×m)
The wheel nuts must be kept tightened to
specification at all times. It is recom-
mended that wheel nuts be tightened to
specification at each lubrication interval.
Adjust tire pressure to the COLD pres-
sure.COLD pressure:
After vehicle has been parked for three
hours or more or driven less than 1 mile
(1.6 km).
COLD tire pressures are shown on the
tire placard affixed to the inside of the
glove box lid.
IRetighten the wheel nuts when the
vehicle has been driven for 600 miles
(1,000 km) (also in cases of a flat tire,
etc.).
5. Securely store the flat tire and jacking
equipment in the vehicle.
WARNING
IAlways make sure that the spare tire
and jacking equipment are properly
secured after use. Such items can
become dangerous projectiles in an
accident or sudden stop.
IThe spare tire is designed for emer-
gency use. See specific instructions
under the heading ``Wheels and
tires'' in the ``Do-it-yourself'' section
of this manual.
In case of emergency
6-7
ZX
Page 215 of 269
If you have a flat tire, see the ``In case of
emergency'' section of this manual.
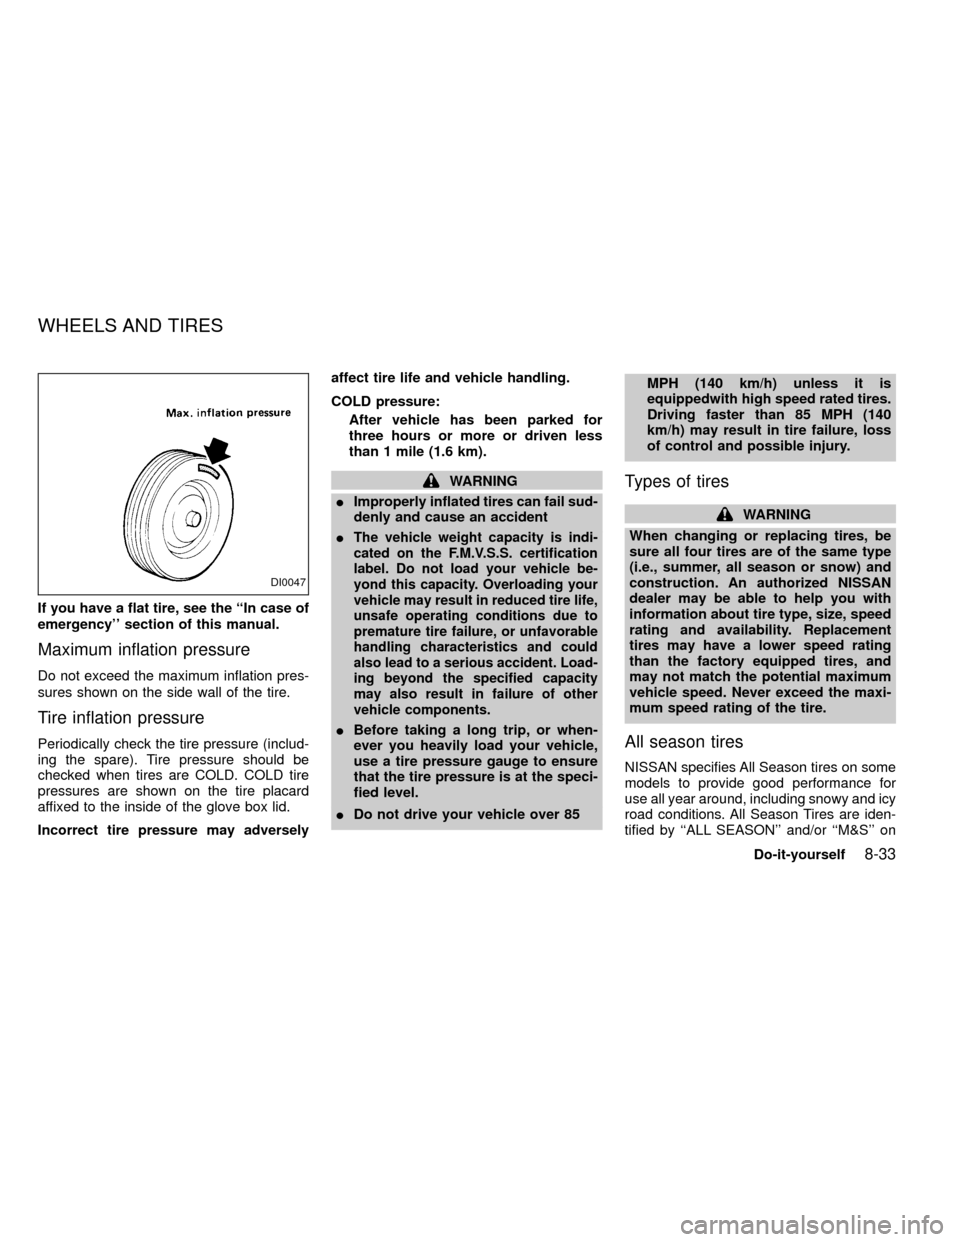
Maximum inflation pressure
Do not exceed the maximum inflation pres-
sures shown on the side wall of the tire.
Tire inflation pressure
Periodically check the tire pressure (includ-
ing the spare). Tire pressure should be
checked when tires are COLD. COLD tire
pressures are shown on the tire placard
affixed to the inside of the glove box lid.
Incorrect tire pressure may adverselyaffect tire life and vehicle handling.
COLD pressure:
After vehicle has been parked for
three hours or more or driven less
than 1 mile (1.6 km).
WARNING
IImproperly inflated tires can fail sud-
denly and cause an accident
I
The vehicle weight capacity is indi-
cated on the F.M.V.S.S. certification
label. Do not load your vehicle be-
yond this capacity. Overloading your
vehicle may result in reduced tire life,
unsafe operating conditions due to
premature tire failure, or unfavorable
handling characteristics and could
also lead to a serious accident. Load-
ing beyond the specified capacity
may also result in failure of other
vehicle components.
IBefore taking a long trip, or when-
ever you heavily load your vehicle,
use a tire pressure gauge to ensure
that the tire pressure is at the speci-
fied level.
IDo not drive your vehicle over 85MPH (140 km/h) unless it is
equippedwith high speed rated tires.
Driving faster than 85 MPH (140
km/h) may result in tire failure, loss
of control and possible injury.
Types of tires
WARNING
When changing or replacing tires, be
sure all four tires are of the same type
(i.e., summer, all season or snow) and
construction. An authorized NISSAN
dealer may be able to help you with
information about tire type, size, speed
rating and availability. Replacement
tires may have a lower speed rating
than the factory equipped tires, and
may not match the potential maximum
vehicle speed. Never exceed the maxi-
mum speed rating of the tire.
All season tires
NISSAN specifies All Season tires on some
models to provide good performance for
use all year around, including snowy and icy
road conditions. All Season Tires are iden-
tified by ``ALL SEASON'' and/or ``M&S'' on
DI0047
WHEELS AND TIRES
Do-it-yourself8-33
ZX
Page 246 of 269

EMISSION CONTROL
INFORMATION LABEL
The emission control information label is
attached to the underside of the hood as
shown.
TIRE PLACARD
The cold tire pressure is shown on the tire
placard affixed to the inside of the glove box
lid.
AIR CONDITIONER
SPECIFICATION LABEL
The label is attached to the underside of the
hood as shown.
ATI1011ATI1019ATI1013
10-14Technical and consumer information
ZX
Page 247 of 269
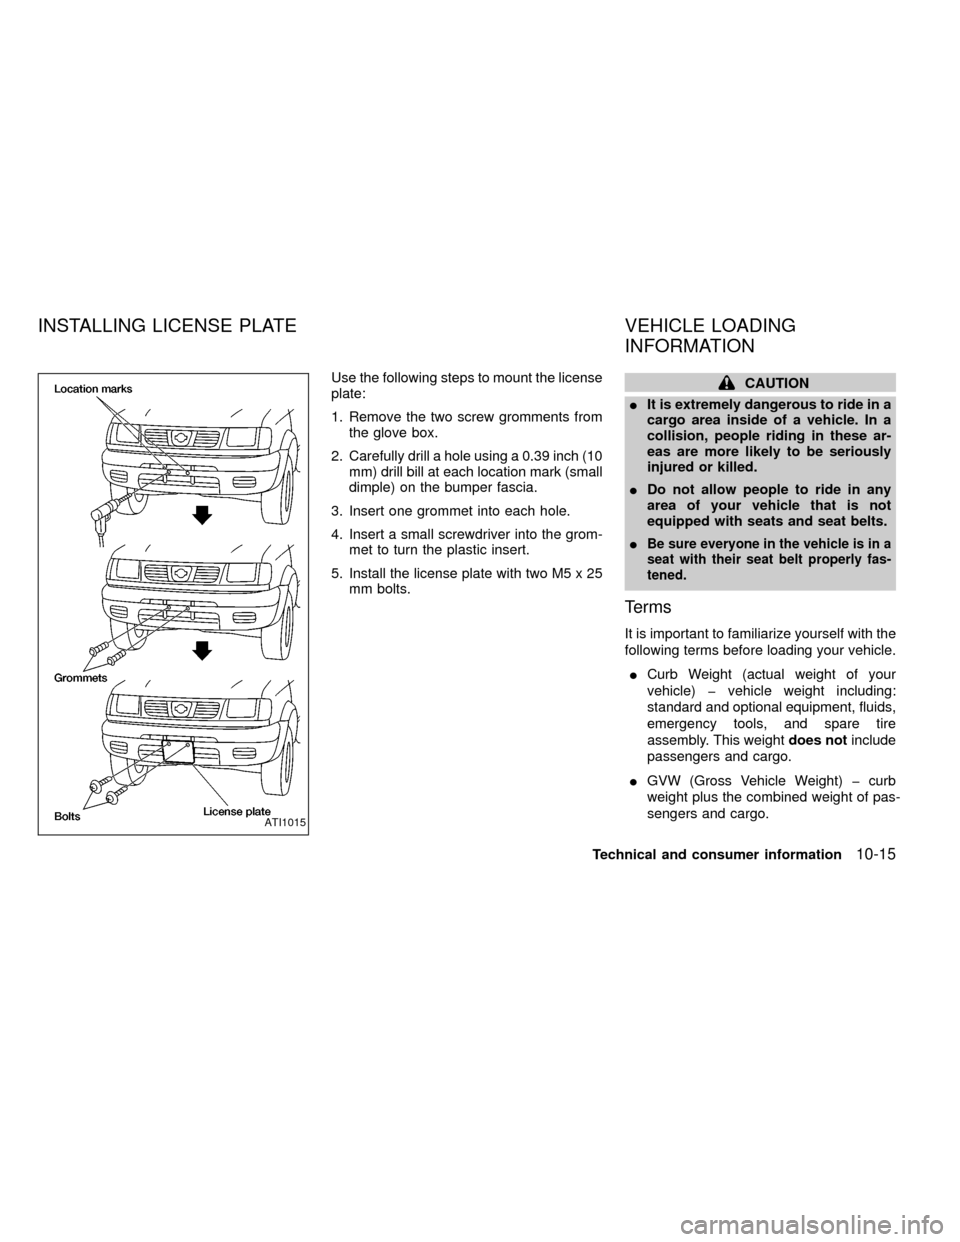
Use the following steps to mount the license
plate:
1. Remove the two screw gromments from
the glove box.
2. Carefully drill a hole using a 0.39 inch (10
mm) drill bill at each location mark (small
dimple) on the bumper fascia.
3. Insert one grommet into each hole.
4. Insert a small screwdriver into the grom-
met to turn the plastic insert.
5. Install the license plate with two M5 x 25
mm bolts.CAUTION
IIt is extremely dangerous to ride in a
cargo area inside of a vehicle. In a
collision, people riding in these ar-
eas are more likely to be seriously
injured or killed.
IDo not allow people to ride in any
area of your vehicle that is not
equipped with seats and seat belts.
I
Be sure everyone in the vehicle is in a
seat with their seat belt properly fas-
tened.
Terms
It is important to familiarize yourself with the
following terms before loading your vehicle.
ICurb Weight (actual weight of your
vehicle) þ vehicle weight including:
standard and optional equipment, fluids,
emergency tools, and spare tire
assembly. This weightdoes notinclude
passengers and cargo.
IGVW (Gross Vehicle Weight) þ curb
weight plus the combined weight of pas-
sengers and cargo.
ATI1015
INSTALLING LICENSE PLATE VEHICLE LOADING
INFORMATION
Technical and consumer information10-15
ZX
Page 256 of 269
Trailer hitch
Check the towing capacity of your bumper
hitch or receiver-type frame mounted hitch.
Choose a proper hitch for your vehicle and
trailer. A genuine Nissan trailer hitch is avail-
able from your NISSAN dealer. Make sure
the trailer hitch is securely attached to the
vehicle to help avoid personal injury or
property damage due to sway caused by
crosswinds, rough road surfaces or passing
trucks.
CAUTION
ISpecial hitches which include frame
reinforcements are required for tow-
ing above 2,000 lb (907 kg). Suitable
genuine NISSAN hitches for pickup
trucks and sport utility vehicles are
available at an authorized NISSAN
dealer.
IThe hitch should not be attached to
or affect the operation of the impact-
absorbing bumper.
IDo not use axle-mounted hitches.
IDo not modify the vehicle exhaust
system, brake system, etc. to install
a trailer hitch.ITo reduce the possibility of addi-
tional damage if your vehicle is
struck from the rear, where practical,
remove the hitch and/or receiver
when not in use. Remove receiver
when not in use. After the hitch is
removed, seal the bolt holes to pre-
vent exhaust fumes, water or dust
from entering the passenger com-
partment.
IRegularly check that all trailer hitch
mounting bolts are securely
mounted.
Tire pressures
IWhen towing a trailer, inflate the vehicle
tires to the recommended cold tire pres-
sure indicated on the tire placard (af-
fixed to the inside of the glove box lid).
ITrailer tire condition, size, load rating
and proper inflation pressure should be
in accordance with the trailer and tire
manufacturers' specifications.
Safety chain
Always use suitable safety chains between
your vehicle and the trailer. Safety chainsshould be crossed and should be attached
to the hitch, not to the vehicle bumper or
axle. Be sure to leave enough slack in the
chain to permit turning corners.
Trailer lights
Trailer lights should comply with Federal
and/or local regulations. For assistance in
hooking up trailer lights, contact an autho-
rized NISSAN dealer.
Trailer brakes
If your trailer is equipped with a braking
system, make sure it conforms to Federal
and/or local regulations and that it is prop-
erly installed.
WARNING
Never connect a trailer brake system
directly to the vehicle brake system.
Pre-towing tips
IBe certain your vehicle maintains a level
position when a loaded and/or unloaded
trailer is hitched. Do not drive the vehicle
if it has an abnormal nose-up or nose-
down condition; check for improper
10-24Technical and consumer information
ZX