2000 MITSUBISHI CARISMA ECU
[x] Cancel search: ECUPage 8 of 280

GENERAL INFORMATION
1–8
Installation of accessoriesEB24A-Ce
Before fitting any accessories, please con-
sult your authorized MITSUBISHI dealer.
(1) The installation of accessories, optional
parts, etc., should only be carried out
within the limits prescribed by law in
your country, and in accordance with
the guidelines and warnings contained
within the documents accompanying
this vehicle.
Only MITSUBISHI approved acces-
sories should be fitted to your vehicle.
(2) Improper installation of electrical parts
could cause fire, please refer to the
Modification/alterations to the electrical
or fuel systems section within this
owner’s handbook.
(3) When using a communication system
such as a cellular phone or a radio set
inside the vehicle, a separate external
antenna must be fitted. When a cellular
phone or a radio set is used by using an
internal antenna alone, it may interfere
with the vehicle’s electrical system and
adversely affect safe operation of the
vehicle.
(4) Tyres and wheels which do not meet
specifications must not be used.
Refer to the “Specifications” section for
information regarding wheel and tyre
sizes on page 10–11.(5) Do not fail to read all relative instructions
before first putting into service and prior
to the attachment or installation of ac-
cessories, parts or other modifications
to the vehicle!Important points!Due to the large number of accessory and
replacement parts of different manufacturers
in the market, it is not possible, not only for
MITSUBISHI MOTOR SALES Europe B.V.,
but also an authorized MITSUBISHI dealer,
to check whether the attachment or installa-
tion of such parts affects the driving safety of
your MITSUBISHI-vehicle.
Even when such parts are officially autho-
rized, for example by a “general operators
permit” (an appraisal for the part) or through
the execution of the part in an officially ap-
proved manner of construction, or when a
single operation permit following the attach-
ment or installation of such parts, it cannot be
deduced from that alone, that the driving
safety of your vehicle has not been affected.Consider also that there basically exists no
liability on the part of the appraiser or the offi-
cial. Only in the case of parts (MITSUBISHI
original replacement or exchange parts as
well as MITSUBISHI accessories) that are
recommended and released by an autho-
rized MITSUBISHI dealer and that are at-
tached or installed by an authorized MIT-
SUBISHI dealer can you assume, that
optimal safety has been provided. The same
also pertains to modifications of MIT-
SUBISHI vehicles with respect to the pro-
duction specifications. For your own safety,
in such cases as well, you should only un-
dertake modifications according to the rec-
ommendations of an authorized MIT-
SUBISHI dealer.
Page 10 of 280
GENERAL INFORMATION
1–10
CAUTION
(2) When luggage is loaded onto the
vehicle, please make sure to drive
slowly and avoid excessive man-
euvers such as sudden braking or
quick turning.
In addition, place the luggage on
the carrier so that its weight is dis-
tributed evenly with the heaviest
items on the bottom. Do not load
items that are wider than the roof
carrier.
The additional weight on the roof
could heighten the vehicle’s centre
of gravity and affect the vehicle
handling characteristics.
As a result, driving errors or emerg-
ency maneuvers could lead to a
loss of control and result in an acci-
dent.
CAUTION
(3) Before driving and after travelling a
short distance, always check the
load to make sure it is securely fas-
tened to the roof carrier.
Check periodically during your
travel that the load remains secure.
If the load is not secure, it could fall
from the vehicle and damage your
vehicle, another vehicle or create
road hazard.
NOTE
(1) To prevent wind noise or reduction in
gas mileage, remove the roof carrier
when not in use.
(2) Before using an automatic car wash,
check with the attendant to determine if
the roof carrier should be removed.
(3) Be sure that adequate clearance is
maintained for raising the sunroof (For
vehicles with sunroof) and tailgate
(hatchback) when installing a roof
carrier.
Genuine partsEB05A-Fi
Don’t play around with substitutes.
MITSUBISHI has gone to great lengths to
bring you a superbly crafted vehicle offering
the highest quality and dependability. Don’t
reduce that quality and dependability by us-
ing substitute parts.
Always use MITSUBISHI Genuine Parts de-
signed and manufactured to maintain your
MITSUBISHI vehicle at top performance.
The operation of vehicle components can be
less efficient in case of using Non-Genuine
Parts.
Failure to use Genuine Parts may invalidate
any future warranty claim. MITSUBISHI will
not be liable for any malfunction of your ve-
hicle that may have been caused by the use
of substitute parts in place of MITSUBISHI
Genuine Parts.
At the MITSUBISHI dealer you can also get
appropriate advice and the assembling of
Genuine Parts will be handled professional-
ly.
MITSUBISHI Genuine Parts are identified by
this mark and are available at all authorized
MITSUBISHI dealers.
Page 21 of 280
LOCKING AND UNLOCKING
2–9
F13A063a
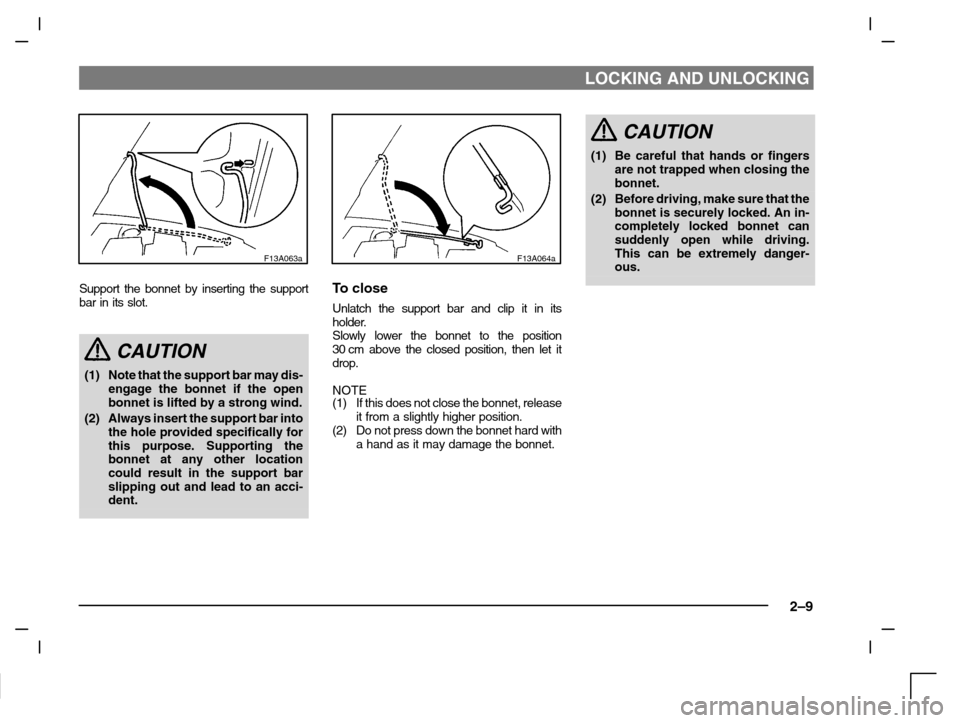
Support the bonnet by inserting the support
bar in its slot.
CAUTION
(1) Note that the support bar may dis-
engage the bonnet if the open
bonnet is lifted by a strong wind.
(2) Always insert the support bar into
the hole provided specifically for
this purpose. Supporting the
bonnet at any other location
could result in the support bar
slipping out and lead to an acci-
dent.
F13A064a
To close
Unlatch the support bar and clip it in its
holder.
Slowly lower the bonnet to the position
30 cm above the closed position, then let it
drop.
NOTE
(1) If this does not close the bonnet, release
it from a slightly higher position.
(2) Do not press down the bonnet hard with
a hand as it may damage the bonnet.
CAUTION
(1) Be careful that hands or fingers
are not trapped when closing the
bonnet.
(2) Before driving, make sure that the
bonnet is securely locked. An in-
completely locked bonnet can
suddenly open while driving.
This can be extremely danger-
ous.
Page 31 of 280
SEATS AND SEATBELTS
3–3
CAUTION
(1) Make sure that the seat is ad-
justed by an adult.
If it is adjusted by a child, an unex-
pected accident might occur.
(2) Do not place a cushion or the like
between your back and the seat-
back while driving. The effective-
ness of the head restraints will be
reduced in the event of an acci-
dent.
(3) When sliding or reclining the seat
rearward, pay careful attention to
the rear seat passengers.
G21B024a
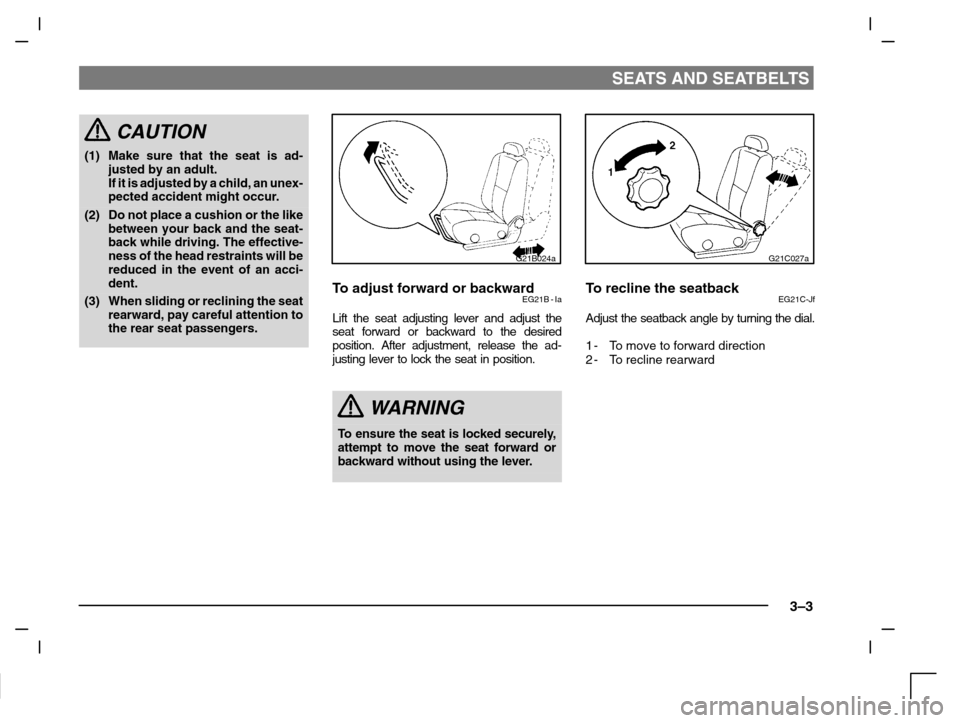
To adjust forward or backwardEG21B - Ia
Lift the seat adjusting lever and adjust the
seat forward or backward to the desired
position. After adjustment, release the ad-
justing lever to lock the seat in position.
WARNING
To e n s u r e the seat is locked securely,
attempt to move the seat forward or
backward without using the lever.
G21C027a
To recline the seatbackEG21C-Jf
Adjust the seatback angle by turning the dial.
1-To move to forward direction
2-To recline rearward
Page 45 of 280
SEATS AND SEATBELTS
3–17
G28B005a
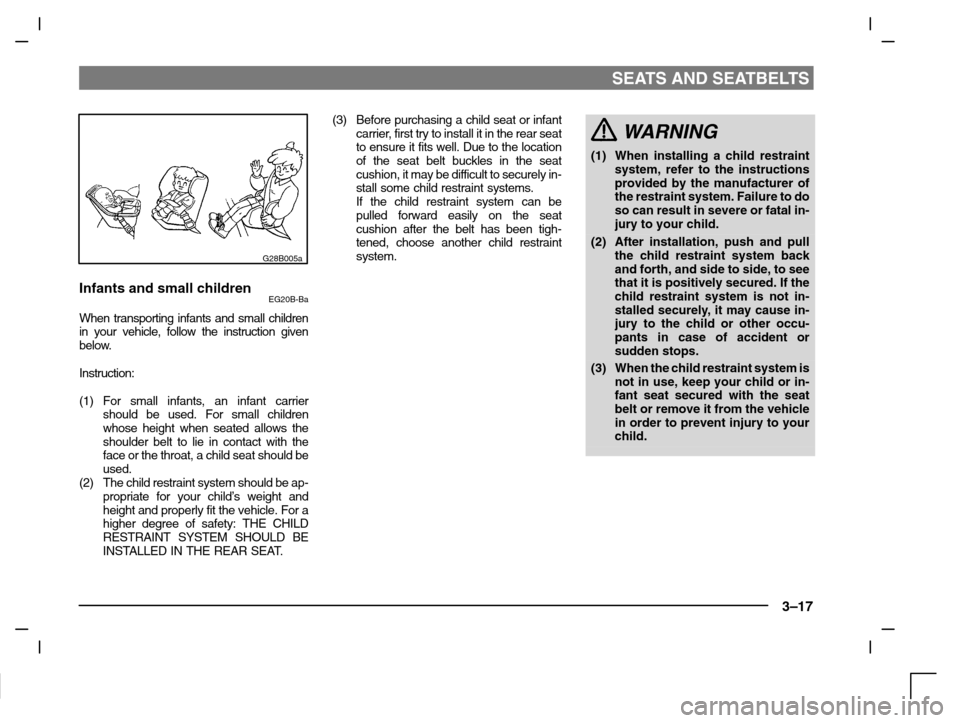
Infants and small childrenEG20B-Ba
When transporting infants and small children
in your vehicle, follow the instruction given
below.
Instruction:
(1) For small infants, an infant carrier
should be used. For small children
whose height when seated allows the
shoulder belt to lie in contact with the
face or the throat, a child seat should be
used.
(2) The child restraint system should be ap-
propriate for your child’s weight and
height and properly fit the vehicle. For a
higher degree of safety: THE CHILD
RESTRAINT SYSTEM SHOULD BE
INSTALLED IN THE REAR SEAT.(3) Before purchasing a child seat or infant
carrier, first try to install it in the rear seat
to ensure it fits well. Due to the location
of the seat belt buckles in the seat
cushion, it may be difficult to securely in-
stall some child restraint systems.
If the child restraint system can be
pulled forward easily on the seat
cushion after the belt has been tigh-
tened, choose another child restraint
system.
WARNING
(1) When installing a child restraint
system, refer to the instructions
provided by the manufacturer of
the restraint system. Failure to do
so can result in severe or fatal in-
jury to your child.
(2) After installation, push and pull
the child restraint system back
and forth, and side to side, to see
that it is positively secured. If the
child restraint system is not in-
stalled securely, it may cause in-
jury to the child or other occu-
pants in case of accident or
sudden stops.
(3) When the child restraint system is
not in use, keep your child or in-
fant seat secured with the seat
belt or remove it from the vehicle
in order to prevent injury to your
child.
Page 48 of 280
SEATS AND SEATBELTS
3–20
G18C056a
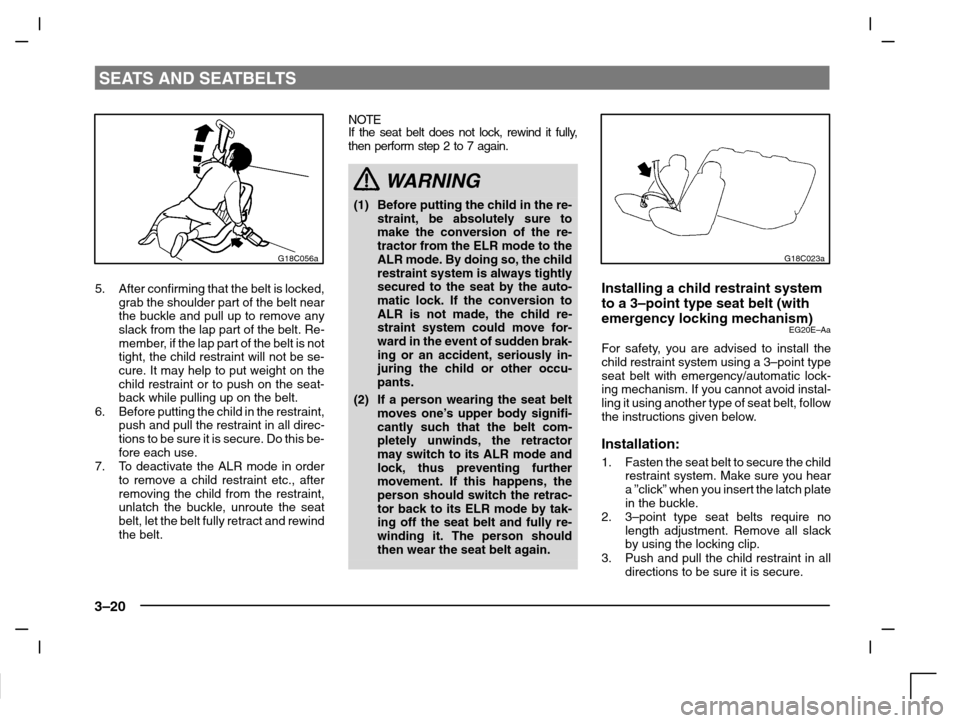
5. After confirming that the belt is locked,
grab the shoulder part of the belt near
the buckle and pull up to remove any
slack from the lap part of the belt. Re-
member, if the lap part of the belt is not
tight, the child restraint will not be se-
cure. It may help to put weight on the
child restraint or to push on the seat-
back while pulling up on the belt.
6. Before putting the child in the restraint,
push and pull the restraint in all direc-
tions to be sure it is secure. Do this be-
fore each use.
7. To deactivate the ALR mode in order
to remove a child restraint etc., after
removing the child from the restraint,
unlatch the buckle, unroute the seat
belt, let the belt fully retract and rewind
the belt.NOTE
If the seat belt does not lock, rewind it fully,
then perform step 2 to 7 again.
WARNING
(1) Before putting the child in the re-
straint, be absolutely sure to
make the conversion of the re-
tractor from the ELR mode to the
ALR mode. By doing so, the child
restraint system is always tightly
secured to the seat by the auto-
matic lock. If the conversion to
ALR is not made, the child re-
straint system could move for-
ward in the event of sudden brak-
ing or an accident, seriously in-
juring the child or other occu-
pants.
(2) If a person wearing the seat belt
moves one’s upper body signifi-
cantly such that the belt com-
pletely unwinds, the retractor
may switch to its ALR mode and
lock, thus preventing further
movement. If this happens, the
person should switch the retrac-
tor back to its ELR mode by tak-
ing off the seat belt and fully re-
winding it. The person should
then wear the seat belt again.
G18C023a
Installing a child restraint system
to a 3–point type seat belt (with
emergency locking mechanism)
EG20E–Aa
For safety, you are advised to install the
child restraint system using a 3–point type
seat belt with emergency/automatic lock-
ing mechanism. If you cannot avoid instal-
ling it using another type of seat belt, follow
the instructions given below.
Installation:
1. Fasten the seat belt to secure the child
restraint system. Make sure you hear
a ”click” when you insert the latch plate
in the buckle.
2. 3–point type seat belts require no
length adjustment. Remove all slack
by using the locking clip.
3. Push and pull the child restraint in all
directions to be sure it is secure.
Page 122 of 280

STARTING AND DRIVING
5–22
I04S040a
Sports mode
(Vehicles with Sports mode)
EI04S-Oa
Whether the vehicle is stationary or in mo-
tion, sports mode is selected by pushing the
selector lever from the “D” (DRIVE) position
into the manual gate (A). To return to “D”
range operation, push the selector lever
back into the main gate (B).
In sports mode, gear shifts can be made
rapidly simply by moving the selector lever
backwards and forwards. In contrast to a
manual transmission, the sports mode al-
lows gear shifts with the accelerator pedal
depressed.
+ (UP): Push the lever forward once to shift
up one gear.
– (DOWN): Pull the lever backwards once to
shift down one gear.
CAUTION
(1) Upward shifts do not take place
automatically in sports mode.
The driver must execute upward
shifts in accordance with prevail-
ing road conditions, taking care
to keep the engine speed below
the red zone.
(2) By rapidly moving the selector
lever backwards (DOWN) twice, it
is possible to skip one gear, i.e.,
3rd to 1st or 4th to 2nd. Since
sudden engine braking and/or
rapid accelera-tion can cause a
loss of traction, however, down-
shifts must be made carefully in
accordance with the vehicle’s
speed.
NOTE
(1) In sports mode, only the 4 forward gears
can be selected. To reverse or park the
vehicle, move the selector lever to the
“R” (REVERSE) or “P” (PARK) position
as required.
(2) To maintain the required levels of ve-
hicle performance and safety, the sys-
tem may not execute certain gear shifts
when the selector lever is operated,
such as 4th gear at low speed.
(3) In sports mode, downward shifts are
made automatically when the vehicle
slows down. When the vehicle stops,
1st gear is automatically selected.
(4) When driving away on a slippery road,
push the selector lever forward into the
+(UP) position. This causes the trans-
mission to shift into the 2nd gear which
is better for smooth driving away on a
slippery road. Push the selector lever to
the – (DOWN) side to shift back to the
1st gear.
(5) Move the selector lever gently between
the manual and main gates and be-
tween positions in the manual gate.
Undue force could damage the selector
lever.
Page 130 of 280

STARTING AND DRIVING
5–30
Rear
I24A052a
(2) After driving on snowy roads, remove
any snow and ice which may have be-
come adhered to the wheel areas.
When doing this, be careful not to dam-
age the wheel speed sensors (A) and
cables located at each wheel.
(3) The ABS becomes operative after the
vehicle has accelerated to a speed in
excess of approximately 10 km/h. It
stops operating when the vehicle de-
celerates to a speed below approxi-
mately 5 km/h.
G09A017a
Steering wheel height
adjustment
EG09A-Ci
To adjust the steering wheel height, release
the tilt lock lever while holding the steering
wheel by hand, and raise or lower the steer-
ing wheel to the desired height.
After adjustment, securely lock the lever by
pulling it upward.
1-Locked
2-Released
WARNING
(1) After adjusting to the desired
height, check to be sure that the
lever is locked.
(2) Do not attempt to adjust the steer-
ing wheel while you are driving
the vehicle.
(3) When releasing the tilt lock lever,
move it to the release position (2)
and hold the steering wheel by
hand to prevent it falling to the
lowest position.