Page 162 of 232

SERVICE RECOMMENDATIONS
To help you service your vehicle:
²We highlight do-it-yourself items in the engine compartment for easy
location.
²We provide a Scheduled Maintenance Guide which makes tracking
routine service easy.
If your vehicle requires professional service, your dealership can provide
necessary parts and service. Check your ªWarranty Guideº to find out
which parts and services are covered.
Use only recommended fuels, lubricants, fluids and service parts
conforming to specifications. Motorcraft parts are designed and built to
provide the best performance in your vehicle.
PRECAUTIONS WHEN SERVICING YOUR VEHICLE
Be especially careful when inspecting or servicing your vehicle.
²Do not work on a hot engine.
²When the engine is running, keep loose clothing, jewelry or long hair
away from moving parts.
²Do not work on a vehicle with the engine running in an enclosed
space, unless you are sure you have enough ventilation.
²Keep all lit cigarettes, open flames and other lit material away from
the battery and all fuel related parts.
If you disconnect the battery, the engine must ªrelearnº its idle
conditions before your vehicle will drive properly, as explained in the
Batterysection in this chapter.
Working with the engine off
1. Set the parking brake, and ensure the gearshift is securely latched in
park.
2. Turn off the engine and remove the key.
3. Block the wheels to prevent the vehicle from moving unexpectedly.
Working with the engine on
1. Set the parking brake and ensure the gearshift is securely latched in P
(Park).
2. Block the wheels to prevent the vehicle from moving unexpectedly.
Maintenance and care
162
Page 166 of 232

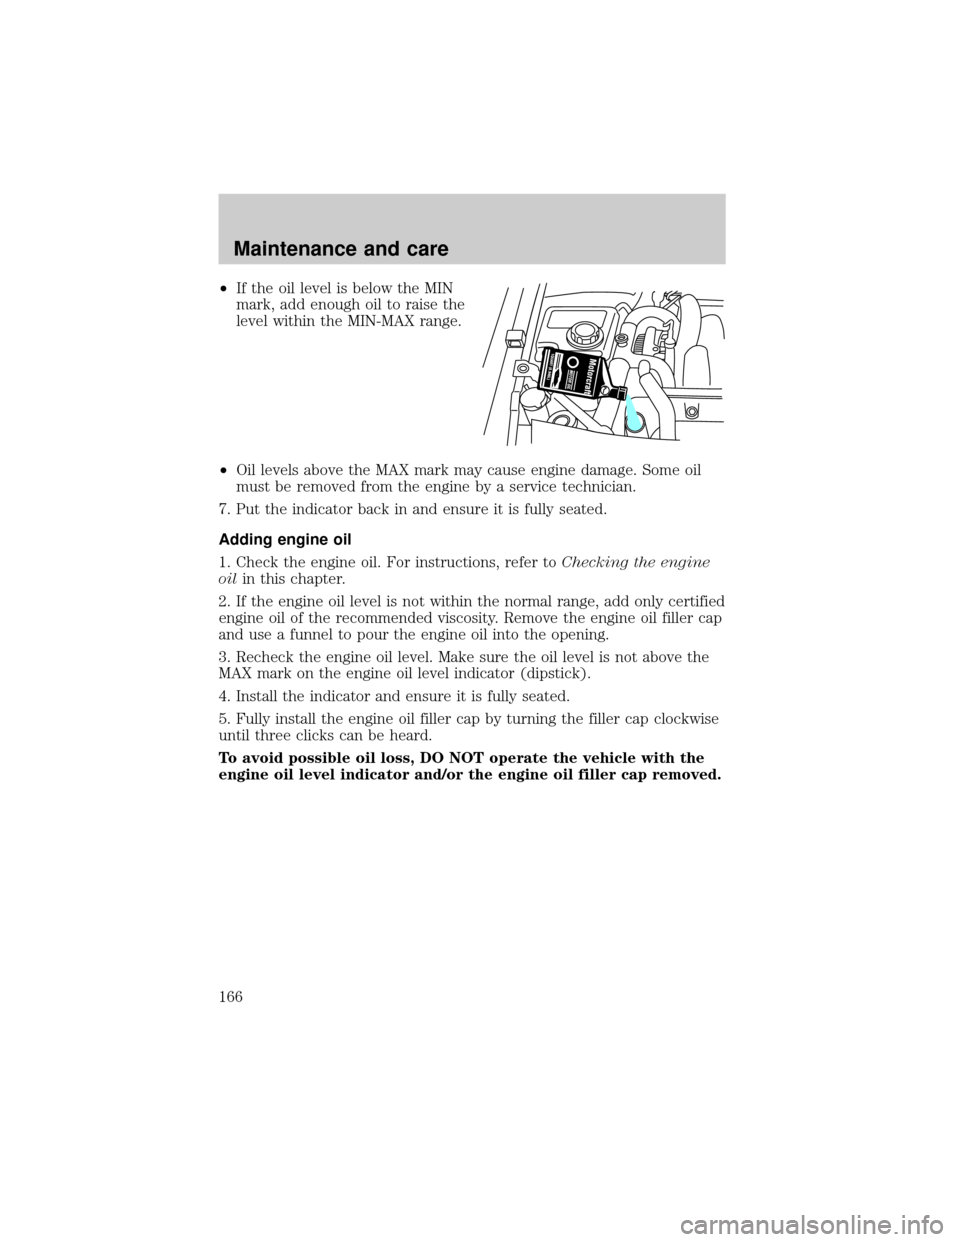
²If the oil level is below the MIN
mark, add enough oil to raise the
level within the MIN-MAX range.
²Oil levels above the MAX mark may cause engine damage. Some oil
must be removed from the engine by a service technician.
7. Put the indicator back in and ensure it is fully seated.
Adding engine oil
1. Check the engine oil. For instructions, refer toChecking the engine
oilin this chapter.
2. If the engine oil level is not within the normal range, add only certified
engine oil of the recommended viscosity. Remove the engine oil filler cap
and use a funnel to pour the engine oil into the opening.
3. Recheck the engine oil level. Make sure the oil level is not above the
MAX mark on the engine oil level indicator (dipstick).
4. Install the indicator and ensure it is fully seated.
5. Fully install the engine oil filler cap by turning the filler cap clockwise
until three clicks can be heard.
To avoid possible oil loss, DO NOT operate the vehicle with the
engine oil level indicator and/or the engine oil filler cap removed.
Maintenance and care
166
Page 168 of 232

BRAKE FLUID
Checking and adding brake fluid
Brake fluid should be checked and
refilled as needed. Refer to the
Scheduled Maintenance Guide for
the service interval schedules.
1. Clean the reservoir cap before
removal to prevent dirt or water
from entering the reservoir.
2. Visually inspect the fluid level.
3. If necessary, add brake fluid from
a clean un-opened container until
the level reaches MAX. Do not fill
above this line.
4. Use only brake fluids certified to
meet Ford specifications. Refer toLubricant specificationsin the
Capacities and specificationschapter. DOT 3 fluid is recommended.
However, if DOT 3 is not available, DOT 4 fluid can be used.
Brake fluid is toxic. If brake fluid contacts the eyes, flush eyes
with running water for 15 minutes. Seek medical attention if
irritation persists. If taken internally, drink water and induce vomiting.
Seek medical attention immediately.
If you use DOT 5 or any other brake fluid that is not DOT 3 or
DOT 4, you will cause permanent damage to your brakes.
Do not let the reservoir for the master cylinder run dry, this may
cause the brakes to fail.
MAX
Maintenance and care
168
Page 170 of 232

The engine coolant must be maintained at the correct fluid level
and concentration to work properly. If the engine coolant fluid
level and concentration is not maintained correctly, damage to
the engine and cooling system may result.
When the engine is cold, check the
level of the engine coolant in the
reservoir.
²The engine coolant should be at the ªcold fill levelº as listed on the
engine coolant reservoir.
²If the engine coolant reservoir becomes empty, the LOW ENGINE
COOLANT warning will illuminate in the message center.
²Refer to the Scheduled Maintenance Guide for service interval
schedules.
²Be sure to read and understandPrecautions when servicing your
vehiclein this chapter.
If the engine coolant has not been checked at the recommended interval,
the engine coolant reservoir may become low or empty. If this occurs,
the LOW ENGINE COOLANT warning will illuminate and you will need
to add engine coolant to the reservoir. Refer toAdding engine coolant
in this chapter.
COLD FILL
LEVEL
Maintenance and care
170
Page 174 of 232

CHECKING AND ADDING POWER STEERING FLUID
Check the power steering fluid.
Refer to the Scheduled Maintenance
Guide for the service interval
schedules. If adding fluid is
necessary, use only MERCONtAT F.
1. Start the engine and let it run until it reaches normal operating
temperature (the engine coolant temperature gauge indicator will be
near the center of the normal area between H and C).
2. While the engine idles, turn the steering wheel left and right several
times.
3. Turn the engine off.
4. Check the fluid level in the
reservoir. It should be between the
MIN and MAX lines. Do not add
fluid if the level is in this range.
5. If the fluid is low, add fluid in small amounts, continuously checking
the level until it reaches the range between the MIN and MAX lines. Be
sure to put the cap back on the reservoir.
TRANSMISSION FLUID
Checking automatic transmission fluid
Refer to your Scheduled Maintenance Guide for scheduled intervals for
fluid checks and changes. Your transaxle does not consume fluid.
However, the fluid level should be checked if the transaxle is not working
properly, i.e., if the transaxle slips or shifts slowly or if you notice some
sign of fluid leakage.
Maintenance and care
174
Page 177 of 232

BATTERY
Your vehicle is equipped with a
Motorcraft maintenance-free battery
which normally does not require
additional water during its life of
service.
However, for severe usage or in high temperature climates, check the
battery electrolyte level. Refer to the Scheduled Maintenance Guide for
the service interval schedules.
Keep the electrolyte level in each cell up to the ªlevel indicatorº.
Do not overfill the battery cells.
If the electrolyte level in the battery is low, you can add plain tap water
to the battery, as long as you do not use hard water (water with a high
mineral or alkali content). If possible, however, try to only fill the battery
cells with distilled water. If the battery needs water often, have the
charging system checked.
If your battery has a cover/shield, make sure it is reinstalled
after the battery has been cleaned or replaced.
For longer, trouble-free operation, keep the top of the battery clean and
dry. Also, make certain the battery cables are always tightly fastened to
the battery terminals.
If you see any corrosion on the battery or terminals, remove the cables
from the terminals and clean with a wire brush. You can neutralize the
acid with a solution of baking soda and water.
Maintenance and care
177
Page 181 of 232

Be careful when installing the new filter. Avoid bending or tearing the
filter and make sure it is fully seated in its mounting location after
installation.
WINDSHIELD WIPER BLADES
Check the wiper blades at least twice a year or when they seem less
effective. Substances such as tree sap and some hot wax treatments used
by commercial car washes reduce the effectiveness of wiper blades.
Checking the wiper blades
If the wiper blades do not wipe properly, clean both the windshield and
wiper blades using undiluted windshield wiper solution or a mild
detergent. Rinse thoroughly with clean water. To avoid damaging the
blades, do not use fuel, kerosene, paint thinner or other solvents.
Changing the wiper blades
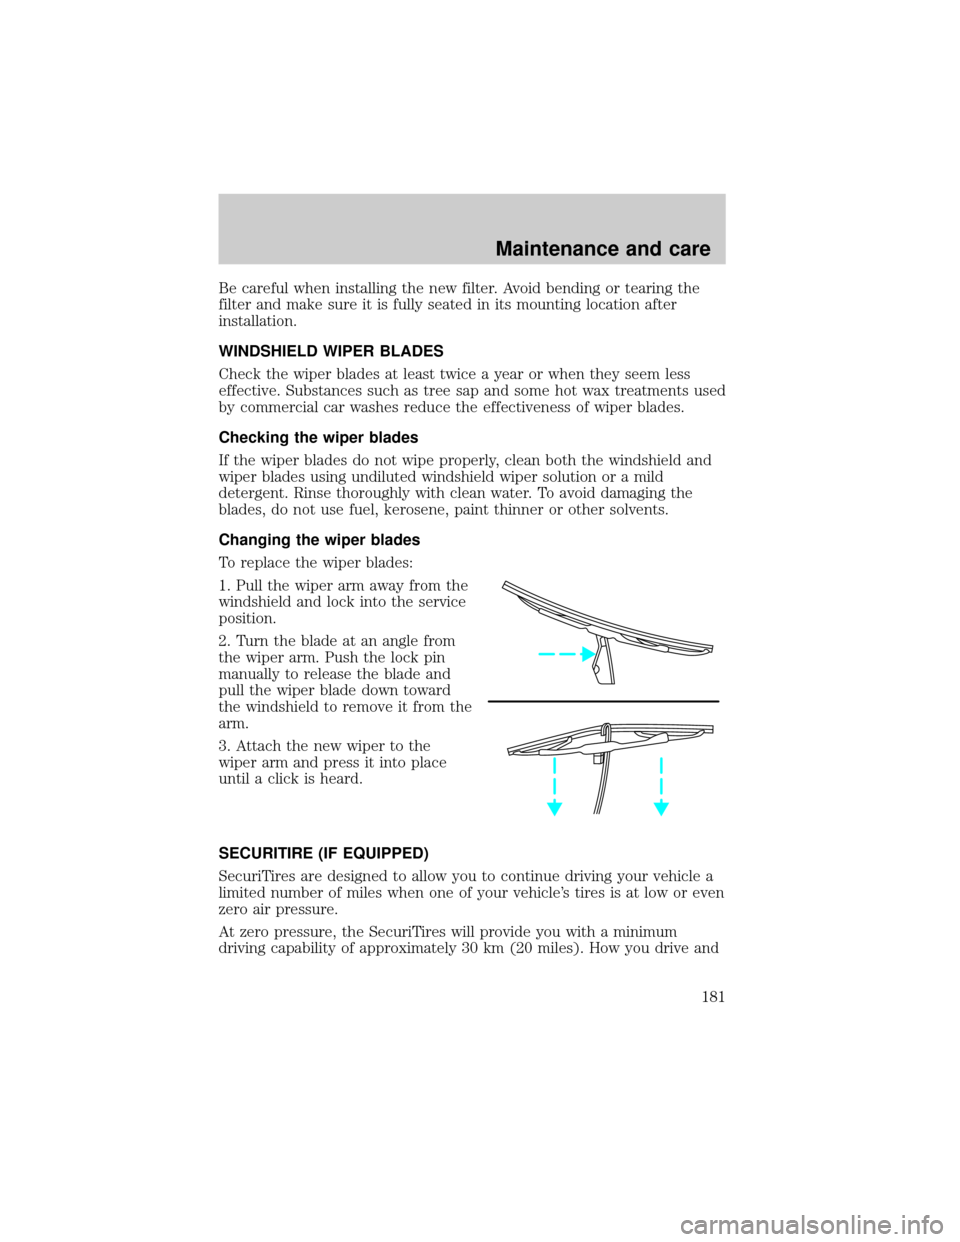
To replace the wiper blades:
1. Pull the wiper arm away from the
windshield and lock into the service
position.
2. Turn the blade at an angle from
the wiper arm. Push the lock pin
manually to release the blade and
pull the wiper blade down toward
the windshield to remove it from the
arm.
3. Attach the new wiper to the
wiper arm and press it into place
until a click is heard.
SECURITIRE (IF EQUIPPED)
SecuriTires are designed to allow you to continue driving your vehicle a
limited number of miles when one of your vehicle's tires is at low or even
zero air pressure.
At zero pressure, the SecuriTires will provide you with a minimum
driving capability of approximately 30 km (20 miles). How you drive and
Maintenance and care
181
Page 182 of 232

the actual amount of air pressure left in your tires will determine exactly
how many miles can be driven.
To extend the mileage and help prevent damage to low or deflated tires:
²do not exceed 90 km/h (55 mph). Drive at a reduced rate of speed, if
possible.
²avoid excessive hard steering and braking maneuvers, if possible.
²stop periodically to allow the tires to cool down.
Pressure alert system
Each of your SecuriTires is
monitored by a low tire pressure
sensor. A warning will appear in the
overhead console when the pressure
in one of your tires drops below
acceptable levels or if the system
has malfunctioned.
This device complies with Part 15 of
the FCC rules and with RS-210 of
Industry Canada. Operation is
subject to the following two
conditions: (1) This device may not
cause harmful interference, and (2)
This device must accept any interference received, including interference
that may cause undesired operation.
Maintenance warning
The LOW TIRE PRESSURE warning will illuminate and stay on when one
of your vehicle's tires drops below 124 kPa (18 psi). The warning light
will also come on and stay lit if the Pressure Alert System has
malfunctioned.
If this warning appears, check the pressure in your tires as soon as
possible and adjust any tire that is low to the recommended air pressure
level.
If the warning remains on after you have adjusted the tires to the
recommended air pressure levels, take your vehicle to an authorized
Lincoln/Mercury dealer for service.
ROOF
LOW TIRE
PRESSURE
OPEN
Maintenance and care
182