Page 16 of 232

If Memory position 1 or Memory
position 2 wishes to make
temporary changes to their seat or
outside mirror positions without
affecting their preferred positions
they may do so by:
²
Using the switch on the back of
the remote transmitter to turn the
Memory Profile System OFF prior
to pressing the unlock control on
the remote transmitter or
unlocking the vehicle with the key.
²Entering the vehicle without
identifying themselves using the two methods listed above.
²Turning the DRIVER ID (if equipped in the message center) OFF to
allow for temporary setting changes.
This option may be useful to temporarily reposition the driver's seat and
mirrors during an extended drive.
Operator selectable features
System check
Pressing this control causes the
message center to cycle through the
status of each of the systems being
monitored. For each of these systems, the message center will indicate
either an OK message or a warning message for three seconds.
The sequence of the system check report is:
²voltage level
²engine temp
²oil level
²coolant level
²washer fluid
²doors (driver and passenger side). This message can only be reset by
closing the door(s). If the RESET control is pressed, PLEASE CLOSE
DOOR will be displayed.
²trunk closed
²exterior lamps (front turn, brake and tail)
ON
MEMORY1 RECALL
OFF
SYSTEM
Instrumentation
16
Page 18 of 232

Gear Display Data ERR Warning reappears after key is
turned from OFF to ON
Brake Lamp Out
Check Traction Control
Check Ride Control
Trunk Ajar
Check Steering Assist
Low Washer Fluid
Air Leveling Disabled
Tail Lamp Out
Check FRT Turn Lamps
Turn on Headlamps
Warning messages that have been reset are divided into two categories:
²They will reappear on the display ten minutes from the reset.
²They will not reappear until an ignition OFF-ON cycle has been
completed. This acts as a reminder that these warning conditions still
exist within the vehicle.
E/M (if equipped)
Press this control to switch the
odometer and display readouts from
metric (kilometers) to English
(miles) units.
DRIVER ID (if equipped)
Press this control and use SELECT
to choose DRIVER 1 or DRIVER 2
when choosing operator selectable
features. Seat and mirror positions
and nine operator selectable features, found under the MENU and
VEHICLE HANDLING controls, will be saved to DRIVER 1 or DRIVER 2.
These will be automatically recalled when the drivers identify themselves
to the system with the remote entry transmitter (refer toBasic
Operation of Memory Profile Systemin this section) or selecting
DRIVER 1 or DRIVER 2 in the message center. When a vehicle setting is
changed, the message center will display ªSAVED TO DRIVER 1 or
DRIVER 2º for 5 seconds to confirm the change has been made. Press
the SELECT to choose ªOFFº for temporary position/setting changes
which will not be stored.
E/M
DRIVER ID
Instrumentation
18
Page 47 of 232

5. START, cranks the engine. Release the key as soon as the engine
starts.
Refer to theSecurilockyPassive Anti-Theft Systemsection in this
chapter for more information on Securilockykeys.
KEY SYSTEM
The vehicle is equipped with a master key and valet key lock system.
The master key will actuate doors, trunk, glove box, ignition and remote
trunk release. The valet key (marked ªvaletº) will actuate doors and
ignition only.
WINDSHIELD WIPER/WASHER CONTROLS
Rotate the windshield wiper control
to the desired interval, low or high
speed position.
The bars of varying length are for
intermittent wipers. When in this
position rotate the control upward
for fast intervals and downward for
slow intervals.
Push the control on the end of the
stalk to activate washer. Push and
hold for a longer wash cycle. The
washer will automatically shut off
after ten seconds of continuous use.
Windshield wiper/washer features
The exterior lamps will illuminate when the ignition is ON and the
windshield wiper control is in the interval, LO or HI position.
The instrument panel lighting will dim noticeably approximately 15
seconds after the wipers are turned on. The lights will remain in this
state until 30 seconds after the wipers are turned off.
HI
LO
F
S
OFF
HI
LO
F
S
OFF
Controls and features
47
Page 77 of 232

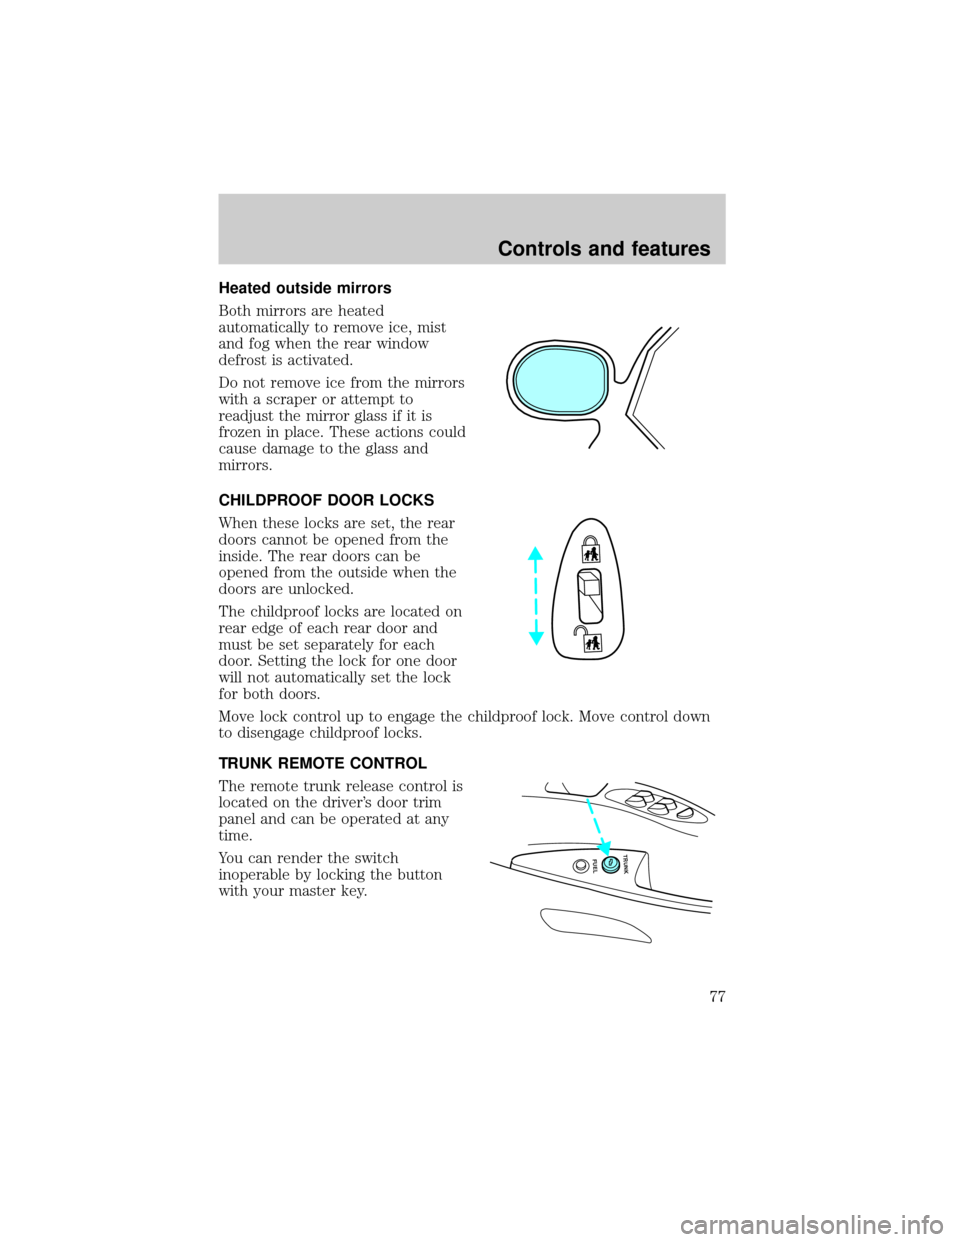
Heated outside mirrors
Both mirrors are heated
automatically to remove ice, mist
and fog when the rear window
defrost is activated.
Do not remove ice from the mirrors
with a scraper or attempt to
readjust the mirror glass if it is
frozen in place. These actions could
cause damage to the glass and
mirrors.
CHILDPROOF DOOR LOCKS
When these locks are set, the rear
doors cannot be opened from the
inside. The rear doors can be
opened from the outside when the
doors are unlocked.
The childproof locks are located on
rear edge of each rear door and
must be set separately for each
door. Setting the lock for one door
will not automatically set the lock
for both doors.
Move lock control up to engage the childproof lock. Move control down
to disengage childproof locks.
TRUNK REMOTE CONTROL
The remote trunk release control is
located on the driver's door trim
panel and can be operated at any
time.
You can render the switch
inoperable by locking the button
with your master key.
FUEL TRUNK
Controls and features
77
Page 78 of 232
FUEL DOOR RELEASE
Your vehicle is equipped with a
locking fuel door. To open the door,
press the control located on the
door.
Fuel filler door override release
If the remote release is inoperative, open the trunk, then pull the
override release handle located inside the trunk on the passenger side to
open the fuel filler door.
CENTER CONSOLE (IF EQUIPPED)
Your vehicle is equipped with a
variety of console features. These
include:
²Utility compartment
²Cupholders
²Ashtray and lighter
²Compact disc changer (if
equipped)
²Power point
²Coin holder
²Cellular phone (if equipped)
Use only soft cups in the cupholder. Hard objects can injure you
in a collision.
Mini console (if equipped)
The mini console is available in the six passenger vehicle only, and
consists of the:
FUEL TRUNK
Controls and features
78
Page 82 of 232

This process will arm your anti-theft system (if equipped). For more
information on arming the anti-theft system, refer toPerimeter alarm
systemin this chapter.
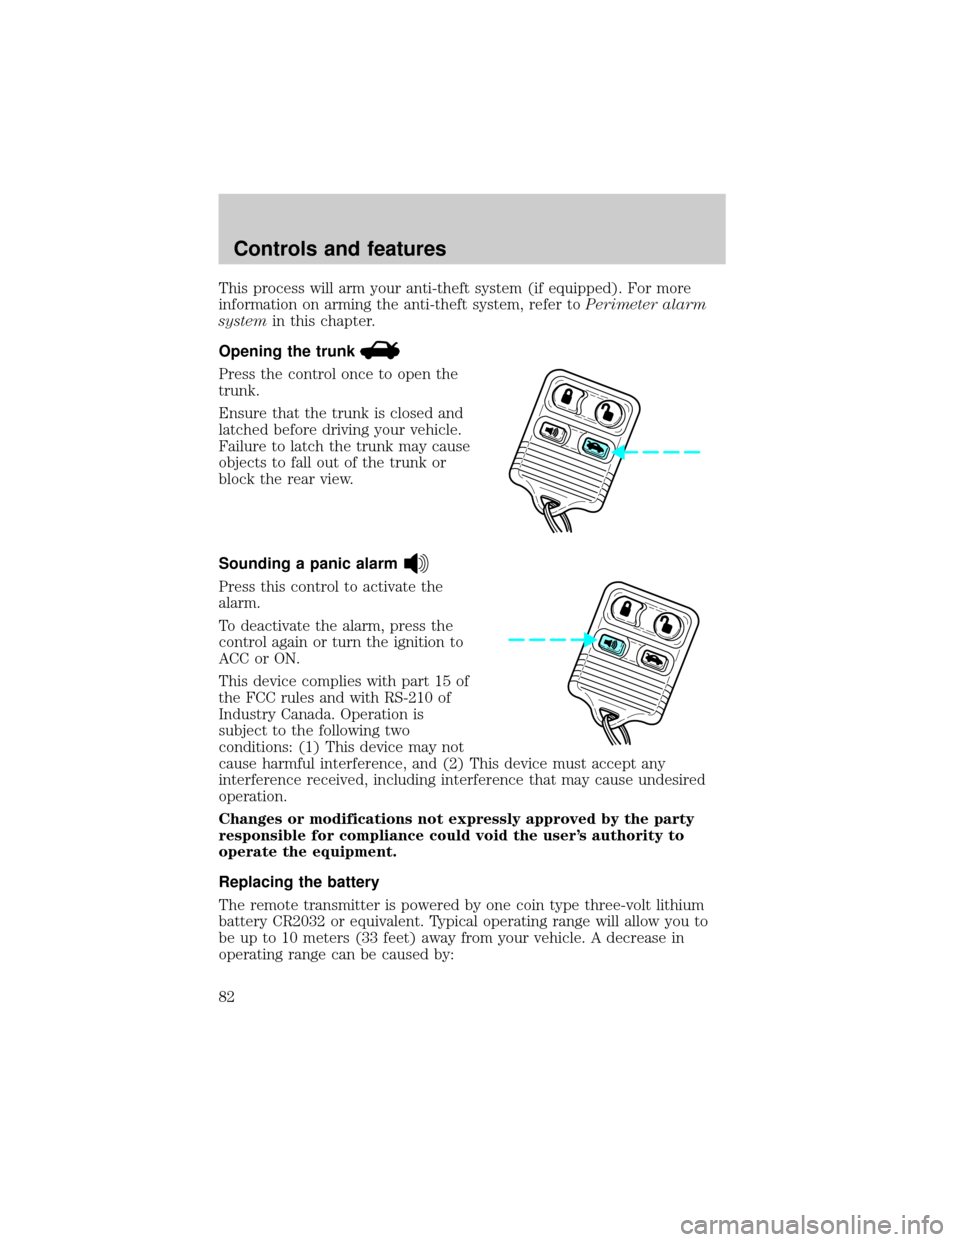
Opening the trunk
Press the control once to open the
trunk.
Ensure that the trunk is closed and
latched before driving your vehicle.
Failure to latch the trunk may cause
objects to fall out of the trunk or
block the rear view.
Sounding a panic alarm
Press this control to activate the
alarm.
To deactivate the alarm, press the
control again or turn the ignition to
ACC or ON.
This device complies with part 15 of
the FCC rules and with RS-210 of
Industry Canada. Operation is
subject to the following two
conditions: (1) This device may not
cause harmful interference, and (2) This device must accept any
interference received, including interference that may cause undesired
operation.
Changes or modifications not expressly approved by the party
responsible for compliance could void the user's authority to
operate the equipment.
Replacing the battery
The remote transmitter is powered by one coin type three-volt lithium
battery CR2032 or equivalent. Typical operating range will allow you to
be up to 10 meters (33 feet) away from your vehicle. A decrease in
operating range can be caused by:
Controls and features
82
Page 85 of 232
The system can be deactivated by
switching the transmitter to OFF.
KEYLESS ENTRY SYSTEM
With the keyless entry keypad, you
can:
²lock or unlock the vehicle doors
without using the key.
²arm and disarm the perimeter alarm system (if equipped)
²reprogram remote entry transmitters.
See alsoRemote entry systemandPerimeter alarm systemin this
chapter for more information.
Your vehicle has a factory-set 5±digit code that operates the keyless
entry system. You can also program your own 5±digit personal entry
code.
The factory-set code is located:
²on the owner's wallet card in the glove compartment
²taped to the computer module
²in the interior of the trunk
When pressing the controls on the keyless entry keypad, press the
middle of the controls to ensure a good activation.
ON OFF
123
45678
90
Controls and features
85
Page 87 of 232
Unlocking the doors and releasing the trunk with the keyless entry
system
To unlock the driver door, enter either the factory-set code or personal
code (each digit pressed within 5 seconds of prior digit). The interior
lamps will illuminate.
To unlock all doors, enter the
factory-set code or personal code
(driver door unlocks) and press 3/4
within five seconds.
To release the trunk, enter the
factory-set code or personal code
(driver door unlocks) and press 5/6
within five seconds.
After the factory-set code or personal code has been entered, you can
unlock all doors (press 3/4) and release the trunk (press 5/6) as long as
the controls are pressed within five seconds of each other.
Locking doors with the keyless entry system
It is not necessary to enter the factory-set code prior to locking all doors.
To lock the doors:
²Press 7/8 and 9/0 at the same
time.
123
45678
90
123
45678
90
123
45678
90
Controls and features
87