2000 HONDA PASSPORT automatic transmission
[x] Cancel search: automatic transmissionPage 87 of 267

Operatio
n
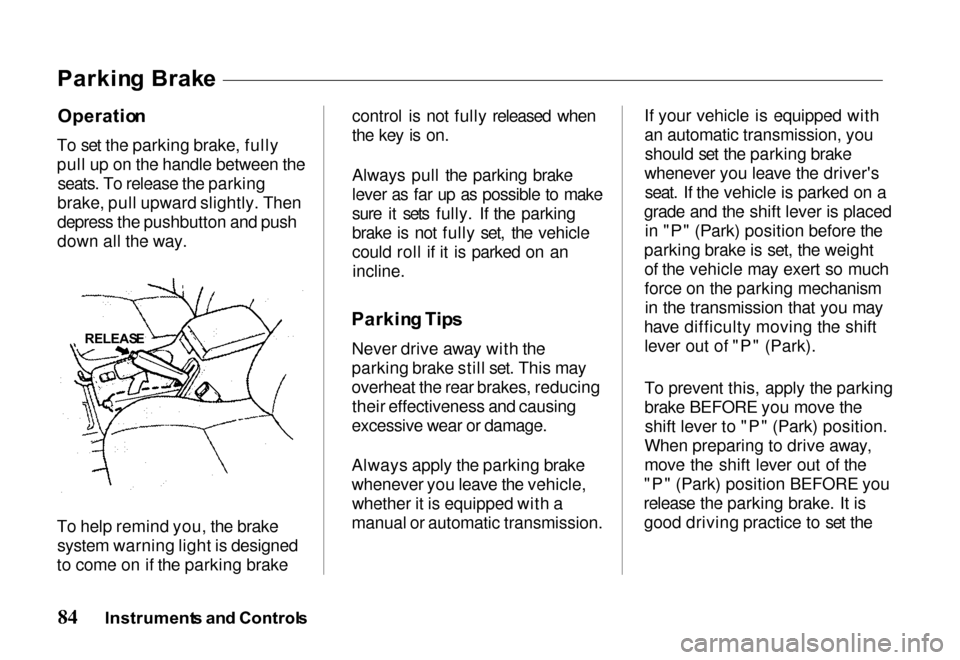
To set the parking brake, fully
pull up on the handle between the seats. To release the parking
brake, pull upward slightly. Then
depress the pushbutton and push
down all the way.
To help remind you, the brake system warning light is designed
to come on if the parking brake control is not fully released when
the key is on.
Always pull the parking brake
lever as far up as possible to make
sure it sets fully. If the parking
brake is not fully set, the vehicle
could roll if it is parked on an
incline.
Parkin g Tip s
Never drive away with the
parking brake still set. This may
overheat the rear brakes, reducing their effectiveness and causing
excessive wear or damage.
Always apply the parking brake
whenever you leave the vehicle, whether it is equipped with a
manual or automatic transmission. If your vehicle is equipped with
an automatic transmission, you
should set the parking brake
whenever you leave the driver's seat. If the vehicle is parked on a
grade and the shift lever is placed in "P" (Park) position before the
parking brake is set, the weight of the vehicle may exert so much
force on the parking mechanismin the transmission that you may
have difficulty moving the shift lever out of "P" (Park).
To prevent this, apply the parking
brake BEFORE you move theshift lever to "P" (Park) position.
When preparing to drive away,
move the shift lever out of the
"P" (Park) position BEFORE you
release the parking brake. It is good driving practice to set the
Instrument s an d Control s
Parkin
g Brak e
RELEAS E
Page 100 of 267

Key
s an d Ignitio n
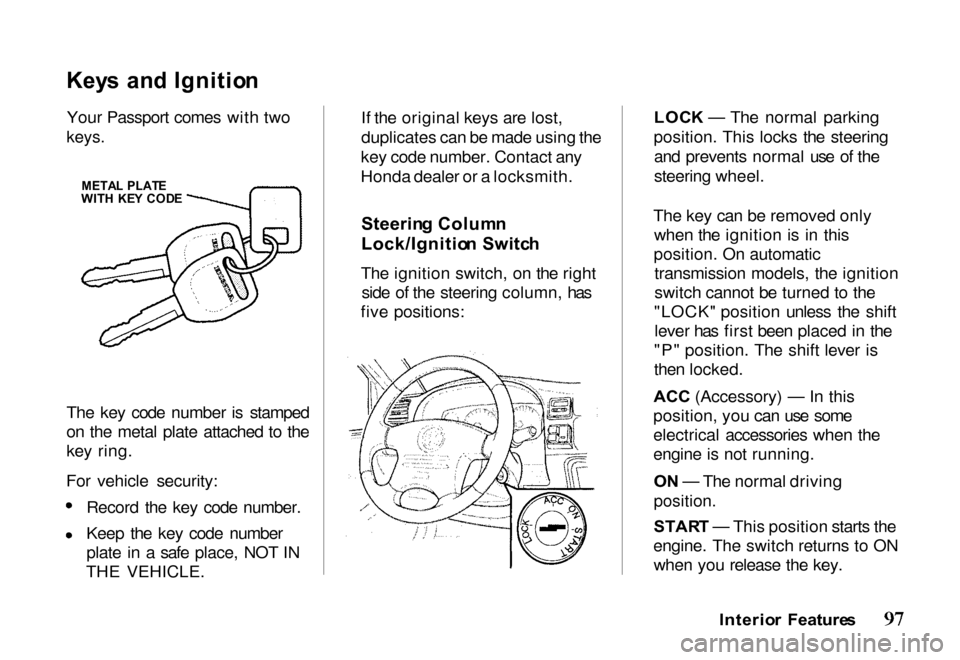
Your Passport comes with two
keys.
The key code number is stamped
on the metal plate attached to the
key ring.
For vehicle security: Record the key code number.
Keep the key code number
plate in a safe place, NOT IN
THE VEHICLE. If the original keys are lost,
duplicates can be made using the
key code number. Contact any
Honda dealer or a locksmith.
Steerin g Colum n
Lock/Ignitio n Switc h
The ignition switch, on the right side of the steering column, has
five positions: LOC
K — The normal parking
position. This locks the steering and prevents normal use of the
steering wheel.
The key can be removed only when the ignition is in this
position. On automatic transmission models, the ignition
switch cannot be turned to the
"LOCK" position unless the shift lever has first been placed in the
"P" position. The shift lever is
then locked.
ACC (Accessory) — In this
position, yo
u can use some
electrical accessories when the
engine is not running.
O N — The normal driving
position.
STAR T — This position starts the
engine. The switch returns to ON when you release the key.
Interior Feature s
META
L PLAT E
WIT H KE Y COD E
Page 101 of 267

The anti-theft steering column
lock is not interconnected with the
parking brake. You must alwaysset the parking brake when
leaving the vehicle.
To prevent discharging the battery, avoid use of electrical accessories
with the engine shut off.
For easier key operation when
unlocking, rotate the steering
wheel slightly to relieve pressure
on the steering lock.
Ke y Remova l
Manual Transmission With the vehicle fully stopped,remove the key from the switch
by turning it to the "LOCK"
position and removing it. Automatic Transmission
With the vehicle fully stopped, place
the automatic transmission shift
lever in "P" (Park) position. Turn
the key to the "LOCK" position.
Ke y Reminde r
The key reminder circuit causes a beeper to sound when the door is
held open with the key left in theignition switch. This is to help
prevent accidentally locking the
key inside the vehicle.
The beeper stops when the door is
closed or when the key is removed.
Guar d Agains t Thef t
Your new Passport has features to
help prevent theft of the vehicle, its equipment, and its contents.
These anti-theft features work
depending on how well you use
them.
Park in a well-lighted areawhenever possible.
Lock the steering column and
take the key with you.
— Turn the ignition switch to "LOCK" and remove the key.
This locks both the ignition switch and steering control.
Interio r Feature s
Removing the key from the
ignition switch while driving
locks the steering. This can
cause you to lose control.
Remove the key from the
ignition switch only when
parked.
Page 148 of 267

Tap Down (While Cruise Control
System Is in Use)
Quickly pressing and releasing the
"SET/COAST" button with the
cruise control engaged allows you
to "tap down" the preset cruising speed. Each depression decreases
the preset cruising speed by one
mile per hour (1.6 km/h). The
preset cruising speed can be decreased to a minimum of 25
miles per hour (40 km/h) in this
manner.
Disengaging
Disengage the cruise control
system by depressing the brake
pedal, or the clutch pedal on manual transmission vehicles.
You can also turn off the system
by turning the knob to "CANCEL,"
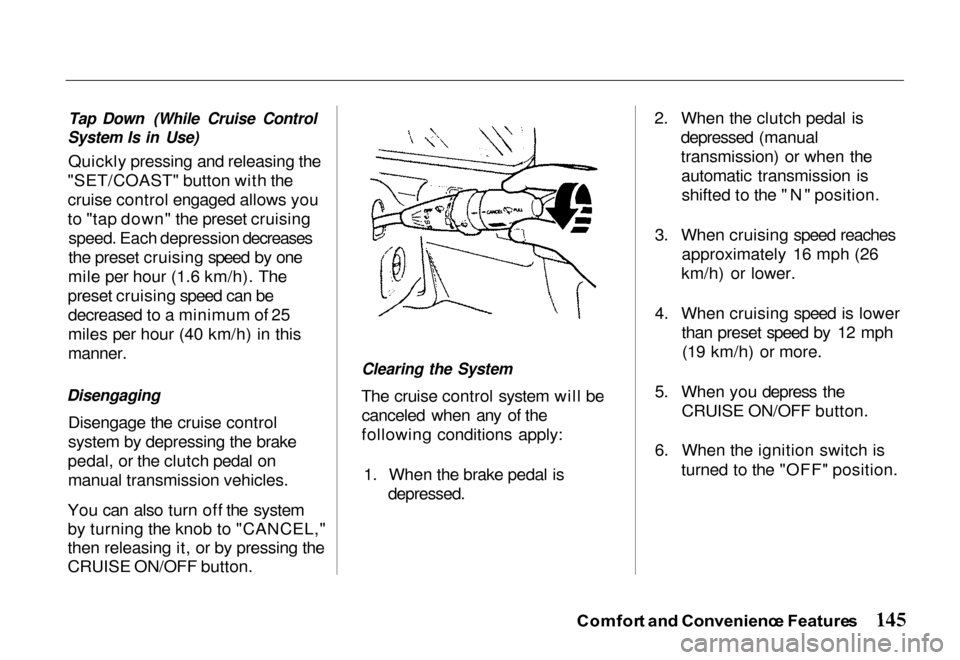
then releasing it, or by pressing the
CRUISE ON/OFF button.
Clearing the System
The cruise control system will be canceled when any of the
following conditions apply:
1. When the brake pedal is
depressed.
2. When the clutch pedal is
depressed (manual
transmission) or when theautomatic transmission isshifted to the "N" position.
3. When cruising speed reaches approximately 16 mph (26
km/h) or lower.
4. When cruising speed is lower than preset speed by 12 mph(19 km/h) or more.
5. When you depress the CRUISE ON/OFF button.
6. When the ignition switch is turned to the "OFF" position.
Comfor t an d Convenienc e Feature s
Page 156 of 267

switch is turned to the "ON"
or "START" position.
5. Check all gauges (including
the fuel gauge).
6. Release the parking brake
(and make sure the "BRAKE"
light turns off).
See related topics in this manual if
you find any problems.
Startin g th e Engin e
1. Apply the parking brake.
2. Manual Transmission: Press
the clutc
h pedal to the floor
and shift the transmission to
the Neutral position. Hold the
clutch pedal to the floor while
you are starting the engine. A starter safety switch keeps the
starter from operating if the
clutch pedal is not fully
depressed.
Automatic Transmission:
Place the shift lever in "P"
or "N" position ("P" is
preferred). A starter safety switch prevents the starter
from operating if the shift lever is in any drive position.
If it is necessary to restart the
engine with the vehicle
moving, place the shift lever in "N" (never in "P").
3. Do not touch the accelerator pedal. Start the engine byturning the ignition switch to
"START."
If the engine does not start in 10 seconds, wait 15 seconds to let
the starter cool down. Then crank
the engine at wide open throttle
for a maximum of 10 seconds. If
the engine still does not start, wait
another 15 seconds and repeat the
entire procedure. Do not crank the engine for more
than 10 seconds at a time. Wait 15
seconds before trying again.
4. Return the ignition switch to
the "ON" position as soon as
the engine starts.
5. Apply the regular brakes and shift into the proper gear.
Release the parking brake and
brake pedal and drive off.
In models with an automatic
transmission, you cannot shift
from "P" (Park) position to any other position unless the
brake pedal is applied.
Driving Tip s
Page 157 of 267

Ne
w Vehicl e Break-I n
You may drive your new vehicle
from its very first mile/kilometer without following a formal
"break-in" schedule. However,
there are things you can do during
the first few hundred miles/
kilometers of driving that will add
to the future performance and
economy of your vehicle.
It is recommended that your speed
during the first 500 miles (800
kilometers) be limited to a
maximum of 55 mph (90 km/h) and that you do not drive for long
periods at any one constant speed, either fast or slow. During this
period, avoid full-throttle starts and, if possible, avoid hard stops;
especially during the first 200
miles (320 kilometers) of driving.
Always drive at moderate speed
until the engine has completely warmed up.
Parkin
g
When leaving your vehicle
unattended:
Set the parking brake.
Place the shift lever in "P" (Park) position for automatic
transmission.
When parking a vehicle equipped
with a manual transmission on an
upward slope, or on a level surface, place the shift lever in
the "1st" position.
When parking a vehicle
equipped with a manual
transmission on a downward slope, place the shift lever in
the "R" (Reverse) position. Turn the key to the "LOCK"
position.
Remove the key. The beeper
will remind you. Close all windows and lock all
doors.
Check to make certain the
lights are turned off. The
beeper will remind you. If your vehicle is equipped with
a transfer case (4WD), make
sure the shift lever is in 4H or
4L.
Parkin g Tip s
Never drive the vehicle with
the parking brake set. This can
overheat the rear brakes,
reducing their effectiveness and
causing excessive wear or
damage.
Always apply the parking brake
whenever you leave the vehicle,
whether it is equipped with a
manual or automatic transmission.
Drivin g Tip s
Page 158 of 267

If your vehicle is equipped with
an automatic transmission, set
the parking brake before you
leave the driver's seat. If the
vehicle is parked on a grade and the transmission shift leveris placed in "P" (Park) position
before you set the parking
brake, the weight of the vehicle may exert so much force on the
transmission that you may have
difficulty moving the shift
lever out of "P" (Park)
position. To prevent this, apply the parking brake BEFORE
moving the shift lever to "P" (Park). When you want to drive
away, move the shift lever out
of the "P" (Park) position
BEFORE releasing the parking
brake. It is good driving
practice to set the parking
brake first, then place the
transmission in "PARK"
position, even on level
surfaces.
If the parking brake does not
seem to hold the vehicle as
well as before, have the vehicle
serviced by your Honda dealer.
Do not park your vehicle over
high grass, dry leaves or other
combustible materials. The
catalytic converter gets very
hot and could set fire to these
materials.
Anti-Loc
k Brake s
Your vehicle has an Anti-lock
Brake System (ABS) as standard
equipment. ABS helps to prevent
the wheels from locking up and skidding during hard braking,
allowing you to retain steering
control.
When the front tires skid, you lose steering control; the vehicle
continues straight ahead even
though you turn the steering
wheel. The ABS helps to prevent
lock-up and retain steering control
by pumping the brakes rapidly;
much faster than a person can do it.
Yo u shoul d neve r pum p th e
brak e pedal , this defeats the
purpose of the ABS. Let the ABS work for you by always keeping
firm, steady pressure on the brake
pedal as you steer away from the
Driving Tip s
Brake
s
Page 183 of 267

Jum
p Startin g
Do not push or tow your vehicle to start it. Under some conditions
this may damage the three-way catalytic converter or other parts
of the vehicle.
If your vehicle has a discharged
battery, it can be started by using the battery in another vehicle; a
procedure called "jump starting." To jump start your vehicle:
1. Position the vehicle with the good (charged) battery so that
the jump-starting cables will
reach. Do not allow the vehiclesto touch. Check to see that the
bumpers do not touch.
2. Turn off all electric motors and accessories in both
vehicles. Turn off all lights
except hazard flashers and
lights needed to light up the
work area. Turn off theignition, apply the parking
brake firmly, and shift an automatic transmission to
"P" (Park) and a manual
transmission to "N" (Neutral)
in both vehicles.
3. Check fluid level of the battery before attempting to
charge or jump start. (Do not use an open flame to check,
and do not smoke.)CHARG ETEST
INDICATO R
BLUE
COLORLES S
If the battery is a sealed type
and if the fluid level is below
the lower level line on the side
of the battery, do not try to
jump start the vehicle or charge or test the battery. Do
not add fluid. Instead, install a new battery.
I n Cas e o f Emergenc y
A battery can explode if you
do not follow the correct
procedure, seriously injuring
anyone nearby.
Keep all sparks, open flames,
and smoking materials away
from the battery.
CHARGIN G
NECESSAR Y
LOWE
R
LEVE L
O K
UPPERLEVEL