Page 10 of 352
Your Vehicle's Safety Features
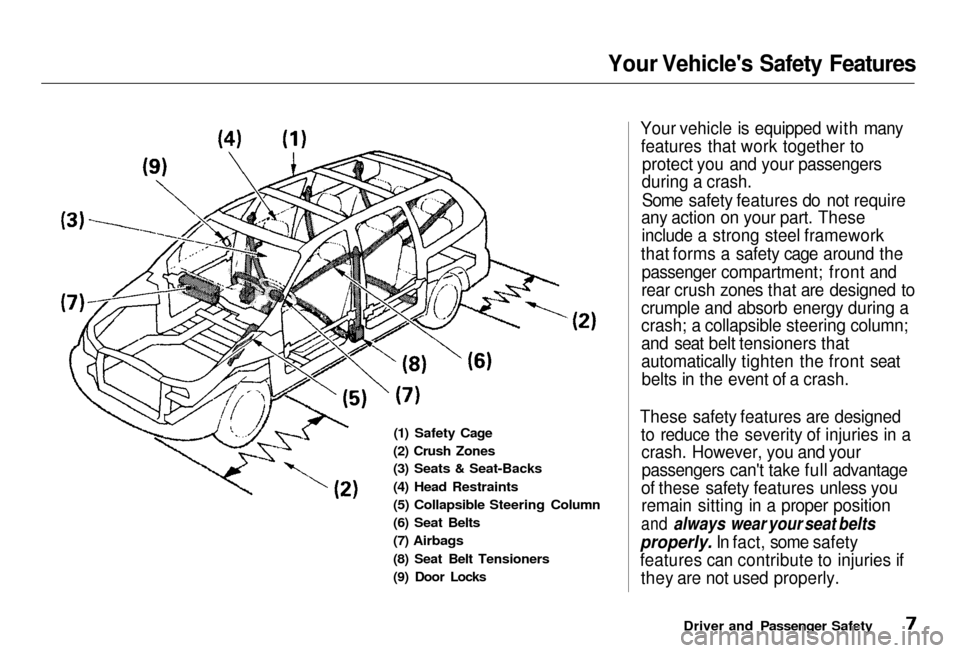
(1) Safety Cage
(2) Crush Zones
(3
) Seats & Seat-Backs
(4) Head Restraints
(5)
Collapsible Steering Column
(6) Seat Belts
(7)
Airbags
(8)
Seat Belt Tensioners
(9)
Door Locks
Your vehicle is equipped with many
features that work together to protect
you and your passengers
during a crash.
Some safety features do not require
any action on your part. These
include
a strong steel framework
that
forms a safety cage around the
passenger
compartment; front and
rear crush zones that are designed to
crumple and absorb energy during a
crash;
a collapsible steering column;
and seat belt tensioners that
automatically tighten the front seat belts in the event of a crash.
These safety features are designed to reduce the severity of injuries in acrash.
However, you and your
passengers
can't take full advantage
of these safety features unless you
remain
sitting in a proper position
and always wear your seat belts
properly. I
n fact, some safety
features can contribute to injuries if they
are not used properly.
Driver and Passenger Safety
Page 13 of 352
Your Vehicle' s Safet y Feature s
Seats & Seat-Back s
Your vehicle's seats are designed to keep you in a comfortable, uprightposition so you can take fulladvantage of the protection offered
by seat belts and the energy absorbing materials in the seats.
How you adjust your seats and seat-
backs can also affect your safety. For example, sitting too close to the
steering wheel or dashboard
increases the risk of you or your
passenger being injured by striking
the inside of the vehicle, or by an inflating airbag.
Reclining a seat-back too far reduces
the seat belt's effectiveness and increases the chance that the seat'soccupant will slide under the seat
belt in a crash and be seriously injured.What you should do: Move the front
seats as far back as possible, and
keep adjustable seat-backs in an
upright position whenever the
vehicle is moving.
Hea d Restraint s
Head restraints can help protect you
from whiplash and other injuries. For maximum protection, the back of
your head should rest against the center of the head restraint. Doo
r Lock s
Keeping your doors locked reduces
the chance of being thrown out of
the vehicle during a crash. It also
helps prevent occupants from accidentally opening a door and
falling out, and outsiders from unexpectedly opening your doors.
Drive r an d Passenge r Safet y
Page 62 of 352

Indicator Light s
U.S.
Anti-loc k Brak e Syste m
(ABS ) Indicato r
This light normally comes on for a few seconds when you turn theignition switch ON (II), and when
the ignition switch is turned toSTART (III). If this light comes on at
any other time, there is a problem in
the ABS. If this happens, take the
vehicle to your dealer to have it checked. With the light on, your
vehicle still has normal braking ability but no anti-lock. For complete
information, see page 211. Tractio
n Contro l Syste m
(TCS ) Indicato r
On EX model
This indicator has three functions:
1. It comes on as a reminder that you have turned off the Traction
Control System.
2. It flashes when the TCS is
regulating wheelspin.
3. If it comes on and stays on whenthe Traction Control System is on,it indicates that there is a problem
in the TCS.
This light also comes on when youturn the ignition ON (II) and goes offafter the engine starts. See page 213 for more information on the
TCS.
Immobilize r Syste m
Indicato r
This indicator comes on for a few seconds when you turn the ignition
switch ON (II). It will then go off if
you have inserted a properly-coded ignition key. If it is not a properly-
coded key, the indicator will blinkand the engine will not start (see
page 77 ).
This indicator also blinks several times when you turn the ignition switch from ON (II) to ACCESSORY (I) or LOCK (0).
Instrument s an d Control s
Canad
a
T C SA B S
Page 83 of 352
Keys and Locks
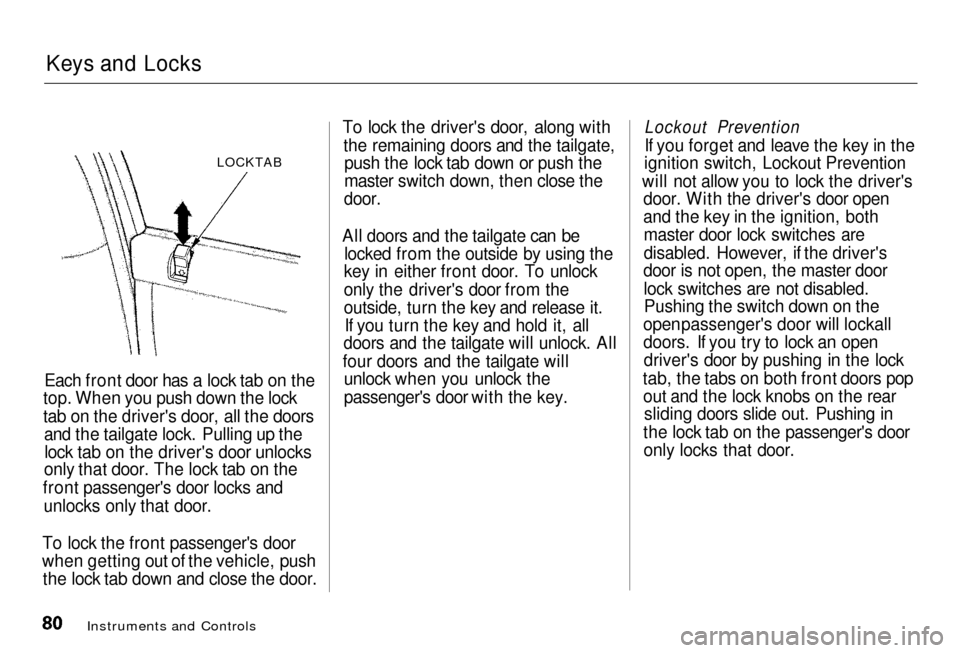
LOCKTAB
Each front door has a lock tab on the
top.
When you push down the lock
tab on the driver's door, all the doors and the tailgate lock. Pulling up the
lock tab on the driver's door unlocks
only
that door. The lock tab on the
front
passenger's door locks and
unlocks only that door.
To lock the front passenger's door
when getting out of the vehicle, push
the
lock tab down and close the door. To lock the driver's door, along with
the
remaining doors and the tailgate,
push the lock tab down or push the
master
switch down, then close the
door.
All doors and the tailgate can be locked from the outside by using the
key
in either front door. To unlock
only
the driver's door from the
outside,
turn the key and release it.
If you turn the key and hold it, all
doors
and the tailgate will unlock. All
four doors and the tailgate will unloc
k when you unlock the
passenger's door with the key.
Instruments and Controls
Lockout Prevention
I
f you forget and leave the key in the
ignition
switch, Lockout Prevention
will
not allow you to lock the driver's
door.
With the driver's door open
and
the key in the ignition, both
master
door lock switches are
disabled. However, if the driver's
door is not open, the master door
lock switches are not disabled.Pushin
g the switch down on the
open
passenger's door will lockall
doors. If you try to lock an open driver's
door by pushing in the lock
tab, the tabs on both front doors pop out
and the lock knobs on the rear
sliding doors slide out. Pushing in
the lock tab on the passenger's door only
locks that door.
Page 112 of 352
Seat
s
Foldin g th e Thir d Sea t
To create more cargo space, you can fold the third seat into the floor
recess.
To fold the third seat:
1. Remove the head restraints by pushing the release buttons and
pulling the restraints out. 2. Store the head restraints in the
side cargo net. To install the side
cargo net, hook the four loops on
the net to the tabs on the left side
panel.
Make sure the head restraint legs
are inside the cargo net so they do
not damage the seat as you fold it.
3. Unlock the seat-back by pulling
the handle. Push the seat-back
forward.
CONTINUED
Instrument s an d Control s
RELEAS
E BUTTO N HANDL
E
Page 202 of 352
Carrying Carg o
Carryin g Carg o in th e Carg o Are a
o r o n a Roo f Rac k
Distribute cargo evenly on the
floor of the cargo area, placing the heaviest items on the bottom and as far forward as possible. Tie
down items that could be thrown
about the vehicle during a crash or
sudden stop.
If you carry large items that
prevent you from closing the
tailgate, exhaust gas can enter the
passenger area. To avoid thepossibility of carbo n monoxid e
poisoning , follow the instructions
on page 53 .
If you can carry any items on a
roof rack, be sure the total weight of the rack and the items on it
does not exceed 150 Ib.
If you use an accessory roof rack,
the roof rack weight limit may be
lower. Refer to the information that came with your roof rack. Sid
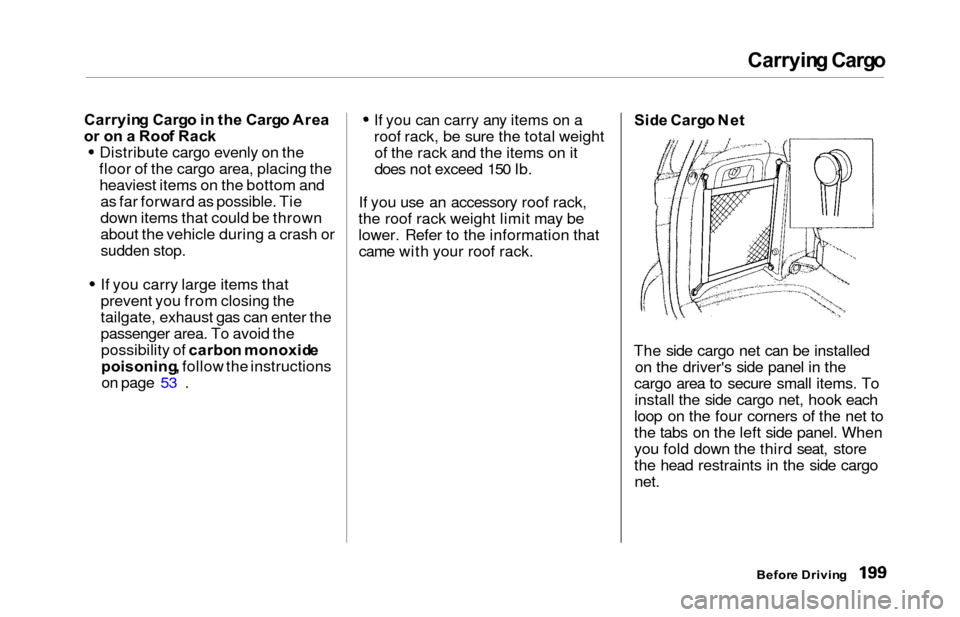
e Carg o Ne t
The side cargo net can be installed on the driver's side panel in the
cargo area to secure small items. To install the side cargo net, hook each
loop on the four corners of the net to
the tabs on the left side panel. When
you fold down the third seat, store
the head restraints in the side cargo net.
Befor e Drivin g
Page 203 of 352
Carrying Carg o
On EX model
You can use the cargo net to secure
items in the cargo area, and storesmall items between the two halves
of the net. To install the cargo net,
hook the loops on the four corners of
the net to the tabs at both sides of
the tailgate sill.
Befor e Drivin g
Cargo Ne t
Page 204 of 352
Drivin
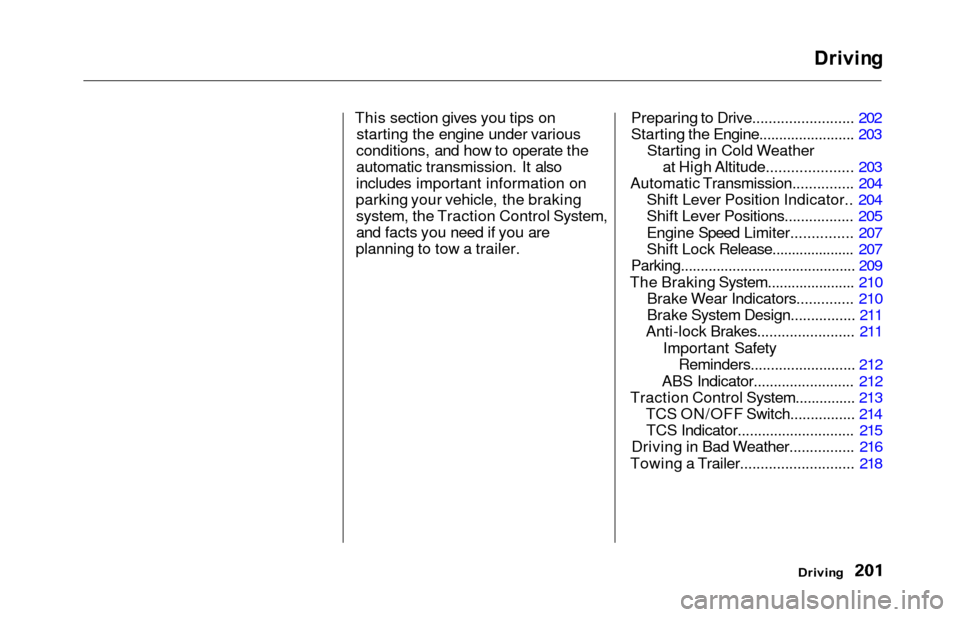
g
This section gives you tips on starting the engine under various
conditions, and how to operate the
automatic transmission. It also
includes important information on
parking your vehicle, the braking system, the Traction Control System,
and facts you need if you are
planning to tow a trailer. Preparing to Drive......................... 202
Starting the Engine........................ 203
Starting in Cold Weatherat High Altitude..................... 203
Automatic Transmission............... 204 Shift Lever Position Indicator.. 204
Shift Lever Positions................. 205
Engine Speed Limiter............... 207
Shift Lock Release..................... 207
Parking............................................ 209
The Braking System...................... 210 Brake Wear Indicators.............. 210
Brake System Design................ 211
Anti-lock Brakes........................ 211
Important SafetyReminders.......................... 212
ABS Indicator......................... 212
Traction Control System............... 213 TCS ON/OFF Switch................ 214TCS Indicator............................. 215
Driving in Bad Weather................ 216
Towing a Trailer............................ 218
Driving