2000 HONDA ODYSSEY air condition
[x] Cancel search: air conditionPage 219 of 352
Driving in Ba d Weathe r
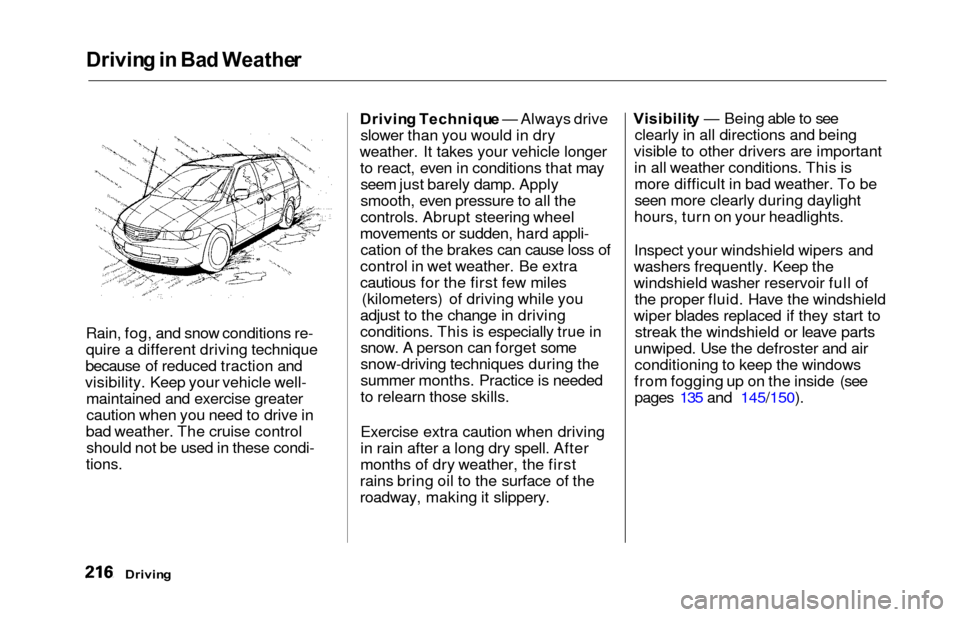
Rain, fog, and snow conditions re-
quire a different driving technique
because of reduced traction and
visibility. Keep your vehicle well- maintained and exercise greater
caution when you need to drive in
bad weather. The cruise control should not be used in these condi-
tions.
Drivin g Techniqu e — Always drive
slower than you would in dry
weather. It takes your vehicle longer to react, even in conditions that mayseem just barely damp. Apply
smooth, even pressure to all the
controls. Abrupt steering wheel
movements or sudden, hard appli- cation of the brakes can cause loss of
control in wet weather. Be extra
cautious for the first few miles (kilometers) of driving while you
adjust to the change in driving
conditions. This is especially true in snow. A person can forget some
snow-driving techniques during the
summer months. Practice is needed
to relearn those skills.
Exercise extra caution when driving
in rain after a long dry spell. After
months of dry weather, the first
rains bring oil to the surface of the
roadway, making it slippery. Visibilit
y — Being able to see
clearly in all directions and being
visible to other drivers are important in all weather conditions. This ismore difficult in bad weather. To be
seen more clearly during daylight
hours, turn on your headlights.
Inspect your windshield wipers and
washers frequently. Keep the
windshield washer reservoir full of the proper fluid. Have the windshield
wiper blades replaced if they start to streak the windshield or leave parts
unwiped. Use the defroster and air conditioning to keep the windows
from fogging up on the inside (see pages 135 and 145/150).
Drivin g
Page 226 of 352

Towing a Traile r
Drivin g Safel y Wit h a Traile r
The added weight, length, and height of a trailer will affect your
vehicle's handling and performance, so driving with a trailer requires
some special driving skills and
techniques.
For your safety and the safety of
others, take time to practice driving
maneuvers before heading for the
open road, and follow the guidelines
discussed below.
Towing Speeds and Gears
Driving slower than normal in all
driving situations, and obey postedspeed limits for vehicles with trailers.
Use the D
4 position when towing a
trailer on level roads. D3 is the
proper shift lever position to use
when towing a trailer in hilly terrain.
(See "Driving on Hills" in the next
column for additional gear
information.)
Making Turns and Braking
Make turns more slowly and wider
than normal. The trailer tracks a smaller arc than your vehicle, and it
can hit or run over something the
vehicle misses. Allow more time and distance for braking. Do not brake or
turn suddenly as this could cause the
trailer to jackknife or turn over.
Driving on Hills
When climbing hills, closely watch your temperature gauge. If it nearsthe red mark, turn the air
conditioning off, reduce speed and, if
necessary, pull to the side of the
road to let the engine cool.
If the automatic transmission shifts
frequently between 3rd and 4th
gears while going up a hill, shift to D
3. If you must stop when facing uphill,
use the foot brake or parking brake.
Do not try to hold the vehicle in
place by pressing on the accelerator,
as this can cause the automatic
transmission to overheat.
When driving down hills, reduce
your speed and shift down to 2nd
gear. Do not "ride" the brakes, and
remember it will take longer to slowdown and stop when towing a trailer.
Drivin g
CONTINUED
Page 228 of 352

Maintenance
This section explains why it is
important to keep your vehicle well
maintained and to follow basic
maintenance safety precautions.
This section also includes Maintenance Schedules for normal
driving and severe driving conditions,
a Maintenance Record, and instruc-
tions for simple maintenance tasks
you may want to take care of
yourself.
If you have the skills and tools to per-
form more complex maintenance tasks on your Honda, you may want
to purchase the Service Manual. See page 337 for information on how to
obtain a copy, or see your Honda
dealer.
Maintenance Safety....................... 226
Important Safety Precautions.. 227
Maintenance Schedule.................. 228
Required Maintenance Record.... 235
Owner Maintenance Checks........ 237
Fluid Locations............................... 238
Engine Oil....................................... 239 Adding Oil................................... 239Recommended Oil..................... 239
Synthetic Oil............................... 240
Additives..................................... 241
Changing the Oil and Filter...... 241
Cooling System.............................. 243
Adding Engine Coolant............. 243
Replacing Engine Coolant........ 245
Windshield Washers..................... 248
Automatic Transmission Fluid..... 249
Brake Fluid..................................... 250
Brake System............................ . 250
Power Steering............................... 251
Air Cleaner Element...................... 252
Hood Latch.................................... . 254
Spark Plugs..................................... 254
Replacement............................... 254
Specifications............................. 256
Battery............................................ 257
Wiper Blades.................................. 259
Air Conditioning System............... 261 Air Conditioning Filter.................. 262Drive Belts...................................... 262
Timing Belt.................................... . 263
Tires................................................ 263 Inflation....................................... 263
Inspection.................................. . 265
Maintenance............................... 266
Tire Rotation.............................. 266 Replacing Tires and Wheels.... 267
Wheels and Tires....................... 268
Winter Driving........................... 268
Snow Tires.............................. 269
Tire Chains............................. 269
Lights............................................. . 270
Headlight Aiming...................... 272
Replacing Bulbs......................... 272
Storing Your Vehicle..................... 281
Maintenanc e
Page 237 of 352
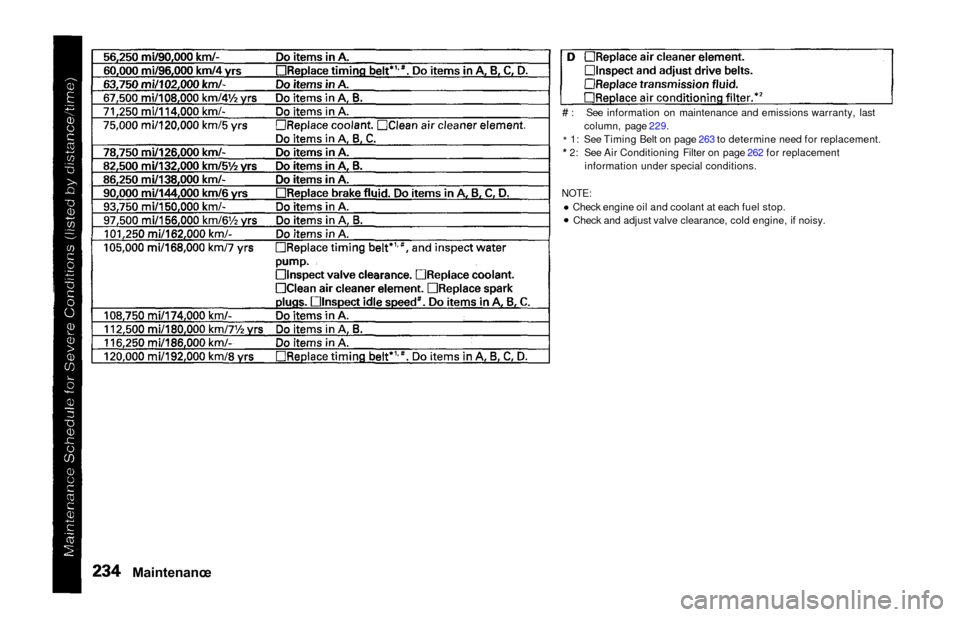
# : See information on maintenance and emissions warranty, lastcolumn, page 229.
* 1: See Timing Belt on page 263 to determine need for replacement.
* 2: See Air Conditioning Filter on page 262 for replacement
information under special conditions.
NOTE:Check engine oil and coolant at each fuel stop.Check and adjust valve clearance, cold engine, if noisy.
Maintenanc e
Page 255 of 352
Air Cleane r Elemen t
The air cleaner element should be
cleaned or replaced according to the
time and distance recommendations
in the maintenance schedule.
Cleanin g (Sever e Conditions )
Clean the air cleaner element by
blowing compressed air through it in
the opposite direction to normal air
flow. If you do not have access to compressed air (such as a servicestation), ask your Honda dealer to do
this service.
Follow the replacement procedure
for removal and reinstallation.
Replacemen t
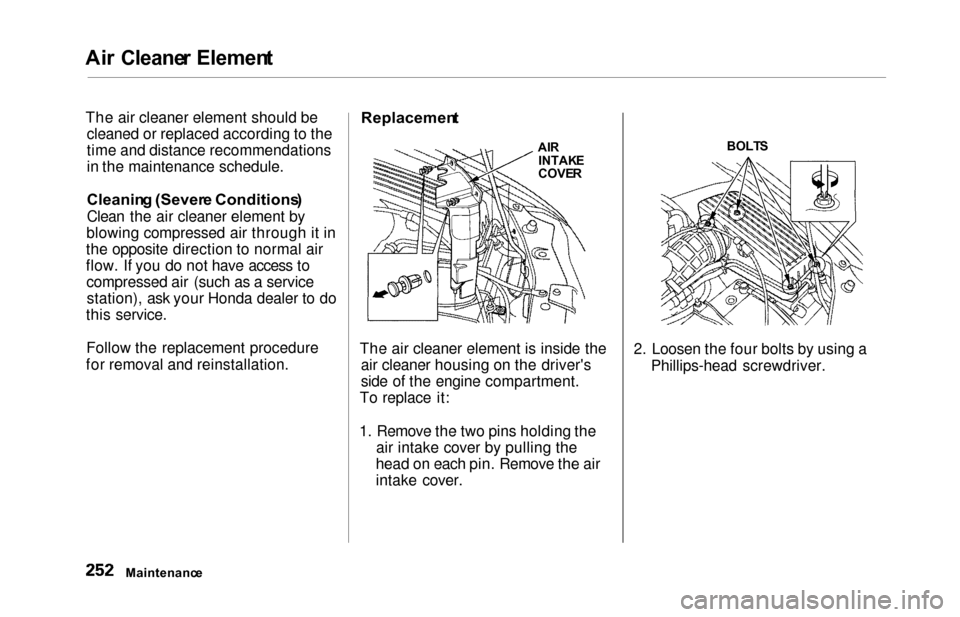
The air cleaner element is inside the
air cleaner housing on the driver's
side of the engine compartment.
To replace it:
1. Remove the two pins holding the air intake cover by pulling the
head on each pin. Remove the air
intake cover. 2. Loosen the four bolts by using a
Phillips-head screwdriver.
Maintenanc e AI
R
INTAK E
COVER BOLT
S
Page 264 of 352
Air Conditionin g Syste m
Your vehicle's air conditioning is a
sealed system. Any major mainte-
nance, such as recharging, should be done by a qualified mechanic. You
can do a couple of things to make sure the air conditioning works
efficiently.
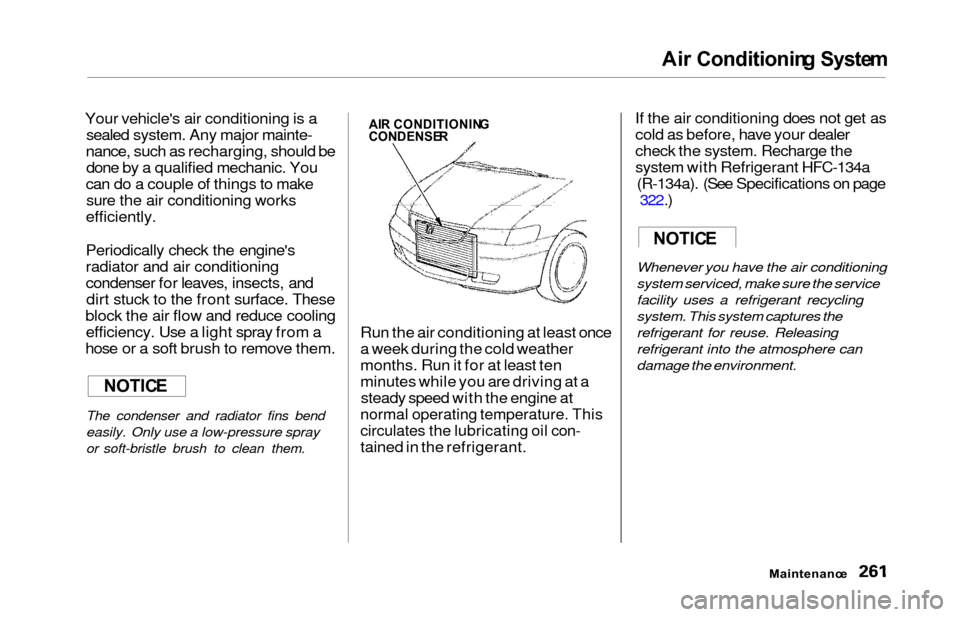
Periodically check the engine's
radiator and air conditioning
condenser for leaves, insects, and dirt stuck to the front surface. These
block the air flow and reduce cooling efficiency. Use a light spray from a
hose or a soft brush to remove them.
The condenser and radiator fins bend
easily. Only use a low-pressure spray
or soft-bristle brush to clean them.
Run the air conditioning at least once
a week during the cold weather
months. Run it for at least ten
minutes while you are driving at a steady speed with the engine at
normal operating temperature. This
circulates the lubricating oil con-
tained in the refrigerant. If the air conditioning does not get as
cold as before, have your dealer
check the system. Recharge the
system with Refrigerant HFC-134a
(R-134a). (See Specifications on page 322.)
Whenever you have the air conditioning
system serviced, make sure the service
facility uses a refrigerant recycling
system. This system captures the
refrigerant for reuse. Releasing
refrigerant into the atmosphere can
damage the environment.
Maintenanc e
NOTICE
AIR CONDITIONIN GCONDENSER
NOTICE
Page 265 of 352
Air Conditionin g Filter , Driv e Belt s
Air Conditionin g Filte r
The air conditioning filter removes pollen and dust that is brought in
from the outside through the heatingand cooling system/climate control
system.
This filter should be replaced every 30,000 miles (48,000 km) under
normal conditions. It should be
replaced every 15,000 miles (24,000
km) if you drive primarily in urban areas that have high concentrations
of soot in the air from industry and
diesel-powered vehicles. Replace it
more often if air flow from the
heating and cooling system/climate control system becomes less than
usual. Have the air conditioning filter
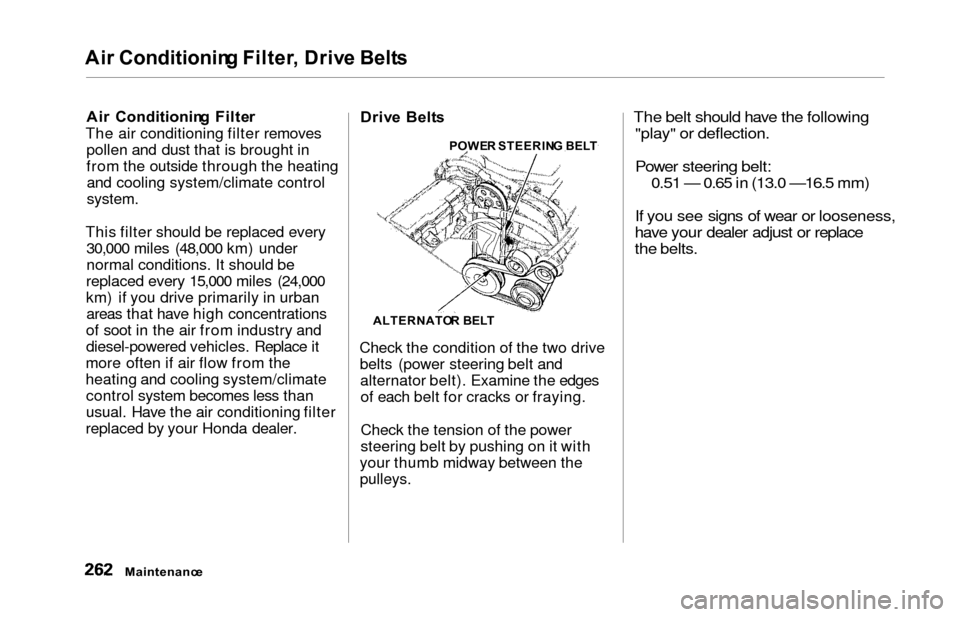
replaced by your Honda dealer. Driv
e Belt s
Check the condition of the two drive belts (power steering belt andalternator belt). Examine the edgesof each belt for cracks or fraying.
Check the tension of the power
steering belt by pushing on it with
your thumb midway between the
pulleys.
The belt should have the following "play" or deflection.
Power steering belt: 0.51 — 0.65 in (13.0
—16.5 mm)
If you see signs of wear or looseness,
have your dealer adjust or replace
the belts.
Maintenanc e
ALTERNATO R BEL T
POWE
R STEERIN G BEL T
Page 266 of 352
Timing Belt , Tire s
Timin g Bel t
The timing belt should normally be replaced at the intervals shown in
the maintenance schedule.
Replace the belt at 60,000 miles (U.S.)
or 100,000 km (Canada) if you regu-
larly drive your vehicle in one or more of these conditions:
In very high temperatures
(over 110°F,43°C).
In very low temperatures
(under — 20°F, — 29°C).
Tire s
To safely operate your vehicle, your tires must be the proper type andsize, in good condition with adequate
tread, and correctly inflated. The
following pages give more detailed information on how and when tocheck air pressure, how to inspect
your tires for damage and wear, and
what to do when your tires need to be replaced.Inflatio n
Keeping the tires properly inflated
provides the best combination of
handling, tread life and riding comfort. Underinflated tires wear
unevenly, adversely affect handlingand fuel economy, and are more
likely to fail from being overheated. Overinflated tires can make your
vehicle ride more harshly, are more prone to damage from road hazards,and wear unevenly.
We recommend that you visually check your tires every day. If you
think a tire might be low, check it immediately with a tire gauge.
CONTINUED
Maintenanc e
Using tires that are excessively
worn or improperly inflated can
cause a crash in which you can be seriously hurt or killed.
Follow all instructions in this
owner's manual regarding tire inflation and maintenance.