2000 HONDA ODYSSEY front brake
[x] Cancel search: front brakePage 121 of 352
Center Table , Beverag e Holde r
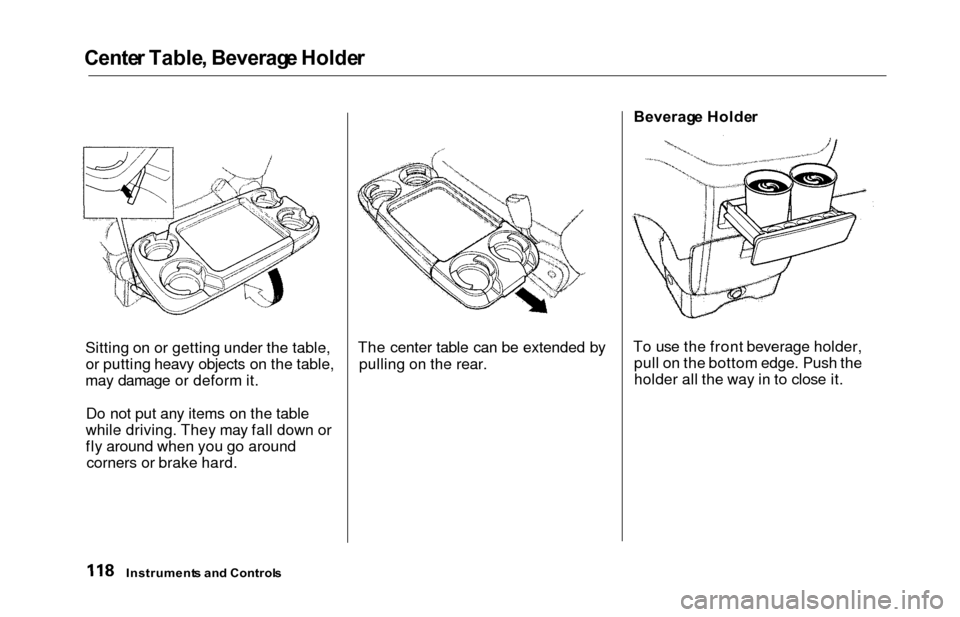
Sitting on or getting under the table,
or putting heavy objects on the table,
may damage or deform it.
Do not put any items on the table
while driving. They may fall down or
fly around when you go around corners or brake hard. The center table can be extended by
pulling on the rear. Beverag
e Holde r
To use the front beverage holder, pull on the bottom edge. Push the
holder all the way in to close it.
Instrument s an d Control s
Page 193 of 352
Service Statio n Procedure s
3. Remove the fuel fill cap slowly.
You may hear a hissing sound aspressure inside the tank escapes.
Place the cap in the holder on the
fuel fill door.
4. Stop filling the tank after the fuel nozzle automatically clicks off. Do
not try to "top off" the tank, leavesome room for the fuel to expand
with temperature changes.
5. Screw the fuel fill cap back on, tighten it until it clicks several
times. If you do not properly
tighten the cap, the Malfunction
Indicator Lamp may come on (seepage 309 ).
6. Push the fuel fill door closed until it latches.Openin g th e Hoo d
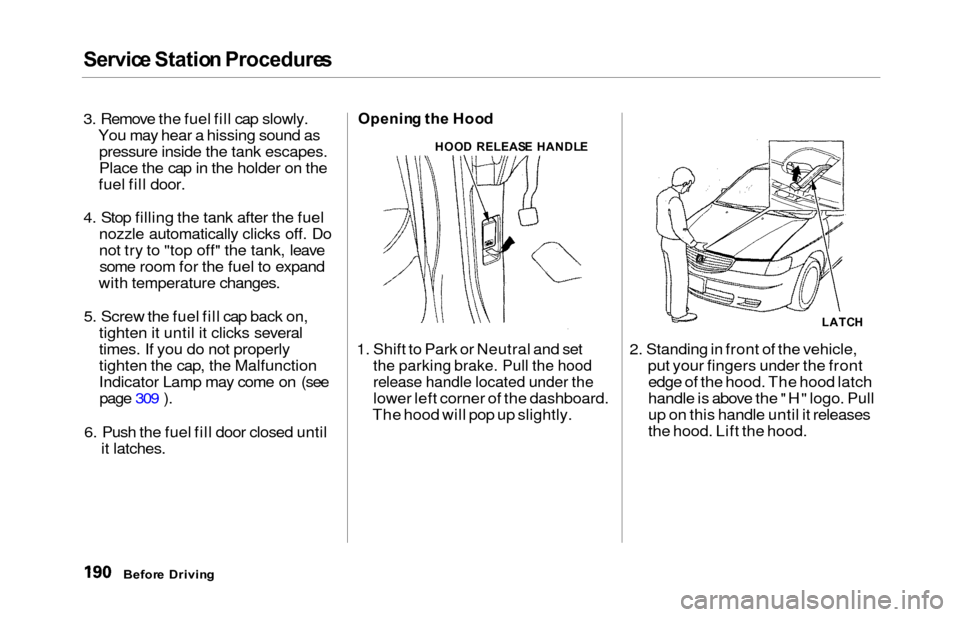
1. Shift to Park or Neutral and set
the parking brake. Pull the hood
release handle located under the
lower left corner of the dashboard.
The hood will pop up slightly. 2. Standing in front of the vehicle,
put your fingers under the frontedge of the hood. The hood latch
handle is above the "H" logo. Pull
up on this handle until it releases
the hood. Lift the hood.
Befor e Drivin g
HOOD RELEAS E HANDL E
LATCH
Page 212 of 352
Parking
Always use the parking brake when
you park your vehicle. The indicator on the instrument panel shows that
the parking brake is not fully
released; it does not indicate that the
parking brake is firmly set. Makesure the parking brake is set firmly
or your vehicle may roll if it is
parked on an incline.
Set the parking brake before you put
the transmission in Park. This keeps
the vehicle from moving and putting
pressure on the parking mechanismin the transmission — making it
easier to move the shift lever out of
Park when you want to drive away. If the vehicle is facing uphill, turn
the front wheels away from the curb.
If the vehicle is facing downhill, turn
the front wheels toward the curb.Make sure the parking brake is fully
released before driving away. Driving with the parking brake
partially set can overheat or damage
the rear brakes. Parkin
g Tip s
Make sure the windows are closed.
Turn off the lights.
Place any packages, valuables, etc.,
in the cargo area or take them
with you.
Lock the doors with the key or the
remote transmitter.
Never park over dry leaves, tall
grass, or other flammable materials. The three way catalytic
converter gets very hot, and could
cause these materials to catch on
fire.
Drivin g
Page 213 of 352
The Brakin g Syste m
Your Honda is equipped with front
disc brakes. The brakes on the rear
wheels are drum. A power assist helps reduce the effort needed on
the brake pedal. The ABS helps you
retain steering control when braking
very hard.
Put your foot on the brake pedal only
when you intend to brake. Resting
your foot on the pedal keeps the brakes applied lightly, causing them
to build up heat. Heat build-up canreduce how well your brakes work. It
also keeps your brake lights on all
the time, confusing drivers behind
you.
Constant application of the brakes
when going down a long hill builds up heat and reduces their effective-
ness. Use the engine to assist the
brakes by downshifting to a lower
gear and taking your foot off the accelerator pedal.
Check your brakes after driving
through deep water. Apply the
brakes moderately to see if they feel normal. If not, apply them gently and
frequently until they do. Since a
longer distance is needed to stop
with wet brakes, be extra cautious and alert in your driving. Brak
e Wea r Indicator s
The front disc brakes on all vehicles have audible brake wear indicators.
When the brake pads need replacing,
you will hear a distinctive metallic "screeching" sound when you apply
the brakes. If you do not have the
brake pads replaced, they will begin screeching all the time.
Your brakes may sometimes squeal or squeak when you apply them
lightly. Do not confuse this with the
brake wear indicators. They make a
very audible "screeching."
Drivin g
Page 214 of 352
The Brakin g Syste m
Brake Syste m Desig n
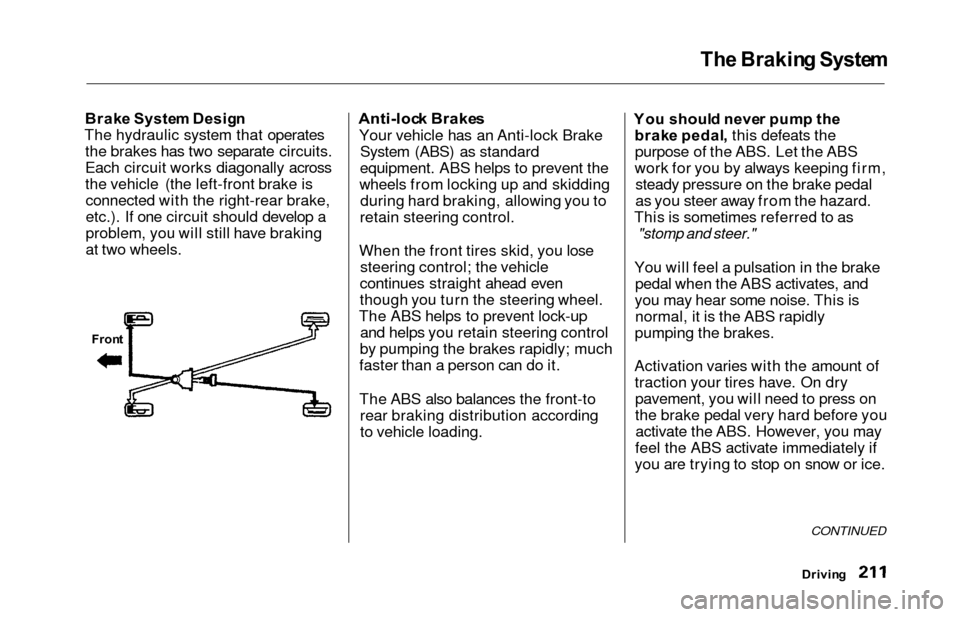
The hydraulic system that operates the brakes has two separate circuits.
Each circuit works diagonally across
the vehicle (the left-front brake isconnected with the right-rear brake,
etc.). If one circuit should develop a
problem, you will still have braking
at two wheels.Anti-loc k Brake s
Your vehicle has an Anti-lock Brake
System (ABS) as standard
equipment. ABS helps to prevent the
wheels from locking up and skidding during hard braking, allowing you to
retain steering control.
When the front tires skid, you lose steering control; the vehicle
continues straight ahead even
though you turn the steering wheel.
The ABS helps to prevent lock-up and helps you retain steering control
by pumping the brakes rapidly; much
faster than a person can do it.
The ABS also balances the front-to rear braking distribution according
to vehicle loading. Yo
u shoul d neve r pum p th e
brak e pedal , this defeats the
purpose of the ABS. Let the ABS
work for you by always keeping firm, steady pressure on the brake pedal
as you steer away from the hazard.
This is sometimes referred to as
"stomp and steer."
You will feel a pulsation in the brake pedal when the ABS activates, and
you may hear some noise. This is normal, it is the ABS rapidly
pumping the brakes.
Activation varies with the amount of traction your tires have. On drypavement, you will need to press on
the brake pedal very hard before youactivate the ABS. However, you may
feel the ABS activate immediately if
you are trying to stop on snow or ice.
Drivin g
CONTINUED
Front
Page 216 of 352
The Brakin g System , Tractio n Contro l Syste m
If the ABS indicator and the brake
system indicator come on together,
and the parking brake is fully
released, the front-to-rear braking
distribution system may also shut
down.
Test your brakes as instructed on page 310. If the brakes feel normal,drive slowly and have your vehicle
repaired by your dealer as soon as
possible. Avoid sudden hard braking
which could cause the rear wheels to lock up and possibly lead to a loss of
control.
On EX model
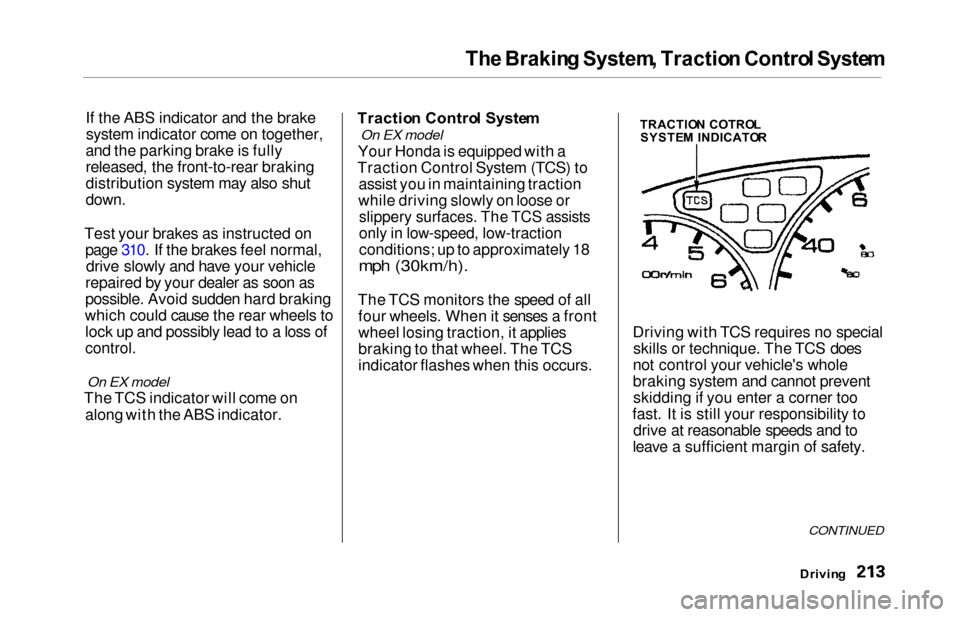
The TCS indicator will come on
along with the ABS indicator. Tractio
n Contro l Syste m
On EX model
Your Honda is equipped with a
Traction Control System (TCS) to assist you in maintaining traction
while driving slowly on loose or
slippery surfaces. The TCS assists
only in low-speed, low-traction
conditions; up to approximately 18
mph (30km/h).
The TCS monitors the speed of all four wheels. When it senses a front
wheel losing traction, it applies
braking to that wheel. The TCS
indicator flashes when this occurs. Driving with TCS requires no special
skills or technique. The TCS does
not control your vehicle's whole
braking system and cannot prevent skidding if you enter a corner too
fast. It is still your responsibility to drive at reasonable speeds and to
leave a sufficient margin of safety.
Drivin g
CONTINUED
TRACTIO N COTRO L
SYSTE M INDICATO R
Page 272 of 352
Tires
Snow Tires
If you mount snow tires on your
Honda, make sure they are radial
tires of the same size and load range as the original tires. Mount snow
tires on all four wheels to balance
your vehicle's handling in all weather conditions. Keep in mind the traction
provided by snow tires on dry roads
may not be as high as your vehicle's
original equipment tires. You should
drive cautiously even when the roads
are clear. Check with the tire dealer
for maximum speed recommenda-
tions.
Tire Chains
Because your Honda has limited tire
clearance, mount only SAE Class "S"
cable-type traction devices on the
front tires. Use traction devices only
when required by driving conditions or local laws. Make sure they are the
correct size for your tires.
Metal link-type "chains" should not
be used. No matter how tight they seem to be installed, they can come
into contact with the body and suspension, causing serious damage.
When installing cables, follow the manufacturer's instructions and
mount them as tightly as you can.Drive slowly with them installed. If
you hear them coming in contact
with the body or chassis, stop and investigate. Make sure the cables are
installed tightly, and that they are
not contacting the brake lines or
suspension.
Remove them as soon as you begin driving on cleared roads.
Traction devices that are the wrong
size or improperly installed can
damage your vehicle's brake lines,
suspension, body, and wheels. Stop driving if they are hitting any part of
the vehicle.
Maintenanc e
NOTICE
Page 284 of 352
Storing You r Vehicl e
If you need to park your vehicle for
an extended period (more than one
month), there are several things you
should do to prepare it for storage.
Proper preparation helps prevent
deterioration and makes it easier to
get your vehicle back on the road. If
possible, store your vehicle indoors.
Fill the fuel tank.Change the engine oil and filter
(see page 241).
Wash and dry the exterior
completely.
Clean the interior. Make sure the
carpeting, floor mats, etc. are
completely dry.
Leave the parking brake off. Put
the transmission in Park.
Block the rear wheels.
If the vehicle is to be stored for a
longer period, it should be
supported on jackstands so the
tires are off the ground. Leave one window open slightly (if
the vehicle is being stored
indoors).
Disconnect the battery.
Support the front and rear wiper
blade arms with a folded towel or rag so they do not touch the
windshield.
To minimize sticking, apply a silicone spray lubricant to all door
and tailgate seals. Also, apply a
vehicle body wax to the painted surfaces that mate with the door
and tailgate seals.
Cover the vehicle with a
"breathable" cover, one made
from a porous material such as cotton. Nonporous materials, such
as plastic sheeting, trap moisture,
which can damage the paint.
If possible, run the engine for a
while periodically (preferably once a month).
If you store your vehicle for 12
months or longer, have your Honda
dealer perform the inspections called
for in the 24 months/30,000 miles (48,000 km) maintenance schedule
(Normal Conditions) as soon as you
take it out of storage (see page 230).
The replacements called for in the maintenance schedule are not
needed unless the vehicle hasactually reached that time or mileage.
Maintenanc e