Page 86 of 256
One time disable
Anytime the safety belt is buckled and then unbuckled during an ignition
ON cycle, Belt Minder will be disabled for that ignition cycle only.
Deactivating/activating the belt minder feature
Read steps1-9thoroughly before proceeding with the
deactivation/activation programming procedure.
The Belt Minder feature can be deactivated/activated by performing the
following procedure:
Before following the procedure, make sure that:
²the parking brake is set
²the gearshift is in P (Park) (automatic transmission) or the neutral
position (manual transmission).
²the ignition switch is in the OFF position
²all vehicle doors are closed
²the driver's safety belt is unbuckled
²the parklamps/headlamps are in OFF position (If vehicle is equipped
with Autolamps, this will not affect the procedure.)
To reduce the risk of injury, do not deactivate/activate the Belt
Minder feature while driving the vehicle.
1. Turn the ignition switch to the RUN (or ON) position. (DO NOT
START THE ENGINE)
2. Wait until the safety belt warning light turns off. (Approximately 1±2
minutes)
²Steps 3±5 must be completed within 60 seconds or the procedure will
have to be repeated.
3. Buckle then unbuckle the safety belt three times, ending with the
safety belt unbuckled. This can be done before or during Belt Minder
warning activation.
4. Turn on the parklamps/headlamps, turn off the parklamps/headlamps.
5. Buckle then unbuckle the safety belt three times, ending with the
safety belt unbuckled.
²After step 5 the safety belt warning light will be turned on for three
seconds.
Seating and safety restraints
86
Page 105 of 256
2. Make sure the headlamps and vehicle accessories are off.
If starting a vehicle with an automatic transmission:
²Make sure the parking brake is
set.
²Make sure the gearshift is in P (Park).
If starting a vehicle with a manual transmission:
²Make sure the parking brake is set.
²Push the clutch pedal to the
floor.
3. Turn the key to 4 (ON) without
turning the key to 5 (START).
If there is difficulty in turning the key,
firmly rotate the steering wheel left
and right until the key turns freely.
This condition may occur when:
²front wheels are turned
²front wheel is against the curb
²steering wheel is turned when
getting in or out of the vehicle
1
2
34
5
Starting
105
Page 112 of 256
Always set the parking brake fully and make sure that the
gearshift is securely latched in P (Park) (automatic
transmission) or in 1 (First) (manual transmission).
The parking brake is not recommended to stop a moving vehicle.
However, if the normal brakes fail, the parking brake can be used to stop
your vehicle in an emergency. Since the parking brake applies only the
rear brakes, the vehicle's stopping distance will increase greatly and the
handling of your vehicle will be adversely affected.
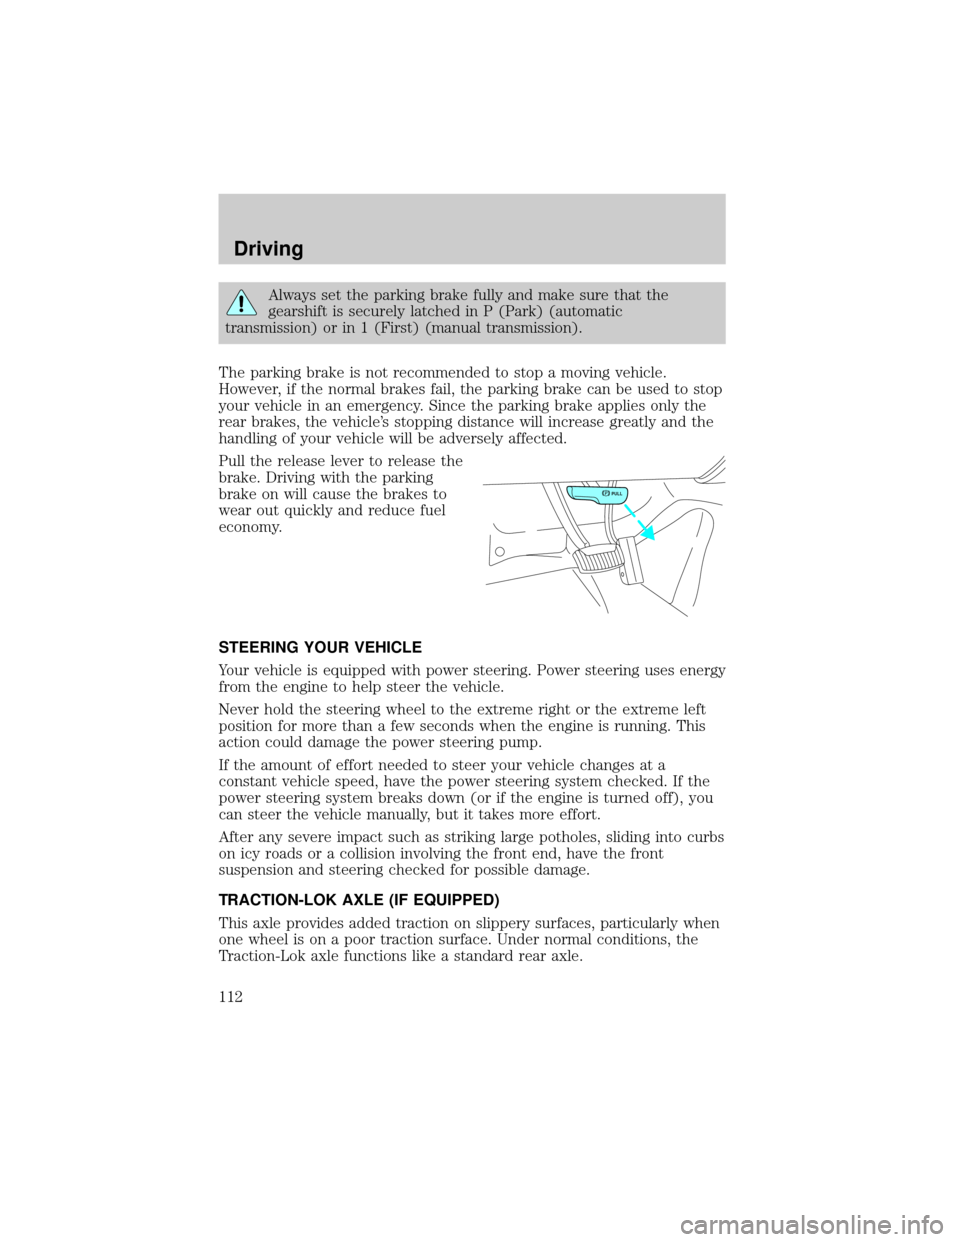
Pull the release lever to release the
brake. Driving with the parking
brake on will cause the brakes to
wear out quickly and reduce fuel
economy.
STEERING YOUR VEHICLE
Your vehicle is equipped with power steering. Power steering uses energy
from the engine to help steer the vehicle.
Never hold the steering wheel to the extreme right or the extreme left
position for more than a few seconds when the engine is running. This
action could damage the power steering pump.
If the amount of effort needed to steer your vehicle changes at a
constant vehicle speed, have the power steering system checked. If the
power steering system breaks down (or if the engine is turned off), you
can steer the vehicle manually, but it takes more effort.
After any severe impact such as striking large potholes, sliding into curbs
on icy roads or a collision involving the front end, have the front
suspension and steering checked for possible damage.
TRACTION-LOK AXLE (IF EQUIPPED)
This axle provides added traction on slippery surfaces, particularly when
one wheel is on a poor traction surface. Under normal conditions, the
Traction-Lok axle functions like a standard rear axle.
PULL
Driving
112
Page 117 of 256

higher speeds causes the transmission to shift to a lower gear, and will
shift to 1 (Low) after vehicle decelerates to the proper speed.
Forced Downshifts
To gain acceleration in(Overdrive) or Drive (O/D OFF) when
passing another vehicle, push the accelerator to the floor. The
transmission will downshift to the appropriate gear: third, second or first
gear.
Shift strategy (4R100 automatic transmission)
To account for customer driving habits and conditions, your 4R100
automatic transmission electronically controls the shift quality by using
an adaptive learning strategy. The adaptive learning strategy is
maintained by power from the battery. When the battery is disconnected
or a new battery is installed, the transmission must relearn its adaptive
strategy. Optimal shifting will resume within a few hundred kilometers
(miles) of operation.
If the shift quality does not improve within a few hundred
kilometers (miles) of operation, or if the downshifts and other
throttle conditions do not function normally, see your dealer or a
qualified service technician as soon as possible.
MANUAL TRANSMISSION OPERATION (IF EQUIPPED)
Using the clutch
Vehicles equipped with a manual transmission have a starter interlock
that prevents cranking the engine unless the clutch pedal is fully
depressed.
Driving
117
Page 118 of 256
When starting a vehicle with a manual transmission, you must:
1. Make sure the parking brake is
fully set.
2. Depress the clutch pedal fully.
3. Put the gearshift lever in N
(Neutral).
4. Turn the ignition to position 5
(START) to start the engine, let the
engine idle for a few seconds.
5. Depress the brake pedal.
6. Release the parking brake.
7. Move the gearshift lever to the
desired gear.
8. Release the brake pedal.
9. Slowly release the clutch pedal
while slowly pressing down on the
accelerator pedal.
²Do not drive with your foot resting on the clutch pedal and do not use
the clutch to hold your vehicle at a standstill while waiting on a hill.
These actions will greatly reduce clutch life.
1
24R3D1
24 R
L3D
1
2
34
5
Driving
118
Page 122 of 256
Removing key from ignition
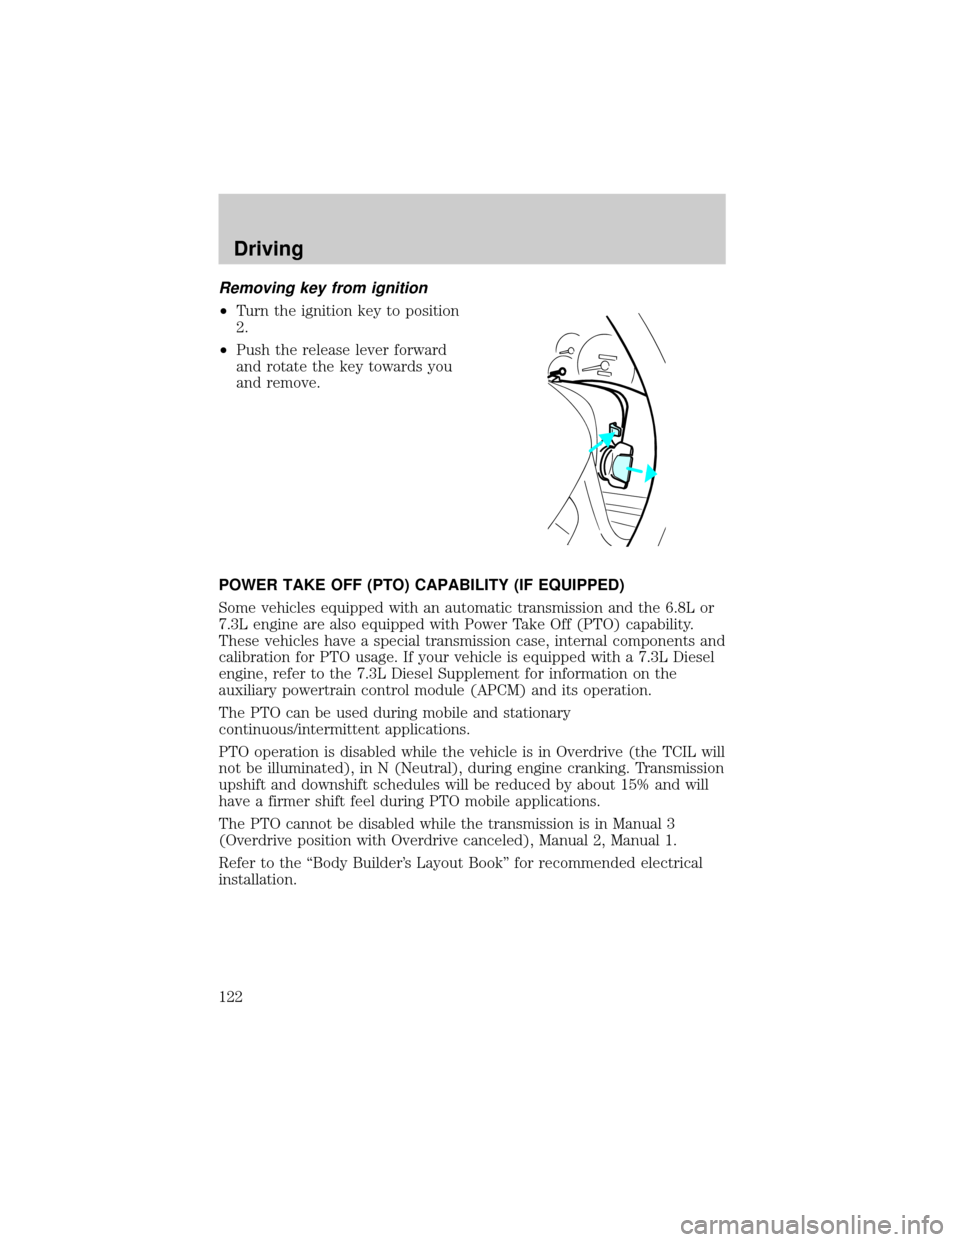
²Turn the ignition key to position
2.
²Push the release lever forward
and rotate the key towards you
and remove.
POWER TAKE OFF (PTO) CAPABILITY (IF EQUIPPED)
Some vehicles equipped with an automatic transmission and the 6.8L or
7.3L engine are also equipped with Power Take Off (PTO) capability.
These vehicles have a special transmission case, internal components and
calibration for PTO usage. If your vehicle is equipped with a 7.3L Diesel
engine, refer to the 7.3L Diesel Supplement for information on the
auxiliary powertrain control module (APCM) and its operation.
The PTO can be used during mobile and stationary
continuous/intermittent applications.
PTO operation is disabled while the vehicle is in Overdrive (the TCIL will
not be illuminated), in N (Neutral), during engine cranking. Transmission
upshift and downshift schedules will be reduced by about 15% and will
have a firmer shift feel during PTO mobile applications.
The PTO cannot be disabled while the transmission is in Manual 3
(Overdrive position with Overdrive canceled), Manual 2, Manual 1.
Refer to the ªBody Builder's Layout Bookº for recommended electrical
installation.
Driving
122
Page 123 of 256
FOUR-WHEEL DRIVE (4WD) OPERATION (IF EQUIPPED)
For important information regarding safe operation of this type
of vehicle, seePreparing to drive your vehiclein this chapter.
When Four±wheel drive (4WD) is engaged, power is supplied to all four
wheels through a transfer case. 4WD power can be selected when
additional driving power is desired.
If equipped with the Electronic Shift 4WD System, and the
instrument panel control is moved to 4WD Low while the vehicle
is moving, the system will not engage and no damage will occur to
the 4WD system. Before 4WD Low can be engaged, the vehicle
must be brought to a complete stop with the brake pedal
depressed and the transmission placed in neutral (or the clutch
pedal depressed on manual transmissions).
4WD operation is not recommended on dry pavement. Doing so could
result in difficult disengagement of the transfer case, increased tire wear
and decreased fuel economy.
Electronic shift on the fly (ESOF) 4x4 system (if equipped)
The 4WD system:
²provides 4x4 High engagement and disengagement while the vehicle is
moving.
²is operated by a rotary control located on the instrument panel that
allows you select 2WD, 4x4 High or 4x4 Low operation.
²uses hub locks that can be engaged and disengaged automatically by
using a rotary control located on the instrument panel.
Driving
123
Page 126 of 256
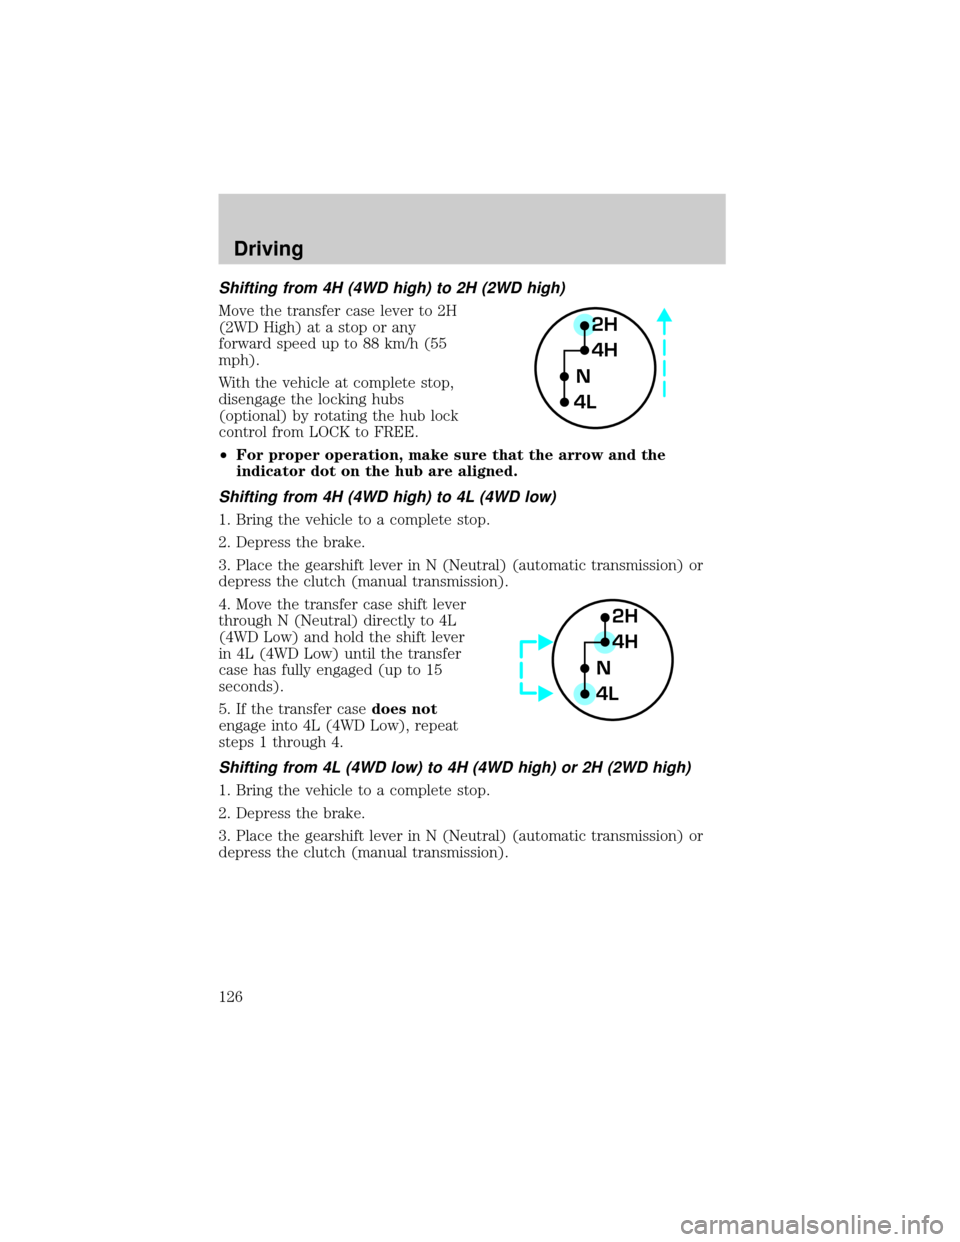
Shifting from 4H (4WD high) to 2H (2WD high)
Move the transfer case lever to 2H
(2WD High) at a stop or any
forward speed up to 88 km/h (55
mph).
With the vehicle at complete stop,
disengage the locking hubs
(optional) by rotating the hub lock
control from LOCK to FREE.
²For proper operation, make sure that the arrow and the
indicator dot on the hub are aligned.
Shifting from 4H (4WD high) to 4L (4WD low)
1. Bring the vehicle to a complete stop.
2. Depress the brake.
3. Place the gearshift lever in N (Neutral) (automatic transmission) or
depress the clutch (manual transmission).
4. Move the transfer case shift lever
through N (Neutral) directly to 4L
(4WD Low) and hold the shift lever
in 4L (4WD Low) until the transfer
case has fully engaged (up to 15
seconds).
5. If the transfer casedoes not
engage into 4L (4WD Low), repeat
steps 1 through 4.
Shifting from 4L (4WD low) to 4H (4WD high) or 2H (2WD high)
1. Bring the vehicle to a complete stop.
2. Depress the brake.
3. Place the gearshift lever in N (Neutral) (automatic transmission) or
depress the clutch (manual transmission).
2H
4H
4LN
2H
4H
4LN
Driving
126