Page 5 of 429
Table of Contents (cont'd)
Defensive Driving
Drunken Driving
Control of a Vehicle
Braking
SteeringDriving Tips for Various Road Conditions
Recreational Vehicle Towing
Loading Your Vehicle
Towing a Trailer Heating and Air Conditioning
Setting the Radio ClockRadio/Cassette Player/CD Player
Radio Theft-Deterrent Feature (If Equipped)
Hazard Warning Flashers
Jump Starting
Towing Your VehicleEngine Overheating
Changing a Flat Tire
If You're Stuck
Problems on the Road
Section
3
Section
4
Section
5
Your Driving and the Road Comfort Controls and Audio Systems
iii
Page 97 of 429

1-85
CAUTION:
A child in a rear-facing child restraint can be
seriously injured or killed if the front passenger's
air bag inflates. This is because the back of the
rear
-facing child restraint would be very close to
the inflating air bag. If your vehicle is a
passenger van, always secure a rear
-facing child
restraint in a rear seat.
If your vehicle is a cargo van, do not use a
rear
-facing child restraint in this vehicle. If a
forward
-facing child restraint is suitable for your
child, always move the passenger seat as far back
as it will go.
Although a rear seat is a safer place, you can secure a
forward
-facing child restraint in the right front seat.
You'll be using the lap
-shoulder belt. See the earlier part
about the top strap if the child restraint has one. Be sure
to follow the instructions that came with the child
restraint. Secure the child in the child restraint when and
as the instructions say.
1. Because your vehicle has a front passenger air bag,
always move the seat as far back as it will go before
securing a forward
-facing child restraint.
(See ªSeatsº in the Index.)
2. Put the restraint on the seat.
3. Pick up the latch plate, and run the lap and shoulder
portions of the vehicle's safety belt through or
around the restraint. The child restraint instructions
will show you how.
Page 105 of 429

2-
2-1
Section 2 Features and Controls
Here you can learn about the many standard and optional features on your vehicle, and information on starting,
shifting and braking. Also explained are the instrument panel and the warning systems that tell you if everything is
working properly
-- and what to do if you have a problem.
2
-2 Keys
2
-4 Door Locks
2
-7 Keyless Entry System (Option)
2
-14 Multifunction Alarm Locks and
Lighting Choices
2
-24 Sliding Door
2
-26 Power Sliding Door (Option)
2
-32 Liftgate
2
-33 Theft
2
-34 Content Theft-Deterrent (Option)
2
-36 PASS-Key� III
2
-38 New Vehicle ªBreak-Inº
2
-38 Ignition Positions
2
-40 Starting Your Engine
2
-41 Engine Coolant Heater (If Equipped)
2
-42 Automatic Transaxle Operation
2
-47 Parking Brake
2
-48 Shifting Into PARK (P)2
-50 Shifting Out of PARK (P)
2
-51 Parking Over Things That Burn
2
-51 Engine Exhaust
2
-52 Running Your Engine While You're Parked
2
-53 Windows
2
-55 Turn Signal/Multifunction Lever
2
-62 Exterior Lamps
2
-63 Interior Lamps
2
-68 Storage Compartments
2
-79 Accessory Inflator System (Option)
2
-82 Accessory Power Outlets
2
-83 OnStar� System (If Equipped)
2
-84 The Instrument Panel -- Your
Information System
2
-88 Warning Lights, Gages, Messages
and Indicators
2
-96 Message Center
2
-102 Driver Information Center (DIC) (Option)
Page 185 of 429

2-81
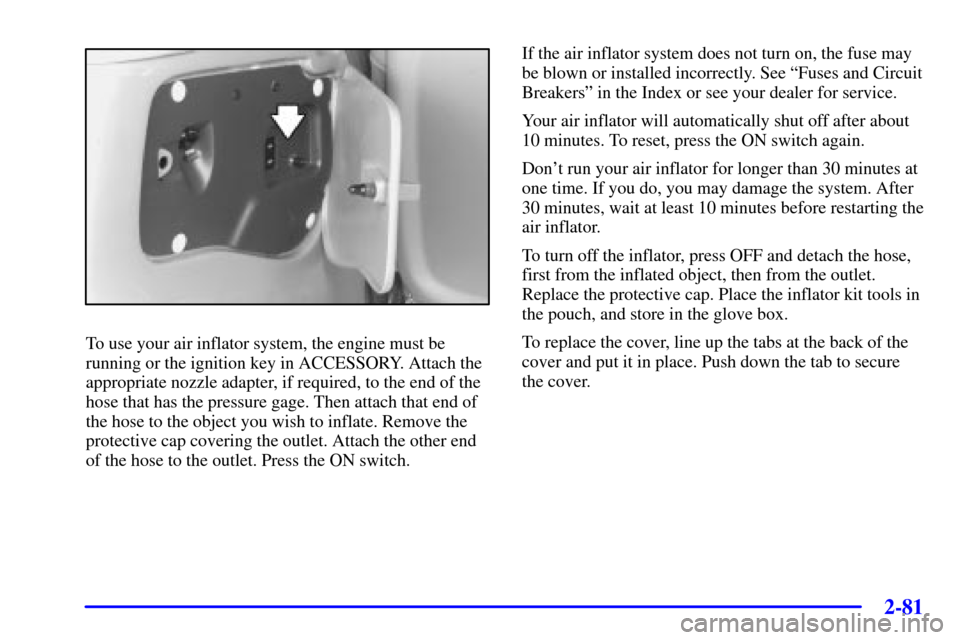
To use your air inflator system, the engine must be
running or the ignition key in ACCESSORY. Attach the
appropriate nozzle adapter, if required, to the end of the
hose that has the pressure gage. Then attach that end of
the hose to the object you wish to inflate. Remove the
protective cap covering the outlet. Attach the other end
of the hose to the outlet. Press the ON switch.If the air inflator system does not turn on, the fuse may
be blown or installed incorrectly. See ªFuses and Circuit
Breakersº in the Index or see your dealer for service.
Your air inflator will automatically shut off after about
10 minutes. To reset, press the ON switch again.
Don't run your air inflator for longer than 30 minutes at
one time. If you do, you may damage the system. After
30 minutes, wait at least 10 minutes before restarting the
air inflator.
To turn off the inflator, press OFF and detach the hose,
first from the inflated object, then from the outlet.
Replace the protective cap. Place the inflator kit tools in
the pouch, and store in the glove box.
To replace the cover, line up the tabs at the back of the
cover and put it in place. Push down the tab to secure
the cover.
Page 194 of 429

2-90
CAUTION:
If the air bag readiness light stays on after you
start your vehicle, it means the air bag system
may not be working properly. The air bags in
your vehicle may not inflate in a crash, or they
could even inflate without a crash. To help avoid
injury to yourself or others, have your vehicle
serviced right away if the air bag readiness light
stays on after you start your vehicle.
The air bag readiness light should flash for a few
seconds when you turn the ignition key to RUN.
If the light doesn't come on then, have it fixed so it
will be ready to warn you if there is a problem.
Brake System Warning Light
When the ignition is on, the brake system warning light
will come on when you set your parking brake. The light
will stay on if your parking brake doesn't release fully.
If it stays on after your parking brake is fully released,
it means you have a brake problem.
Your vehicle's hydraulic brake system is divided into
two parts. If one part isn't working, the other part can
still work and stop you. For good braking, though, you
need both parts working well.
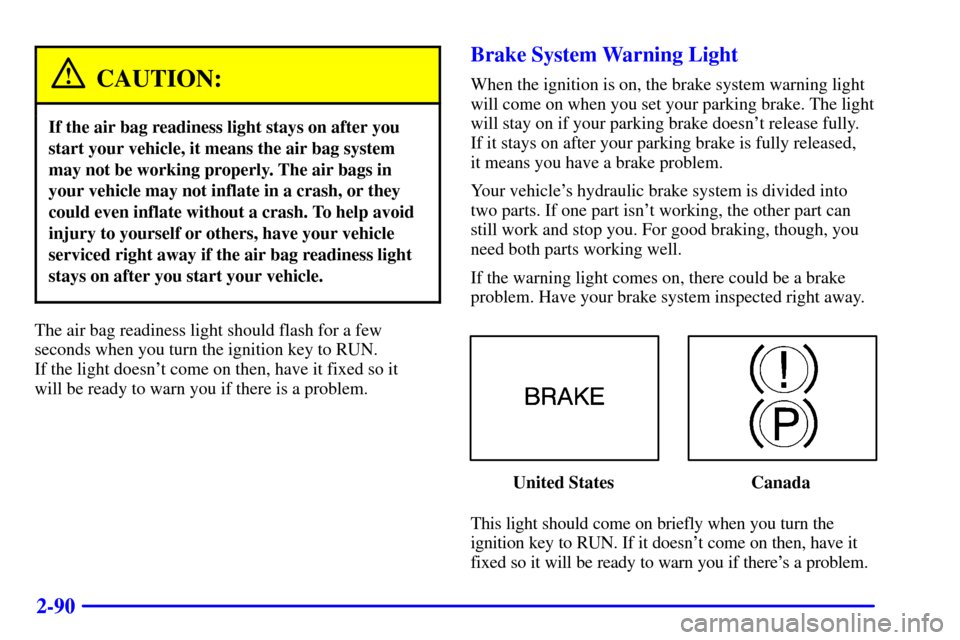
If the warning light comes on, there could be a brake
problem. Have your brake system inspected right away.
United States Canada
This light should come on briefly when you turn the
ignition key to RUN. If it doesn't come on then, have it
fixed so it will be ready to warn you if there's a problem.
Page 384 of 429

6-60
Fuses Usage
SWC
BACKLIGHTSteering Wheel Radio Control
Switches (Illumination)
PCM/PASS
KEY/CLUSTERInstrument Cluster to
PRNDL Indicators
PWR MIRROR Power Remote Control
Mirror Switch
CRUISE Cruise Control Module, Switch and
Release Switch
PCM/CRANK Power Control Module (PCM),
Ignition Crank
PASS KEY PASS
-Key III System
PWR LOCK Body Control Module (BCM)
HTD MIRROR Heated Mirrors
RH T/LP Not Used
RR FOG LP Not Used
CIGAR/DLC Cigarette Lighter and Data Link
Connector (DLC)
T/SIG Turn Signal Switch
PWR
QTR VENTInterior Lamp and Multifunction
Switch (Power Vent Switch)
FRT
WPR/WSHRWindshield Wiper/Washer
Motor and SwitchFuses Usage
HAZARD Turn Signal Switch
RR PWR SCKT Rear Electric Accessory
Plug Housing
DRL Daytime Running Lamps (DRL)
Control Module
LH T/LP Not Used
RR
DEFOG/HTD
MIRRORSRear Window Defogger Relay,
Heated Mirrors
FRT PWR SCKT Front Electric Accessory
Plug Housing
SIR Inflatable Restraint Control Module
HVAC
BLOWERHeater
-A/C Control
MALL/
CLUSTERInstrument Cluster, BCM,
Electronic Level Control (ELC)
Sensor and Relay
STOP LAMP Stoplamp Switch
CLUSTER
BATTModule/Electronic Brake Control
Module/Electronic Brake Traction
Control Module (EBCM/EBTCM)