Page 119 of 429

2-15
Entering Programming Mode
To program features, your vehicle must be in the
programming mode. Follow these steps:
1. The content theft
-deterrent system (if equipped)
must be disarmed. See ªContent Theft
-Deterrent
Systemº in this section.
2. Remove the BCM PRGRM fuse from the instrument
panel fuse block, located to the right of the glove
box. (See ªFuses and Circuit Breakersº in the Index.)
3. Close the driver's door.
4. Turn the ignition key towards you to ACCESSORY.
5. Count the number of chimes you hear. You will hear
two to four chimes depending on the features your
vehicle is equipped with. Refer to the chart
shown previously.
You can now program your choices.
To exit the programming mode, follow the steps listed
under ªExiting Programming Modeº later in
this section.
Delayed Illumination and Exit Lighting
With delayed illumination, the interior lamps will stay
on for about 25 seconds after all the doors and the
liftgate are closed.
With exit lighting, the interior lamps will come on and
stay on for about 25 seconds whenever you remove the
key from the ignition.
To customize these features to your preference,
see ªProgrammable Modesº following.
Programmable Modes
Your vehicle can be programmed to one of the
following modes.
Mode 1: Both Features Off (The interior lamps will turn
on or off at the same instant that a door is opened
or closed.)
Mode 2: Delayed Illumination Only (The interior lamps
will stay on for about 25 seconds after all the doors and
liftgate are closed, or until you lock the doors.)
Mode 3: Exit Lighting Only (The interior lamps will
come on whenever you remove the key from the ignition
and stay on for about 25 seconds, or until you lock
the doors.)
Page 185 of 429

2-81
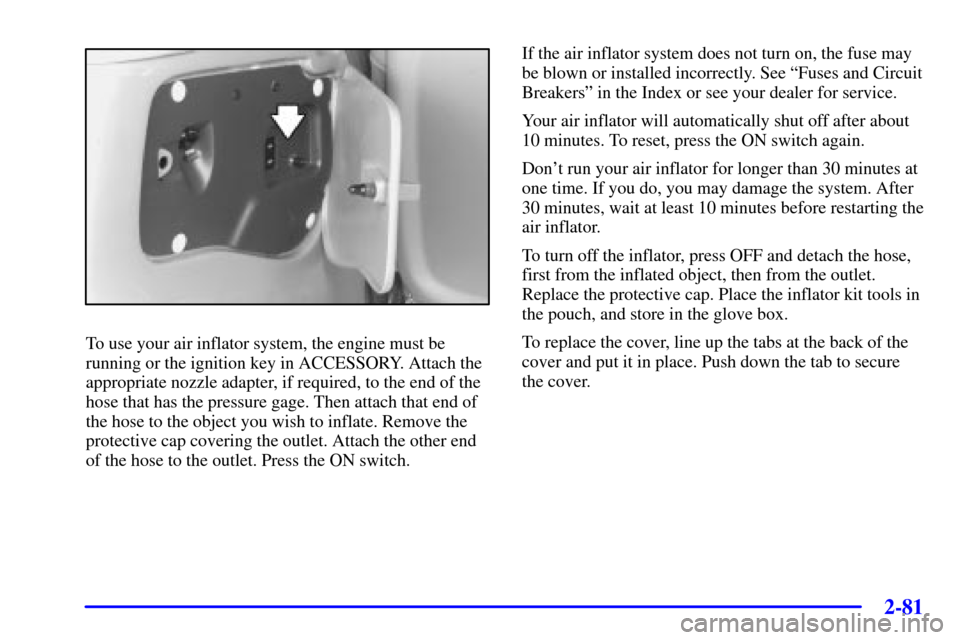
To use your air inflator system, the engine must be
running or the ignition key in ACCESSORY. Attach the
appropriate nozzle adapter, if required, to the end of the
hose that has the pressure gage. Then attach that end of
the hose to the object you wish to inflate. Remove the
protective cap covering the outlet. Attach the other end
of the hose to the outlet. Press the ON switch.If the air inflator system does not turn on, the fuse may
be blown or installed incorrectly. See ªFuses and Circuit
Breakersº in the Index or see your dealer for service.
Your air inflator will automatically shut off after about
10 minutes. To reset, press the ON switch again.
Don't run your air inflator for longer than 30 minutes at
one time. If you do, you may damage the system. After
30 minutes, wait at least 10 minutes before restarting the
air inflator.
To turn off the inflator, press OFF and detach the hose,
first from the inflated object, then from the outlet.
Replace the protective cap. Place the inflator kit tools in
the pouch, and store in the glove box.
To replace the cover, line up the tabs at the back of the
cover and put it in place. Push down the tab to secure
the cover.
Page 189 of 429
2-85
The main components of the instrument panel are:
A. Side Vents
B. Front Vents
C. Turn Signal/Multifunction Lever
D. Hazard Warning Flashers Switch
E. Instrument Panel Cluster
F. Center Vents
G. Audio System
H. Side Vents
I. Lamp Switch
J. Hood Release
K. HornL. Ignition Switch
M. Climate Controls
N. Rear Fan Controls (Option)
O. Accessory Power Outlet
P. Storage Bin
Q. Instrument Panel Switchbank
R. Ashtray and Cigarette Lighter
S. Glove Box
T. Front Vents
U. Instrument Panel Fuse Block
Page 383 of 429
6-59
Instrument Panel Fuse Block
The instrument panel fuse
block is located to the right
of the glove box.
Pull the door open to access the instrument
panel fuse block.
Circuit
BreakersUsage
HEADLAMP DRL Control Module, Headlamp and
Instrument Panel Dimmer Switch
PWR WDO Front Power Windows
PWR HEATED
SEAT/PSD6
-Way Power Seat(s) and Rear Side
Door Actuator Motor
FRT HVAC/
HI BLWRBlower Motor Hi Speed
Relay Module