Page 4 of 429
Table of Contents
Keys and Door Locks
Keyless Entry System (Option)
Automatic Transaxle
Parking Brake
Windows
Tilt Wheel
Turn Signal/Multifunction Lever
Windshield Wipers
Cruise Control (Option)Interior and Exterior Lamps
Mirrors
Storage Compartments
Convenience Net (Option)
Accessory Power Outlets
OnStar® System (If Equipped)
Instrument Panel, Warning Lights and Gages
Driver Information Center (Option) Seats and Seat Controls
Safety BeltsAir Bag Systems
Child Restraints
Section
1
Section
2
Seats and Restraint Systems
Features and Controls
ii
Page 105 of 429

2-
2-1
Section 2 Features and Controls
Here you can learn about the many standard and optional features on your vehicle, and information on starting,
shifting and braking. Also explained are the instrument panel and the warning systems that tell you if everything is
working properly
-- and what to do if you have a problem.
2
-2 Keys
2
-4 Door Locks
2
-7 Keyless Entry System (Option)
2
-14 Multifunction Alarm Locks and
Lighting Choices
2
-24 Sliding Door
2
-26 Power Sliding Door (Option)
2
-32 Liftgate
2
-33 Theft
2
-34 Content Theft-Deterrent (Option)
2
-36 PASS-Key� III
2
-38 New Vehicle ªBreak-Inº
2
-38 Ignition Positions
2
-40 Starting Your Engine
2
-41 Engine Coolant Heater (If Equipped)
2
-42 Automatic Transaxle Operation
2
-47 Parking Brake
2
-48 Shifting Into PARK (P)2
-50 Shifting Out of PARK (P)
2
-51 Parking Over Things That Burn
2
-51 Engine Exhaust
2
-52 Running Your Engine While You're Parked
2
-53 Windows
2
-55 Turn Signal/Multifunction Lever
2
-62 Exterior Lamps
2
-63 Interior Lamps
2
-68 Storage Compartments
2
-79 Accessory Inflator System (Option)
2
-82 Accessory Power Outlets
2
-83 OnStar� System (If Equipped)
2
-84 The Instrument Panel -- Your
Information System
2
-88 Warning Lights, Gages, Messages
and Indicators
2
-96 Message Center
2
-102 Driver Information Center (DIC) (Option)
Page 116 of 429

2-12 Resynchronization
Your remote keyless entry system uses a continually
changing code for increased security. Normally, the
receiver in your vehicle will keep track of this
changing code.
�Loss of synchronization will occur if the transmitter
is activated more than 256 times while out of range
of the vehicle.
�Loss of synchronization will occur after the battery
replacement if the transmitter is immediately activated
more than 16 times while out of range of the vehicle.
If your remote keyless entry transmitter has stopped
working, you may need to resynchronize the transmitter
to the vehicle receiver. To do this, press the LOCK and
UNLOCK buttons together and hold for at least seven
seconds or until the horn sounds if equipped with the
content theft
-deterrent system. Check the
transmitter operation.
Switchbanks
There are two sets of switchbanks located in the front of
the vehicle. The switches will vary with the options that
are on your vehicle. It is useful to become familiar with
them since they are used frequently while operating
the vehicle.
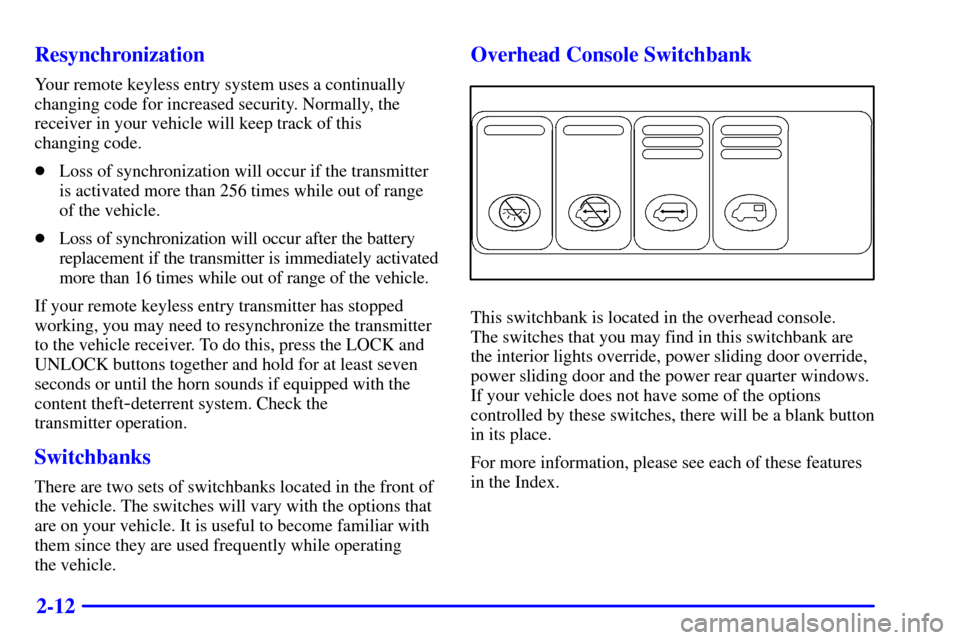
Overhead Console Switchbank
This switchbank is located in the overhead console.
The switches that you may find in this switchbank are
the interior lights override, power sliding door override,
power sliding door and the power rear quarter windows.
If your vehicle does not have some of the options
controlled by these switches, there will be a blank button
in its place.
For more information, please see each of these features
in the Index.
Page 167 of 429

2-63
A light sensor on top of the instrument panel makes the
DRL work, so be sure it isn't covered. The DRL system
will make front parking and turn signal lamps come on
in daylight when:
�The ignition is on,
�the headlamp switch is off, and
�the parking brake is released.
When the DRL are on, only your front parking and turn
signal lamps will be on. Your instrument panel won't be
lit up.
When it's dark enough outside, the exterior lamps will
come on automatically. When it's bright enough outside,
the exterior lamps will go out and the DRL will turn on.
Of course, you may still turn on the headlamps any time
you need to.
To idle your vehicle with the DRL off, set the parking
brake while the ignition is in OFF or LOCK. Then start
the vehicle. The DRL will stay off until you release the
parking brake.
As with any vehicle, you should turn on the regular
headlamp system when you need it.Interior Lamps
Instrument Panel Intensity Control
Turn the control, located below the headlamps switch,
clockwise to increase the brightness of the instrument
panel lights, and counterclockwise to decrease the
brightness. Turn the control all the way
counterclockwise to turn them off.
Interior Lamps Control
Turn the dial all the way clockwise to turn on the
interior lamps, if the interior lamps override switch is
off. Turn the dial counterclockwise to turn the lamps off.
Page 171 of 429

2-67
Battery Saver
Your vehicle has a feature to help prevent you from
draining the battery, in case you accidentally leave the
interior lamps on. If you leave any interior lamps on
while the ignition is in LOCK or OFF, they will
automatically turn off after 10 minutes. The lamps won't
come back on again until you:
�Turn the ignition to RUN or ACCESSORY,
�turn the interior lamps dial all the way clockwise,
then slightly back counterclockwise, or
�open (or close and reopen) a door that is closed.
If your vehicle has less than 15 miles (25 km) on the
odometer, the battery saver will turn off the lamps after
only three minutes.
Mirrors
Inside Day/Night Rearview Mirror
To reduce glare from lights behind you, pull the lever
toward you (to the night position). To return the mirror
to the day position, push the lever away from you.
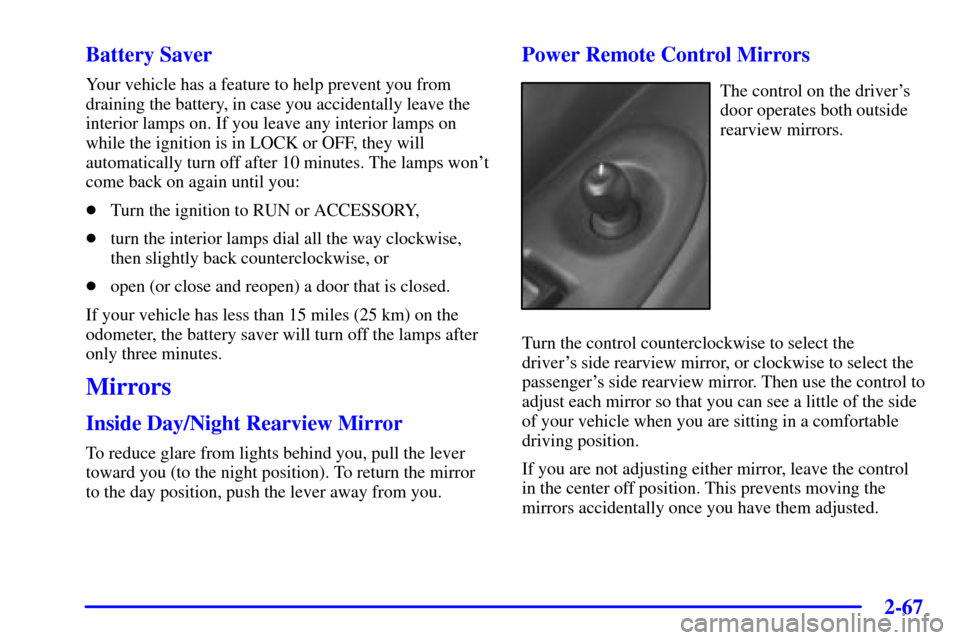
Power Remote Control Mirrors
The control on the driver's
door operates both outside
rearview mirrors.
Turn the control counterclockwise to select the
driver's side rearview mirror, or clockwise to select the
passenger's side rearview mirror. Then use the control to
adjust each mirror so that you can see a little of the side
of your vehicle when you are sitting in a comfortable
driving position.
If you are not adjusting either mirror, leave the control
in the center off position. This prevents moving the
mirrors accidentally once you have them adjusted.
Page 173 of 429
2-69
Compact Overhead Console
The front overhead console includes two reading lamps,
a storage compartment and a switchbank.
The switchbank has switches for the optional power
sliding door, power sliding door override, interior lights
override and the power rear quarter windows
(if equipped). For information on these switches,
see each of these features in the Index.
Overhead Console (If Equipped)
The optional front overhead console has reading lamps,
a switchbank, storage compartments, including one
for your garage door opener and another one for your
sunglasses, and a driver information center (DIC).
The garage door opener and sunglasses storage
compartments are explained on the following pages.
For information on the other features listed,
see of of them in the Index.
Page 384 of 429

6-60
Fuses Usage
SWC
BACKLIGHTSteering Wheel Radio Control
Switches (Illumination)
PCM/PASS
KEY/CLUSTERInstrument Cluster to
PRNDL Indicators
PWR MIRROR Power Remote Control
Mirror Switch
CRUISE Cruise Control Module, Switch and
Release Switch
PCM/CRANK Power Control Module (PCM),
Ignition Crank
PASS KEY PASS
-Key III System
PWR LOCK Body Control Module (BCM)
HTD MIRROR Heated Mirrors
RH T/LP Not Used
RR FOG LP Not Used
CIGAR/DLC Cigarette Lighter and Data Link
Connector (DLC)
T/SIG Turn Signal Switch
PWR
QTR VENTInterior Lamp and Multifunction
Switch (Power Vent Switch)
FRT
WPR/WSHRWindshield Wiper/Washer
Motor and SwitchFuses Usage
HAZARD Turn Signal Switch
RR PWR SCKT Rear Electric Accessory
Plug Housing
DRL Daytime Running Lamps (DRL)
Control Module
LH T/LP Not Used
RR
DEFOG/HTD
MIRRORSRear Window Defogger Relay,
Heated Mirrors
FRT PWR SCKT Front Electric Accessory
Plug Housing
SIR Inflatable Restraint Control Module
HVAC
BLOWERHeater
-A/C Control
MALL/
CLUSTERInstrument Cluster, BCM,
Electronic Level Control (ELC)
Sensor and Relay
STOP LAMP Stoplamp Switch
CLUSTER
BATTModule/Electronic Brake Control
Module/Electronic Brake Traction
Control Module (EBCM/EBTCM)