Page 322 of 421

yellowblue
6-19
2. If your vehicle does not
have a panel under the
center of the instrument
panel, or when the panel
is removed, reach under
the instrument panel
towards the front of the
vehicle and pull
downward on the filter
retaining bracket.
3. Remove the air filter by pulling downward on the
element. Remove the second portion of the air filter
by sliding it towards the rear of the vehicle and then
pulling downward.
4. Install the new filter by reversing the steps listed
previously. Be sure to follow any instructions that
may be included in the replacement filter package.
Refer to the Maintenance Schedule to determine when to
replace the passenger compartment air filter. See
ªScheduled Maintenanceº in the Index.Automatic Transmission Fluid
When to Check and Change
A good time to check your automatic transmission fluid
level is when the engine oil is changed.
Change both the fluid and filter every 50,000 miles
(83 000 km) if the vehicle is mainly driven under one or
more of these conditions:
�In heavy city traffic where the outside temperature
regularly reaches 90�F (32�C) or higher.
�In hilly or mountainous terrain.
�When doing frequent trailer towing.
�Uses such as found in taxi, police or delivery service.
If you do not use your vehicle under any of these
conditions, change the fluid and filter every
100,000 miles (166 000 km).
See ªScheduled Maintenance Servicesº in the Index.
Page 359 of 421

yellowblue
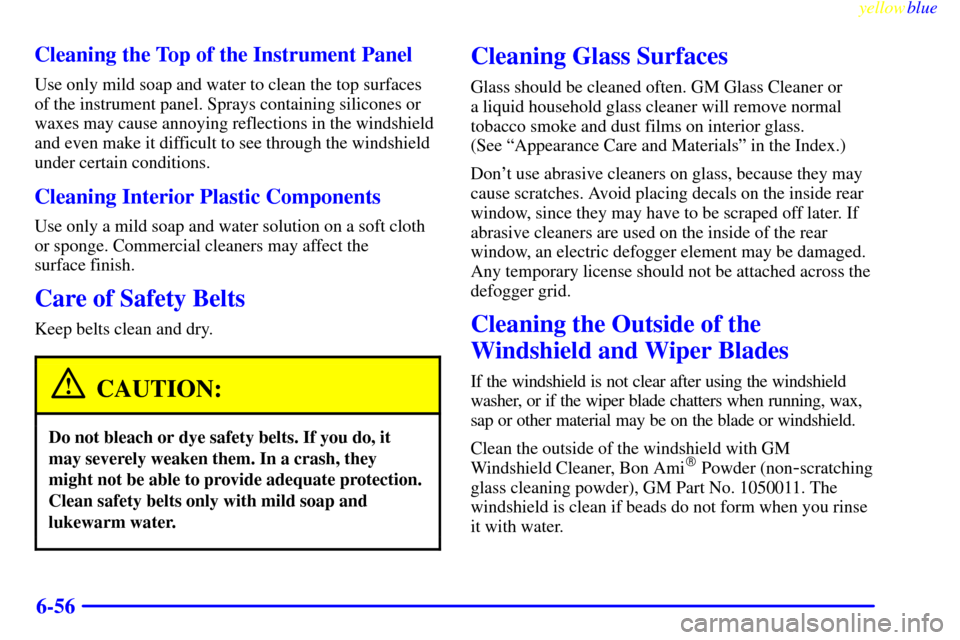
6-56 Cleaning the Top of the Instrument Panel
Use only mild soap and water to clean the top surfaces
of the instrument panel. Sprays containing silicones or
waxes may cause annoying reflections in the windshield
and even make it difficult to see through the windshield
under certain conditions.
Cleaning Interior Plastic Components
Use only a mild soap and water solution on a soft cloth
or sponge. Commercial cleaners may affect the
surface finish.
Care of Safety Belts
Keep belts clean and dry.
CAUTION:
Do not bleach or dye safety belts. If you do, it
may severely weaken them. In a crash, they
might not be able to provide adequate protection.
Clean safety belts only with mild soap and
lukewarm water.
Cleaning Glass Surfaces
Glass should be cleaned often. GM Glass Cleaner or
a liquid household glass cleaner will remove normal
tobacco smoke and dust films on interior glass.
(See ªAppearance Care and Materialsº in the Index.)
Don't use abrasive cleaners on glass, because they may
cause scratches. Avoid placing decals on the inside rear
window, since they may have to be scraped off later. If
abrasive cleaners are used on the inside of the rear
window, an electric defogger element may be damaged.
Any temporary license should not be attached across the
defogger grid.
Cleaning the Outside of the
Windshield and Wiper Blades
If the windshield is not clear after using the windshield
washer, or if the wiper blade chatters when running, wax,
sap or other material may be on the blade or windshield.
Clean the outside of the windshield with GM
Windshield Cleaner, Bon Ami
� Powder (non-scratching
glass cleaning powder), GM Part No. 1050011. The
windshield is clean if beads do not form when you rinse
it with water.
Page 364 of 421

yellowblue
6-61
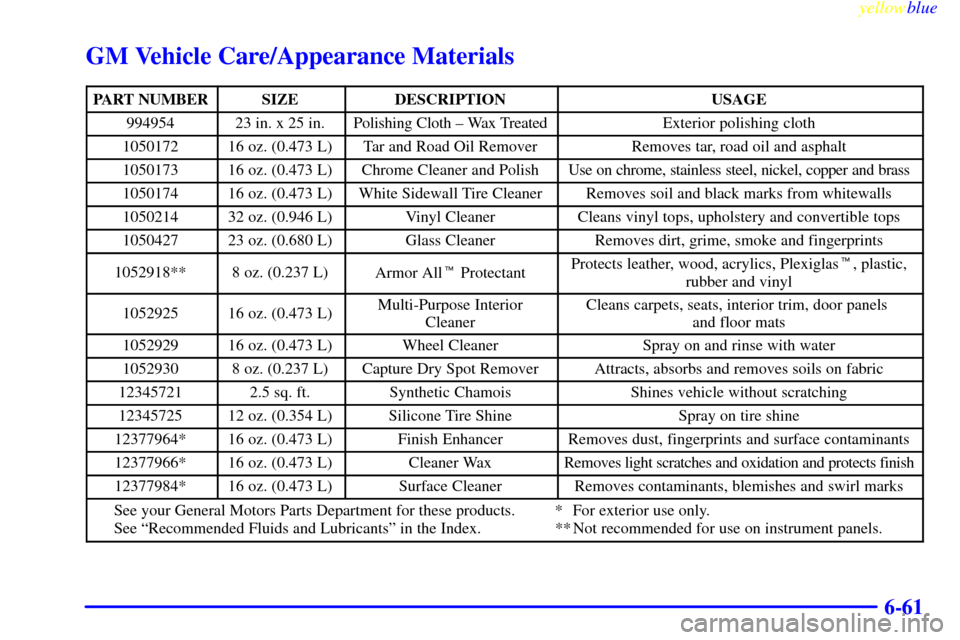
GM Vehicle Care/Appearance Materials
PART NUMBERSIZEDESCRIPTIONUSAGE
99495423 in. x 25 in.Polishing Cloth ± Wax TreatedExterior polishing cloth
105017216 oz. (0.473 L)Tar and Road Oil RemoverRemoves tar, road oil and asphalt
105017316 oz. (0.473 L)Chrome Cleaner and PolishUse on chrome, stainless steel, nickel, copper and brass
105017416 oz. (0.473 L)White Sidewall Tire CleanerRemoves soil and black marks from whitewalls
105021432 oz. (0.946 L)Vinyl CleanerCleans vinyl tops, upholstery and convertible tops
105042723 oz. (0.680 L)Glass CleanerRemoves dirt, grime, smoke and fingerprints
1052918**8 oz. (0.237 L)Armor All� ProtectantProtects leather, wood, acrylics, Plexiglas�, plastic,
rubber and vinyl
105292516 oz. (0.473 L)Multi-Purpose Interior
CleanerCleans carpets, seats, interior trim, door panels
and floor mats
105292916 oz. (0.473 L)Wheel CleanerSpray on and rinse with water
10529308 oz. (0.237 L)Capture Dry Spot RemoverAttracts, absorbs and removes soils on fabric
123457212.5 sq. ft.Synthetic ChamoisShines vehicle without scratching
1234572512 oz. (0.354 L)Silicone Tire ShineSpray on tire shine
12377964*16 oz. (0.473 L)Finish EnhancerRemoves dust, fingerprints and surface contaminants
12377966*16 oz. (0.473 L)Cleaner WaxRemoves light scratches and oxidation and protects finish
12377984*16 oz. (0.473 L)Surface CleanerRemoves contaminants, blemishes and swirl marks
See your General Motors Parts Department for these products. * For exterior use only.
See ªRecommended Fluids and Lubricantsº in the Index. ** Not recommended for use on instrument panels.
Page 365 of 421
yellowblue
6-62
Vehicle Identification Number (VIN)
This is the legal identifier for your vehicle. It appears on
a plate in the front corner of the instrument panel, on the
driver's side. You can see it if you look through the
windshield from outside your vehicle. The VIN also
appears on the Vehicle Certification and Service Parts
labels and the certificates of title and registration.
Engine Identification
The 8th character in your VIN is the engine code. This
code will help you identify your engine, specifications
and replacement parts.
Service Parts Identification Label
You'll find this label on the inside of the glove box. It's
very helpful if you ever need to order parts. On this
label is:
�your VIN,
�the model designation,
�paint information and
�a list of all production options and
special equipment.
Be sure that this label is not removed from the vehicle.
Page 367 of 421
yellowblue
6-64
Instrument Panel Fuse Block
The fuse block access door
is on the driver's side edge
of the instrument panel. Pull
off the cover to access the
fuse block.
You can remove fuses with a fuse extractor which is
mounted to the fuse block access door. To remove fuses
if you don't have a fuse extractor, hold the end of the
fuse between your thumb and index finger and pull
straight out.
You may have spare fuses located behind the fuse block
access door. These can be used to replace a bad fuse.
However, make sure it is of the correct amperage.
NAME Usage
L BODY Retained Accessory Power Relay
LOCK Power Door Locks
DRV UNLOCK Power Door Lock Relay
LOCK Power Door Lock Relay
HVAC 1 Climate Control System
Page 368 of 421
yellowblue
6-65
NAME Usage
CRUISE Cruise Control, Instrument Cluster
IGN 3 Ignition, Power Seats
4WD Four
-Wheel Drive System,
Auxiliary Battery
CRANK Starting System
INT PRK Parking Lamps, Sidemarker
Lamps, Interior Lamps
L DOOR Power Door Lock Relay
BRAKE Anti
-Lock Brake System
RR WIPER Not Used
ILLUM Interior Lamps
SEAT Power Seat Circuit Breaker
TURN Exterior Lamps, Turn Signals,
Hazard Lamps
UNLOCK Power Door Locks
HTR A/C Climate Control SystemNAME Usage
WS WPR Windshield Wipers
IGN 1 Ignition, Instrument Panel
AIR BAG Air Bag
MIR/LOCK Power Mirrors, Power Door Locks
DR LOCK Power Door Locks
PWR WDO Power Window Circuit Breaker
UNLOCK Power Door Lock Relay
IGN 0 PRND321 Display, Odometer,
VCM/PCM
SEO IGN Special Equipment Option,
Ignition, Manual Selectable Ride
SEO ACCY Special Equipment Option
Accessory, Cellular Telephone
RAP #1 Retained Accessory Power Relay
RDO 1 Audio System
RAP #2 Not Used
Page 369 of 421
yellowblue
6-66
Center Instrument Panel Utility Block
The center instrument panel utility block is located
underneath the instrument panel, to the left of the
steering column.
Relay Name Usage
SEO Special Equipment Option
HTD ST Heated Seats
SPARE 4 Not UsedRelay Name Usage
VANITY Headliner Wiring
TRAILER Trailer Brake Wiring
PWR ST Power Seats
SPARE 5 Not Used
CLUTCH Manual Transmission
Clutch Switch
UPF Upfitter
PARK LAMP Parking Lamps
FRT PRK EXPT Not Used
SL RIDE Manual Selectable Ride Switch
SPARE 2 Not Used
RR PRK LP Not Used
RR FOG LP Not Used
SPARE 3 Not Used
INAV PWR Interior Lights Feed
CTSY LP Courtesy Lamps
CEL PHONE Cellular Telephone Wiring
Page 411 of 421

yellowblue
8-3
STEP TWO -- If after contacting a member of
dealership management, it appears your concern cannot be
resolved by the dealership without further help, contact
the Chevrolet Customer Assistance Center by
calling 1-800-222-1020. In Canada, contact GM of Canada
Customer Communication Centre in Oshawa by calling
1-800-263-3777 (English) or 1-800-263-7854 (French).
We encourage you to call the toll-free number in order
to give your inquiry prompt attention. Please have the
following information available to give the Customer
Assistance Representative:
�Vehicle Identification Number (This is available
from the vehicle registration or title, or the plate
at the top left of the instrument panel and visible
through the windshield.)
�Dealership name and location
�Vehicle delivery date and present mileageWhen contacting Chevrolet, please remember that your
concern will likely be resolved at a dealer's facility. That
is why we suggest you follow Step One first if you have
a concern.
STEP THREE -- Both General Motors and your dealer
are committed to making sure you are completely
satisfied with your new vehicle. However, if you
continue to remain unsatisfied after following the
procedure outlined in Steps One and Two, file with the
GM/BBB Auto Line Program to enforce any additional
rights you may have. Canadian owners refer to your
Warranty and Owner Assistance Information booklet
for information on the Canadian Motor Vehicle
Arbitration Plan (CAMVAP).