Page 4 of 359
ii
Table of Contents
Keys and Door Locks
Remote Keyless Entry (RKE) System
Trunk Release
Automatic Transmission
Parking Brake
Windows
Tilt Wheel
Turn Signal/Multifunction Lever
Windshield Wipers
Cruise Control
Interior and Exterior LampsMirrors
Storage Compartments
Convenience Net
Accessory Power Outlets
OnStar® System (If Equipped)
Sunroof (Option)
HomeLink® Transmitter (Option)
Instrument Panel, Warning Lights and Gages
Driver Information Center
Memory and Personalization/Personal Choice Feature Seats and Seat Controls
Safety BeltsAir Bag Systems
Child Restraints
Section
1
Section
2
Seats and Restraint Systems
Features and Controls
Page 11 of 359
ix
For example,
these symbols
are used on an
original battery:
CAUTION
POSSIBLE
INJURY
PROTECT
EYES BY
SHIELDING
CAUSTIC
BATTERY
ACID COULD
CAUSE
BURNS
AVOID
SPARKS OR
FLAMES
SPARK OR
FLAME
COULD
EXPLODE
BATTERY
These symbols
are important
for you and
your passengers
whenever your
vehicle is
driven:
DOOR LOCK
UNLOCK
FASTEN
SEAT
BELTS
POWER
WINDOW
AIR BAG
These symbols
have to do with
your lamps:
MASTER
LIGHTING
SWITCH
TURN
SIGNALS
PARKING
LAMPS
HAZARD
WARNING
FLASHER
DAYTIME
RUNNING
LAMPS
FOG LAMPS
These symbols
are on some of
your controls:
WINDSHIELD
WIPER
WINDSHIELD
WASHER
WINDSHIELD
DEFROSTER
REAR
WINDOW
DEFOGGER
VENTILATING
FAN
These symbols
are used on
warning and
indicator lights:
ENGINE
COOLANT
TEMP
BATTERY
CHARGING
SYSTEM
BRAKE
COOLANT
ENGINE OIL
PRESSURE
ANTI-LOCK
BRAKES
Here are some
other symbols
you may see:
FUSE
LIGHTER
HORN
SPEAKER
FUEL
Vehicle Symbols
These are some of the symbols you may find on your vehicle.
Page 61 of 359

2-
2-1
Section 2 Features and Controls
Here you can learn about the many standard and optional features on your vehicle, and information on starting,
shifting and braking. Also explained are the instrument panel and the warning systems that tell you if everything is
working properly
-- and what to do if you have a problem.
2
-2 Keys
2
-4 Door Locks
2
-7 Remote Keyless Entry (RKE) System
2
-10 Trunk
2
-13 Theft
2
-14 Theft-Deterrent System
2
-16 PASS-Key� III
2
-18 New Vehicle ªBreak-Inº
2
-18 Ignition Positions
2
-19 Starting Your Engine
2
-21 Engine Coolant Heater (If Equipped)
2
-22 Automatic Transaxle Operation
2
-26 Parking Brake
2
-27 Shifting Into PARK (P)
2
-29 Shifting Out of PARK (P)
2
-30 Ultrasonic Rear Parking Assist
(URPA) (Option)
2
-31 Parking Over Things That Burn2
-32 Engine Exhaust
2
-32 Running Your Engine While You're Parked
2
-33 Windows
2
-34 Tilt Wheel
2
-36 Turn Signal/Multifunction Lever
2
-43 Exterior Lamps
2
-48 Interior Lamps
2
-50 Mirrors
2
-54 Storage Compartments
2
-57 Sun Visors
2
-59 Sunroof (Option)
2
-60 HomeLink� Transmitter (Option)
2
-64 The Instrument Panel -- Your
Information System
2
-69 Warning Lights, Gages and Indicators
2
-79 Driver Information Center (DIC)
2
-94 Navigation (Option)
Page 62 of 359
2-2
Keys
CAUTION:
Leaving children in a vehicle with the ignition
key is dangerous for many reasons. A child or
others could be badly injured or even killed.
They could operate the power windows or other
controls or even make the vehicle move. If they
turned the ignition to ACC or ON and moved the
shift lever out of PARK (P), that would release
the parking brake. Don't leave the keys in a
vehicle with children.
Page 83 of 359

2-23
CAUTION:
It is dangerous to get out of your vehicle if the
shift lever is not fully in PARK (P) with the
parking brake firmly set. Your vehicle can roll.
Don't leave your vehicle when the engine is
running unless you have to. If you have left the
engine running, the vehicle can move suddenly.
You or others could be injured. To be sure your
vehicle won't move, even when you're on fairly
level ground, always set your parking brake and
move the shift lever to PARK (P).
See ªShifting Into PARK (P)º in the Index.
If you're pulling a trailer, see ªTowing a Trailerº
in the Index.
Ensure the shift lever is fully in PARK (P) before
starting the engine. Your vehicle has an automatic
transaxle shift lock control system. You have to fully
apply your regular brakes before you can shift from
PARK (P) when the ignition key is in ON. If you cannot
shift the shift lever all the way into PARK (P), ease
pressure on the shift lever and push the shift lever all the
way into PARK (P) as you maintain brake application.
Then move the shift lever into the gear you wish.
See ªShifting Out of PARK (P)º in the Index.
REVERSE (R): Use this gear to back up.
NOTICE:
Shifting to REVERSE (R) while your vehicle is
moving forward could damage your transaxle.
Shift to REVERSE (R) only after your vehicle
has stopped.
Page 86 of 359

2-26 Performance Shift Display (STS Only)
When your vehicle detects a change in driving
conditions, it will automatically initiate the appropriate
performance shift mode. When this occurs, the gear
display on the instrument panel cluster will change to
indicate that the transmission has shifted to a different
gear. For example, the gear display on the cluster may
indicate D, 3, 2, or 1 even though the gearshift lever is
still in OVERDRIVE (D). Once the performance shift
mode ends, the gear display on the cluster will return to
matching the gearshift lever indication.
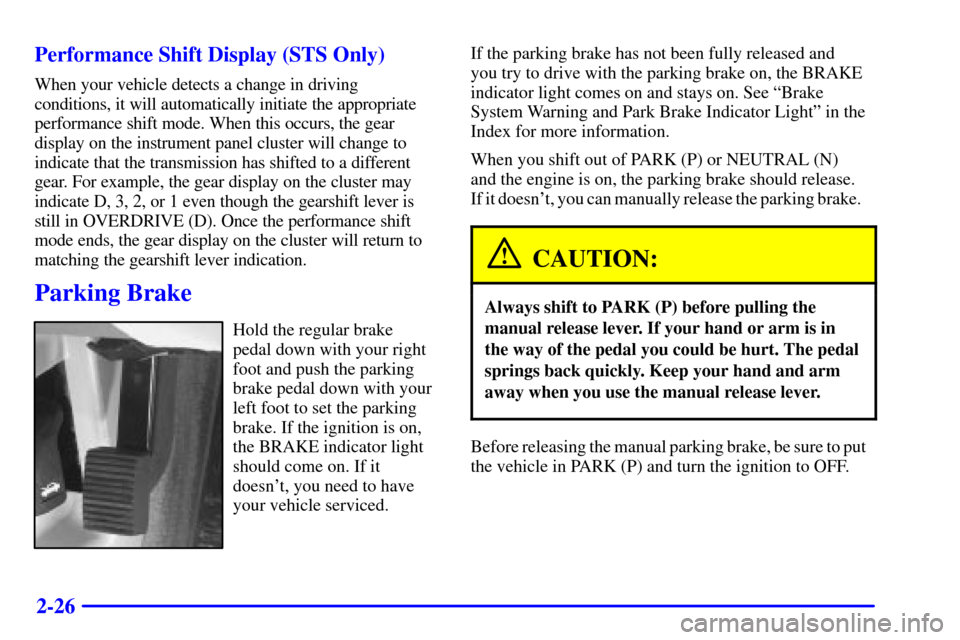
Parking Brake
Hold the regular brake
pedal down with your right
foot and push the parking
brake pedal down with your
left foot to set the parking
brake. If the ignition is on,
the BRAKE indicator light
should come on. If it
doesn't, you need to have
your vehicle serviced.If the parking brake has not been fully released and
you try to drive with the parking brake on, the BRAKE
indicator light comes on and stays on. See ªBrake
System Warning and Park Brake Indicator Lightº in the
Index for more information.
When you shift out of PARK (P) or NEUTRAL (N)
and the engine is on, the parking brake should release.
If it doesn't, you can manually release the parking brake.
CAUTION:
Always shift to PARK (P) before pulling the
manual release lever. If your hand or arm is in
the way of the pedal you could be hurt. The pedal
springs back quickly. Keep your hand and arm
away when you use the manual release lever.
Before releasing the manual parking brake, be sure to put
the vehicle in PARK (P) and turn the ignition to OFF.
Page 87 of 359

2-27
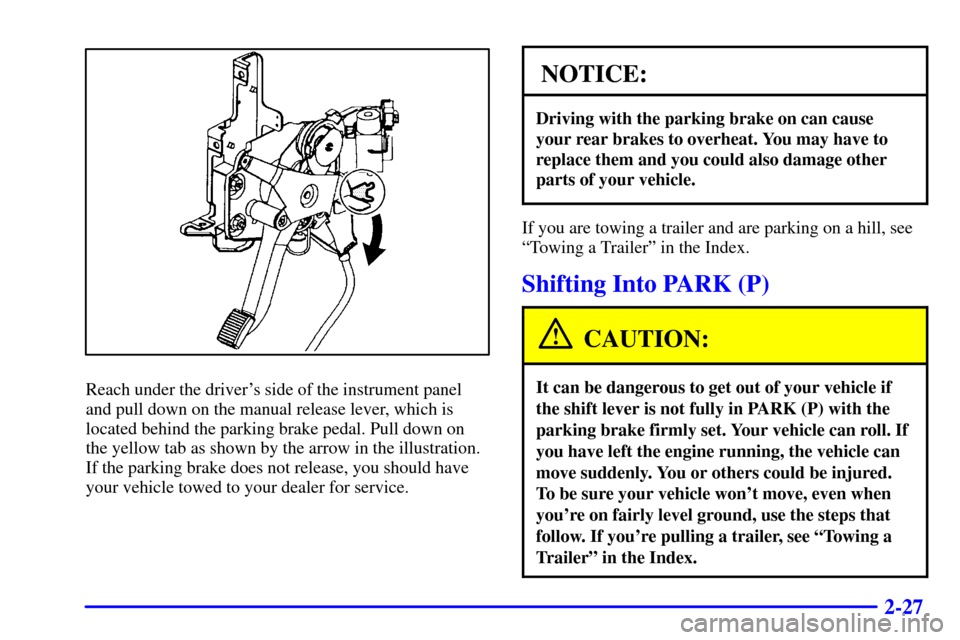
Reach under the driver's side of the instrument panel
and pull down on the manual release lever, which is
located behind the parking brake pedal. Pull down on
the yellow tab as shown by the arrow in the illustration.
If the parking brake does not release, you should have
your vehicle towed to your dealer for service.
NOTICE:
Driving with the parking brake on can cause
your rear brakes to overheat. You may have to
replace them and you could also damage other
parts of your vehicle.
If you are towing a trailer and are parking on a hill, see
ªTowing a Trailerº in the Index.
Shifting Into PARK (P)
CAUTION:
It can be dangerous to get out of your vehicle if
the shift lever is not fully in PARK (P) with the
parking brake firmly set. Your vehicle can roll. If
you have left the engine running, the vehicle can
move suddenly. You or others could be injured.
To be sure your vehicle won't move, even when
you're on fairly level ground, use the steps that
follow. If you're pulling a trailer, see ªTowing a
Trailerº in the Index.
Page 88 of 359

2-28 Console Shift Lever
1. Hold the brake pedal down with your right foot.
2. Move the shift lever into
PARK (P) by pushing
the lever all the way
toward the front of
your vehicle.
3. With your right foot still holding the brake pedal
down, set the parking brake.
4. Turn the ignition key to OFF.
5. Remove the key and take it with you. If you can
leave your vehicle with the ignition key in your
hand, your vehicle is in PARK (P).
Leaving Your Vehicle With the
Engine Running
CAUTION:
It can be dangerous to leave your vehicle with
the engine running. Your vehicle could move
suddenly if the shift lever is not fully in PARK (P)
with the parking brake firmly set. And, if you
leave the vehicle with the engine running, it could
overheat and even catch fire. You or others could
be injured. Don't leave your vehicle with the
engine running unless you have to.
If you have to leave your vehicle with the engine running,
be sure your vehicle is in PARK (P) and your parking brake
is firmly set before you leave it.