Page 112 of 321

2-47
Interior Lamps
Instrument Panel Brightness Control
This control dial is located to the right of the fog lamp
button. As you turn the control dial up, the instrument
panel lights will brighten.
Illuminated Entry
This system turns on the courtesy lamps (dome lamps
and door entry lamps) for about 20 seconds when any of
the following occur:
�if you manually unlock your vehicle with the key,
�if any door is opened,
�if you press the unlock button on the remote keyless
entry transmitter, or
�after the last door on your vehicle is closed.
Illuminated entry immediately ends when your vehicle's
ignition is turned to ON or START.
Rear Reading Lamps
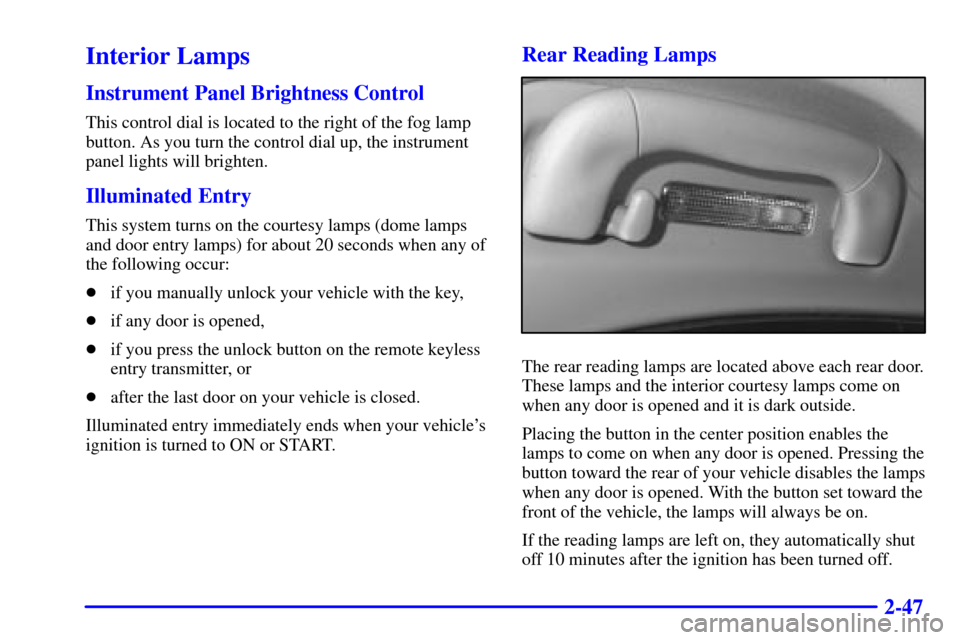
The rear reading lamps are located above each rear door.
These lamps and the interior courtesy lamps come on
when any door is opened and it is dark outside.
Placing the button in the center position enables the
lamps to come on when any door is opened. Pressing the
button toward the rear of your vehicle disables the lamps
when any door is opened. With the button set toward the
front of the vehicle, the lamps will always be on.
If the reading lamps are left on, they automatically shut
off 10 minutes after the ignition has been turned off.
Page 114 of 321
2-49
At night, when the glare is too high, the mirror will
gradually darken to reduce glare (this change may
take a few seconds). The mirror will return to its clear
daytime state when the glare is reduced.
Cleaning Photocells
Use a cotton swab and glass cleaner to clean the front
and rear photocells that make the auto
-dimming
feature work.
Time Delay
This feature prevents rapid changing of the mirror from
the night mode to the day mode as you drive under
lights and through traffic.
Power Remote Control Mirror
Move the rocker switch
to the left to choose the
driver's side mirror or
move the switch to the
right to select the
passenger's side mirror.
To adjust the mirror, push
the four
-way control pad in
the direction you want the
mirror to go. Adjust each
mirror so you can see the
side of your vehicle and the
area behind your vehicle.
Your vehicle's ignition must be in ON (II) for this
feature to work.
Page 116 of 321

2-51 Map Pockets
The map/storage pockets are located on each door as well
as on the passenger's and driver's front seatbacks. Also
located on the driver's door map pocket is a coin holder.
Center Console Storage Area
The front storage area comes with a small storage bin
and a cupholder that pulls out for use. To open the lid
of the storage bin, press and hold the button at the front
edge of the storage lid and lift up.
Rear Seat Cupholder
There is a cupholder for rear seat passengers located in
the rear seat center armrest. To access the cupholder,
fold the armrest down.
Convenience Net
The convenience net is on the floor of the trunk. Put
small loads, like grocery bags, under the net. It can help
keep them from moving around during sharp turns or
quick starts and stops.
The net is not for larger, heavier loads. Store them in the
trunk as far forward as you can. When not using the net,
hook it to the metal loops, securing it to the floor.
Ashtrays and Cigarette Lighter
The front ashtray is located below the radio. Press on
the cover and release to access it. To clean the ashtray,
press the black tab to the right of the tray to release it.
Now pull up on the tray to remove and clean it.
To replace the tray after cleaning, follow these steps.
1. Hold the cover (flap) on top of the tray down so it
is not in the way.
2. Insert the tray downward and forward into the
ashtray holder.
3. Press down on the tray to snap it into place.
To use the rear ashtray, lift the lid.
NOTICE:
Don't put papers or other flammable items
into the ashtrays. Hot cigarettes or other
smoking materials could ignite them, causing
a damaging fire.
Page 117 of 321

2-52
The cigarette lighter is located next to the ashtray.
Press it all the way in and release. It will pop back
out by itself when it's ready to light. You also have a
lighter on the back of the center console near the rear
seat air outlet.
These lighters (receptacles) work at all times, even when
your vehicle's ignition has been turned off.
NOTICE:
Don't hold a cigarette lighter in with your hand
while it is heating. If you do, it won't be able to
back away from the heating element when it's
ready. That can make it overheat, damaging the
lighter and the heating element.
Sun Visors
Illuminated Visor Vanity Mirror
Turn the sunshade down and lift the cover to see the
mirror. Lighting is automatic.
Rear Sunshade (Option)
The power rear sunshade helps reduce the amount of
heat and light from the sun entering through the rear
window. The sunshade increases the comfort level of the
rear seat passengers as well as keeping your vehicle a
little cooler when it's parked in a sunny area.
This button is located on
the instrument panel, near
the radio. To use, press the
button. The button returns
to its original position
when released. The rear
sunshade automatically
raises. To lower the
sunshade, press the
button again.
Page 144 of 321
2-79 Automatic Transmission Warning Light
(If Equipped)
This light comes on briefly
when the ignition is turned
on. If the light remains on
or lights up while driving,
there may be a fault in the
automatic transmission.
Have your vehicle serviced.
Leveling Indicator Light
This light comes on steady
when the rear load level in
your vehicle changes.Do not drive your vehicle when this light is on. The rear
of your vehicle is too low and part of the body or the
rear axle may be damaged when driving over bumpy
roads. When the light goes out, leveling is complete.
This procedure is automatic
-- you don't have
to do anything.
If the light comes on flashing, there may be a problem
with the leveling system. You should reduce your
vehicle speed and have your vehicle serviced soon.
Brake Pad Wear Indicator Light
This light comes on when
the brake pads on your
vehicle have significantly
worn. The pads will have to
be replaced, so have your
vehicle serviced soon.
Page 154 of 321

3-10
PUSHBUTTONS: The six numbered pushbuttons let
you return to your favorite stations. You can set up to
18 stations (six AM, six FM1 and six FM2). Just:
1. Turn the radio on.
2. Press BAND to select AM, FM1 or FM2.
3. Tune in the desired station.
4. Press and hold one of the six numbered buttons
for more than two seconds until you hear a beep.
Whenever you press that numbered button for less
than two seconds, the station you set will return.
5. Repeat the steps for each pushbutton.
When battery power is removed and later applied, you
will not have to reset your radio presets because the
radio remembers them.
PRESET SCAN: Press and hold SCAN for two to
three seconds until PRESET SCAN appears on the
display to listen to each of your preset stations for
a few seconds (factory presets which have not been
reprogrammed with your stations will be ignored).
The radio will go to the first preset station stored on
your pushbuttons, stop for a few seconds, then go on
to the next preset station. Press SCAN again to stop
scanning. If a preset station has weak reception,
the radio will not stop at the preset station.Setting the Tone
BASS: Press this knob lightly so it extends. Turn the
knob clockwise to increase and counterclockwise to
decrease bass.
TREB: Press this knob lightly so it extends. Turn the
knob clockwise to increase and counterclockwise to
decrease treble. If a station is weak or noisy, you may
want to decrease the treble.
Push these knobs back into their stored positions when
you're not using them.
Adjusting the Speakers
BAL: Press this knob lightly so it extends. Turn the
knob clockwise to adjust sound to the right speakers
and counterclockwise for the left speakers. The middle
position balances the sound between the speakers.
FADE: Press this knob lightly so it extends. Turn the
knob clockwise to adjust the sound to the front speakers
and counterclockwise for the rear speakers. The middle
position balances the sound between the speakers.
Push these knobs back into their stored positions when
you're not using them.
Page 184 of 321

4-9
Remember: Anti-lock doesn't change the time you need
to get your foot up to the brake pedal or always decrease
stopping distance. If you get too close to the vehicle in
front of you, you won't have time to apply your brakes
if that vehicle suddenly slows or stops. Always leave
enough room up ahead to stop, even though you have
anti
-lock brakes.
Using Anti
-Lock
Don't pump the brakes. Just hold the brake pedal down
firmly and let anti
-lock work for you. You may hear the
anti
-lock pump or motor operate, and feel the brake
pedal pulsate, but this is normal.
Braking in Emergencies
With anti-lock, you can steer and brake at the same
time. In many emergencies, steering can help you more
than even the very best braking.
Traction Control System
Your vehicle has a traction control system that limits wheel
spin. This is especially useful in slippery road conditions.
The system operates only if it senses that one or both of
the rear wheels are spinning or beginning to lose traction.
When this happens, the system brakes the spinning wheel
and/or reduces engine power to limit wheel spin.
You may feel or hear the system working, but
this is normal.
This warning light will
come on to let you know if
there's a problem with your
traction control system.
See ªTraction Control System Warning Lightº in the
Index. When this warning light comes on and stays
on, the system will not limit wheel spin. Adjust your
driving accordingly.
When the system is limiting wheel spin, the Traction
Control System warning light will be blinking.
Page 215 of 321
5-2
Hazard Warning Flashers
Your hazard warning flashers let you warn others. They
also let police know you have a problem. Your front and
rear turn signal lamps will flash on and off.
Pressing this button on the
center console makes the
front and rear turn signal
lamps flash on and off. The
indicator light on the button
also flashes. Pressing the
button again turns the
flashers off. The flashers
work regardless of the
key position.
When the hazard warning flashers are on, the turn
signals won't work since they are already flashing.
Other Warning Devices
If you carry reflective triangles, you can set one up
at the side of the road about 300 feet (100 m) behind
your vehicle.