Page 4 of 321
ii
Table of Contents
Keys and Door Locks
Remote Keyless Entry (RKE) System
Trunk Release
Automatic Transmission
Windows
Tilt Wheel
Turn Signal/Multifunction Lever
Windshield Wipers
Cruise ControlInterior and Exterior Lamps
Mirrors
Storage Compartments
Convenience Net
Accessory Power Outlet
OnStar® System (If Equipped)
Sunroof (Option)
HomeLink® Transmitter (Option)
Instrument Panel, Warning Lights and Gages Seats and Seat Controls
Safety BeltsAir Bag Systems
Child Restraints
Section
1
Section
2
Seats and Restraint Systems
Features and Controls
Page 11 of 321
ix
For example,
these symbols
are used on an
original battery:
CAUTION
POSSIBLE
INJURY
PROTECT
EYES BY
SHIELDING
CAUSTIC
BATTERY
ACID COULD
CAUSE
BURNS
AVOID
SPARKS OR
FLAMES
SPARK OR
FLAME
COULD
EXPLODE
BATTERY
These symbols
are important
for you and
your passengers
whenever your
vehicle is
driven:
DOOR LOCK
UNLOCK
FASTEN
SEAT
BELTS
POWER
WINDOW
AIR BAG
These symbols
have to do with
your lamps:
MASTER
LIGHTING
SWITCH
TURN
SIGNALS
PARKING
LAMPS
HAZARD
WARNING
FLASHER
DAYTIME
RUNNING
LAMPS
FOG LAMPS
These symbols
are on some of
your controls:
WINDSHIELD
WIPER
WINDSHIELD
WASHER
WINDSHIELD
DEFROSTER
REAR
WINDOW
DEFOGGER
VENTILATING
FAN
These symbols
are used on
warning and
indicator lights:
ENGINE
COOLANT
TEMP
BATTERY
CHARGING
SYSTEM
BRAKE
COOLANT
ENGINE OIL
PRESSURE
ANTI-LOCK
BRAKES
Here are some
other symbols
you may see:
FUSE
LIGHTER
HORN
SPEAKER
FUEL
Vehicle Symbols
These are some of the symbols you may find on your vehicle.
Page 66 of 321

2-
2-1
Section 2 Features and Controls
Here you can learn about the many standard and optional features on your vehicle, and information on starting,
shifting and braking. Also explained are the instrument panel and the warning systems that tell you if everything is
working properly
-- and what to do if you have a problem.
2
- 2 Keys
2
- 4 Door Locks
2
- 7 Remote Keyless Entry System (RKE)
2
- 11 Trunk
2
- 12 Theft
2
- 13 Theft-Deterrent System (Option)
2
- 15 Immobilizer
2
- 16 New VehicleªBreak-Inº
2
- 16 Ignition Positions
2
- 18 Starting Your Engine
2
- 19 Engine Coolant Heater (If Equipped)
2
- 21 Automatic Transmission Operation
2
- 26 Parking Brake
2
- 27 Shifting Into PARK (P)
2
- 29 Shifting Out of PARK (P)
2
- 30 Parking Over Things that Burn2
- 31 Engine Exhaust
2
- 31 Running Your Engine While You're Parked
2
- 32 Windows
2
- 34 Horn
2
- 34 Tilt Wheel
2
- 35 Turn Signal/Multifunction Lever
2
- 41 Exterior Lamps
2
- 47 Interior Lamps
2
- 48 Mirrors
2
- 50 Storage Compartments
2
- 53 OnStar� System (If Equipped)
2
- 54 Sunroof (Option)
2
- 58 HomeLink� Transmitter (If Equipped)
2
- 62 The Instrument Panel -- Your
Information System
2
- 66 Warning Lights, Gages and Indicators
Page 106 of 321

2-41
Passing Another Vehicle While Using Cruise Control
Use the accelerator pedal to increase your speed. When
you take your foot off the pedal, your vehicle will slow
down to the cruise control speed you set earlier.
Using Cruise Control on Hills
How well the cruise control will work on hills depends
upon your speed, load and the steepness of the hills.
When going up steep hills, you may have to step on the
accelerator pedal to maintain your speed. When going
downhill, you may have to brake or shift to a lower gear
to keep your speed down. Of course, applying the brake
takes you out of cruise control. Many drivers find this to
be too much trouble and don't use cruise control on
steep hills.
Ending Cruise Control
There are two ways to end cruise control:
�Step lightly on the brake pedal.
�Press the OFF button at the end of the cruise lever.
Erasing Speed Memory
The cruise control set speed memory is erased when you
turn off the cruise control or the ignition.Exterior Lamps
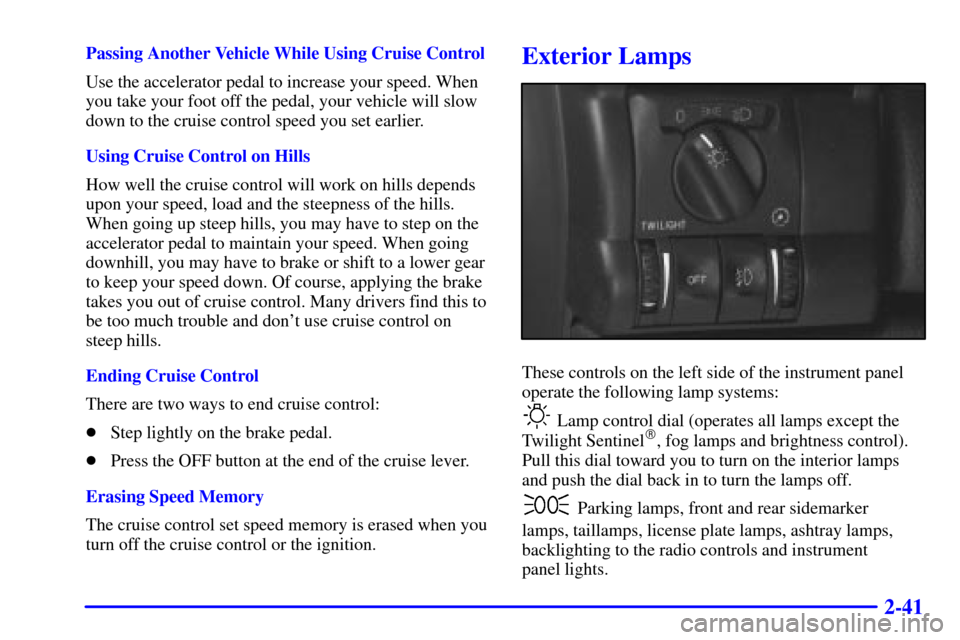
These controls on the left side of the instrument panel
operate the following lamp systems:
Lamp control dial (operates all lamps except the
Twilight Sentinel�, fog lamps and brightness control).
Pull this dial toward you to turn on the interior lamps
and push the dial back in to turn the lamps off.
Parking lamps, front and rear sidemarker
lamps, taillamps, license plate lamps, ashtray lamps,
backlighting to the radio controls and instrument
panel lights.
Page 107 of 321

2-42
Headlamps.
Fog lamps.
Twilight Sentinel.
Turns the Twilight Sentinel system off.
Instrument panel brightness control.
Turn the lamp control dial clockwise (to the first
position) to turn on the parking lamps, front and rear
sidemarker lamps, taillamps, license plate lamps, ashtray
lamps, instrument panel lights and backlighting to the
center console controls. Turn the lamp control dial all
the way clockwise (to the second position) to turn on
the low
-beam headlamps.
Turn the lamp control dial counterclockwise to turn
the lamps off.
Headlamps
Turn the lamp control dial all the way to the right to turn
on the low
-beam headlamps.
To turn on the high
-beam headlamps, the low-beam
headlamps must already be on. Push the turn signal lever on
the left side of the steering wheel away from you to engage
the high
-beam headlamps. Pull the lever toward you to
return to the low
-beam headlamps. For more information,
see ªHeadlamp High/Low Beamº in the Index.
Turn the lamp control dial all the way to the left to turn
the headlamps off.
Please note that if the headlamps are activated while
driving and then you turn your vehicle's ignition off
while the lamp dial is still turned on, the headlamps will
turn off. If, however, you open the driver's door while
the lamp dial is still turned on, a warning chime will
sound reminding you to turn the lamp control dial to
OFF. This will stop the warning chime from sounding.
(If you want the headlamps to remain on, you must
manually turn the lamp control dial off and then back
on to the headlamp position. The headlamps will stay
on until manually turned off again.)
Page 112 of 321

2-47
Interior Lamps
Instrument Panel Brightness Control
This control dial is located to the right of the fog lamp
button. As you turn the control dial up, the instrument
panel lights will brighten.
Illuminated Entry
This system turns on the courtesy lamps (dome lamps
and door entry lamps) for about 20 seconds when any of
the following occur:
�if you manually unlock your vehicle with the key,
�if any door is opened,
�if you press the unlock button on the remote keyless
entry transmitter, or
�after the last door on your vehicle is closed.
Illuminated entry immediately ends when your vehicle's
ignition is turned to ON or START.
Rear Reading Lamps
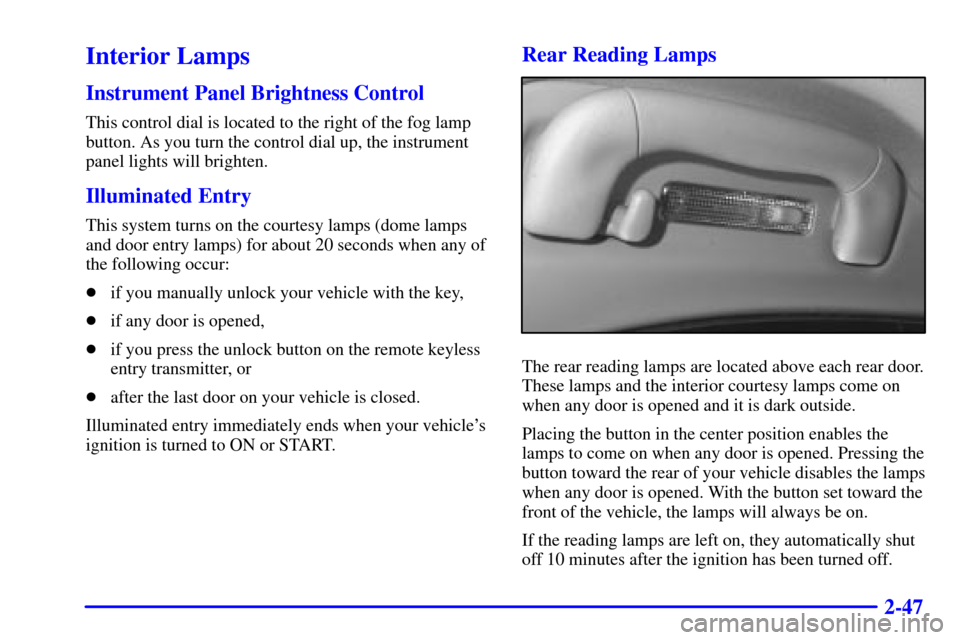
The rear reading lamps are located above each rear door.
These lamps and the interior courtesy lamps come on
when any door is opened and it is dark outside.
Placing the button in the center position enables the
lamps to come on when any door is opened. Pressing the
button toward the rear of your vehicle disables the lamps
when any door is opened. With the button set toward the
front of the vehicle, the lamps will always be on.
If the reading lamps are left on, they automatically shut
off 10 minutes after the ignition has been turned off.
Page 114 of 321
2-49
At night, when the glare is too high, the mirror will
gradually darken to reduce glare (this change may
take a few seconds). The mirror will return to its clear
daytime state when the glare is reduced.
Cleaning Photocells
Use a cotton swab and glass cleaner to clean the front
and rear photocells that make the auto
-dimming
feature work.
Time Delay
This feature prevents rapid changing of the mirror from
the night mode to the day mode as you drive under
lights and through traffic.
Power Remote Control Mirror
Move the rocker switch
to the left to choose the
driver's side mirror or
move the switch to the
right to select the
passenger's side mirror.
To adjust the mirror, push
the four
-way control pad in
the direction you want the
mirror to go. Adjust each
mirror so you can see the
side of your vehicle and the
area behind your vehicle.
Your vehicle's ignition must be in ON (II) for this
feature to work.
Page 131 of 321

2-66
Warning Lights, Gages and Indicators
This part describes the warning lights and gages that
may be on your vehicle. The pictures will help you
locate them.
Warning lights and gages can signal that something is
wrong before it becomes serious enough to cause an
expensive repair or replacement. Paying attention to
your warning lights and gages could also save you
or others from injury.
Warning lights come on when there may be or is a
problem with one of your vehicle's functions. As you
will see in the details on the next few pages, some
warning lights come on briefly when you start the
engine just to let you know they're working. If you are
familiar with this section, you should not be alarmed
when this happens.
Gages can indicate when there may be or is a problem
with one of your vehicle's functions. Often gages and
warning lights work together to let you know when
there's a problem with your vehicle.When one of the warning lights comes on and stays on
when you are driving, or when one of the gages shows
there may be a problem, check the section that tells you
what to do about it. Please follow this manual's advice.
Waiting to do repairs can be costly
-- and even
dangerous. So please get to know your warning lights
and gages. They're a big help.
Safety Belt Reminder Light
When the key is turned to ON or START, a tone will
come on for about eight seconds to remind people to
fasten their safety belts, unless the driver's safety belt is
already buckled.
The safety belt light will
also come on and stay on
for about four seconds,
then it will flash for about
60 seconds.
If the driver's belt is already buckled, neither the tone
nor the light will come on.