2000 BMW 540I SEDAN seats
[x] Cancel search: seatsPage 10 of 217
Contents
Overview
Controls and features
Cockpit16
Instrument cluster18
Indicator and warning lamps22
Multifunction steering wheel
(MFL)25
Hazard warning flashers27
Warning triangle 27
First-aid kit 27
Refueling28
Fuel specifications29
Tire inflation pressure29
Locks and security systems:
Keys34
Electronic vehicle
immobilizer35
Central locking system36
Opening and closing Ð from the
outside36
With the key 36
Opening and closing Ð from the
inside40
Luggage compartment lid/
Tailgate41
Luggage compartment44
Alarm system45
Electric power windows47
Sliding/Tilt sunroof 48
Adjustments:
Seats 50
Steering wheel 54
Mirrors54
Seat, mirror and steering wheel
memory56
Car Memory, Key Memory58
Passenger safety systems:
Safety belts59
Airbags60
Child restraints 64
Child seat security66
Child-safety locks66
Driving:
Steering/Ignition lock67
Starting the engine68
Switching off the engine69
Parking brake69
Manual transmission70
Automatic transmission 71
Automatic transmission with
Steptronic 74
Indicator/Headlamp flasher77
Wiper/Washer system77
Rear window defroster79
Cruise control80
Everything under control:
Odometer, outside temperature
display82
Tachometer83
Energy control83
Fuel gauge83
Temperature gauge84
Service Interval Display84
Check Control85
Onboard computer88
Technology for safety and
convenience:
Park Distance Control (PDC) 90
Automatic Stability Control plus
Traction (ASC+T)/Dynamic
Stability Control (DSC) 91
Tire Pressure Control (RDC) 92
Page 32 of 217
32n
Locks and security systems:
Keys34
Electronic vehicle
immobilizer35
Central locking system36
Opening and closing
Ð from the outside36
With the key36
Opening and closing
Ð from the inside40
Luggage compartment lid/
Tailgate41
Luggage compartment44
Alarm system45
Electric power windows47
Sliding/Tilt sunroof48
Adjustments:
Seats50
Steering wheel54
Mirrors54
Seat, mirror and steering wheel
memory56
Car Memory, Key Memory58
Passenger safety systems:
Safety belts59
Airbags60
Child restraints64
Child seat security66
Child-safety locks66Driving:
Steering/Ignition lock67
Starting the engine68
Switching off the engine69
Parking brake69
Manual transmission70
Automatic transmission71
Automatic transmission with
Steptronic74
Indicator/Headlamp flasher77
Wiper/Washer system77
Rear window defroster79
Cruise control80
Everything under control:
Odometer, outside temperature
display82
Tachometer83
Energy control83
Fuel gauge83
Temperature gauge84
Service Interval Display84
Check Control85
Onboard computer88
Technology for safety and
convenience:
Park Distance Control (PDC)90
Automatic Stability Control plus
Traction (ASC+T)/Dynamic
Stability Control (DSC)91
Tire Pressure Control (RDC)92
Page 48 of 217
48n
Electric power windows Sliding/Tilt sunroof
*
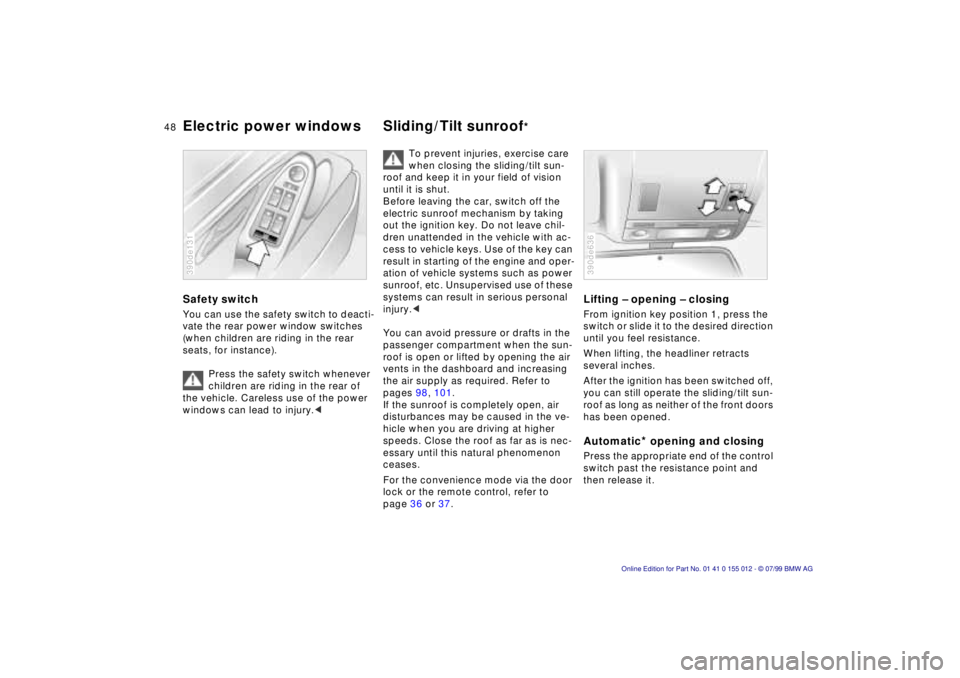
Safety switchYou can use the safety switch to deacti-
vate the rear power window switches
(when children are riding in the rear
seats, for instance).
Press the safety switch whenever
children are riding in the rear of
the vehicle. Careless use of the power
windows can lead to injury.< 390de131
To prevent injuries, exercise care
when closing the sliding/tilt sun-
roof and keep it in your field of vision
until it is shut.
Before leaving the car, switch off the
electric sunroof mechanism by taking
out the ignition key. Do not leave chil-
dren unattended in the vehicle with ac-
cess to vehicle keys. Use of the key can
result in starting of the engine and oper-
ation of vehicle systems such as power
sunroof, etc. Unsupervised use of these
systems can result in serious personal
injury.<
You can avoid pressure or drafts in the
passenger compartment when the sun-
roof is open or lifted by opening the air
vents in the dashboard and increasing
the air supply as required. Refer to
pages 98, 101.
If the sunroof is completely open, air
disturbances may be caused in the ve-
hicle when you are driving at higher
speeds. Close the roof as far as is nec-
essary until this natural phenomenon
ceases.
For the convenience mode via the door
lock or the remote control, refer to
page 36 or 37.
Lifting Ð opening Ð closingFrom ignition key position 1, press the
switch or slide it to the desired direction
until you feel resistance.
When lifting, the headliner retracts
several inches.
After the ignition has been switched off,
you can still operate the sliding/tilt sun-
roof as long as neither of the front doors
has been opened.Automatic
* opening and closing
Press the appropriate end of the control
switch past the resistance point and
then release it. 390de636
Page 50 of 217
50n
For maximum safety, please comply
with the following instructions when ad-
justing a seat:
Never try to adjust your seat while
operating the vehicle. The seat
could respond with unexpected move-
ment, and the ensuing loss of vehicle
control could lead to an accident. Wear
the safety belt firmly against your body
at all times. In the event of a frontal im-
pact, a loose lap belt could slide over
your hips, leading to abdominal injury.
In addition, the safety belt's restraint ef-
fectiveness is reduced if the belt is
worn loosely.
Never ride with the backrest reclined to
an extreme horizontal angle (especially
important for front passengers to re-
member). Keep the backrest relatively
upright to minimize the risk of "sliding
under" the safety belt and sustaining in-
jury in an accident.
Do not slide the seats to the rear when
the vehicle is at an extreme angle (on
garage ramps or steep slopes, for in-
stance), to prevent the shoulder strap's
automatic height adjustment mecha-
nism from disengaging.<
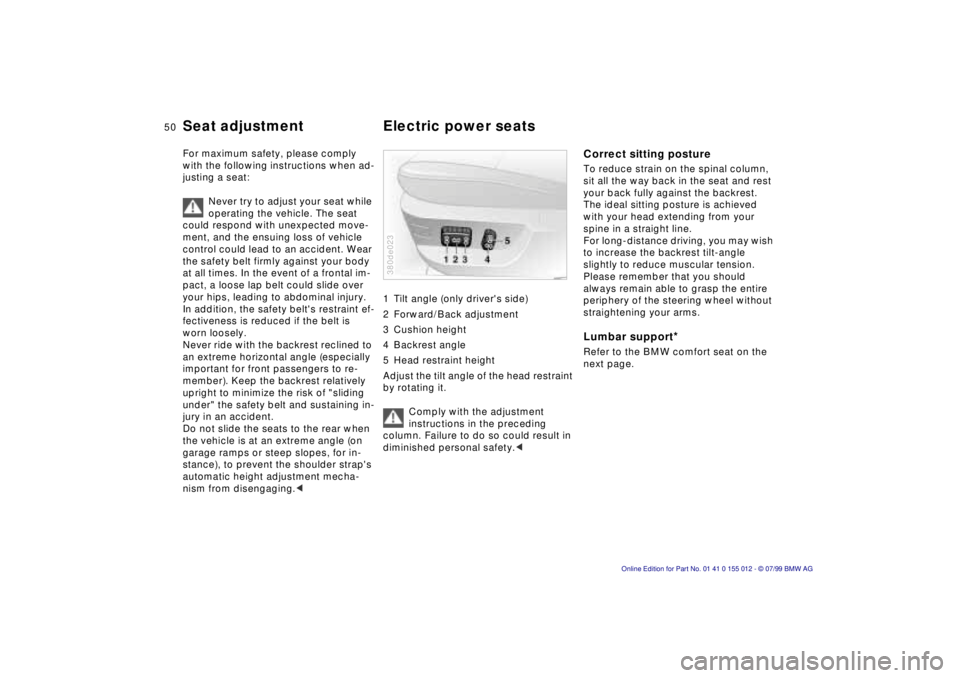
1 Tilt angle (only driver's side)
2 Forward/Back adjustment
3 Cushion height
4 Backrest angle
5 Head restraint height
Adjust the tilt angle of the head restraint
by rotating it.
Comply with the adjustment
instructions in the preceding
column. Failure to do so could result in
diminished personal safety.< 380de023
Correct sitting postureTo reduce strain on the spinal column,
sit all the way back in the seat and rest
your back fully against the backrest.
The ideal sitting posture is achieved
with your head extending from your
spine in a straight line.
For long-distance driving, you may wish
to increase the backrest tilt-angle
slightly to reduce muscular tension.
Please remember that you should
always remain able to grasp the entire
periphery of the steering wheel without
straightening your arms.Lumbar support
*
Refer to the BMW comfort seat on the
next page.
Seat adjustment Electric power seats
Page 108 of 217
108n
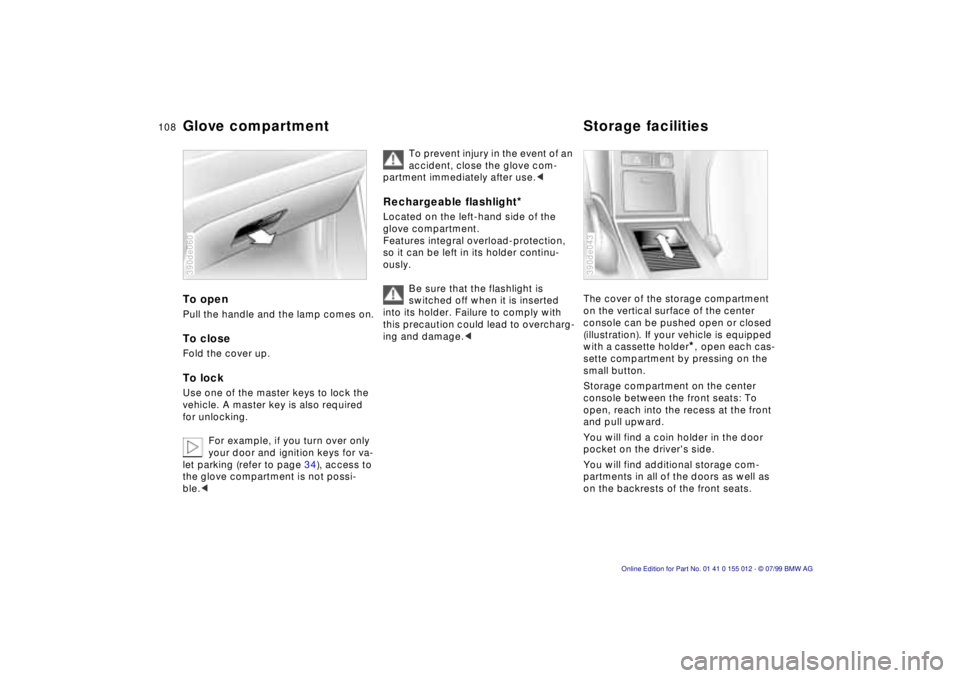
Glove compartment Storage facilitiesTo openPull the handle and the lamp comes on.To closeFold the cover up.To lockUse one of the master keys to lock the
vehicle. A master key is also required
for unlocking.
For example, if you turn over only
your door and ignition keys for va-
let parking (refer to page 34), access to
the glove compartment is not possi-
ble.< 390de060
To prevent injury in the event of an
accident, close the glove com-
partment immediately after use.<
Rechargeable flashlight
*
Located on the left-hand side of the
glove compartment.
Features integral overload-protection,
so it can be left in its holder continu-
ously.
Be sure that the flashlight is
switched off when it is inserted
into its holder. Failure to comply with
this precaution could lead to overcharg-
ing and damage.<
The cover of the storage compartment
on the vertical surface of the center
console can be pushed open or closed
(illustration). If your vehicle is equipped
with a cassette holder
*, open each cas-
sette compartment by pressing on the
small button.
Storage compartment on the center
console between the front seats: To
open, reach into the recess at the front
and pull upward.
You will find a coin holder in the door
pocket on the driver's side.
You will find additional storage com-
partments in all of the doors as well as
on the backrests of the front seats.
390de043
Page 114 of 217
114n
Ski bag
*
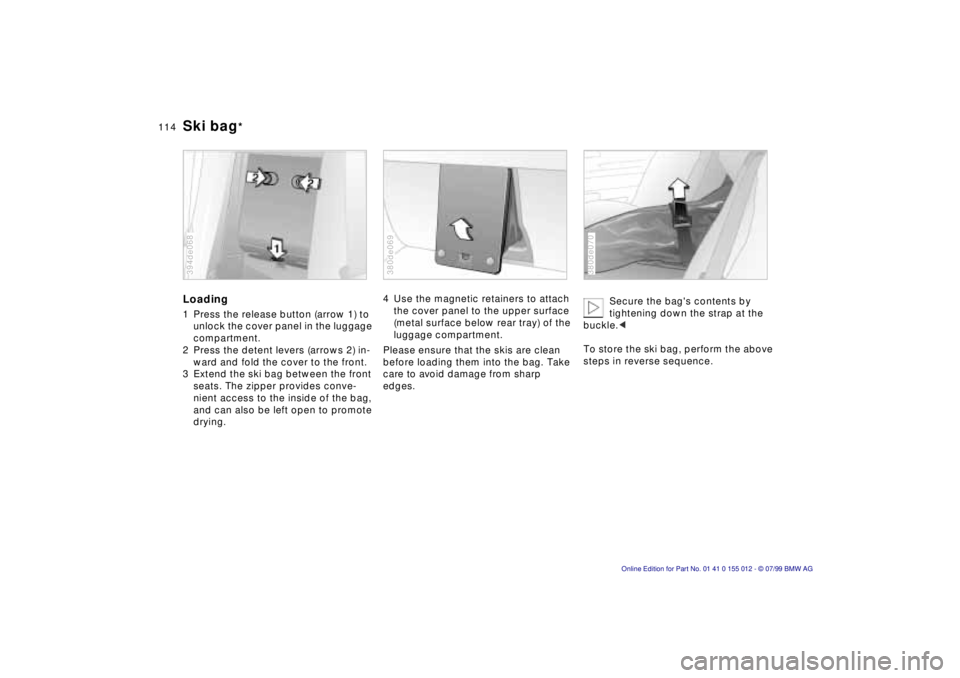
Loading1 Press the release button (arrow 1) to
unlock the cover panel in the luggage
compartment.
2 Press the detent levers (arrows 2) in-
ward and fold the cover to the front.
3 Extend the ski bag between the front
seats. The zipper provides conve-
nient access to the inside of the bag,
and can also be left open to promote
drying.394de068
4 Use the magnetic retainers to attach
the cover panel to the upper surface
(metal surface below rear tray) of the
luggage compartment.
Please ensure that the skis are clean
before loading them into the bag. Take
care to avoid damage from sharp
edges.380de069
Secure the bag's contents by
tightening down the strap at the
buckle.<
To store the ski bag, perform the above
steps in reverse sequence.
380de070
Page 116 of 217
116n
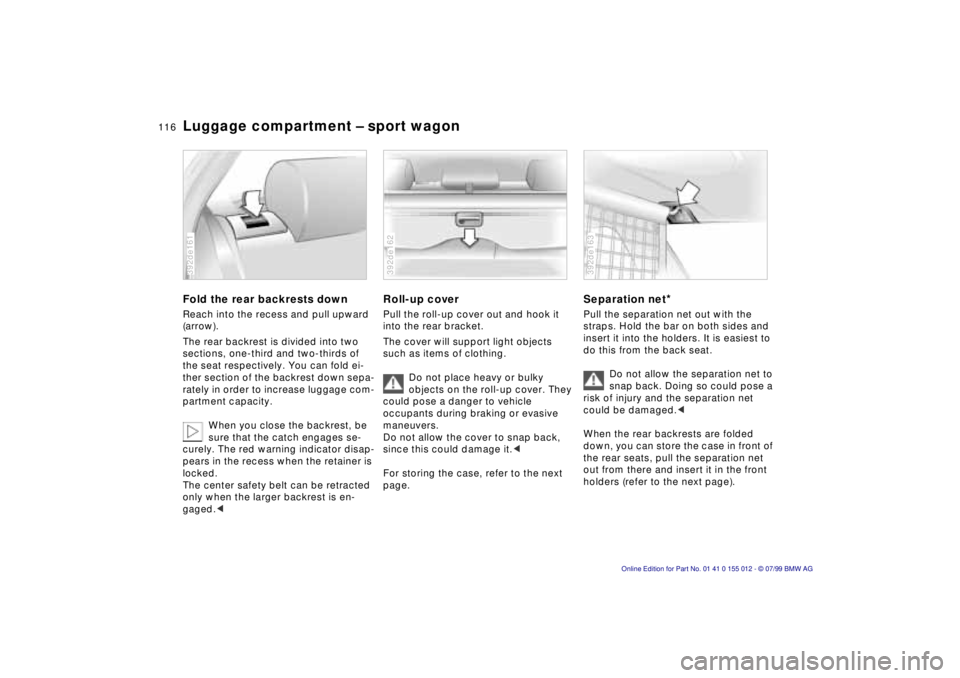
Luggage compartment Ð sport wagonFold the rear backrests downReach into the recess and pull upward
(arrow).
The rear backrest is divided into two
sections, one-third and two-thirds of
the seat respectively. You can fold ei-
ther section of the backrest down sepa-
rately in order to increase luggage com-
partment capacity.
When you close the backrest, be
sure that the catch engages se-
curely. The red warning indicator disap-
pears in the recess when the retainer is
locked.
The center safety belt can be retracted
only when the larger backrest is en-
gaged.<392de161
Roll-up coverPull the roll-up cover out and hook it
into the rear bracket.
The cover will support light objects
such as items of clothing.
Do not place heavy or bulky
objects on the roll-up cover. They
could pose a danger to vehicle
occupants during braking or evasive
maneuvers.
Do not allow the cover to snap back,
since this could damage it.<
For storing the case, refer to the next
page.392de162
Separation net
*
Pull the separation net out with the
straps. Hold the bar on both sides and
insert it into the holders. It is easiest to
do this from the back seat.
Do not allow the separation net to
snap back. Doing so could pose a
risk of injury and the separation net
could be damaged.<
When the rear backrests are folded
down, you can store the case in front of
the rear seats, pull the separation net
out from there and insert it in the front
holders (refer to the next page).392de163
Page 117 of 217
117n
RepairsIndexOverview Controls Car care Technology Data
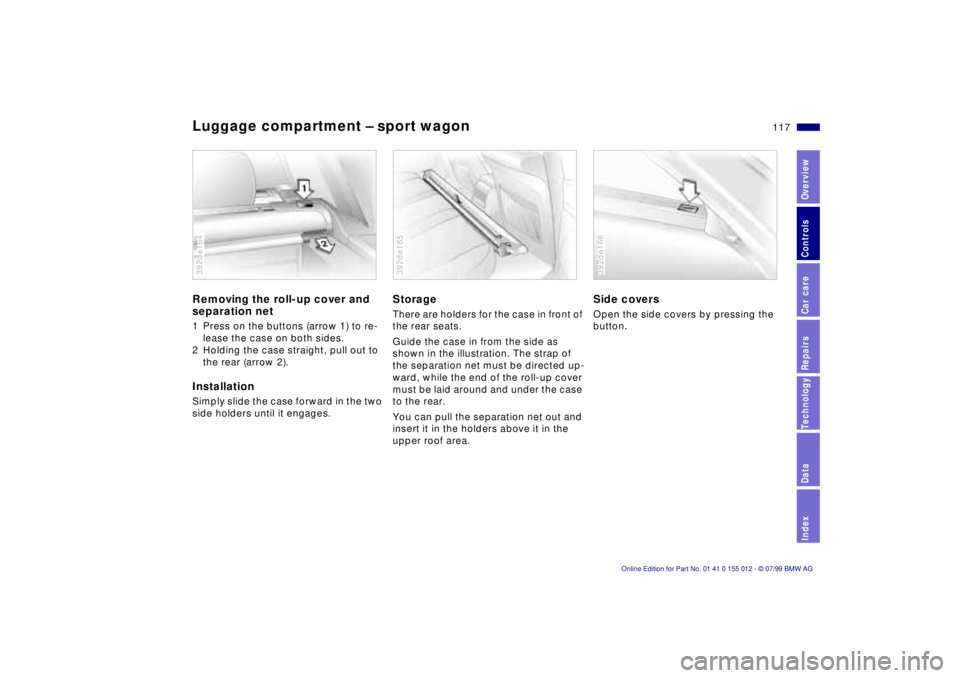
Luggage compartment Ð sport wagonRemoving the roll-up cover and
separation net1 Press on the buttons (arrow 1) to re-
lease the case on both sides.
2 Holding the case straight, pull out to
the rear (arrow 2).InstallationSimply slide the case forward in the two
side holders until it engages.392de164
StorageThere are holders for the case in front of
the rear seats.
Guide the case in from the side as
shown in the illustration. The strap of
the separation net must be directed up-
ward, while the end of the roll-up cover
must be laid around and under the case
to the rear.
You can pull the separation net out and
insert it in the holders above it in the
upper roof area.392de165
Side coversOpen the side covers by pressing the
button.392de166