2000 BMW 540I SEDAN height
[x] Cancel search: heightPage 50 of 217
50n
For maximum safety, please comply
with the following instructions when ad-
justing a seat:
Never try to adjust your seat while
operating the vehicle. The seat
could respond with unexpected move-
ment, and the ensuing loss of vehicle
control could lead to an accident. Wear
the safety belt firmly against your body
at all times. In the event of a frontal im-
pact, a loose lap belt could slide over
your hips, leading to abdominal injury.
In addition, the safety belt's restraint ef-
fectiveness is reduced if the belt is
worn loosely.
Never ride with the backrest reclined to
an extreme horizontal angle (especially
important for front passengers to re-
member). Keep the backrest relatively
upright to minimize the risk of "sliding
under" the safety belt and sustaining in-
jury in an accident.
Do not slide the seats to the rear when
the vehicle is at an extreme angle (on
garage ramps or steep slopes, for in-
stance), to prevent the shoulder strap's
automatic height adjustment mecha-
nism from disengaging.<
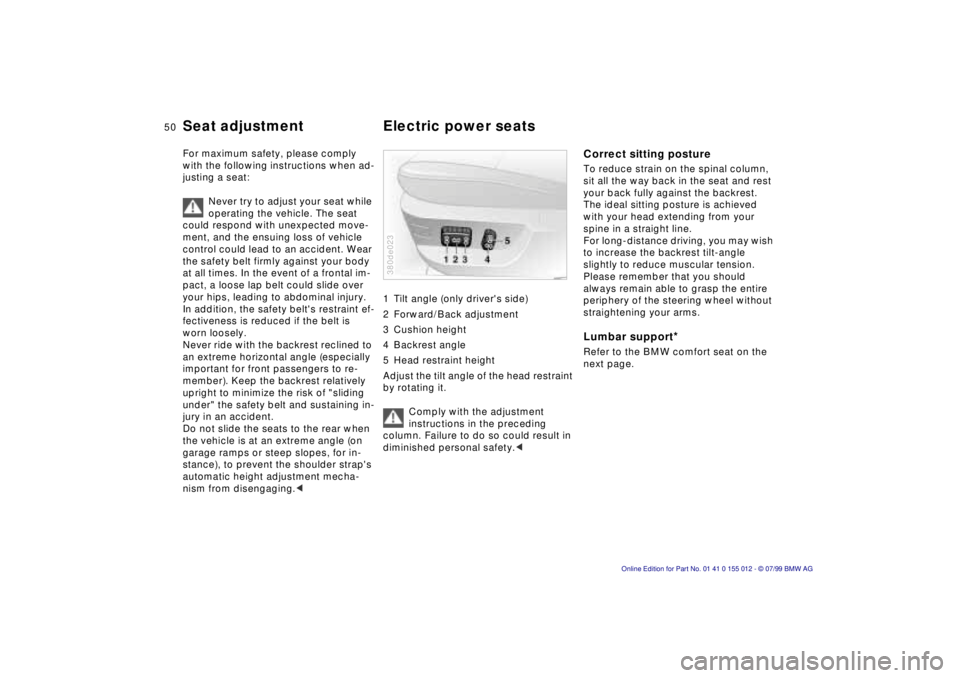
1 Tilt angle (only driver's side)
2 Forward/Back adjustment
3 Cushion height
4 Backrest angle
5 Head restraint height
Adjust the tilt angle of the head restraint
by rotating it.
Comply with the adjustment
instructions in the preceding
column. Failure to do so could result in
diminished personal safety.< 380de023
Correct sitting postureTo reduce strain on the spinal column,
sit all the way back in the seat and rest
your back fully against the backrest.
The ideal sitting posture is achieved
with your head extending from your
spine in a straight line.
For long-distance driving, you may wish
to increase the backrest tilt-angle
slightly to reduce muscular tension.
Please remember that you should
always remain able to grasp the entire
periphery of the steering wheel without
straightening your arms.Lumbar support
*
Refer to the BMW comfort seat on the
next page.
Seat adjustment Electric power seats
Page 52 of 217
52n
BMW comfort seat
*
BMW sports seat
*
Front passenger's seat adjusted for
relaxed traveling:
1 Adjust the upper backrest section
to its extreme rear position
2 Increase the seat cushion tilt
3 Tilt the backrest more
4 Bring the upper backrest section
forward.
Make corrections in the forward-
backward adjustment of the seat
to ensure that the safety belt still fits
firmly against your body. If you do not
do this, the protection provided by the
safety belt may be reduced.<
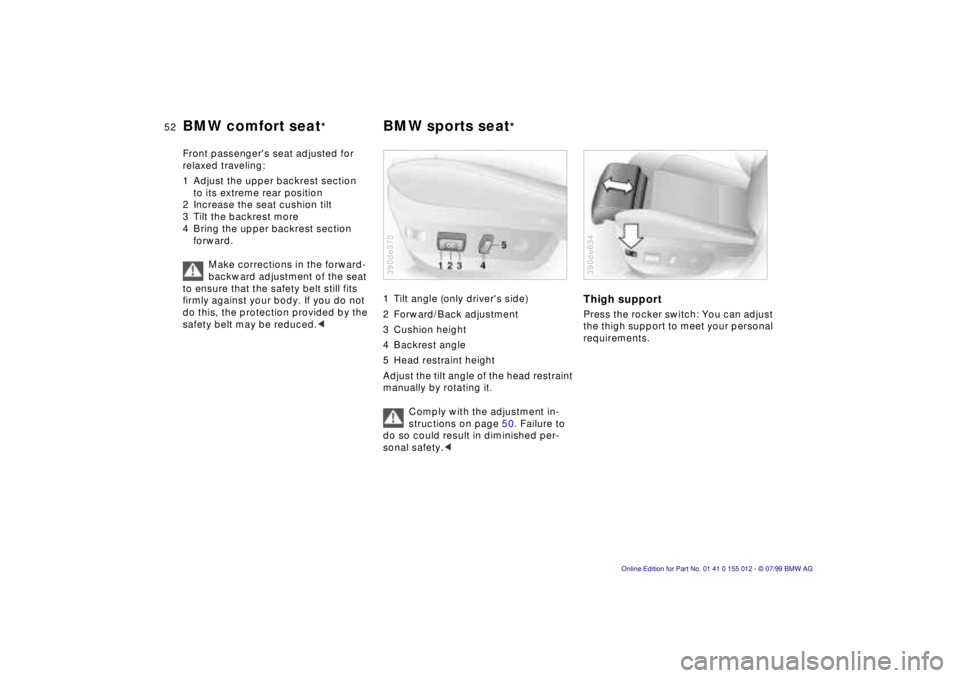
1 Tilt angle (only driver's side)
2 Forward/Back adjustment
3 Cushion height
4 Backrest angle
5 Head restraint height
Adjust the tilt angle of the head restraint
manually by rotating it.
Comply with the adjustment in-
structions on page 50. Failure to
do so could result in diminished per-
sonal safety.<390de370
Thigh supportPress the rocker switch: You can adjust
the thigh support to meet your personal
requirements.390de634
Page 53 of 217
53n
RepairsIndexOverview Controls Car care Technology Data
BMW sports seat
*
BMW active seat*
Correct sitting postureTo reduce strain on the spinal column,
sit all the way back in the seat and rest
your back fully against the backrest.
The ideal sitting posture is achieved
with your head extending from your
spine in a straight line.
For long-distance driving, you may wish
to increase the backrest tilt-angle
slightly to reduce muscular tension.
Please remember that you should
always remain able to grasp the entire
periphery of the steering wheel without
straightening your arms.
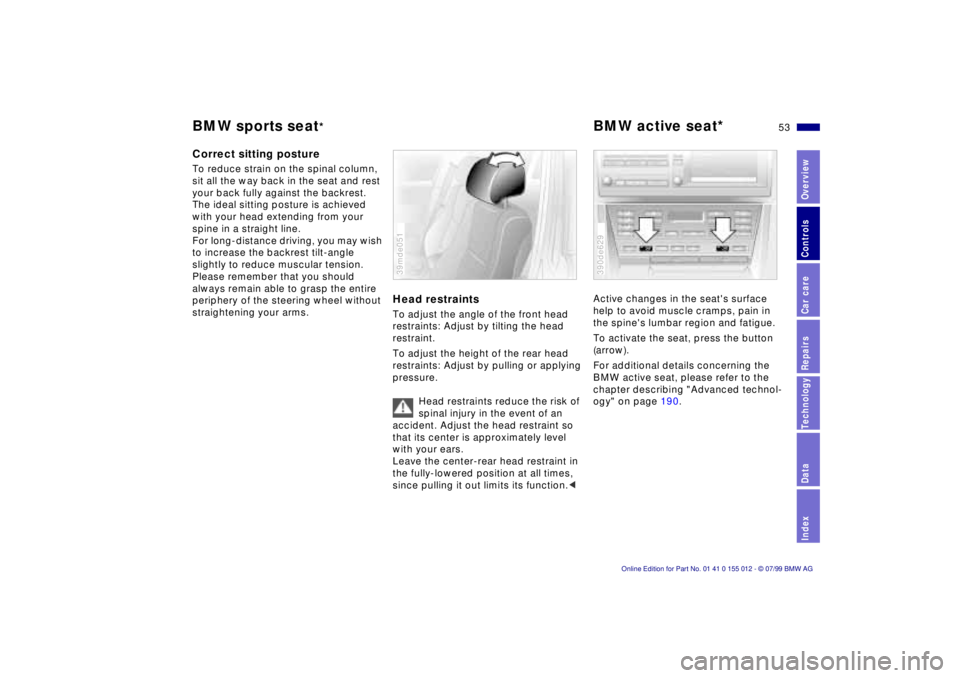
Head restraintsTo adjust the angle of the front head
restraints: Adjust by tilting the head
restraint.
To adjust the height of the rear head
restraints: Adjust by pulling or applying
pressure.
Head restraints reduce the risk of
spinal injury in the event of an
accident. Adjust the head restraint so
that its center is approximately level
with your ears.
Leave the center-rear head restraint in
the fully-lowered position at all times,
since pulling it out limits its function.< 39mde051
Active changes in the seat's surface
help to avoid muscle cramps, pain in
the spine's lumbar region and fatigue.
To activate the seat, press the button
(arrow).
For additional details concerning the
BMW active seat, please refer to the
chapter describing "Advanced technol-
ogy" on page 190.390de629
Page 143 of 217
143n
RepairsIndexOverview Controls Car care Technology Data
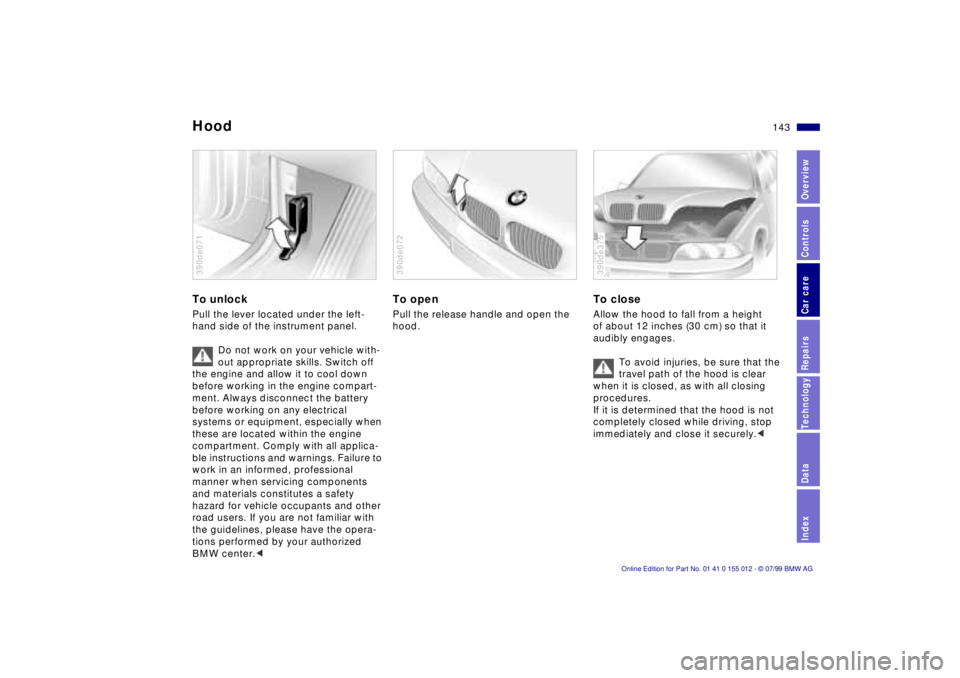
HoodTo unlockPull the lever located under the left-
hand side of the instrument panel.
Do not work on your vehicle with-
out appropriate skills. Switch off
the engine and allow it to cool down
before working in the engine compart-
ment. Always disconnect the battery
before working on any electrical
systems or equipment, especially when
these are located within the engine
compartment. Comply with all applica-
ble instructions and warnings. Failure to
work in an informed, professional
manner when servicing components
and materials constitutes a safety
hazard for vehicle occupants and other
road users. If you are not familiar with
the guidelines, please have the opera-
tions performed by your authorized
BMW center.<390de071
To openPull the release handle and open the
hood.390de072
To closeAllow the hood to fall from a height
of about 12 inches (30 cm) so that it
audibly engages.
To avoid injuries, be sure that the
travel path of the hood is clear
when it is closed, as with all closing
procedures.
If it is determined that the hood is not
completely closed while driving, stop
immediately and close it securely.< 390de375
Page 173 of 217
173n
RepairsIndexOverview Controls Car care Technology Data
Changing tires
Safety measures in the event of a
flat tire or wheel change:
Stop the vehicle as far as possible from
passing traffic. Park on a firm, flat,
surface. Switch on the hazard flashers.
Turn the steering wheel to the straight-
ahead position, remove the key and
engage the steering lock. Shift into 1st
or reverse (selector lever in Park with
automatic transmission) and engage the
parking brake. All passengers should
be outside the car and well away from
your immediate working area (behind a
guardrail, for instance).
If a warning triangle or portable hazard
warning lamp is available, set it up on
the roadside at an appropriate distance
from the rear of the vehicle. Comply
with all safety guidelines and regula-
tions.
Change the wheel only on a level, firm
surface which is not slippery. Avoid
jacking the car on a soft or slippery sup-
port surface (snow, ice, loose gravel,
etc.), since it could slide sideways.
Position the jack on a firm support
surface.
Do not place wooden blocks or similar
objects under the jack. If this is done,
the jack might not be able to reach its
full support capacity because of the
limited height.
Do not lie under the vehicle or start the
engine when the vehicle is supported
by the jack Ð risk of fatal injury.<
What you will needIn order to avoid rattling noises later,
note the position of the tools when you
remove them and return them to their
original position when you are through
using them.
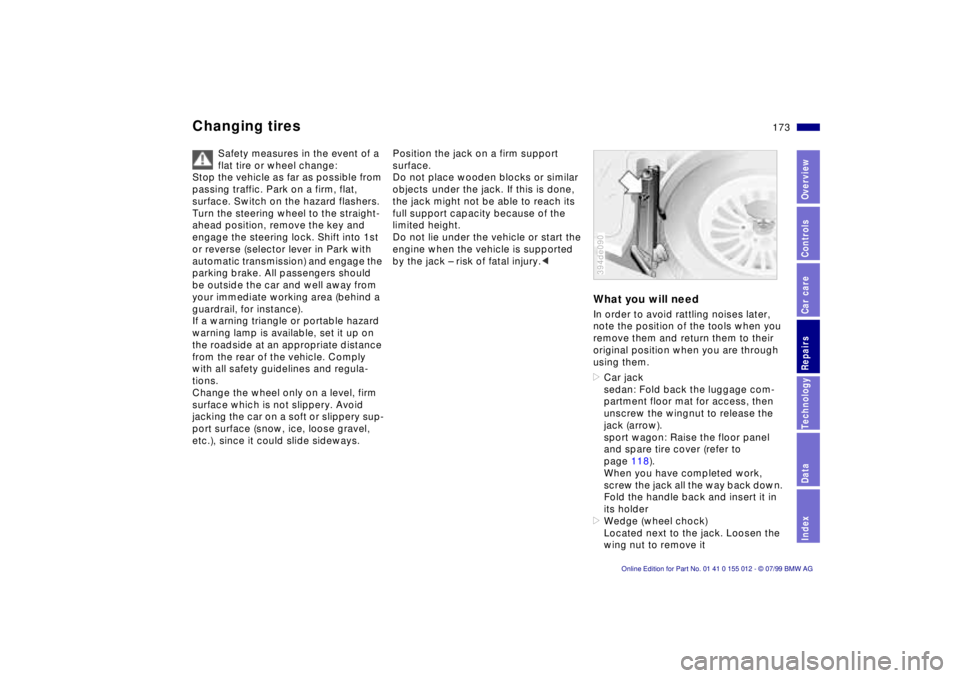
>Car jack
sedan: Fold back the luggage com-
partment floor mat for access, then
unscrew the wingnut to release the
jack (arrow).
sport wagon: Raise the floor panel
and spare tire cover (refer to
page 118).
When you have completed work,
screw the jack all the way back down.
Fold the handle back and insert it in
its holder
>Wedge (wheel chock)
Located next to the jack. Loosen the
wing nut to remove it394de090
Page 195 of 217
195n
RepairsIndexOverview Controls Car care Technology Data
Level control system
*
Xenon lamps
*
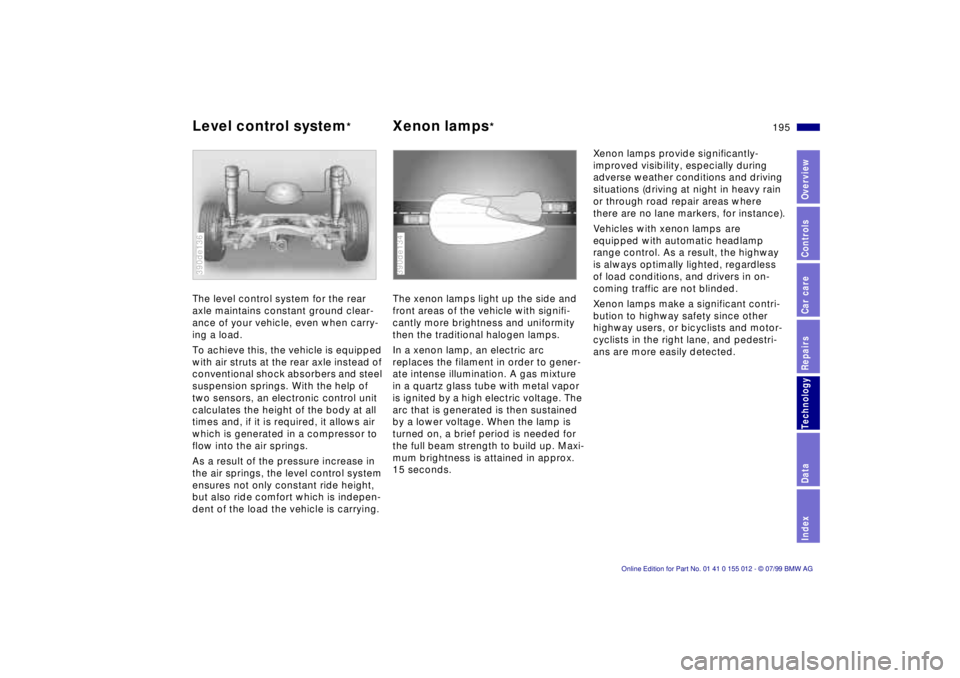
The level control system for the rear
axle maintains constant ground clear-
ance of your vehicle, even when carry-
ing a load.
To achieve this, the vehicle is equipped
with air struts at the rear axle instead of
conventional shock absorbers and steel
suspension springs. With the help of
two sensors, an electronic control unit
calculates the height of the body at all
times and, if it is required, it allows air
which is generated in a compressor to
flow into the air springs.
As a result of the pressure increase in
the air springs, the level control system
ensures not only constant ride height,
but also ride comfort which is indepen-
dent of the load the vehicle is carrying.390de136
The xenon lamps light up the side and
front areas of the vehicle with signifi-
cantly more brightness and uniformity
then the traditional halogen lamps.
In a xenon lamp, an electric arc
replaces the filament in order to gener-
ate intense illumination. A gas mixture
in a quartz glass tube with metal vapor
is ignited by a high electric voltage. The
arc that is generated is then sustained
by a lower voltage. When the lamp is
turned on, a brief period is needed for
the full beam strength to build up. Maxi-
mum brightness is attained in approx.
15 seconds.390de134
Xenon lamps provide significantly-
improved visibility, especially during
adverse weather conditions and driving
situations (driving at night in heavy rain
or through road repair areas where
there are no lane markers, for instance).
Vehicles with xenon lamps
are
equipped with automatic headlamp
range control. As a result, the highway
is always optimally lighted, regardless
of load conditions, and drivers in on-
coming traffic are not blinded.
Xenon lamps make a significant contri-
bution to highway safety since other
highway users, or bicyclists and motor-
cyclists in the right lane, and pedestri-
ans are more easily detected.
Page 210 of 217

Everything from A to Z
G
Gasoline29
Gasoline gauge83
Glove compartment108
Gross weight201
H
Handbrake23, 69
Handsfree system109
Hazard warning system27
Hazard warning triangle27
Head restraint53
Headlamp cleaning78
Headlamp covers,
care155, 167
Headlamp flasher77
Headlamp washer
system148
Heated seats103
Heated steering wheel103
Heating and ventilation98
Heating while stopped102
Heavy loads120
Height199
Height adjustment
Seats52
Steering wheel54
HiFi system192
High beams24
Bulb replacement167
High Performance Synthetic
Oils150Hood release143
Horn25, 26
Hydraulic Brake Assistant,
refer to DBC24, 129
I
Ice warning82
Identification number of the
vehicle153
Identification, tires137
Ignition key35
Ignition lock67
Independent ventilation104
Indicator77
Indicator lamps22
Inflation pressure30, 134
Monitoring92, 194
INSPECTION84
Instrument cluster18, 20
Instrument lighting94
Instrument panel20
Instrument panel switch77
Instruments18
Integrated rear axle194
Intensive automatic cleaning
unit78
Intensive cleaning
system148
Interaxle tire rotation136
Interference indicators85
Interference with
car phones133Interior lamps96
Remote control38
Interior mirror55
automatic dimming
feature55
Interior motion sensor46
Deactivation46
Interior rearview mirror
with automatic dimming
feature55, 192
Interlock67
Intermittent wiper switch77
J
Jack173
Jump-starting182
K
Key Memory58
Keys35
Kickdown72, 75
L
Lashing eye44, 120
Leather care159
Length199
Level control
system24, 132, 195
Light switch94
Light-alloy wheels138, 140
Lighter110Lights-on warning94
Load-securing devices120
Locking and unlocking the
doors36, 37
Low beams94
Bulb replacement167
Low beams, bulb
replacement167
Low-fuel warning lamp83
Lug bolts174
Lug wrench174
Luggage compartment
Capacity201
Lamps96
Net44
Luggage compartment lid/
Tailgate44
Emergency actuation41
Opening separately41
Remote control39
Luggage space44
Luggage straps44
Lumbar support51
M
M Multifunction steering
wheel (MFL)26
M+S tires138
Magic Eye177
Maintenance84, 154