2000 BMW 540I SEDAN change wheel
[x] Cancel search: change wheelPage 53 of 217
53n
RepairsIndexOverview Controls Car care Technology Data
BMW sports seat
*
BMW active seat*
Correct sitting postureTo reduce strain on the spinal column,
sit all the way back in the seat and rest
your back fully against the backrest.
The ideal sitting posture is achieved
with your head extending from your
spine in a straight line.
For long-distance driving, you may wish
to increase the backrest tilt-angle
slightly to reduce muscular tension.
Please remember that you should
always remain able to grasp the entire
periphery of the steering wheel without
straightening your arms.
Head restraintsTo adjust the angle of the front head
restraints: Adjust by tilting the head
restraint.
To adjust the height of the rear head
restraints: Adjust by pulling or applying
pressure.
Head restraints reduce the risk of
spinal injury in the event of an
accident. Adjust the head restraint so
that its center is approximately level
with your ears.
Leave the center-rear head restraint in
the fully-lowered position at all times,
since pulling it out limits its function.< 39mde051
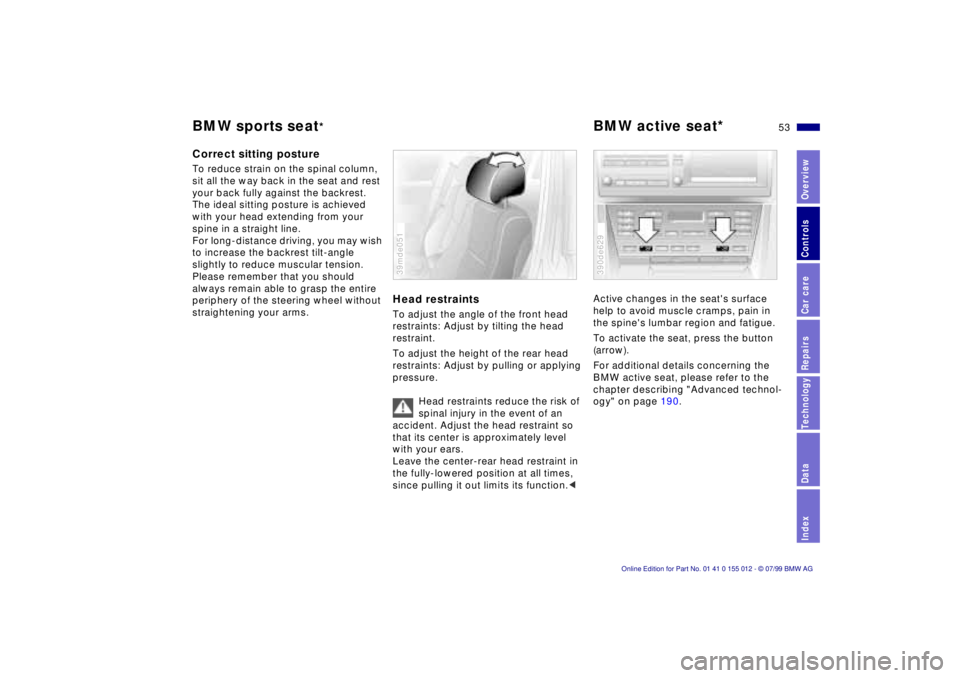
Active changes in the seat's surface
help to avoid muscle cramps, pain in
the spine's lumbar region and fatigue.
To activate the seat, press the button
(arrow).
For additional details concerning the
BMW active seat, please refer to the
chapter describing "Advanced technol-
ogy" on page 190.390de629
Page 72 of 217

72n
Automatic transmission
*
Before leaving the vehicle when
the engine is running, shift the se-
lector lever to the "Park" or "Neutral"
position and apply the parking brake.
The vehicle could move if this is not
done.
Never leave the car unattended with the
engine running. An unattended vehicle
with a running engine represents a po-
tential safety hazard.
If you should accidentally select "Neu-
tral" while traveling at high speed,
remove your foot from the accelerator
pedal immediately. Allow the engine
speed to drop to idle before selecting
the desired drive position. Damage
could otherwise occur due to excessive
engine speed.<
P ParkSelect "Park" only when the vehicle is
stationary. The transmission locks to
prevent the rear wheels from turning.R ReverseSelect "Reverse" only when the vehicle
is stationary.
N NeutralSelect "Neutral" only if your journey is
interrupted for a long period.D Drive
(automatic shift program)This position is designed for driving
under all normal operating conditions.
All forward gears are available.4 Ð Sport ProgramThis position is recommended if you
wish to select a performance-oriented
driving style.
3 and 2 Ð Shift limiterSelect this range when you wish to limit
gear changes (on steep uphill or down-
hill slopes, for instance). The transmis-
sion shifts up only as far as the selected
gear."Kickdown" In the "Kickdown" mode, you achieve
maximum performance.
To activate this mode, depress the ac-
celerator pedal beyond the full-throttle
position, at which a resistance point
must be overcome.
Page 75 of 217
75n
RepairsIndexOverview Controls Car care Technology Data
Automatic transmission with Steptronic
*
Before leaving the vehicle when
the engine is running, shift the se-
lector lever to the "Park" or "Neutral"
position and apply the parking brake.
The vehicle could move if this is not
done. Do not leave the car unattended
with the engine running. An unattended
vehicle with a running engine repre-
sents a potential safety hazard.
If you should inadvertently select "Neu-
tral" while traveling at high speed, re-
move your foot from the accelerator
pedal immediately. Allow the engine
speed to drop to idle before selecting
the desired drive position. Damage
could otherwise occur due to excessive
engine speed.<
P ParkSelect "Park" only when the vehicle is
stationary. The transmission locks to
prevent the rear wheels from turning.R ReverseSelect "Reverse" only when the vehicle
is stationary.N NeutralSelect "Neutral" only if your journey is
interrupted for a long period.
D Drive
(automatic shift program)This position is designed for driving un-
der all normal operating conditions. All
forward gears are available."Kickdown" In the "Kickdown" mode, you achieve
maximum performance.
To activate this mode, depress the ac-
celerator pedal beyond the full-throttle
position, at which a resistance point
must be overcome.
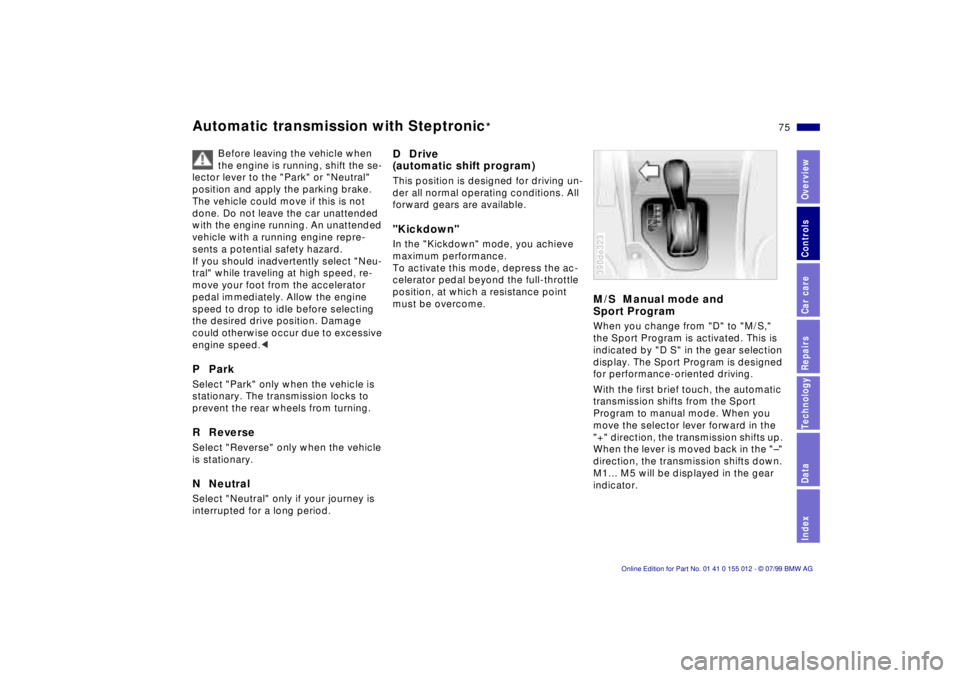
M/S Manual mode and
Sport ProgramWhen you change from "D" to "M/S,"
the Sport Program is activated. This is
indicated by "D S" in the gear selection
display. The Sport Program is designed
for performance-oriented driving.
With the first brief touch, the automatic
transmission shifts from the Sport
Program to manual mode. When you
move the selector lever forward in the
"+" direction, the transmission shifts up.
When the lever is moved back in the "Ð"
direction, the transmission shifts down.
M1... M5 will be displayed in the gear
indicator.390de323
Page 93 of 217
93n
RepairsIndexOverview Controls Car care Technology Data
Tire Pressure Control (RDC)
*
Flat tireIf there is a tire failure with a loss of air
pressure, the red indicator lamp comes
on or the message "TIRE DEFECT" ap-
pears in the Check Control. In addition,
a gong sounds.
If this occurs, reduce vehicle speed im-
mediately and stop the vehicle in a safe
location. Avoid hard brake applications.
Do not oversteer. Replace the wheel
and flat tire.
The spare tire which is available in
your vehicle as standard equip-
ment is equipped with the electronics
required for RDC and, following activa-
tion of the system, is also monitored af-
ter it is mounted.<
The RDC cannot alert you to se-
vere and sudden tire damage
caused by external factors.<
Have the tires changed by your
authorized BMW center.
Your BMW center has the information
needed for working with RDC and is
equipped with the necessary special
tools.<
System interferenceDuring the period of the malfunction,
the yellow indicator lamp comes on
or the message "TIRE CONTROL
INACTIVE" appears in the Check
Control.
You will also see the same message
>in the event of a system fault
>if a wheel is mounted without the
RDC electronics
>if, in addition to the spare tire,
additional wheels with RDC
electronics are on board.
Please contact your authorized BMW
center for additional information.
Page 139 of 217
139n
RepairsIndexOverview Controls Car care Technology Data
Winter tires Snow chains
*
Do not exceed specified
maximum speeds
Never exceed the maximum
speed for which the tires are
rated.
Unprofessional attempts by laymen to
service tires can lead to damage and
accidents.
Have this work performed by skilled
professionals only. Any BMW center
has the required technical knowledge
and the proper equipment and will be
happy to assist you.<
Tire condition, tire pressureWinter tires display a perceptible loss in
their ability to cope with winter driving
conditions once the tread wears to be-
low 0.16 inches (4 mm), and should
thus be replaced.
Comply with the specified tire inflation
pressures Ð and be sure to have the
wheel and tire assemblies balanced
every time you change the tires.
StorageStore tires in a cool, dry place, away
from light whenever possible. Protect
the tires against contact with oil, grease
and fuel.Use narrow-link BMW snow chains
on
summer or winter tires only in pairs and
only on the rear wheels. Comply with all
manufacturer's safety precautions when
mounting the chains.
It is not possible to mount snow
chains on tires with 17-inch
wheels.<
Page 173 of 217
173n
RepairsIndexOverview Controls Car care Technology Data
Changing tires
Safety measures in the event of a
flat tire or wheel change:
Stop the vehicle as far as possible from
passing traffic. Park on a firm, flat,
surface. Switch on the hazard flashers.
Turn the steering wheel to the straight-
ahead position, remove the key and
engage the steering lock. Shift into 1st
or reverse (selector lever in Park with
automatic transmission) and engage the
parking brake. All passengers should
be outside the car and well away from
your immediate working area (behind a
guardrail, for instance).
If a warning triangle or portable hazard
warning lamp is available, set it up on
the roadside at an appropriate distance
from the rear of the vehicle. Comply
with all safety guidelines and regula-
tions.
Change the wheel only on a level, firm
surface which is not slippery. Avoid
jacking the car on a soft or slippery sup-
port surface (snow, ice, loose gravel,
etc.), since it could slide sideways.
Position the jack on a firm support
surface.
Do not place wooden blocks or similar
objects under the jack. If this is done,
the jack might not be able to reach its
full support capacity because of the
limited height.
Do not lie under the vehicle or start the
engine when the vehicle is supported
by the jack Ð risk of fatal injury.<
What you will needIn order to avoid rattling noises later,
note the position of the tools when you
remove them and return them to their
original position when you are through
using them.
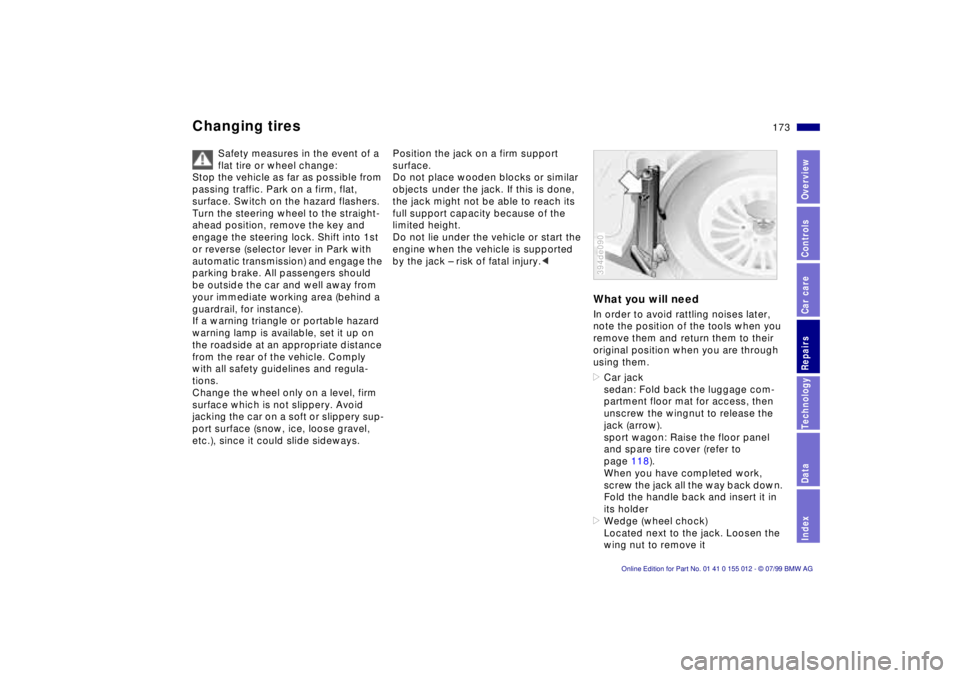
>Car jack
sedan: Fold back the luggage com-
partment floor mat for access, then
unscrew the wingnut to release the
jack (arrow).
sport wagon: Raise the floor panel
and spare tire cover (refer to
page 118).
When you have completed work,
screw the jack all the way back down.
Fold the handle back and insert it in
its holder
>Wedge (wheel chock)
Located next to the jack. Loosen the
wing nut to remove it394de090
Page 174 of 217
174n
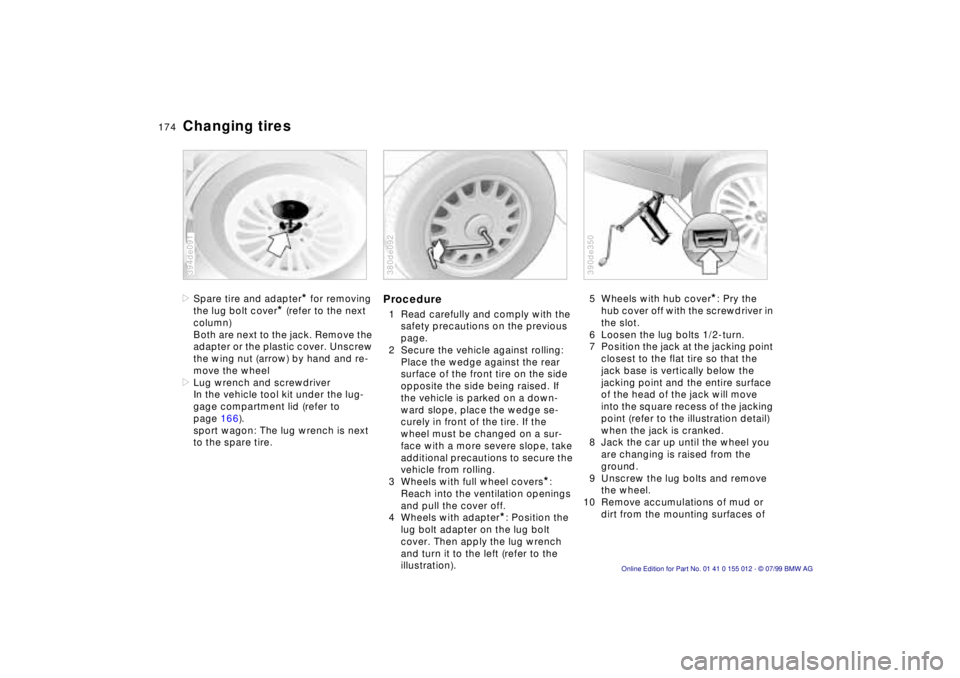
Changing tires>Spare tire and adapter
* for removing
the lug bolt cover
* (refer to the next
column)
Both are next to the jack. Remove the
adapter or the plastic cover. Unscrew
the wing nut (arrow) by hand and re-
move the wheel
>Lug wrench and screwdriver
In the vehicle tool kit under the lug-
gage compartment lid (refer to
page 166).
sport wagon: The lug wrench is next
to the spare tire.
394de091
Procedure1 Read carefully and comply with the
safety precautions on the previous
page.
2 Secure the vehicle against rolling:
Place the wedge against the rear
surface of the front tire on the side
opposite the side being raised. If
the vehicle is parked on a down-
ward slope, place the wedge se-
curely in front of the tire. If the
wheel must be changed on a sur-
face with a more severe slope, take
additional precautions to secure the
vehicle from rolling.
3 Wheels with full wheel covers
*:
Reach into the ventilation openings
and pull the cover off.
4 Wheels with adapter
*: Position the
lug bolt adapter on the lug bolt
cover. Then apply the lug wrench
and turn it to the left (refer to the
illustration).
380de092
5 Wheels with hub cover
*: Pry the
hub cover off with the screwdriver in
the slot.
6 Loosen the lug bolts 1/2-turn.
7 Position the jack at the jacking point
closest to the flat tire so that the
jack base is vertically below the
jacking point and the entire surface
of the head of the jack will move
into the square recess of the jacking
point (refer to the illustration detail)
when the jack is cranked.
8 Jack the car up until the wheel you
are changing is raised from the
ground.
9 Unscrew the lug bolts and remove
the wheel.
10 Remove accumulations of mud or
dirt from the mounting surfaces of
390de350
Page 194 of 217
194n
Tire Pressure Control (RDC)
*
Integrated rear suspension
The Tire Pressure Control system (RDC)
assumes the task of regular tire pres-
sure checks for you. The tire pressure is
monitored at all four wheels, even when
the vehicle is moving.
Behind the valve stem in every wheel,
there is an electronic chip which is
designed for severe-duty applications
and long service life. It contains a pres-
sure sensor, a transmitter and a battery.
The pressure is measured in extremely
short time intervals and then transmit-
ted by a radio signal. If an irregularity is
detected, the transmission rate is
increased.394de304
Near every wheel, there are antennas in
the body which receive the signals from
all four wheels. A central electronics
system evaluates the quadruple signals
and forwards any changes.
The RDC provides an important contri-
bution to driving safety.
The control arms on the patented inte-
grated aluminum rear axle assembly are
not mounted directly on the body. They
are mounted elastically on a chassis
sub-frame which is joined in turn with
elasticity to the vehicle body. The result-
ing double elastic suspension system
effectively absorbs the forces resulting
from bumps and road surface irregulari-
ties.
The compliance rates of the integrated
rear axle assembly's control arm mounts
have been precisely calibrated to help
provide supplementary adjustment in
the tracking angle of the rear wheels
(programmed self-steer effect). The ulti-
mate result is enhanced safety and con-
trol under all conditions.
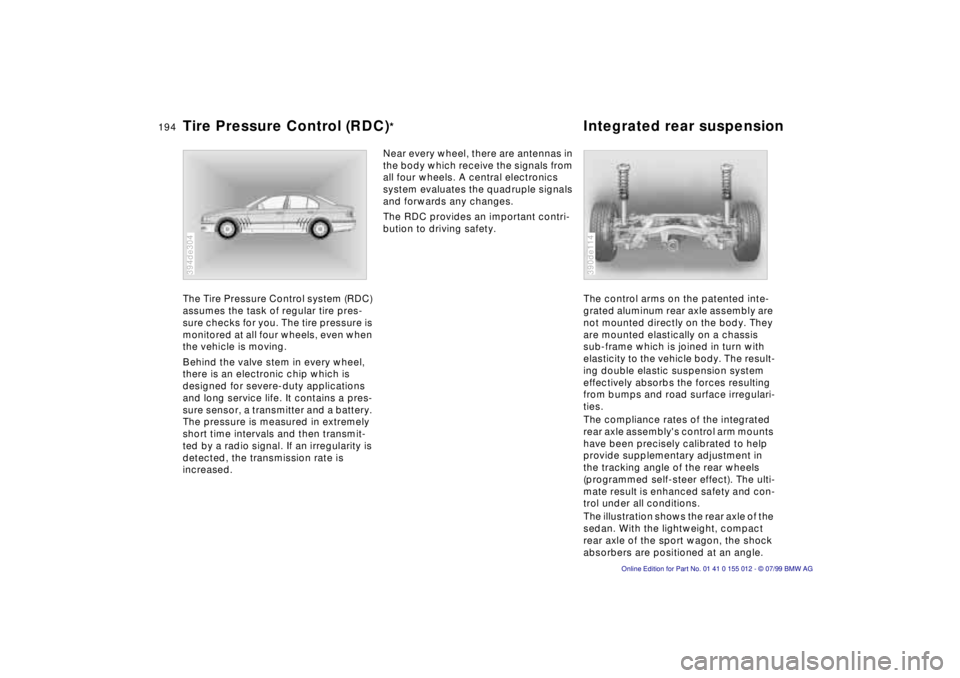
The illustration shows the rear axle of the
sedan. With the lightweight, compact
rear axle of the sport wagon, the shock
absorbers are positioned at an angle.
390de114