2000 BMW 328Ci COUPE tow
[x] Cancel search: towPage 14 of 189

Contents
Owner service procedures
Advanced technology
Technical data
Replacement procedures:
Onboard tool kit140
Windshield wiper blades140
Lamps and bulbs140
Remote control147
Changing tires148
Battery151
Fuses153
Microfilter154
In case of electrical
malfunction:
Fuel filler door155
Sliding/tilt sunroof155
Assistance, giving and
receiving:
Jump-starting156
Towing the vehicle157Adaptive Transmission Control
(ATC)160
Airbags161
Dynamic Stability Control
(DSC)161
Radio reception162
Safety belt tensioner162
Inside rearview mirror with
automatic dimmer163
Tire Pressure Control (RDC)164
Rain sensor165
Self-diagnostics166
Xenon lamp167Engine data170
Dimensions171
Weights172
Capacities173
Electrical system174
Ribbed V-belt174
Page 29 of 189

27n
RepairsIndexOverview Controls Car care Technology Data
Tire inflation pressure The inflation pressures are indicated on
a sticker attached to the B-pillar behind
the driver's door (visible with door
open).Check tire pressuresAll pressure specifications are stated in
psi (kilopascal) with cold tires (cold =
ambient temperature). Refer to the next
page as well.
For trailer towing, the inflation pressure
for heavier loads always applies.
For vehicles with RDC (Tire Pressure
Control)
*:
After a correction of the tire inflation
pressure, reactivate the system. Refer
to page 82.
462de197
Check tire inflation pressures reg-
ularly – at least every two weeks
and before beginning a longer trip. In-
correct tire pressure can otherwise lead
to tire damage and accidents.
Also check the inflation pressure of the
space-saver tire or spare tire
*. Inflate
the spare tire to the highest inflation
specified for your vehicle.<
Comply with tire approval
specificationsThe inflation pressures in the table apply
to tires from BMW-approved manufac-
turers. Your BMW center is familiar with
these pressures. Higher pressures may
be specified for tires from other manu-
facturers. You will find a list of approved
tires beginning on page 117.
Page 44 of 189

42n
Alarm system
*
The conceptThe vehicle's alarm system responds:
>When a door, the hood or the lug-
gage compartment lid is opened
>To motion within the passenger com-
partment (interior motion sensor)
>To a change in the inclination of the
vehicle, e. g. during an attempted
wheel theft of unauthorized towing
>To interruption of battery voltage.
The alarm system signals unauthorized
access to the vehicle or an attempted
theft in different ways:
>Sounding an acoustical alarm for
30 seconds
>Activating the hazard warning flash-
ers for approx. five minutes
*.
To activate and deactivate the
alarm systemWhen the vehicle is locked or unlocked
by using a key or with the remote con-
trol, the alarm system is also simulta-
neously armed or disarmed.
The interior motion sensor is activated
approx. 30 seconds after you have fin-
ished locking the car.
If the alarm system has been armed
correctly, the hazard warning flashers
cycle once. An acoustic warning signal
sounds at the same time.
You can have various confirmation
messages set to inform you that
the alarm system has been armed or
disarmed.<
You can also open the luggage com-
partment lid when the system is armed
by pressing button 3 of the remote con-
trol (refer to page 37). When it is closed,
the lid is once again secured.
Indicator lamp displaysThe indicator lamp is located under the
inside rearview mirror.
>When the indicator lamp flashes
continuously: The system is armed
>The indicator lamp flashes when it is
armed: The door(s), the hood or lug-
gage compartment lid are not com-
pletely closed. Even if you do not
close the alerted area, the system be-
gins to monitor the remaining areas,
and the indicator lamp flashes contin-
uously after 10 seconds. However,
the interior motion sensor is not
activated
>If the indicator lamp goes out when
the system is disarmed: No manipula-
tion or attempted intrusions have
been detected in the period since the
system was armed460de105
Page 47 of 189

45n
RepairsIndexOverview Controls Car care Technology Data
Sliding/tilt sunroof
*
To prevent injuries, exercise care
when closing the sliding/tilt sun-
roof and keep it in your field of vision
until it is completely closed.
Remove the key from the ignition and
close the doors when you leave the
vehicle, so that children cannot operate
the sunroof and possibly injure them-
selves.<
To avoid pressure or drafts in the pas-
senger compartment when the sunroof
is open or raised, keep the air vents in
the dashboard open and increase the air
supply if necessary. Refer to page 91.
When competely opened, the sunroof
may cause unpleasant vibrations in the
vehicle interior. To eliminate these
vibrations, close the sunroof until this
natural effect disappears.
For the convenience operating mode
with the door lock or the remote con-
trol, refer to page 34 or 35.
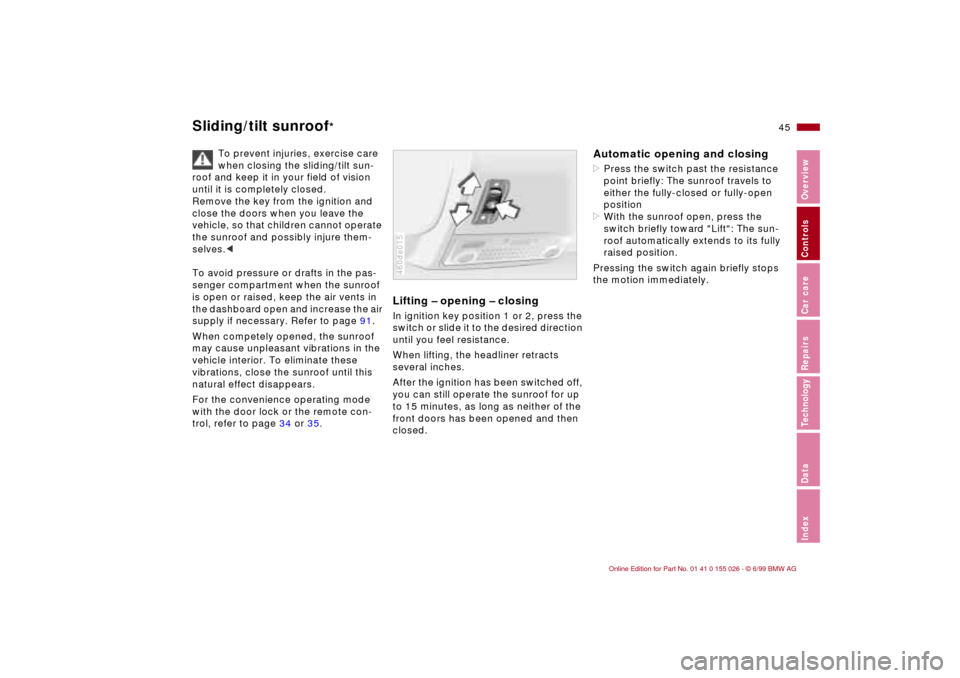
Lifting – opening – closingIn ignition key position 1 or 2, press the
switch or slide it to the desired direction
until you feel resistance.
When lifting, the headliner retracts
several inches.
After the ignition has been switched off,
you can still operate the sunroof for up
to 15 minutes, as long as neither of the
front doors has been opened and then
closed.460de015
Automatic opening and closing>Press the switch past the resistance
point briefly: The sunroof travels to
either the fully-closed or fully-open
position
>With the sunroof open, press the
switch briefly toward "Lift": The sun-
roof automatically extends to its fully
raised position.
Pressing the switch again briefly stops
the motion immediately.
Page 51 of 189

49n
RepairsIndexOverview Controls Car care Technology Data
Entering rear BMW Sports Seat
*
Lumbar support
*
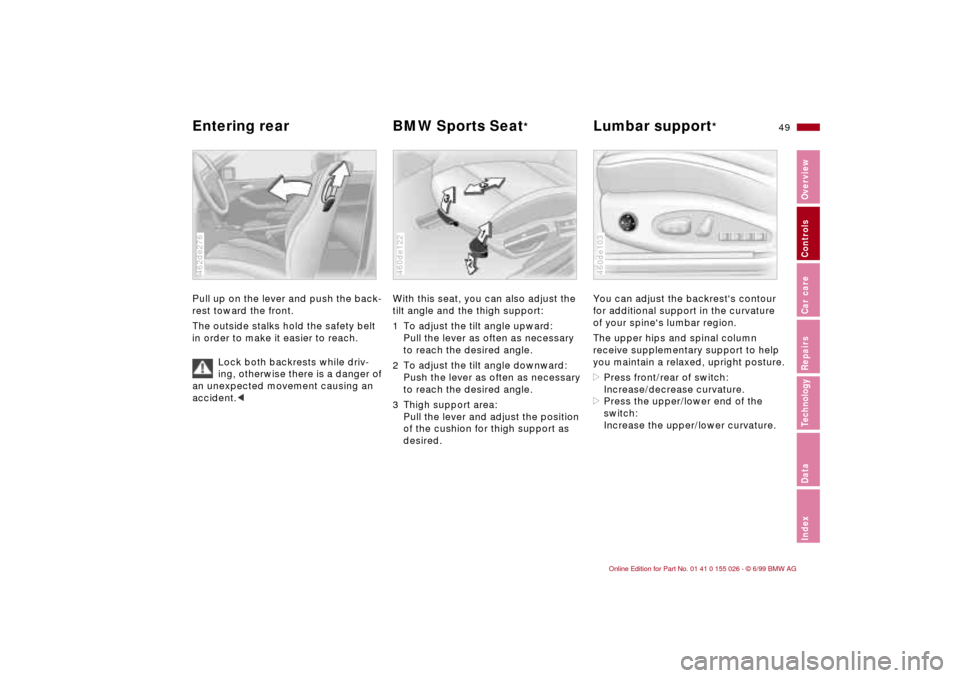
Pull up on the lever and push the back-
rest toward the front.
The outside stalks hold the safety belt
in order to make it easier to reach.
Lock both backrests while driv-
ing, otherwise there is a danger of
an unexpected movement causing an
accident.<462de276
With this seat, you can also adjust the
tilt angle and the thigh support:
1 To adjust the tilt angle upward:
Pull the lever as often as necessary
to reach the desired angle.
2 To adjust the tilt angle downward:
Push the lever as often as necessary
to reach the desired angle.
3 Thigh support area:
Pull the lever and adjust the position
of the cushion for thigh support as
desired.460de122
You can adjust the backrest's contour
for additional support in the curvature
of your spine's lumbar region.
The upper hips and spinal column
receive supplementary support to help
you maintain a relaxed, upright posture.
>Press front/rear of switch:
Increase/decrease curvature.
>Press the upper/lower end of the
switch:
Increase the upper/lower curvature.460de103
Page 54 of 189

52n
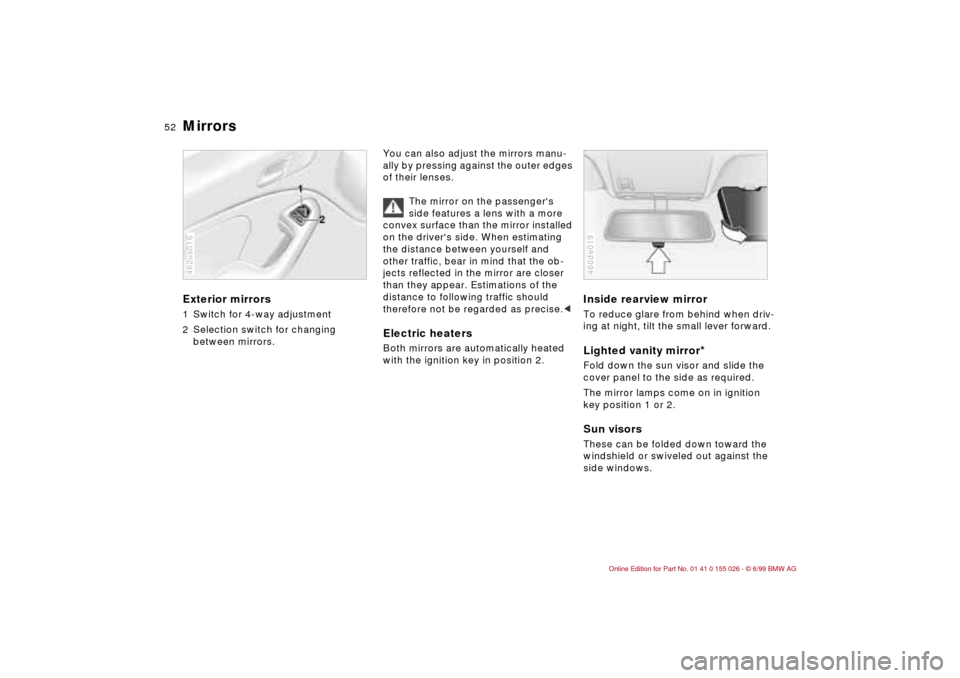
Mirrors Exterior mirrors1 Switch for 4-way adjustment
2 Selection switch for changing
between mirrors.462us016
You can also adjust the mirrors manu-
ally by pressing against the outer edges
of their lenses.
The mirror on the passenger's
side features a lens with a more
convex surface than the mirror installed
on the driver's side. When estimating
the distance between yourself and
other traffic, bear in mind that the ob-
jects reflected in the mirror are closer
than they appear. Estimations of the
distance to following traffic should
therefore not be regarded as precise.
Inside rearview mirror To reduce glare from behind when driv-
ing at night, tilt the small lever forward.Lighted vanity mirror
*
Fold down the sun visor and slide the
cover panel to the side as required.
The mirror lamps come on in ignition
key position 1 or 2.Sun visorsThese can be folded down toward the
windshield or swiveled out against the
side windows.460de019
Page 68 of 189

66n
Automatic transmission with Steptronic
*
You have the option of driving a normal
automatic transmission or switching to
manual.
Whenever you shift the selector lever
out of position D toward the left and
into the M/S gate, the automatic trans-
mission's sports-emphasized shift pro-
gram activates. As soon as you even
begin to move the selector lever in the
direction "+" or "–", Steptronic shifts the
gear and manual operation becomes
active. Whenever you want to use auto-
matic again, just shift the selector lever
toward the right to position D.
The Steptronic automatic transmission
is equipped with ATC (Adaptive Trans-
mission Control). ATC reacts with preci-
sion to your individual driving style and
the current driving conditions. This is
the reason why various shift programs
are used.
For details concerning ATC, please
refer to the chapter "Advanced Tech-
nology" on page 160.
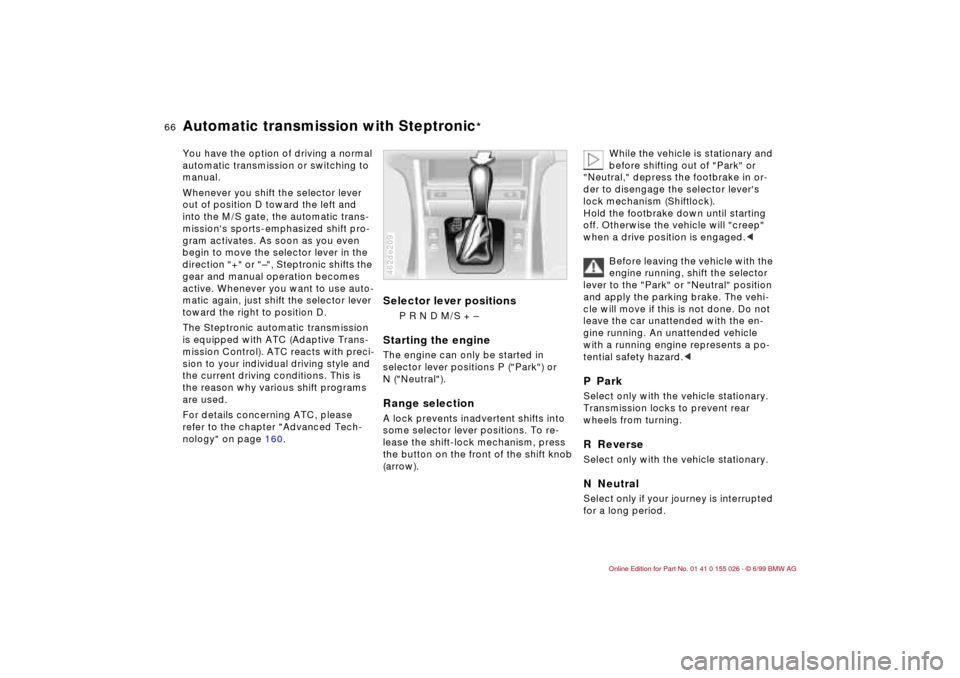
Selector lever positions
P R N D M/S + –
Starting the engineThe engine can only be started in
selector lever positions P ("Park") or
N ("Neutral").Range selectionA lock prevents inadvertent shifts into
some selector lever positions. To re-
lease the shift-lock mechanism, press
the button on the front of the shift knob
(arrow).462de209
While the vehicle is stationary and
before shifting out of "Park" or
"Neutral," depress the footbrake in or-
der to disengage the selector lever's
lock mechanism (Shiftlock).
Hold the footbrake down until starting
off. Otherwise the vehicle will "creep"
when a drive position is engaged.<
Before leaving the vehicle with the
engine running, shift the selector
lever to the "Park" or "Neutral" position
and apply the parking brake. The vehi-
cle will move if this is not done. Do not
leave the car unattended with the en-
gine running. An unattended vehicle
with a running engine represents a po-
tential safety hazard.<
P ParkSelect only with the vehicle stationary.
Transmission locks to prevent rear
wheels from turning.R ReverseSelect only with the vehicle stationary.N NeutralSelect only if your journey is interrupted
for a long period.
Page 70 of 189

68n
Automatic transmission with Steptronic
*
The Steptronic will "think" for you in the
following situations:
>In order to keep the engine from
overrevving, it will automatically shift
into the next higher gear shortly be-
fore the governed speed.
>If you do not do anything to interfere,
it will automatically downshift at
lower speeds.
>In kickdown, it will downshift into the
lowest gear possible, depending on
the engine speed.
Available displays
P R N D SD M1 M2 M3 M4 M5462us019
Electronic transmission control
module
If the indicator lamp comes on,
there is a malfunction in the
transmission system.
Bring the vehicle to a stop, select trans-
mission position "P", set the parking
brake and turn the engine off (ignition
key to position 0).
Wait a few seconds, then start the engine.
If the indicator lamp goes out after a few
seconds, normal transmission perfor-
mance has been restored. Drive off
normally.
If the indicator lamp does not go out, all
selector lever positions can still be se-
lected; however in the forward positions
the vehicle has limited performance as
it drives only in 3
rd and 4
th gear.
If this happens, avoid extreme engine
loads and consult the nearest authorized
BMW center.
Do not carry out any work on the
car in the engine compartment
without first making sure that the selector
lever is in position P or N, and that
the parking brake has been set.<
For towing, tow-starting or jump-start-
ing the vehicle, refer to the information
beginning on page 156.