Page 125 of 189

123n
RepairsIndexOverview Controls Car care Technology Data
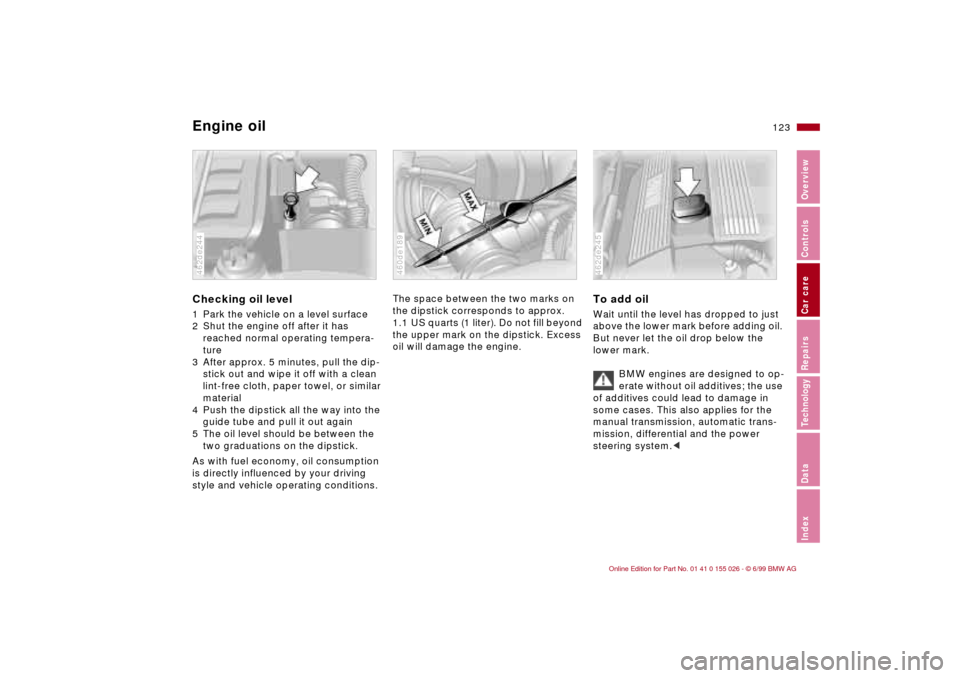
Engine oilChecking oil level 1 Park the vehicle on a level surface
2 Shut the engine off after it has
reached normal operating tempera-
ture
3 After approx. 5 minutes, pull the dip-
stick out and wipe it off with a clean
lint-free cloth, paper towel, or similar
material
4 Push the dipstick all the way into the
guide tube and pull it out again
5 The oil level should be between the
two graduations on the dipstick.
As with fuel economy, oil consumption
is directly influenced by your driving
style and vehicle operating conditions.462de244
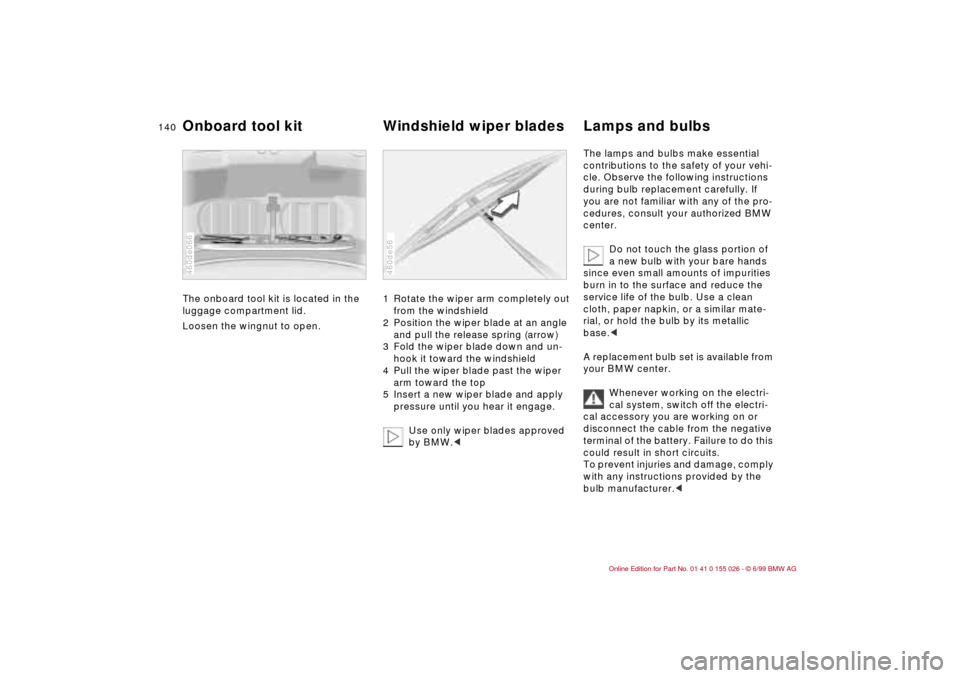
The space between the two marks on
the dipstick corresponds to approx.
1.1 US quarts (1 liter). Do not fill beyond
the upper mark on the dipstick. Excess
oil will damage the engine.460de189
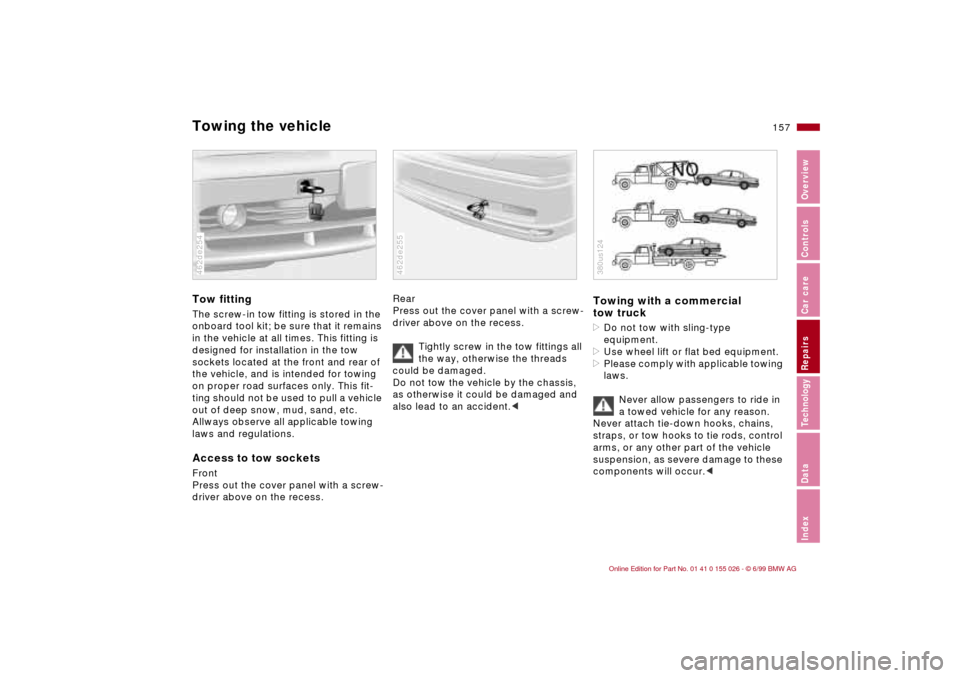
To add oil Wait until the level has dropped to just
above the lower mark before adding oil.
But never let the oil drop below the
lower mark.
BMW engines are designed to op-
erate without oil additives; the use
of additives could lead to damage in
some cases. This also applies for the
manual transmission, automatic trans-
mission, differential and the power
steering system.<462de245
Page 141 of 189
Overview
Controls and features
Operation, care
and maintenance
Owner service procedures
Technical data
Index Advanced technology
139n
RepairsIndexOverview Controls Car care Technology Data
Replacement procedures:
Onboard tool kit140
Windshield wiper blades140
Lamps and bulbs140
Remote control147
Changing tires148
Battery151
Fuses153
Microfilter154
In case of electrical
malfunction:
Fuel filler door155
Sliding/tilt sunroof155
Assistance, giving and
receiving:
Jump-starting156
Towing the vehicle157
Page 142 of 189

140n
The onboard tool kit is located in the
luggage compartment lid.
Loosen the wingnut to open.
460de066
1 Rotate the wiper arm completely out
from the windshield
2 Position the wiper blade at an angle
and pull the release spring (arrow)
3 Fold the wiper blade down and un-
hook it toward the windshield
4 Pull the wiper blade past the wiper
arm toward the top
5 Insert a new wiper blade and apply
pressure until you hear it engage.
Use only wiper blades approved
by BMW.<460de56
The lamps and bulbs make essential
contributions to the safety of your vehi-
cle. Observe the following instructions
during bulb replacement carefully. If
you are not familiar with any of the pro-
cedures, consult your authorized BMW
center.
Do not touch the glass portion of
a new bulb with your bare hands
since even small amounts of impurities
burn in to the surface and reduce the
service life of the bulb. Use a clean
cloth, paper napkin, or a similar mate-
rial, or hold the bulb by its metallic
base.<
A replacement bulb set is available from
your BMW center.
Whenever working on the electri-
cal system, switch off the electri-
cal accessory you are working on or
disconnect the cable from the negative
terminal of the battery. Failure to do this
could result in short circuits.
To prevent injuries and damage, comply
with any instructions provided by the
bulb manufacturer.<
Onboard tool kit Windshield wiper blades Lamps and bulbs
Page 144 of 189
142n
Lamps and bulbsThe illustration shows the left-hand side
of the engine compartment.Parking lamp5 watt bulb
1 Turn the bulb holder to the left (arrow)
and remove
2 Remove and replace the bulb.460de171
Front turn signals 21 watt bulb
1 Using a screwdriver, release the inner
hook through the upper opening
2 Pull out the lamp toward the front
3 Applying light pressure, turn the bulb
to the left. Remove and exchange the
bulb462de261
4 Insert the 2 pins on the lamp into the
guides on the vehicle
5 Push the lamp in. Carefully apply
pressure until you hear it engage.462de262
Page 147 of 189
145n
RepairsIndexOverview Controls Car care Technology Data
Lamps and bulbsCenter (high-mount) brake lamp
LED light bar on the rear window.
Please contact a BMW center in the
case of a malfunction.462de268
License plate lamps5 watt bulb
1 Place a screwdriver in the slot and
press toward the left (arrow) to re-
lease the lens
2 Replace the bulb.460de047
Interior lamps Front
Interior lamps (6 watt bulb) with reading
lamps (2 x 6 watt bulbs)
1 Using a screwdriver, press the lamp
out toward the front
2 Turn the bulb holder to the left and
remove
3 Remove and replace the bulb.460de182
Page 156 of 189
154n
Fuses Microfilter The fuses, their respective ampere rat-
ings and the equipment in their circuits
are all indicated below the fuse holder.
To close the fuse holder, snap it into
position at the top and turn the two fas-
teners inward.
Do not attempt to repair a burned
fuse or replace it with a fuse hav-
ing a different color or amperage rating.
To do this could cause a fire in the vehi-
cle resulting from a circuit overload.<
If a fuse blows repeatedly, refer the
problem to your authorized BMW center
for repair.
1 Open the hood
2 Release the three fasteners (arrow)
with a 1/4-turn
3 Remove the filter cover 460de156
4 Remove the filter by pulling toward
the front and install a new one
5 Position the filter cover and secure it
with the three fasteners.460de157
Page 159 of 189

157n
RepairsIndexOverview Controls Car care Technology Data
Towing the vehicleTow fittingThe screw-in tow fitting is stored in the
onboard tool kit; be sure that it remains
in the vehicle at all times. This fitting is
designed for installation in the tow
sockets located at the front and rear of
the vehicle, and is intended for towing
on proper road surfaces only. This fit-
ting should not be used to pull a vehicle
out of deep snow, mud, sand, etc.
Allways observe all applicable towing
laws and regulations.Access to tow socketsFront
Press out the cover panel with a screw-
driver above on the recess.462de254
Rear
Press out the cover panel with a screw-
driver above on the recess.
Tightly screw in the tow fittings all
the way, otherwise the threads
could be damaged.
Do not tow the vehicle by the chassis,
as otherwise it could be damaged and
also lead to an accident.<462de255
Towing with a commercial
tow truck>Do not tow with sling-type
equipment.
>Use wheel lift or flat bed equipment.
>Please comply with applicable towing
laws.
Never allow passengers to ride in
a towed vehicle for any reason.
Never attach tie-down hooks, chains,
straps, or tow hooks to tie rods, control
arms, or any other part of the vehicle
suspension, as severe damage to these
components will occur.c380us124
Page 181 of 189

Everything from A to Z
179n
RepairsIndexOverview Controls Car care Technology Data
Code, refer to the radio
operating instructions
Coin holder, cup holder 95
Combination switch 69
Compression 170
Computer 77
Configure settings 54
Consumption 78
Consumption display 75
Coolant 110, 126, 173
Coolant thermometer 75
Coolant, antifreeze 110
Cooling system 173
Cornering Brake Control
(CBC) 21, 107
Cruise control 72
Cruising range 79
Curb weight 172
Current check indicator 20DDashboard 16
Data
dimensions 171
engine 170
technical 170
weights 172
Daytime-driving light
switch 84
Defrost setting 91
Defrost windows 91
Defroster, rear window 92Digital clock 77
Dimensions 171
Dipstick 123
Disc brakes 108
Displacement 170
Display lighting 84
Displays 18
Distance warning 80
Diversity, antenna 162
Divided rear backrest 98
Door key 32
Door locks, care 110
Doors
emergency actuation 34
remote control 35
unlocking and locking 34
Drawbar load 172
Drive belts 174
Driving hints 104
Driving lamps 84
DSC (Dynamic Stability
Control) 22, 81, 161
Dynamic Stability Control
(DSC) 22, 81, 161
EElectric power seat 50
Electric power windows 44
Electrical accessories,
failure 153
Electrical system 174Electronic vehicle
immobilizer 33
Elements of operation 16
Emergency actuation
doors 34
tank cover 155
Energy Control 74
Engage 62
Engine
engage 62
Engine compartment 120
Engine coolant 126, 173
Engine data 170
Engine oil
filling capacity 173
quality 124
viscosity 124
Engine oil consumption 123
Engine oil level 21
check 123
Engine oil pressure 20
Engine oil
specifications 124
Engine speed 170
Entry from the rear 49
Exterior mirrors 52
FFailure messages 77
Fault
ABS 107
Fault displays 77Filler cap cover 26
Filling capacities 173
Filling the washer
reservoir 173
First aid 25
First aid kit 25
Fittings, towing 157
Flashlight 94
Flat tire 113, 148
Fog lamps 85
bulb replacement 143
Fog lights 85
Folding rear backrest 98
Follow-Me-Home lamps 84
Footbrake 108
Footwell lamps 85
bulb replacement 146
Front seat adjustment 47
Frost protection,
radiator 126
Fuel 26
preparation 170
Fuel consumption 78
Fuel consumption
display 75
Fuel gauge 75
Fuel quality 26
Fuel tank capacity 173
Fuel tank gauge 75
Functional status 166
Fuses 153