2000 BMW 323i SEDAN lock
[x] Cancel search: lockPage 107 of 189

107n
IndexDataTechnologyRepairsCar careControlsOverview
Antilock Brake System (ABS)Antilock Brake System (ABS)/
Cornering Brake Control (CBC) CBC is an advanced engineering devel-
opment of ABS. When braking during
cornering with high lateral accelera-
tion, or when braking during a lane
change, vehicle stability is improved
and the steering response is enhanced.
In the event of a fault
If the ABS in the instrument
cluster lights up, refer to
page 22. The brake system then
reverts to conventional operation as on
vehicles without ABS. However, have
the brake system checked by your
BMW center as soon as possible. To
prevent undetected defects and cumu-
lative faults from adversely affecting the
brake system, refer any problems to
your BMW center at the earliest oppor-
tunity.
ABS warning lamp for Canadian
models.
If the brake warning lamp
comes on together with the indi-
cator lamps for ABS and DSC
(refer to page 21), the entire
ABS, CBC and DSC control sys-
tem has failed. Continue driving
cautiously and defensively.
Avoid full brake applications.
This could cause the vehicle to lose
stability and you might no longer be
able to control it.
Have the system checked as soon as
possible by your BMW center.
CBC, ABS and DSC indicator
and warning lamps for Canadian
models.
Page 108 of 189

108n
Disc brakesDisc brakes furnish optimum decelera-
tion and braking control and greater
fade resistance under heavy use.
When the vehicle is driven only occa-
sionally, during extended periods when
the vehicle is not used at all, and in oper-
ating conditions where brake applica-
tions are less frequent, there is an
increased tendency for corrosion of the
rotors and accumulation of contamina-
tion on the brake pads. This occurs
because the minimal pressure that must
be exerted by the pads to clean the
rotors by brake applications is not
reached.
If the brake rotors are corroded, they
will tend to respond to braking with a
pulsating effect that even extended
brake applications will fail to cure.
For your own safety: Use only
brake pads that BMW has ap-
proved for your particular vehicle
model. BMW cannot evaluate non-
approved brake pads to determine if
they are suited for use, and therefore
cannot ensure the operating safety of
the vehicle if they are installed.<
Driving notesWhen driving in wet conditions and in
heavy rain, it is effective to apply light
pressure to the brakes every few miles
or kilometers. Be aware of traffic condi-
tions to ensure that this maneuver does
not endanger other road users. The
heat that is generated by the brake ap-
plications helps to dry the brake pads
and rotors.
Maximum braking force is obtained
while the wheels are not locked, but
rather when they are still barely turning
immediately prior to locking. ABS main-
tains this state automatically. If the ABS
fails, you should revert to the staggered
braking technique described above on
page 110.
Long or steep mountain descents do
not necessarily lead to reduced braking
efficiency if you drive downhill with the
transmission in a gear that allows mini-
mal brake applications (or, with an au-
tomatic transmission, in an appropriate
lower range).
You can further increase the engine's
braking effect by selecting a lower gear,
downshifting as far as first gear or plac-
ing the selector lever in position 1.Should engine braking prove inade-
quate, you should still avoid extended,
continuous braking. Instead of main-
taining low to moderate pressure over
an extended period of time, you should
decelerate by applying more substantial
pressure to the brake pedal (watch for
following traffic), releasing the pedal,
and then repeating the application
(staggered braking). The cooling phases
between active braking intervals pre-
vent the brakes from overheating, thus
ensuring that full braking capacity re-
mains available at all times.
Do not coast with the clutch de-
pressed or with the shift lever or
selector lever in neutral. Do not drive
with the engine shut off. The engine
provides no braking effect when the
clutch is depressed or the transmission
is in neutral, and there is no power-
assist for braking or steering when the
engine is not running.
Do not allow floor mats, carpets or any
other objects to protrude into the area
around the brake pedal, the clutch or
the accelerator which could obstruct
their freedom of movement.<
Page 110 of 189

110n
Winter operationThe onset of winter is often accompa-
nied by rapid changes in weather.
Adaptations in driving style should be
accompanied by preparations on the
vehicle itself to ensure that your
progress through the winter remains
safe and trouble-free.CoolantBe sure that the coolant mixture con-
tains the year-round ratio of 50:50
water and extended-duty antifreeze/
corrosion protection. This mixture pro-
vides protection against freezing down
to approx. Ð 34 7 (Ð 37 6). Replace
the coolant every four years.LocksBMW door lock deicer can be used to
free them if frozen. This deicer also
contains lubricant.
After its use, treatment with BMW lock
barrel grease is recommended.Rubber seals and components To prevent the weather-stripping from
freezing, apply a spray-on rubber treat-
ment or silicone spray to the door, hood
and luggage compartment lid seals.
A full range of car care products is
available from your BMW center.<
Snow chains BMW snow chains
* can be mounted on
both summer and winter tires. Mount
them in pairs on the rear wheels only
and comply with the manufacturer's
safety precautions. Do not exceed a
maximum speed of 30 mph (50 km/h).
For best performance, deactivate the
DSC when snow chains are mounted.
Refer to page 79.
Starting offWhen starting from a full stop in deep
snow or for "rocking" the vehicle to free
it, we recommend that you deactivate
the DSC system. Refer to page 79.Driving on low-traction road
surfacesUse smooth, gentle pressure to control
the accelerator pedal. Avoid excessive
engine speeds and shift to the next
higher gear at an early point. On down-
grades or slopes, shift down to the next
lower gear at an early point. Maintain an
adequate distance between yourself
and the car ahead.
BrakesWinter road conditions substantially re-
duce the traction available between the
tires and the road surface. Remember
that braking distances will be signifi-
cantly longer as a result.
ABS is intended to prevent the wheels
from locking during brake applications,
thus helping to maintain vehicle stability
and steering response.
If the ABS does not respond in a critical
braking situation and the wheels lock:
Reduce the pressure on the brake pedal
until the wheels just start to roll again
while still maintaining enough force to
continue braking.
Following that, increase pedal pressure
again. Reduce the pressure as the
wheels lock, then reapply pressure.
Repeat this procedure. This type of
staggered braking will reduce the brak-
ing distance, and the vehicle still re-
mains responsive to steering. It allows
you to steer around hazards once you
have reduced the pressure on the brake
pedal.
Page 111 of 189

111n
IndexDataTechnologyRepairsCar careControlsOverview
Winter operation Power steering
Do not shift down on slick road
surfaces. Doing so could cause
the rear wheels to lose traction and
skid, resulting in a loss of vehicle con-
trol.<
Depress the clutch during hard
braking on road surfaces that pro-
vide only poor or uneven traction.<
Skid control Depress the clutch and release the ac-
celerator pedal, or place the selector
lever of the automatic transmission into
the "Neutral" position. Countersteer
carefully and attempt to regain control
of the vehicle.
ParkingEngage 1st or reverse gear. If your car
is equipped with an automatic trans-
mission, place the selector lever in
Park. On vehicles with manual trans-
mission, also apply the parking brake
when parking on inclined surfaces. In
order to prevent the parking brake lin-
ings from locking due to frost or corro-
sion, dry them by gently applying the
parking brake as the vehicle is coming
to a stop. Make sure that following traf-
fic is not endangered.
The brake lamps do not light up
when the parking brake is ap-
plied.<
High steering effort:
Contact an BMW center immediately to
have this system inspected.
If the power steering fails, in-
creased effort will be required to
steer the vehicle.<
Page 120 of 189

120n
Do not work on your vehicle
without appropriate skills. Always
switch off the engine and allow it to
cool down before working in the engine
compartment. Always disconnect the
battery before working on any electrical
systems or equipment, especially when
these are located within the engine
compartment. Comply with all applica-
ble instructions and warnings. Failure to
work in an informed, professional man-
ner when servicing components and
materials constitutes a safety hazard
for vehicle occupants and other road
users. If you are not familiar with the
guidelines, please have the operations
performed by your BMW center.<
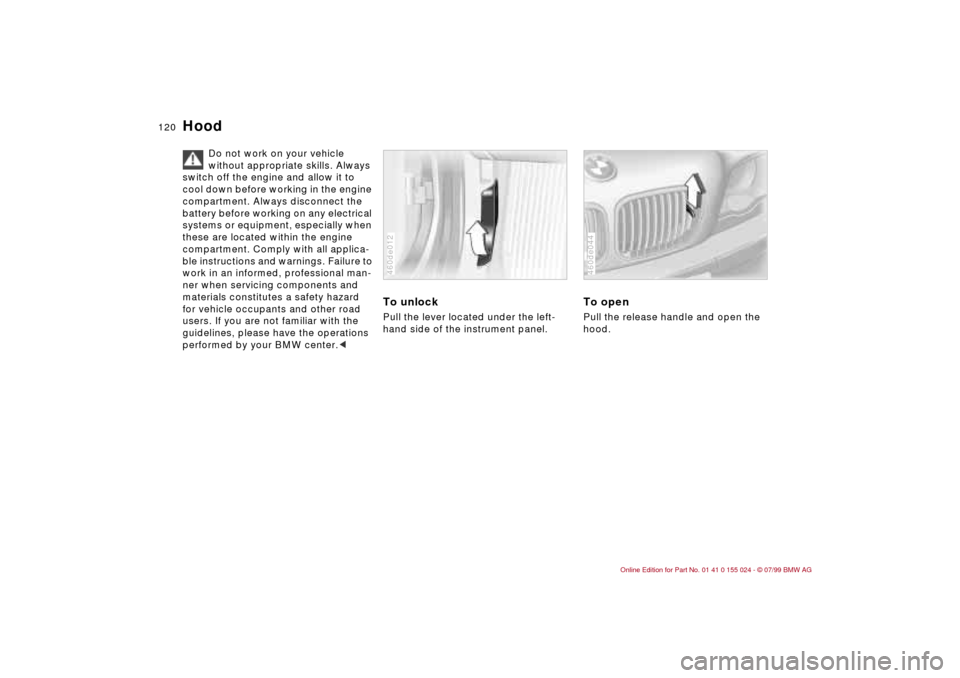
To unlock Pull the lever located under the left-
hand side of the instrument panel. 460de012
To openPull the release handle and open the
hood.460de044
Hood
Page 128 of 189

128n
Coolant
Do not add coolant to the cooling
system when the engine is hot. If
you attempt to do so, escaping coolant
can cause burns.
To avoid the possibility of damage later
on, never use anything other than fac-
tory-approved, nitrite and amino-free
extended-duty antifreeze with corrosion
inhibitor. Your BMW center is familiar
with the official specifications.
Antifreeze and anticorrosion agents are
hazardous to health. You should always
store them in their original container
and in a location that is inaccessible to
children. Extended-duty antifreeze with
corrosion inhibitor contains ethylene
glycol, a flammable substance. For this
reason, do not spill antifreeze with cor-
rosion inhibitor on hot engine parts. It
could ignite and cause serious burns.<
Comply with the applicable envi-
ronmental laws regulating the dis-
posal of extended-duty antifreeze with
corrosion inhibitor.<
Checking coolant levelCorrect coolant level when the engine
is cold (approx. 68 7 or 20 6):
Unscrew the cap from the expansion
tank.
The coolant level is correct when the
end of the red float is aligned with the
upper edge of the filler opening (refer
to the arrow in the illustration), or max.
0.8 in (2 cm) higher, that is up to the
second mark on the float (see also the
schematic diagram next to the filler
opening).460de053
Add coolant Wait until the engine cools before re-
moving the cap from the expansion
tank. The needle of the coolant gauge
in the instrument cluster must be lo-
cated in the blue zone. If it is not, there
is a danger of scalding.
1 Turn the cap slightly counterclock-
wise in order to allow accumulated
pressure to escape. Then open.
2 If the coolant is low, slowly add
coolant until the correct level is
reached Ð do not overfill.
The coolant is a mixture of water and
extended-duty antifreeze with corrosion
inhibitor. Always maintain the pre-
scribed all-season 50:50 mixture ratio
for year-round protection against inter-
nal corrosion. No other additives are
required.
Replace the coolant every four years.
Page 149 of 189

149n
IndexDataTechnologyRepairsCar careControlsOverview
Changing a wheel
Take these precautionary mea-
sures if you have either a flat tire
or are changing the tire.
Stop the vehicle as far as possible from
passing traffic. Park on a firm, flat sur-
face. Switch on the hazard flashers.
Turn the steering wheel to the straight-
ahead position, remove the key and en-
gage the steering lock. Shift into 1st or
reverse (selector lever in "Park" with
automatic) and engage the parking
brake.
Have all passengers leave the car and
remain well away from your immediate
working area (behind a guardrail, for in-
stance).
If a warning triangle or portable hazard
warning lamp is available, set it up on
the roadside at an appropriate distance
from the rear of the vehicle. Comply
with all applicable safety guidelines and
regulations.
Change the wheel only on a level, firm
surface that is not slippery. Avoid jack-
ing the car on a soft or slippery support
surface (snow, ice, loose gravel, etc.),
as it could slide sideways.
Position the jack on a firm support sur-
face.
Do not place wooden blocks or similar
objects under the jack. If you do so, the
jack might not be able to reach its full
support capacity because of the limited
height.
Do not lie under the vehicle or start the
engine when the vehicle is supported
by the jack. Failure to comply with this
creates a risk of fatal injury.<
Your BMW has either a spare wheel
* or
a space-saver spare tire
* for temporary
use and to ensure your mobility.
To remove the spare wheel
*,
lift the floor panel in the luggage
compartment completely out (refer to
page 41).<
You will the need the following:In order to avoid rattling noises later,
note the position of the tools when you
remove them and return them to their
original position when you are through
using them.
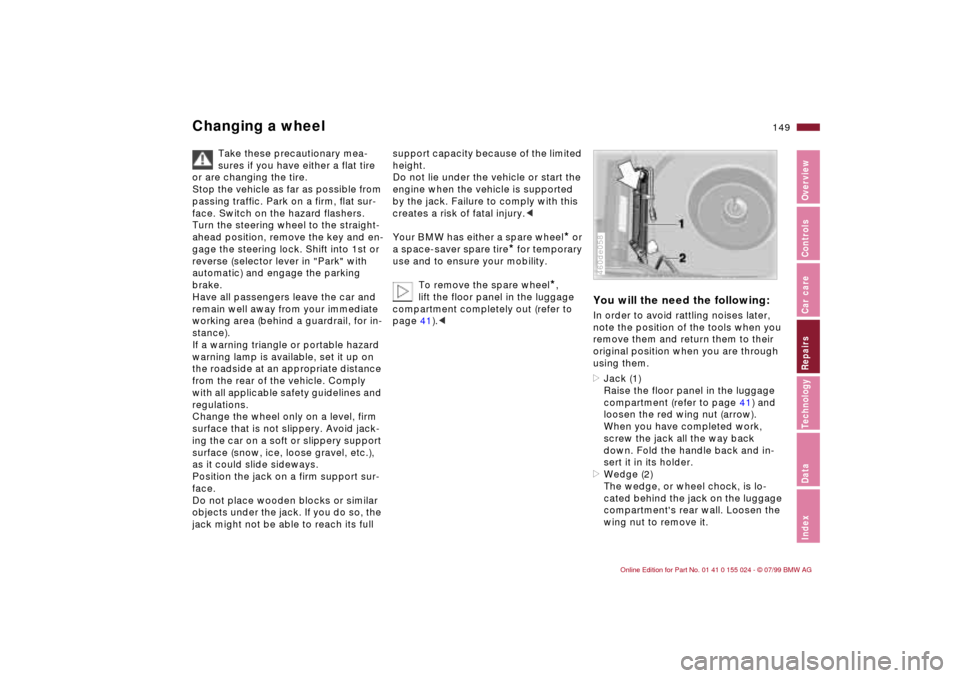
>Jack (1)
Raise the floor panel in the luggage
compartment (refer to page 41) and
loosen the red wing nut (arrow).
When you have completed work,
screw the jack all the way back
down. Fold the handle back and in-
sert it in its holder.
>Wedge (2)
The wedge, or wheel chock, is lo-
cated behind the jack on the luggage
compartment's rear wall. Loosen the
wing nut to remove it.460de058
Page 153 of 189

153n
IndexDataTechnologyRepairsCar careControlsOverview
BatteryBattery careThe battery is absolutely maintenance-
free, that is, the original electrolyte will
normally last for the service life of the
battery under moderate climatic condi-
tions.
For all questions that regard the
battery, please consult your BMW
center. Since the battery is mainte-
nance-free, the following is for your
information only.
comply with the corresponding precau-
tions whenever you work with or near
the battery.
Before handling the battery,
please read the following infor-
mation.
Wear eye protection. Do not
allow particles containing bat-
tery acid or lead to come into
contact with your eyes, your skin, or
your clothing.
Battery acid is extremely corro-
sive. Wear eye protection and
protective gloves. Do not tip the
battery. Battery acid can leak from the
ventilation openings.
Do not allow children access to
batteries and battery acid.
Never allow sparks or open
flame in the vicinity of the bat-
tery. Avoid sparks from electri-
cal cables or electrical equipment. Turn
the key to position 0 in the steering lock
when disconnecting or connecting the
battery. Do not short-circuit the battery
terminals. This creates a risk of injury
from high-energy sparks.
A highly-explosive gas is gener-
ated when the battery is charged.
If battery acid is splashed into
your eyes, rinse them thor-
oughly with clear water for at
least 15 minutes. Consult a physician
immediately. If your skin or clothing are
splashed by acid, rinse immediately
with ample clear water. If electrolyte is
accidentally swallowed, consult a phy-
sician immediately.
In order to protect the battery
case from ultraviolet radiation,
do not place it in direct sunlight.
A discharged battery can freeze. Store
the battery in areas where temperature
remains above freezing.
Removal and installation
Do not disconnect the battery
when the engine is running. If you
do so, the ensuing voltage surge will
damage the vehicle's onboard electron-
ics.
Do not make any modifications in the
wires to the positive terminal. If you do
so, the protective function of the safety
battery terminal is no longer ensured.
Repair and disposal must be performed
by trained technicians only.<
When removing the battery, disconnect
the cable on the negative terminal first,
then the cable on the positive terminal.
Loosen the center adjusting screw on
the battery retaining strap (use the
screwdriver included with the onboard
tool kit) and disconnect the strap.
When installing a battery, connect the
positive terminal first, then connect the
negative terminal.
When installing a battery, be sure
that it is mounted properly and
that the retaining bracket is installed
with the center adjustment screw. If this
is not done, the battery will not be ade-
quately secured in case of an acci-
dent.<