2000 BMW 323i SEDAN lock
[x] Cancel search: lockPage 75 of 189
75n
IndexDataTechnologyRepairsCar careControlsOverview
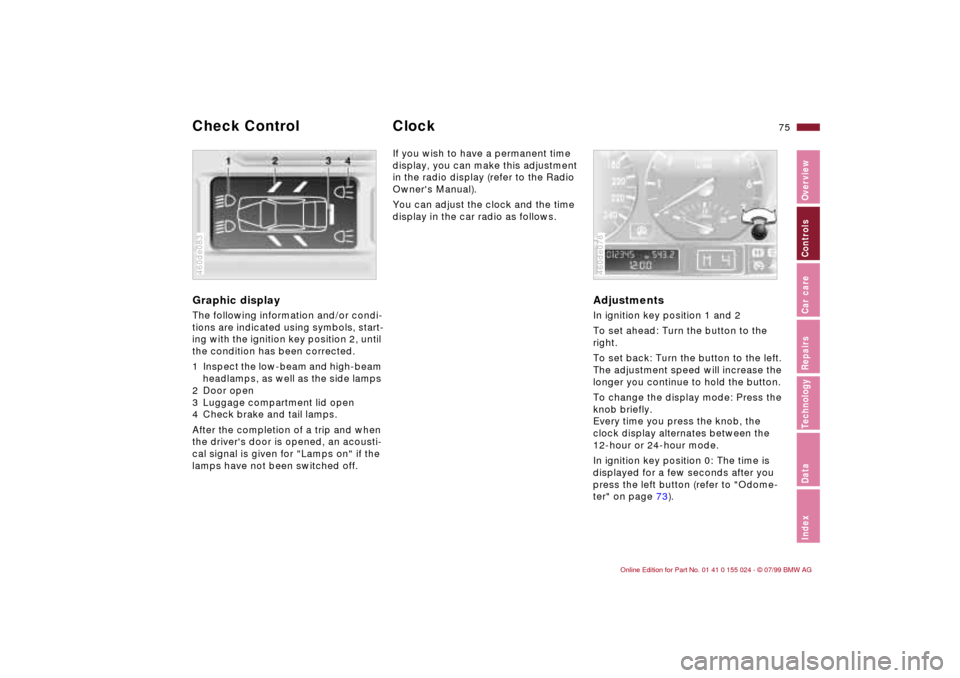
Graphic display The following information and/or condi-
tions are indicated using symbols, start-
ing with the ignition key position 2, until
the condition has been corrected.
1 Inspect the low-beam and high-beam
headlamps, as well as the side lamps
2 Door open
3 Luggage compartment lid open
4 Check brake and tail lamps.
After the completion of a trip and when
the driver's door is opened, an acousti-
cal signal is given for "Lamps on" if the
lamps have not been switched off.460de083
If you wish to have a permanent time
display, you can make this adjustment
in the radio display (refer to the Radio
Owner's Manual).
You can adjust the clock and the time
display in the car radio as follows.
AdjustmentsIn ignition key position 1 and 2
To set ahead: Turn the button to the
right.
To set back: Turn the button to the left.
The adjustment speed will increase the
longer you continue to hold the button.
To change the display mode: Press the
knob briefly.
Every time you press the knob, the
clock display alternates between the
12-hour or 24-hour mode.
In ignition key position 0: The time is
displayed for a few seconds after you
press the left button (refer to "Odome-
ter" on page 73).460de078
Check Control Clock
Page 88 of 189
88n
Automatic climate controlTips for pleasant drivingUse the automatic system (switch on
AUTO Ð button 7). Select an interior
temperature that is comfortable for you
Ð we recommend 70 7 (22 6). When
the outside temperature is above 42 7
(5 6), you can also use the air condi-
tioner (12). This will dry the air as well
as preventing condensation on the win-
dow surfaces Ð if there are passengers
with damp clothing, for example. Set
the air outlets (2) so that the air flows
past you and is not directed straight at
you. Set the rotary dial between the air
outlets (2) for the upper body to a me-
dium position, since air that is some-
what cooler promotes driving without
fatigue.
Detailed setting options are described
for you in the following section.
Your vehicle is set in such a man-
ner that, when you unlock the car
with your personalized remote control,
your own personalized setting of the
automatic climate control is initiated.<
Automatic air distribution
The AUTO program assumes
the adjustment of the air distri-
bution and the air supply for you and in
addition adapts the temperature to ex-
ternal influences (summer, winter) to
meet preferences you can specify. This
program maintains a comfortable in-car
climate regardless of the season. Select
an interior temperature that is comfort-
able for you Ð we recommend 70 7
(22 6). The temperature selected and
AUTO for the air supply appear in
display (10), refer to the overview on
page 86. Open the air outlets for the
upper body area. Switch on the air con-
ditioner in warm weather. The maxi-
mum cooling capacity is achieved when
you set rotary dial (3) to cold. Refer to
page 90.
Individual air distribution
You can cancel the AUTO pro-
gram by selecting specific dis-
tribution patterns to suit your
own individual requirements.
You can direct air to flow onto the win-
dows , toward the upper body ,
and into the footwell .
Temperature
The figures in the display pro-
vide a general indication of inte-
rior temperature. We recommend 70 7
(22 6) as a comfortable setting,
whether the air conditioner is operating
or not. When you start the vehicle, the
system ensures that the selected tem-
perature is reached as quickly as possi-
ble. It then maintains this temperature,
regardless of the season.
Set rotary dial (3; refer to "Draft-free
ventilation" on page 90) to a medium
setting, since air that is somewhat
cooler promotes driving without fatigue.
You can use this setting for mixing air to
make minor comfort modifications.
The full, uncontrolled heater out-
put is available starting at an inte-
rior temperature setting of 90 7
(32 6). At a setting of 60 7 (16 6),
the full cooling output is available when
the air conditioner is activated.<
Page 89 of 189

89n
IndexDataTechnologyRepairsCar careControlsOverview
Automatic climate control Air supply
By pressing the left or right half
of the button, you can vary the
air supply. By doing this, you switch off
the automatic control of the air supply.
Nevertheless, the automatic air distri-
bution remains unchanged.
When you set the lowest blower speed
by pressing the left half of the button,
all of the displays are canceled: The
blower, heating and air conditioner are
switched off, and the air supply is
stopped. You can reactivate the system
by pressing any button of the automatic
climate control.
To defrost the windshield and
side windows
This program quickly removes
ice and condensation from the
windshield and side windows.
Air conditioner
The air is cooled and dehumidi-
fied and Ð depending on the
temperature setting Ð rewarmed when
the air conditioner system is switched
on.
Depending on the weather, the wind-
shield may fog over briefly when the
engine is started.
Switch off the air conditioner at outside
temperatures below approx. 42 7
(5 6). This will help to prevent the win-
dows from fogging up.
If the windows fog over after switching
the air conditioner off, switch it back
on.
Condensation forms in the air
conditioner system during opera-
tion, which then exits under the vehicle.
Traces of condensed water of this kind
are thus normal.<
Automatic recirculated air control
(AUC)
You can respond to unpleasant
external odors by temporarily
blocking the outside air. The system
then recirculates the air already within
the vehicle. By repeated actuation of
the button, you can select one of three
different operation modes.
>Indicator lamps off: Fresh air flows
into the vehicle
>Left-hand indicator lamp on Ð AUC
mode: The system detects pollutants
in the outside air and responds by
deactivating the outside air flow as
required. The system then recircu-
lates the air already within the
vehicle.
Depending on air quality require-
ments, the system automatically
switches between outside air supply
and recirculation of the air already
within the vehicle.
>Right-hand indicator lamp on: The
flow of outside air is permanently
blocked. The system recirculates the
air already within the vehicle.
If the windows fog over in the
recirculated air mode, switch this
mode off and increase the air supply as
required.<
Page 92 of 189
92n
HiFi system Ð harman kardonSpecial acoustical effects are activated
or deactivated every time you press the
button.
When the system is activated, the im-
pression of a significantly larger pas-
senger compartment is created at all
seating areas, together with an im-
provement of the stereo effect.
When reception is weak, the system
frequently switches between stereo and
mono operation. Switch the feature off
if this occurs.460us287
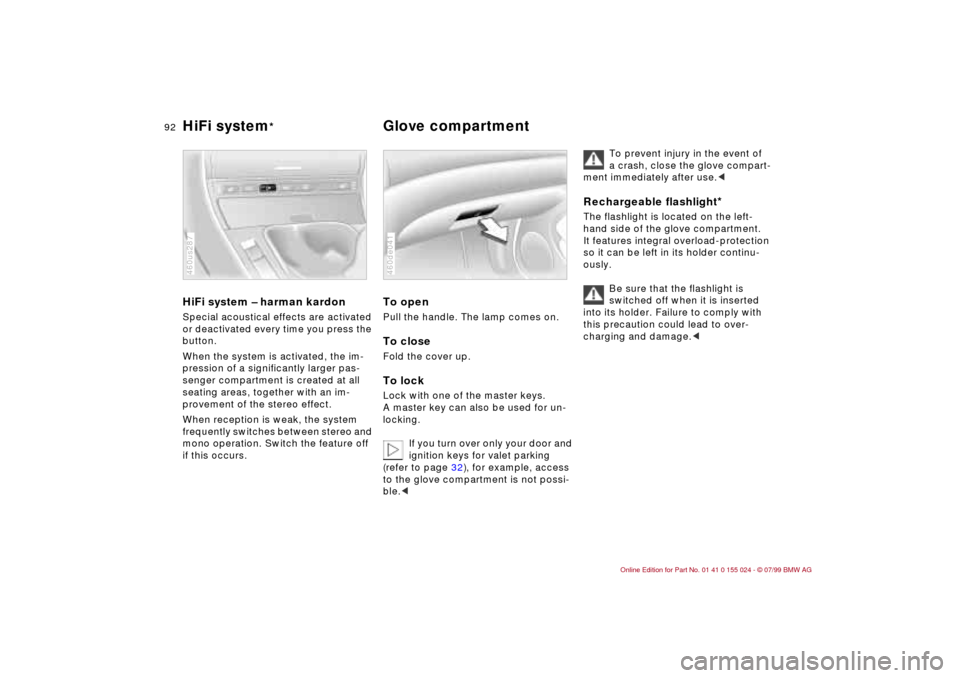
To openPull the handle. The lamp comes on.To closeFold the cover up.To lockLock with one of the master keys.
A master key can also be used for un-
locking.
If you turn over only your door and
ignition keys for valet parking
(refer to page 32), for example, access
to the glove compartment is not possi-
ble.<460de041
To prevent injury in the event of
a crash, close the glove compart-
ment immediately after use.<
Rechargeable flashlight
*
The flashlight is located on the left-
hand side of the glove compartment.
It features integral overload-protection
so it can be left in its holder continu-
ously.
Be sure that the flashlight is
switched off when it is inserted
into its holder. Failure to comply with
this precaution could lead to over-
charging and damage.<
HiFi system
* Glove compartment
Page 97 of 189
97n
IndexDataTechnologyRepairsCar careControlsOverview
Through-loading system
*
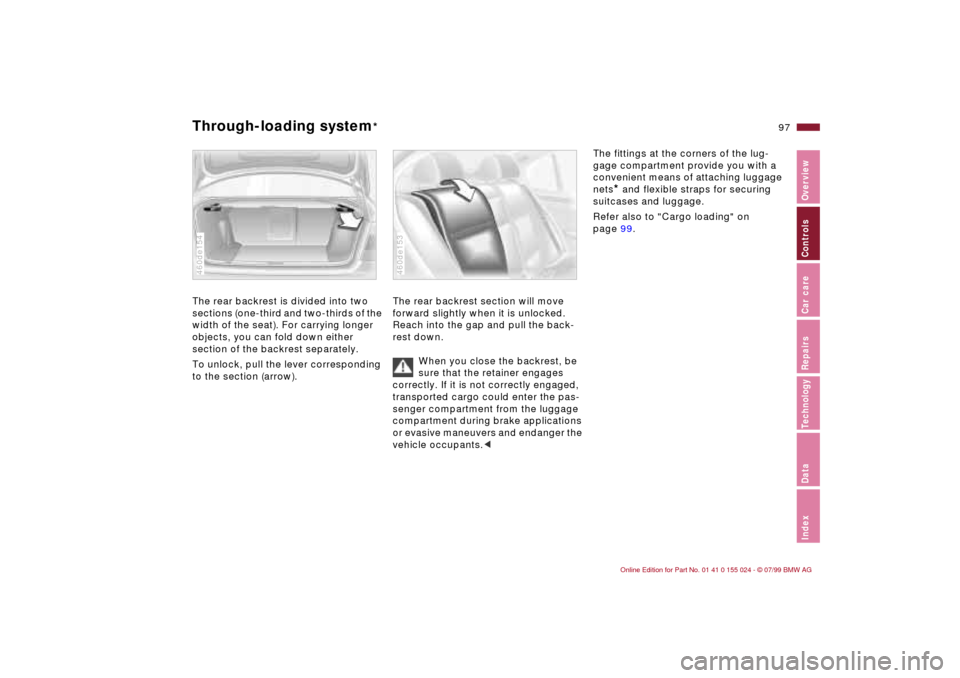
The rear backrest is divided into two
sections (one-third and two-thirds of the
width of the seat). For carrying longer
objects, you can fold down either
section of the backrest separately.
To unlock, pull the lever corresponding
to the section (arrow).460de154
The rear backrest section will move
forward slightly when it is unlocked.
Reach into the gap and pull the back-
rest down.
When you close the backrest, be
sure that the retainer engages
correctly. If it is not correctly engaged,
transported cargo could enter the pas-
senger compartment from the luggage
compartment during brake applications
or evasive maneuvers and endanger the
vehicle occupants.<460de153
The fittings at the corners of the lug-
gage compartment provide you with a
convenient means of attaching luggage
nets
* and flexible straps for securing
suitcases and luggage.
Refer also to "Cargo loading" on
page 99.
Page 98 of 189
98n
Ski bag
*
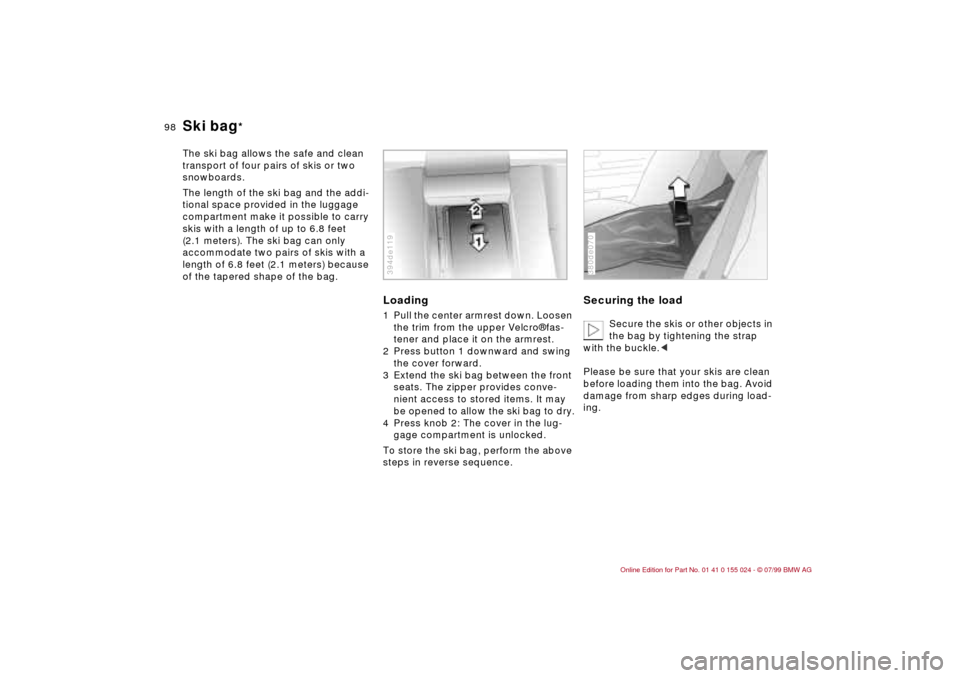
The ski bag allows the safe and clean
transport of four pairs of skis or two
snowboards.
The length of the ski bag and the addi-
tional space provided in the luggage
compartment make it possible to carry
skis with a length of up to 6.8 feet
(2.1 meters). The ski bag can only
accommodate two pairs of skis with a
length of 6.8 feet (2.1 meters) because
of the tapered shape of the bag.
Loading1 Pull the center armrest down. Loosen
the trim from the upper Velcro¨ fas-
tener and place it on the armrest.
2 Press button 1 downward and swing
the cover forward.
3 Extend the ski bag between the front
seats. The zipper provides conve-
nient access to stored items. It may
be opened to allow the ski bag to dry.
4 Press knob 2: The cover in the lug-
gage compartment is unlocked.
To store the ski bag, perform the above
steps in reverse sequence.394de119
Securing the load
Secure the skis or other objects in
the bag by tightening the strap
with the buckle.<
Please be sure that your skis are clean
before loading them into the bag. Avoid
damage from sharp edges during load-
ing.
380de070
Page 103 of 189

Overview
Controls and features
Operation, care
and maintenance
Owner service procedures
Technical data
Index Advanced technology
103n
IndexDataTechnologyRepairsCar careControlsOverview
Special operating instructions:
Break-in procedures104
Driving notes104
Catalytic converter105
Antilock Brake System
(ABS)106
Disc brakes108
Brake system109
Winter operation110
Power steering111
Cellular phones112
Radio reception112
Wheels and tires:
Tire inflation pressures113
Tire condition113
Tire replacement114
Tire rotation115
Wheel and tire
combinations116
Winter tires117
Snow chains117
Approved wheel and tire
specifications118Under the hood:
Hood120
Engine compartment122
Washer fluids124
Washer nozzles124
Engine oil125
Coolant128
Brake fluid129
Vehicle Identification
Number130
Care and maintenance:
The BMW Maintenance
System131
Caring for your car132
Airbags137
Vehicle storage137
Laws and regulations:
Technical modifications to the
vehicle138
OBD interface socket139
Car care
Page 106 of 189

106n
Antilock Brake System (ABS)The concept ABS enhances active safety by helping
to prevent the wheels from locking un-
der braking. This is because locked
wheels are dangerous. When the front
wheels slide, the driver loses steering
control over the vehicle. Traction loss at
the rear wheels can cause the rear end
to break into an uncontrolled skid.
ABS is designed to meet two essential
requirements during every brake appli-
cation:
>To help provide vehicle stability
>To help maintain steering control and
maneuverability Ð on all types of road
surfaces (asphalt, concrete, mud, wet,
snow, ice).
The system can achieve the shortest
braking distances possible under most
conditions (on straight-aways and in
curves, on asphalt, ice, wet road sur-
faces, etc.).
Braking with ABSThe system becomes operative once
the vehicle exceeds a speed of approx.
6 mph (10 km/h). Below approx. 3 mph
(6 km/h), it is once again deactivated.
This means that the wheels can lock in
the final phase of a panic stop Ð a factor
of no significance in actual use.
If you are in a situation that requires full
braking, you will exploit the full benefits
of the ABS system if you apply maxi-
mum brake pressure ("panic stop").
Since the vehicle maintains steering re-
sponsiveness, you can avoid possible
obstacles with a minimum of steering
effort, despite the full brake application.
The ABS system closed-loop control
circuit cycles in fractions of a second.
A pulsation at the brake pedal indicates
to the driver that ABS is active, that is,
that the vehicle is within its maximum
braking range. In addition, a pulsation Ð
a result of the control function cycles Ð
indicates to the driver that vehicle
speed should be reduced to adapt to
road surface conditions when there is
reduced traction and grip between tires
and road surface (slippery road sur-
face).
On road surfaces that have a loose sur-
face layer on a firm base with good
traction (on gravel or snow, for exam-ple), or when snow chains are mounted,
braking distances may be longer than
with locked wheels. However, ABS
continues to provide enhanced vehicle
stability and steering response under
these conditions.
Information for your safetyNot even ABS can suspend the laws of
physics. ABS cannot prevent the con-
sequences of brake applications with
inadequate clearances for safety be-
tween vehicles, when exceeding the
speed limit in curves, or the risks in-
volved when aquaplaning occurs. Re-
sponsibility for these types of situations
remains in the hands (and at the feet) of
the driver. You should never allow the
added safety of ABS to lull you into a
false sense of security, or mislead you
into taking increased risks that could af-
fect your own safety and that of others.
Do not make any modifications to
the ABS system.
Service procedures on ABS are to be
performed by authorized technicians
only.<