Page 69 of 189

69n
IndexDataTechnologyRepairsCar careControlsOverview
Wiper/Washer system1 Intermittent wipe or rain
sensor
*
Intermittent wipe:
You can use rotary dial 6 to select from
four wipe intervals.
In addition, the wipe interval automati-
cally adapts to variations in road speed.
Rain sensor:
The rain sensor is positioned on the
windshield, directly ahead of the inte-
rior rearview mirror. When the rain sen-
sor is activated, the windshield wiper is
controlled automatically, depending on
the degree of wetness of the windshield
(in both snow and rain). You do not
have to be concerned with switching
the windshield wiper on or off or adjust-
ing the wipe interval between intermit-
tent and full wipe. Instead, you can
concentrate fully on the traffic condi-
tions. This is especially important under
adverse weather conditions.
To activate the rain sensor:
In ignition key positions 1 or 2, move
the lever to position 1. The wipers travel
once across the windshield, regardless
of the weather.You can leave the lever permanently in
position 1, and then activate the rain
sensor in ignition key positions 1 or 2.
To do this,
>turn rotary dial 6 briefly or
>use the automatic windshield
washer 5.
To modify the sensitivity of the rain
sensor:
Turn rotary dial 6.
Turn the rain sensor off when
passing through an automatic car
wash. Failure to do so could result in
damage caused by undesired wiper
activation.<
2 Normal wiper speedWhen the vehicle is stationary, the wip-
ers switch automatically to intermittent
wipe (not on vehicles with rain sensor).3 Fast wiper speedWhen the vehicle is stationary, the wip-
ers operate at normal speed (not on
vehicles with rain sensor).5 Automatic windshield washer The system sprays washer fluid against
the windshield and activates the wipers
for a brief period.
If you pull the lever only briefly, the sys-
tem sprays washer fluid onto the wind-
shield without activating the wipers.
Page 70 of 189
70n
Wiper/Washer system Rear window defroster Headlamp washers
*
When the vehicle's lighting system is
switched on, the headlamps will also be
cleaned every fifth time the automatic
windshield washer is activated.
Do not use the washers if there
is any danger that the fluid will
freeze on the windshield. If you do so,
your vision could be obscured. Use an
antifreeze agent. Refer to page 124.
Do not use the washers when the reser-
voir is empty. If you do so, the washer
pump could be damaged.
*
automatically when the ignition key is in
position 2.To activatePress the button: As long as the indica-
tor lamp remains on, the rear window
defroster continues at high-output
(rapid thaw).
After the indicator lamp goes out, the
defroster continues operating at re-
duced power for a limited period before
deactivating automatically. 460de026
To deactivatePress the button if the indicator lamp is
on.
Page 71 of 189

71n
IndexDataTechnologyRepairsCar careControlsOverview
Cruise control
*
You can store and automatically main-
tain any desired vehicle speed above
approx. 20 mph (30 km/h). To activate the system In ignition key positions 1 or 2:
Press button 1. The indicator lamp in
the instrument cluster comes on. You
can now use the cruise control.462de214
To store and maintain speed or
to accelerate Press button 3 briefly:
The system registers and maintains the
current vehicle speed. The speed will
now be increased by approx. 0.6 mph
(approx. 1 km/h) every time you briefly
press the button.
Press and hold button 3:
The vehicle accelerates without pres-
sure on the accelerator pedal. When
you release the button, the system reg-
isters and maintains the current speed.
If, on a downhill gradient, the
engine braking effect is not suffi-
cient, the controlled speed may be
exceeded. Speed may drop on uphill
grades if the engine output is insuffi-
cient.<
To deceleratePress button 2 briefly:
When the cruise control is active, vehi-
cle speed is reduced by approx.
0.6 mph (approx. 1 km/h) every time
you briefly press the button.
Press and hold button 2:
With the cruise control active, the sys-
tem automatically reduces the throttle
opening to slow the vehicle. When you
release the button, the system registers
and maintains the current speed.
Page 72 of 189

72n
Cruise control
*
To cancel the cruise control When the system is activated, press
and hold button 1. The indicator lamp
stays on. You can use the cruise control
again as desired.
In addition, cruise control is canceled
automatically:
>if the brakes are applied
>if the clutch is depressed or the auto-
matic transmission selector lever is
moved from "Drive" to "Neutral"
>if you exceed or fall below the pro-
grammed speed for an extended pe-
riod (by depressing the accelerator,
for example).
To resume the stored settingPress button 4:
The vehicle accelerates to and main-
tains the last speed stored. When you
turn the ignition key to position 0, the
stored speed is deleted from the sys-
tem's memory and the system is deacti-
vated.
To deactivate the system When the cruise control has been can-
celed, press button 1 again. The indica-
tor lamp goes off and the stored speed
is canceled.
Do not use cruise control on twist-
ing roads, when high traffic density
prevents driving at a constant speed,
when the road surface is slick (snow,
rain, ice), or when the road surface is
loose (rocks, sand).<
Page 73 of 189
73n
IndexDataTechnologyRepairsCar careControlsOverview
1 Odometer You can activate the displays shown in
the illustration with the ignition key in
position 0 by pressing the button in the
instrument cluster (arrow).2 Trip odometerTo reset the trip odometer to zero,
press the button (arrow) with the
ignition key in position 1 or 2.460us144
Avoid engine speeds in the red warning
zone of the gauge.
To protect the engine, the fuel supply is
automatically interrupted in this zone;
you will notice a loss of power.460us079
Indicates the current fuel consumption
in mpg (in l/100 km for Canadian mod-
els). You can check your current driving
style to see whether it is conducive to
economy and minimum exhaust emis-
sions.
The needle goes back to zero when the
car is not moving.460us080
Odometer Tachometer Energy Control
Page 74 of 189

74n
Fuel gauge Temperature gauge Service Interval Display When you switch on the ignition, the in-
dicator lamp comes on briefly to con-
firm that the system is stationary.
Once the indicator lamp begins to light
up continuously, there are still approx.
2.1 gallons (8 liters) of fuel in the fuel
tank.
Tank capacity: page 175.
If the tilt of the vehicle varies (extended
driving in mountainous areas, for exam-
ple), there may be slight fluctuations of
the needle.
Fill the fuel tank well before it is
empty. Driving to the last drop of
fuel can result in damage to the engine
and/or the catalytic converter.<460us081
BlueThe engine is still cold. Drive at moder-
ate engine and vehicle speeds.RedWhen you switch on the ignition, the
indicator lamp comes on briefly to con-
firm that the system is operational.
If the lamp comes on while operating
the vehicle: The engine is overheated.
Stop and switch the engine off immedi-
ately and allow it to cool down.Between the blue and red zonesNormal operating range. It is not un-
usual for the needle to rise as far as the
edge of the red zone in response to
high outside temperatures or severe
operating conditions.
Checking coolant level: page 128.460de082
Remaining distance for serviceThe displays shown in the illustration
appear for a few seconds when the
ignition key is in positions 1 and 2 or
after the engine is started.
The next service due appears with the
message OILSERVICE or INSPECTION,
together with the remaining distance
before scheduled service.
The computer bases its calculations of
the remaining distance on the rate of
fuel consumption in the period immedi-
ately preceding your data request.
A flashing message and a "Ð" in front of
the number mean that the service inter-
val has already been exceeded by the
distance shown on the display. Please
contact your BMW center for an
appointment.460de112
Page 75 of 189

75n
IndexDataTechnologyRepairsCar careControlsOverview
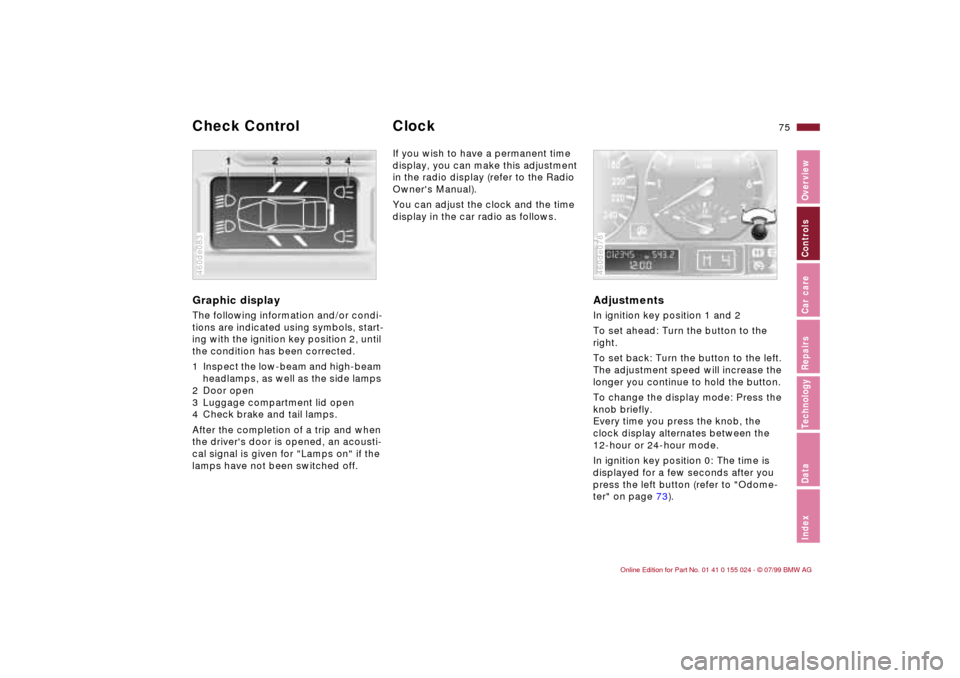
Graphic display The following information and/or condi-
tions are indicated using symbols, start-
ing with the ignition key position 2, until
the condition has been corrected.
1 Inspect the low-beam and high-beam
headlamps, as well as the side lamps
2 Door open
3 Luggage compartment lid open
4 Check brake and tail lamps.
After the completion of a trip and when
the driver's door is opened, an acousti-
cal signal is given for "Lamps on" if the
lamps have not been switched off.460de083
If you wish to have a permanent time
display, you can make this adjustment
in the radio display (refer to the Radio
Owner's Manual).
You can adjust the clock and the time
display in the car radio as follows.
AdjustmentsIn ignition key position 1 and 2
To set ahead: Turn the button to the
right.
To set back: Turn the button to the left.
The adjustment speed will increase the
longer you continue to hold the button.
To change the display mode: Press the
knob briefly.
Every time you press the knob, the
clock display alternates between the
12-hour or 24-hour mode.
In ignition key position 0: The time is
displayed for a few seconds after you
press the left button (refer to "Odome-
ter" on page 73).460de078
Check Control Clock
Page 76 of 189

76n
Onboard computer
*
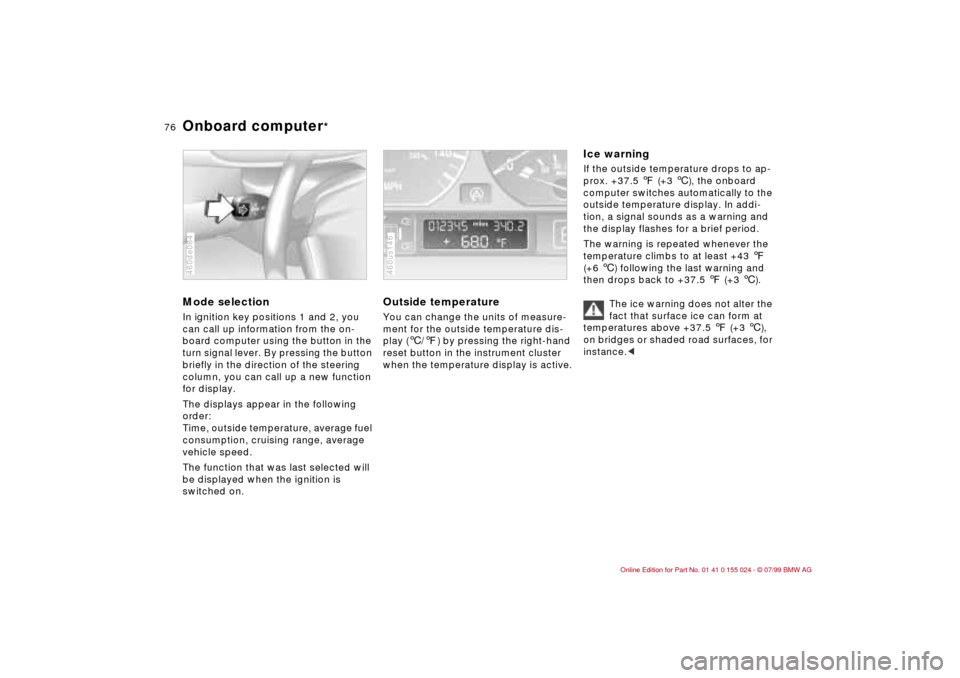
Mode selectionIn ignition key positions 1 and 2, you
can call up information from the on-
board computer using the button in the
turn signal lever. By pressing the button
briefly in the direction of the steering
column, you can call up a new function
for display.
The displays appear in the following
order:
Time, outside temperature, average fuel
consumption, cruising range, average
vehicle speed.
The function that was last selected will
be displayed when the ignition is
switched on.460de084
Outside temperature You can change the units of measure-
ment for the outside temperature dis-
play (6/7) by pressing the right-hand
reset button in the instrument cluster
when the temperature display is active.460us146
Ice warning If the outside temperature drops to ap-
prox. +37.5 7 (+3 6), the onboard
computer switches automatically to the
outside temperature display. In addi-
tion, a signal sounds as a warning and
the display flashes for a brief period.
The warning is repeated whenever the
temperature climbs to at least +43 7
(+6 6) following the last warning and
then drops back to +37.5 7 (+3 6).
The ice warning does not alter the
fact that surface ice can form at
temperatures above +37.5 7 (+3 6),
on bridges or shaded road surfaces, for
instance.<