2000 BMW 323i SEDAN lights
[x] Cancel search: lightsPage 20 of 189

20n
Indicator and warning lamps
Technology that monitors itself
Many of the systems of your BMW
monitor themselves automatically, both
during engine starts and while you are
driving. Indicator and warning lamps
that are identified by "
l
" are tested for
proper functioning whenever the igni-
tion key is turned. They each light up
once for different periods of time.
If a fault should occur in one of these
systems, the corresponding lamp does
not go out after the engine is started, or
it lights up while the vehicle is moving.
You will see how to react to this below.
Red: Stop immediately
Battery charge
l
The battery is no longer being
charged. There is a malfunction
of the alternator ribbed V-belt or in the
charging circuit of the alternator. Please
contact the nearest BMW center.
If the ribbed V-belt is defective, do
not continue driving. If you do so,
the engine could be damaged due to
overheating. If the ribbed V-belt is de-
fective, increased steering effort is also
required.<
Engine oil pressure l
Stop the vehicle and switch off
the engine immediately. Check
the engine oil and top up as required. If
the oil level is correct, please contact
the nearest BMW center.
Do not continue driving. If you do
so, the engine could be damaged
because of inadequate lubrication.<
Tire Pressure Control (RDC)
* l
In addition, an acoustic signal is
sounded: A tire failure has oc-
curred. Reduce vehicle speed immedi-
ately and stop the vehicle. Avoid hard
brake applications. Do not oversteer.
For additional information: Refer to
page 80.
Brake hydraulic system l
If the lamp comes on when the
parking brake is not engaged:
Check the brake fluid level. Before driv-
ing further, be sure to read the notes on
pages 109 and 129.
Brake warning lamp for Cana-
dian models.
Page 21 of 189

21n
IndexDataTechnologyRepairsCar careControlsOverview
Indicator and warning lampsYellow: Stop immediately
Engine oil level
Comes on while driving: Stop
the vehicle and switch off the
engine immediately. The oil level is at
the absolute minimum.
For additional information: Refer to
page 125.
Do not continue driving until you
have topped up the engine oil. If
you continue to drive, the engine could
be damaged because of inadequate
lubrication.<
Red and yellow: Continue driving
cautiously
Cornering Brake Control (CBC) l
If the brake warning lamp comes
on together with the yellow indi-
cator lamps for ABS and DSC:
The entire ABS, CBC and DSC
control system has failed. Con-
tinue driving cautiously and
defensively. Avoid hard brake
applications. Please have the system
checked by your BMW center as soon as
possible.
For additional information: Refer to
pages 79 and 107.
CBC, ABS and DSC indicator
and warning lamps for Canadian
models.
Red: An important reminder
Parking brake
Comes on when the parking
brake is applied Ð an additional
acoustic signal sounds when starting
off.
For additional information: Refer to
page 63.
Brake warning lamp for Cana-
dian models.
Please fasten safety belts l
An acoustic warning signal
sounds simultaneously. Lights
up for a few seconds or until the safety
belt is fastened.
For additional information on safety
belts: Refer to page 54.
Airbags l
Please have the system in-
spected by your BMW center.
For additional information: Refer to
pages 56 and 163.
Page 23 of 189

23n
IndexDataTechnologyRepairsCar careControlsOverview
Indicator and warning lamps
Electronic Engine Power Control
(EML)
* l
Malfunction in engine timing.
Higher brake application pressure may
be necessary and brake pedal travel
may be significantly longer. Please have
the system inspected by your BMW
center.
Add coolant
The coolant level is too low. Top
up the coolant at the earliest
opportunity.
For additional information: Refer to
page 128.
Green: For your information
Turn signal indicator
Flashes when the turn signal in-
dicator is actuated. Includes the
trailer turn signals if you are towing a
trailer. Rapid flashing indicates a sys-
tem malfunction.
For additional information: Refer to
page 68.
Cruise control
*
Comes on when the cruise con-
trol is activated. Available for
operation via the multifunction steering
wheel.
For additional information: Refer to
page 71.
Front fog lamps
*
Lights up whenever you switch
on the front fog lamps.
For additional information: Refer to
page 83.
Blue: For your information
High beams
Lights up when the high beams
are on or the headlamp flasher
is actuated.
For additional information: Refer to
pages 68 and 83.
Page 37 of 189

37n
IndexDataTechnologyRepairsCar careControlsOverview
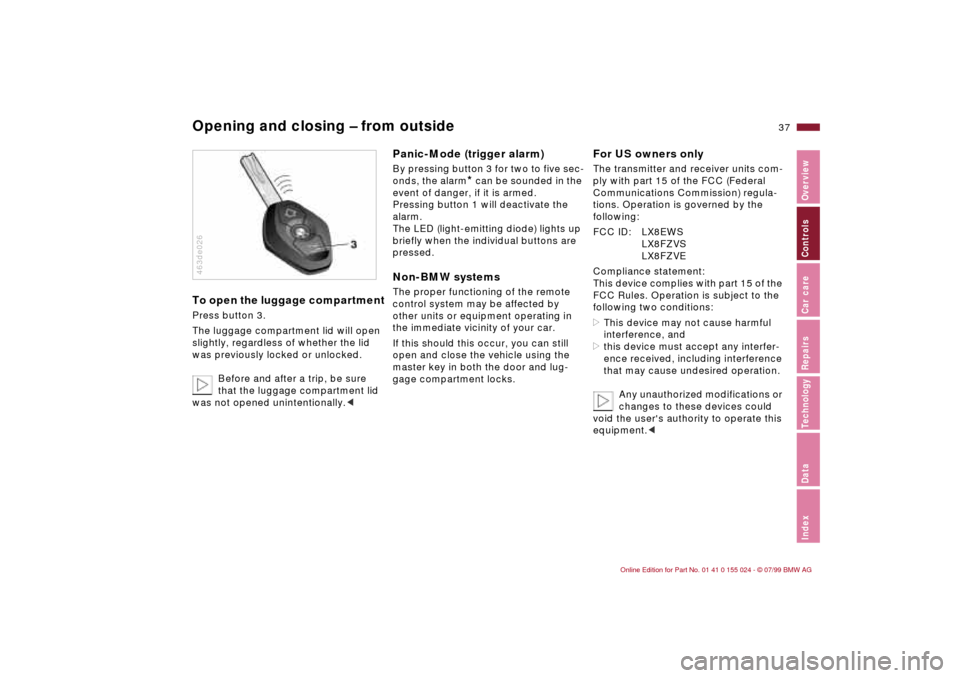
Opening and closing Ð from outsideTo open the luggage compartmentPress button 3.
The luggage compartment lid will open
slightly, regardless of whether the lid
was previously locked or unlocked.
Before and after a trip, be sure
that the luggage compartment lid
was not opened unintentionally.<463de026
Panic-Mode (trigger alarm)By pressing button 3 for two to five sec-
onds, the alarm
* can be sounded in the
event of danger, if it is armed.
Pressing button 1 will deactivate the
alarm.
The LED (light-emitting diode) lights up
briefly when the individual buttons are
pressed.
Non-BMW systemsThe proper functioning of the remote
control system may be affected by
other units or equipment operating in
the immediate vicinity of your car.
If this should this occur, you can still
open and close the vehicle using the
master key in both the door and lug-
gage compartment locks.
For US owners onlyThe transmitter and receiver units com-
ply with part 15 of the FCC (Federal
Communications Commission) regula-
tions. Operation is governed by the
following:
FCC ID: LX8EWS
LX8FZVS
LX8FZVE
Compliance statement:
This device complies with part 15 of the
FCC Rules. Operation is subject to the
following two conditions:
>This device may not cause harmful
interference, and
>this device must accept any interfer-
ence received, including interference
that may cause undesired operation.
Any unauthorized modifications or
changes to these devices could
void the user's authority to operate this
equipment.<
Page 43 of 189

43n
IndexDataTechnologyRepairsCar careControlsOverview
Alarm system
*
>If the indicator lamp flashes for
10 seconds when the system is dis-
armed: An attempted entry has been
detected in the period since the sys-
tem was armed.
Following triggering of an alarm, the in-
dicator lamp will flash continuously.Avoiding an unintentional alarmThe tilt alarm sensor and interior motion
sensor may be switched off at the same
time. You can do this to prevent a false
alarm from being triggered (in garages
with elevator ramps, for instance), or
when the vehicle is transported by
trailer or train:
Lock the vehicle twice (= arm the sys-
tem). Press button 2 on the remote con-
trol twice in succession or lock the
vehicle twice with the key (refer to
page 36).
The indicator lamp lights up briefly and
then flashes continuously. The tilt alarm
sensor and the interior motion sensor
are deactivated as long as the system is
armed.
Interior motion sensorThe transmitter and receiver of the inte-
rior motion sensor are located in a trim
panel in the vehicle's roof.
In order for the interior motion sensor to
function properly, the windows and
sliding/tilt sunroof must be completely
closed.
However, you should switch off the inte-
rior motion sensor (see previous column
under the heading "Avoiding an unin-
tentional alarm") if you wish to leave the
windows or sliding/tilt sunroof open.460de159
The tilt sensor and interior motion
sensor are deactivated if the con-
venience closing mode for the windows
and the sliding/tilt sunroof is interrupted
within the first 10 seconds and then
reinitiated. If this happens, you must
disarm the system and then re-arm it.<
Page 50 of 189

50n
Power seat
*
Seat and mirror memory
*
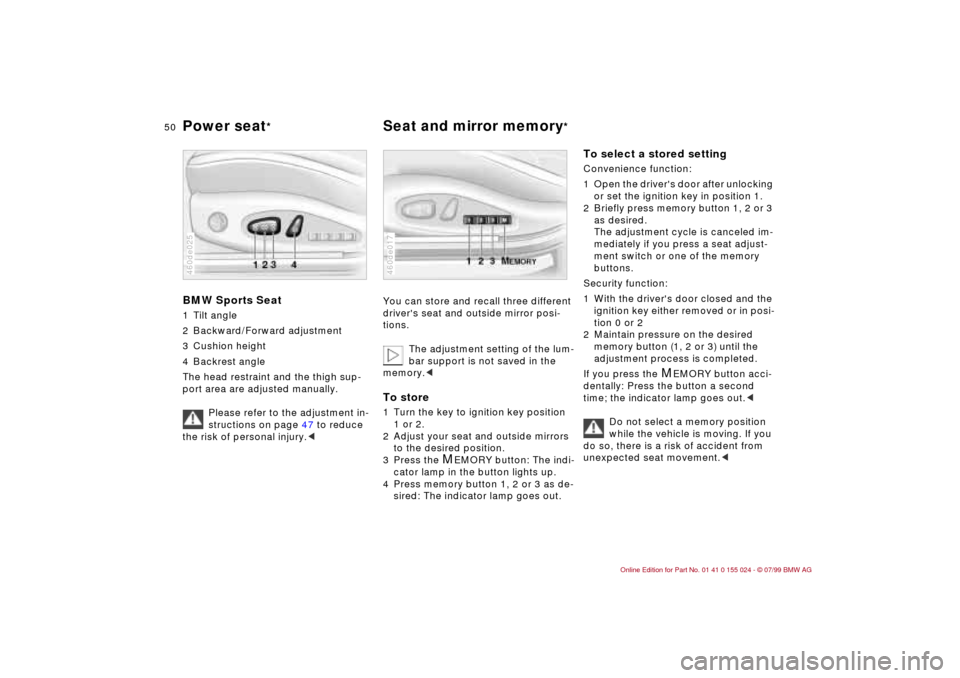
BMW Sports Seat1 Tilt angle
2 Backward/Forward adjustment
3 Cushion height
4 Backrest angle
The head restraint and the thigh sup-
port area are adjusted manually.
Please refer to the adjustment in-
structions on page 47 to reduce
the risk of personal injury.<460de025
You can store and recall three different
driver's seat and outside mirror posi-
tions.
The adjustment setting of the lum-
bar support is not saved in the
memory.
2 Adjust your seat and outside mirrors
to the desired position.
3 Press the
M
EMORY button: The indi-
cator lamp in the button lights up.
4 Press memory button 1, 2 or 3 as de-
sired: The indicator lamp goes out.
460de017
To select a stored setting Convenience function:
1 Open the driver's door after unlocking
or set the ignition key in position 1.
2 Briefly press memory button 1, 2 or 3
as desired.
The adjustment cycle is canceled im-
mediately if you press a seat adjust-
ment switch or one of the memory
buttons.
Security function:
1 With the driver's door closed and the
ignition key either removed or in posi-
tion 0 or 2
2 Maintain pressure on the desired
memory button (1, 2 or 3) until the
adjustment process is completed.
If you press the
M
EMORY button acci-
dentally: Press the button a second
time; the indicator lamp goes out.<
Do not select a memory position
while the vehicle is moving. If you
do so, there is a risk of accident from
unexpected seat movement.<
Page 57 of 189

57n
IndexDataTechnologyRepairsCar careControlsOverview
AirbagsIndicator lamp
The indicator lamp displays the
operational status of the airbag
system when the ignition key is
in position 1 and higher.
System operational:
>The indicator lamp comes on briefly
then goes out.
System malfunction:
>The indicator lamp fails to come on.
>The indicator lamp comes on briefly
before going out, and then lights up
again.
If there is a system malfunction, there is
a risk that the airbags will not be trig-
gered within their normal response
range, even if the level of impact would
normally have triggered them.
Have your BMW center inspect and
repair the system immediately.
The airbag indicator lamp also
comes on if the safety belt ten-
sioners have been triggered.<
For your own safety, please com-
ply with the following precautions
concerning airbags. If you do not, their
protective function may be impaired
and your personal safety endangered.
The following information pertains to all
occupants:
The airbags are supplemental restraint
devices designed to provide extra pro-
tection; they are not a substitute for
safety belts. Wear your safety belt at all
times. The airbags will not be triggered
in the event of a minor accident, a vehi-
cle roll-over, or collisions from the rear.
In these instances, the safety belt offers
the best protection.
Airbags are located under the cover
panels in the steering wheel, in the in-
strument panel, in the side trim panels
in the front and rear
*, in the roof panels,
and in the sides of the inside roof lining.
Select a seat position that is comfort-
able and allows the greatest possible
distance from each of the applicable air-
bags. Hold the steering wheel at the rim
(hands at the "9 o'clock and 3 o'clock"
positions) in order to avoid injuries to
your hands or arms if the airbag is trig-
gered.
Never allow any objects to obstruct the
area between the airbag and an occu-
pant.
Do not use the cover panel above the
front passenger airbag as a storage
area.
Never tape the airbag cover panels,
cover them over or alter them in any
other way.
Never install a rear-facing child restraint
device on the front passenger seat. Chil-
dren under 13 years of age and children
who are smaller than 5 feet (150 cm),
should only travel in the rear seat.
If your vehicle is equipped with side air-
bags in the rear, be sure that child seats
are installed correctly and with the
greatest possible distance from the side
trim panels. Do not allow children to
lean out of the child's seat in the direc-
tion of the side trim panels. Otherwise,
serious injuries could occur if the airbag
is triggered.
At all times, occupants should sit up-
right and be properly restrained (infants
and small children in appropriate child
restraint systems; larger children and
adults using the safety belts). Never let
an occupant's head rest near or on a
side airbag because the inflating airbag
could cause a serious or fatal injury.
Please note that the word "Airbag" im-
printed on the door trim panel indicates
the airbag's location.
Page 63 of 189

63n
IndexDataTechnologyRepairsCar careControlsOverview
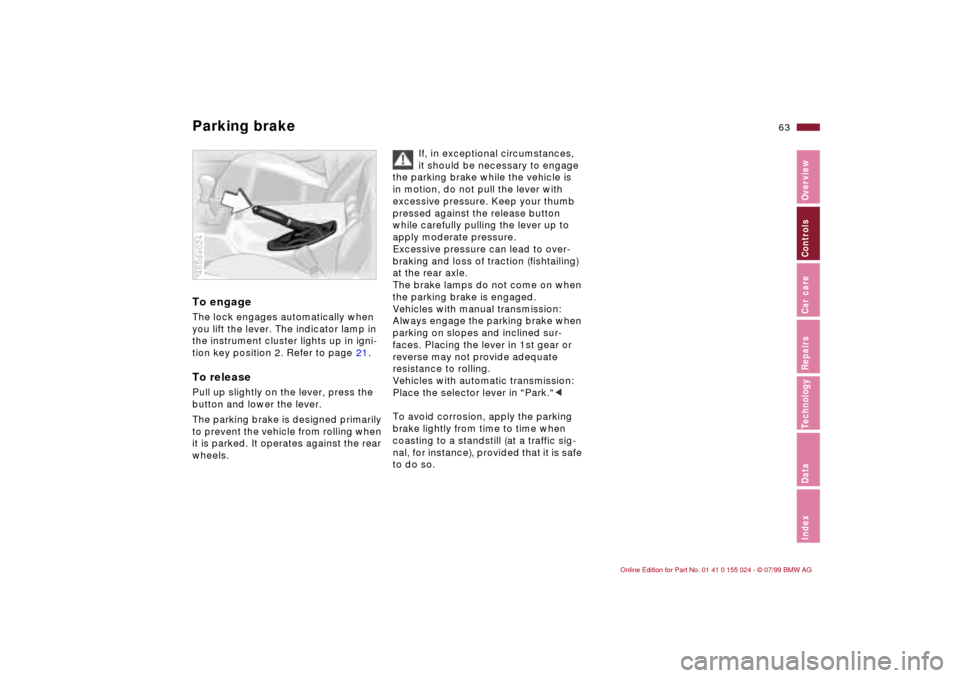
Parking brake To engageThe lock engages automatically when
you lift the lever. The indicator lamp in
the instrument cluster lights up in igni-
tion key position 2. Refer to page 21.To releasePull up slightly on the lever, press the
button and lower the lever.
The parking brake is designed primarily
to prevent the vehicle from rolling when
it is parked. It operates against the rear
wheels.460de024
If, in exceptional circumstances,
it should be necessary to engage
the parking brake while the vehicle is
in motion, do not pull the lever with
excessive pressure. Keep your thumb
pressed against the release button
while carefully pulling the lever up to
apply moderate pressure.
Excessive pressure can lead to over-
braking and loss of traction (fishtailing)
at the rear axle.
The brake lamps do not come on when
the parking brake is engaged.
Vehicles with manual transmission:
Always engage the parking brake when
parking on slopes and inclined sur-
faces. Placing the lever in 1st gear or
reverse may not provide adequate
resistance to rolling.
Vehicles with automatic transmission:
Place the selector lever in "Park."<
To avoid corrosion, apply the parking
brake lightly from time to time when
coasting to a standstill (at a traffic sig-
nal, for instance), provided that it is safe
to do so.