2000 BMW 323i SEDAN ECO mode
[x] Cancel search: ECO modePage 63 of 189
63n
IndexDataTechnologyRepairsCar careControlsOverview
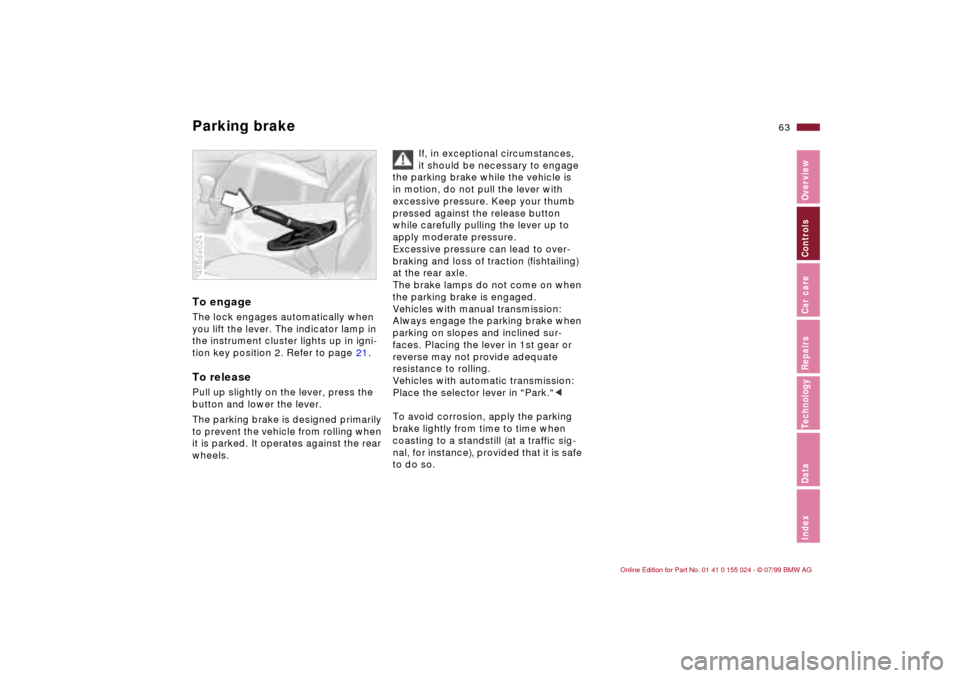
Parking brake To engageThe lock engages automatically when
you lift the lever. The indicator lamp in
the instrument cluster lights up in igni-
tion key position 2. Refer to page 21.To releasePull up slightly on the lever, press the
button and lower the lever.
The parking brake is designed primarily
to prevent the vehicle from rolling when
it is parked. It operates against the rear
wheels.460de024
If, in exceptional circumstances,
it should be necessary to engage
the parking brake while the vehicle is
in motion, do not pull the lever with
excessive pressure. Keep your thumb
pressed against the release button
while carefully pulling the lever up to
apply moderate pressure.
Excessive pressure can lead to over-
braking and loss of traction (fishtailing)
at the rear axle.
The brake lamps do not come on when
the parking brake is engaged.
Vehicles with manual transmission:
Always engage the parking brake when
parking on slopes and inclined sur-
faces. Placing the lever in 1st gear or
reverse may not provide adequate
resistance to rolling.
Vehicles with automatic transmission:
Place the selector lever in "Park."<
To avoid corrosion, apply the parking
brake lightly from time to time when
coasting to a standstill (at a traffic sig-
nal, for instance), provided that it is safe
to do so.
Page 65 of 189
65n
IndexDataTechnologyRepairsCar careControlsOverview
Automatic transmission with Steptronic
*
You have the option of driving with a
normal automatic transmission or
switching to manual.
When you move the selector lever from
the "D" position to the left into the M/S
range, the performance-oriented shift
programs of the automatic transmission
are engaged. As soon as you briefly
touch the selector lever in the "+" or "Ð"
direction, Steptronic changes the gear.
The manual mode is engaged. When-
ever you want to use automatic again,
just shift the selector lever toward the
right to position D.
The automatic transmission with Step-
tronic is equipped with ATC (Adaptive
Transmission Control). ATC reacts with
precision to your individual driving style
and the current driving conditions. It is
for this reason that various shift pro-
grams are used.
For additional details concerning the
ATC, please refer to the chapter de-
scribing "Advanced technology" on
page 162.
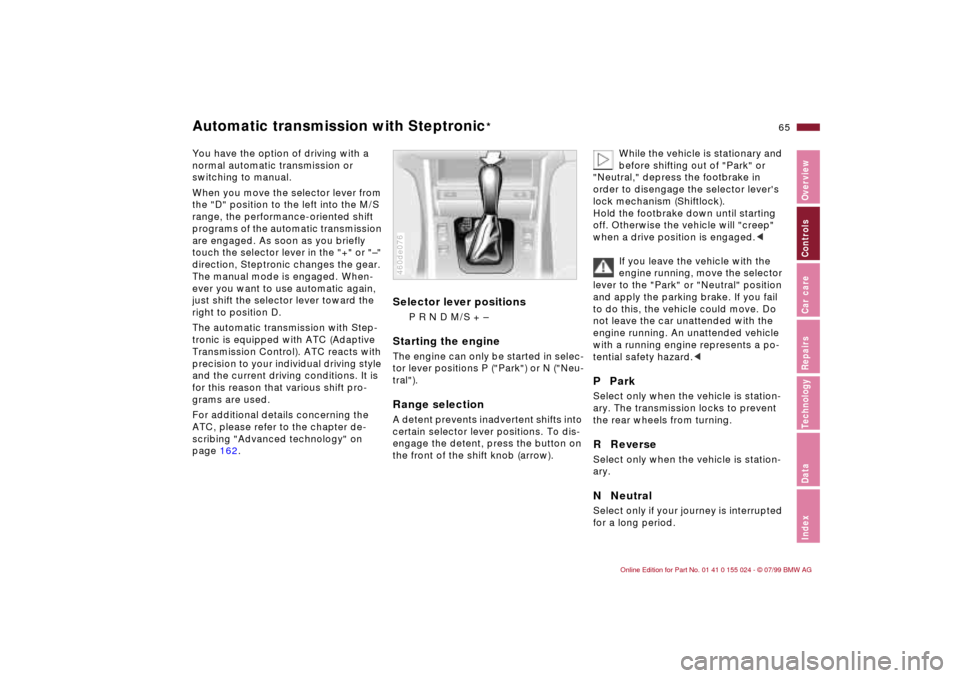
Selector lever positions
P R N D M/S + Ð
Starting the engineThe engine can only be started in selec-
tor lever positions P ("Park") or N ("Neu-
tral").Range selectionA detent prevents inadvertent shifts into
certain selector lever positions. To dis-
engage the detent, press the button on
the front of the shift knob (arrow).460de076
While the vehicle is stationary and
before shifting out of "Park" or
"Neutral," depress the footbrake in
order to disengage the selector lever's
lock mechanism (Shiftlock).
Hold the footbrake down until starting
off. Otherwise the vehicle will "creep"
when a drive position is engaged.<
If you leave the vehicle with the
engine running, move the selector
lever to the "Park" or "Neutral" position
and apply the parking brake. If you fail
to do this, the vehicle could move. Do
not leave the car unattended with the
engine running. An unattended vehicle
with a running engine represents a po-
tential safety hazard.<
P ParkSelect only when the vehicle is station-
ary. The transmission locks to prevent
the rear wheels from turning.R ReverseSelect only when the vehicle is station-
ary.N NeutralSelect only if your journey is interrupted
for a long period.
Page 66 of 189
66n
Automatic transmission with Steptronic
*
D Drive (automatic shift program)This position is designed for driving un-
der all normal operating conditions. All
forward gears are available."Kickdown"In the "Kickdown" mode, you achieve
the maximum acceleration and the top
speed in position D.
To activate this mode, depress the ac-
celerator pedal beyond the full-throttle
position, at which a resistance point
must be overcome.
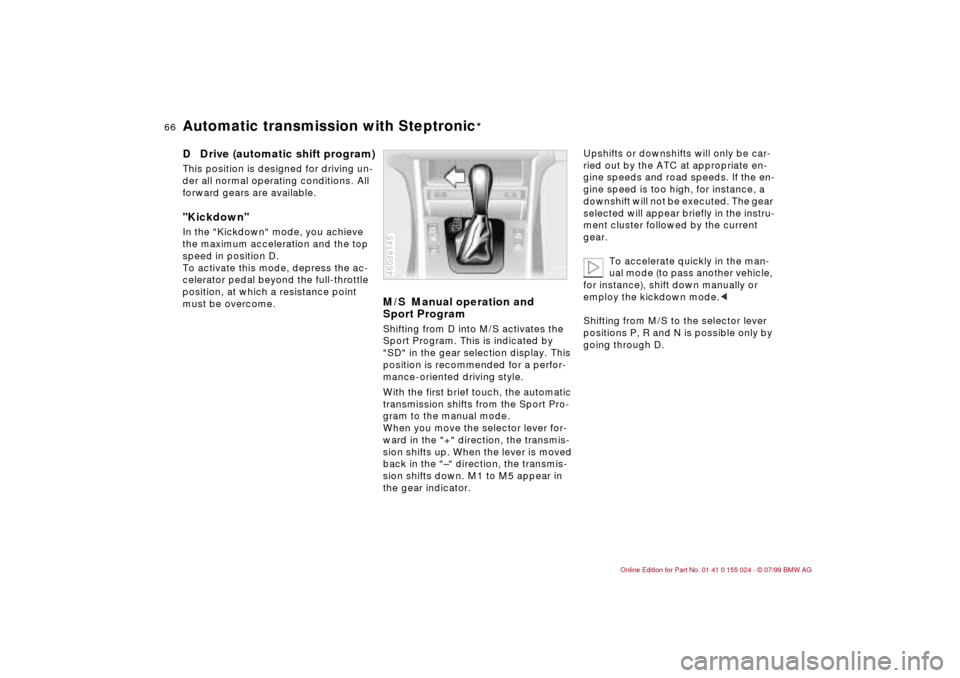
M/S Manual operation and
Sport ProgramShifting from D into M/S activates the
Sport Program. This is indicated by
"SD" in the gear selection display. This
position is recommended for a perfor-
mance-oriented driving style.
With the first brief touch, the automatic
transmission shifts from the Sport Pro-
gram to the manual mode.
When you move the selector lever for-
ward in the "+" direction, the transmis-
sion shifts up. When the lever is moved
back in the "Ð" direction, the transmis-
sion shifts down. M1 to M5 appear in
the gear indicator.460de145
Upshifts or downshifts will only be car-
ried out by the ATC at appropriate en-
gine speeds and road speeds. If the en-
gine speed is too high, for instance, a
downshift will not be executed. The gear
selected will appear briefly in the instru-
ment cluster followed by the current
gear.
To accelerate quickly in the man-
ual mode (to pass another vehicle,
for instance), shift down manually or
employ the kickdown mode.<
Shifting from M/S to the selector lever
positions P, R and N is possible only by
going through D.
Page 67 of 189

67n
IndexDataTechnologyRepairsCar careControlsOverview
Automatic transmission with Steptronic
*
In the following situations, the Step-
tronic "thinks" for you in the manual
mode:
>In order to prevent the engine from
overrevving, the transmission shifts
automatically to the next higher gear
just before the RPM cutoff point.
>If you do not do anything to inter-
vene, it will automatically downshift
at lower speeds.
>In kickdown, it will downshift into
the lowest gear possible, depending
on the engine speed.
>According to the situation, for in-
stance in wintry conditions, the
vehicle can be started in 2nd or
3rd gear.
Available displays
P R N D SD M1 M2 M3 M4 M5460de138
Electronic transmission control
module
If the indicator lamp comes on,
there is a malfunction in the
transmission system.
Bring the vehicle to a stop, select trans-
mission position "P," set the parking
brake and turn the engine off (ignition
key to position 0).
Wait a few seconds, then start the
engine.
If the indicator lamp goes out after a
few seconds, normal transmission per-
formance has been restored. You may
continue to drive as usual.
If the indicator lamp does not go out,
you can place the selector lever in all
positions. However, the vehicle will now
only operate in 3rd and 4th gear.
If this happens, avoid extreme engine
loads and consult the nearest BMW
center.
Do not work in the engine com-
partment when a drive gear (for-
ward or reverse) is engaged. If you do
this, the vehicle could move.<
For towing, tow-starting or jump-start-
ing the vehicle, refer to the information
beginning on page 157.
Page 74 of 189

74n
Fuel gauge Temperature gauge Service Interval Display When you switch on the ignition, the in-
dicator lamp comes on briefly to con-
firm that the system is stationary.
Once the indicator lamp begins to light
up continuously, there are still approx.
2.1 gallons (8 liters) of fuel in the fuel
tank.
Tank capacity: page 175.
If the tilt of the vehicle varies (extended
driving in mountainous areas, for exam-
ple), there may be slight fluctuations of
the needle.
Fill the fuel tank well before it is
empty. Driving to the last drop of
fuel can result in damage to the engine
and/or the catalytic converter.<460us081
BlueThe engine is still cold. Drive at moder-
ate engine and vehicle speeds.RedWhen you switch on the ignition, the
indicator lamp comes on briefly to con-
firm that the system is operational.
If the lamp comes on while operating
the vehicle: The engine is overheated.
Stop and switch the engine off immedi-
ately and allow it to cool down.Between the blue and red zonesNormal operating range. It is not un-
usual for the needle to rise as far as the
edge of the red zone in response to
high outside temperatures or severe
operating conditions.
Checking coolant level: page 128.460de082
Remaining distance for serviceThe displays shown in the illustration
appear for a few seconds when the
ignition key is in positions 1 and 2 or
after the engine is started.
The next service due appears with the
message OILSERVICE or INSPECTION,
together with the remaining distance
before scheduled service.
The computer bases its calculations of
the remaining distance on the rate of
fuel consumption in the period immedi-
ately preceding your data request.
A flashing message and a "Ð" in front of
the number mean that the service inter-
val has already been exceeded by the
distance shown on the display. Please
contact your BMW center for an
appointment.460de112
Page 75 of 189
75n
IndexDataTechnologyRepairsCar careControlsOverview
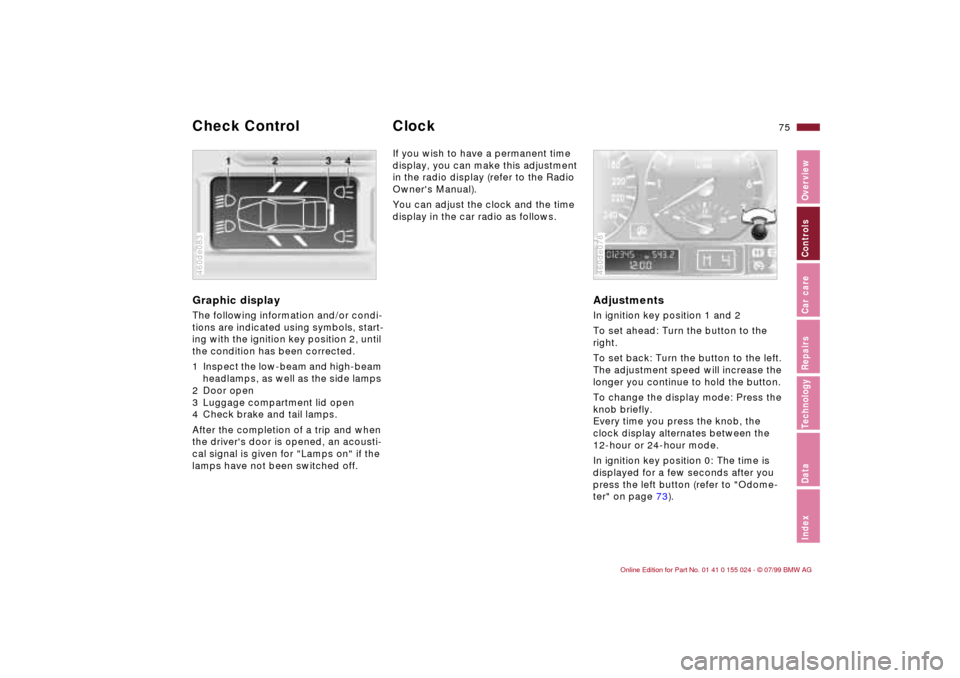
Graphic display The following information and/or condi-
tions are indicated using symbols, start-
ing with the ignition key position 2, until
the condition has been corrected.
1 Inspect the low-beam and high-beam
headlamps, as well as the side lamps
2 Door open
3 Luggage compartment lid open
4 Check brake and tail lamps.
After the completion of a trip and when
the driver's door is opened, an acousti-
cal signal is given for "Lamps on" if the
lamps have not been switched off.460de083
If you wish to have a permanent time
display, you can make this adjustment
in the radio display (refer to the Radio
Owner's Manual).
You can adjust the clock and the time
display in the car radio as follows.
AdjustmentsIn ignition key position 1 and 2
To set ahead: Turn the button to the
right.
To set back: Turn the button to the left.
The adjustment speed will increase the
longer you continue to hold the button.
To change the display mode: Press the
knob briefly.
Every time you press the knob, the
clock display alternates between the
12-hour or 24-hour mode.
In ignition key position 0: The time is
displayed for a few seconds after you
press the left button (refer to "Odome-
ter" on page 73).460de078
Check Control Clock
Page 79 of 189

79n
IndexDataTechnologyRepairsCar careControlsOverview
Dynamic Stability Control (DSC) The conceptDSC maintains vehicle stability, even in
critical driving situations.
The system optimizes vehicle stability
during acceleration and when starting
from a full stop, as well as optimizing
traction. In addition, the system recog-
nizes unstable vehicle conditions (un-
dersteering or oversteering, for example)
and holds the vehicle on a sure course
by intervening via the engine and by
braking intervention at the individual
wheels.
The system activates automatically each
time you start the engine.462us284
Indicator lamp
The indicator lamp in the instru-
ment cluster goes out shortly
after you switch on the ignition.
Refer to pages 21 and 22.
Indicator lamp flashes:
The system is actively regulating drive
torque in response to monitored vehicle
operating conditions.
If the indicator lamp fails to go out after
the engine is started, or comes on dur-
ing the course of normal vehicle opera-
tion:
If the system was not switched off,
there is a system malfunction. The vehi-
cle remains operational, but without
DSC. Please consult your BMW center
for repairs.
To deactivate the systemPress the button. The indicator lamp
flashes.
The illustration depicts the arrangement
of the buttons if the vehicle is fully
equipped. This may vary, depending on
the equipment actually installed.
When the DSC is deactivated, you are
operating the vehicle in the conven-
tional drive mode.
In exceptional instances, it is effective
to deactivate the system:
>when rocking the vehicle or starting
off in deep snow or on loose surfaces
>or when driving with snow chains.
Refer also to page 110.To reactivate the systemPress the button again; the indicator
lamp goes out.
The laws of physics cannot be re-
pealed, even with DSC. Any con-
sequences arising from traction loss
due to excessive vehicle speed remain
the responsibility of the driver. For this
reason, do not take risks by using the
additional safety margin provided by
the system as an excuse.<
For additional details concerning DSC,
please refer to the chapter describing
"Advanced technology" on page 163.
Page 87 of 189
87n
IndexDataTechnologyRepairsCar careControlsOverview
Automatic climate control 1 Air on the windshield and on the
side windows
2 Air flow toward the upper body
The side rotary dials allow you to
open and close the air supply
through an infinitely-variable range,
while the levers change the airflow
direction. The center rotary dial
controls the temperature of the air
as it flows out. Refer to page 90
3 Front footwell ventilation
There are corresponding air vents in
the rear footwell as well.
4 Recirculated air mode/Automatic
recirculated air control (AUC)89
5 Air supply89
6 Temperature88
7 Automatic air distribution88
8 Individual air distribution88
9 Air grill for interior temperature sen-
sor Ð please keep clear and unob-
structed
10 Display for temperature and air
supply88
11 Defrost the windshield and side
windows89
12 Air conditioner89
13 Rear window defroster70, 90