2000 AUDI ALLROAD warning light
[x] Cancel search: warning lightPage 236 of 306
Engine
oil consumption
The rate of the oil consumption depends on
the quality and viscosity of oil, the speed at
which the engine is operated, the climate,
and road conditions as well as amount of
dilution and oxidation of the lubricant.
Because of these variables, no standard
rate of oil consumption can be established,
but drivers should expect higher oil con
sumption at high speeds and when the en
gine is new.
Therefore, we recommend that you check
the oil level at regular intervals (for example,
each time you are refuelling, or before going
on a long trip).
If the oil level should go below the minimal
level, the check engine oil level warn
ing light* in the instrument cluster will
come on. See page 144. You should check
the oil level using the oil dip stick as soon as
possible, and then top off the oil as neces
sary. Notes
• The engine in your vehicle de
pends on oil to lubricate and cool all
of its moving parts. Therefore the
engine oil should be checked regu
larly and kept at the required level.
• Lack of sufficient engine oil may
lead to severe engine damage.
• The oil pressure warning light is
not an oil level indicator.
A Always
heed all WAR NINGS
� on page 232.
Checking the engine oil level
The best time to check the engine oil level
is when the oil is warm.
To get a true reading, the vehicle must be on
level ground.
A Always heed all WAR NINGS
� on page 232.
• After turning off the engine, wait a few
minu tes for the oil to return to the oil pan. VE
HICLE CARE
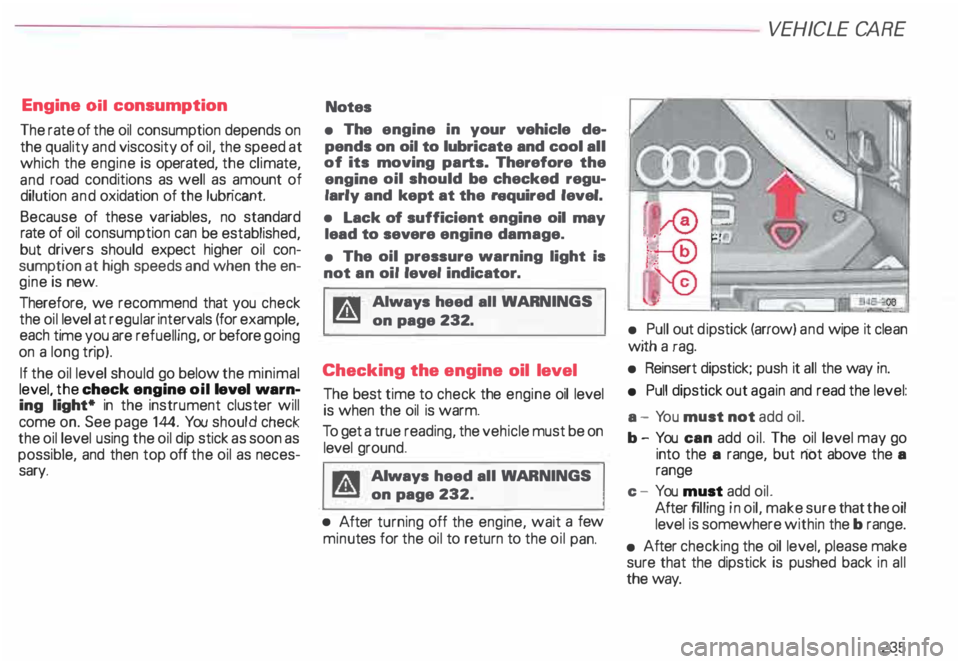
• Pull out dipstick (arrow) and wipe it clean
with a rag.
• Reinsert dipstick; push it all the way in.
• Pull dipstick out again and read the level:
a - Yo u must not add oil.
b- You can add oil. The oil level may go
into the a range, but riot above the a
range
c - You must add oil.
After filling in oil, make sure that the oil
level is somewhere within the b range.
• After checking the oil level, please make
sure that the dipstick is pushed back in all
the way.
235
Page 241 of 306
VE
HICLE CARE
Adding coolant
� WARNING
The cooling system is under pres
sura and can get very hot. Reduce
the risk of scalding from hot cool
ant by following these steps.
• Turn off the engine and allow it
to cool down.
• Protect face, hands and arms es
caping fluid and steam by covering
the cap with a large, thick rag.
• Turn the cap slowly and very
care fully in a counter--clockwise di
rection while applying light, down
ward pressure on the top of the
cap.
• To help avoid being burned, do
not spill antifreeze or coolant on
the exhaust system or hot engine
parts. Under some conditions, the
ethylene glycol in engine coolant
can catch fire.
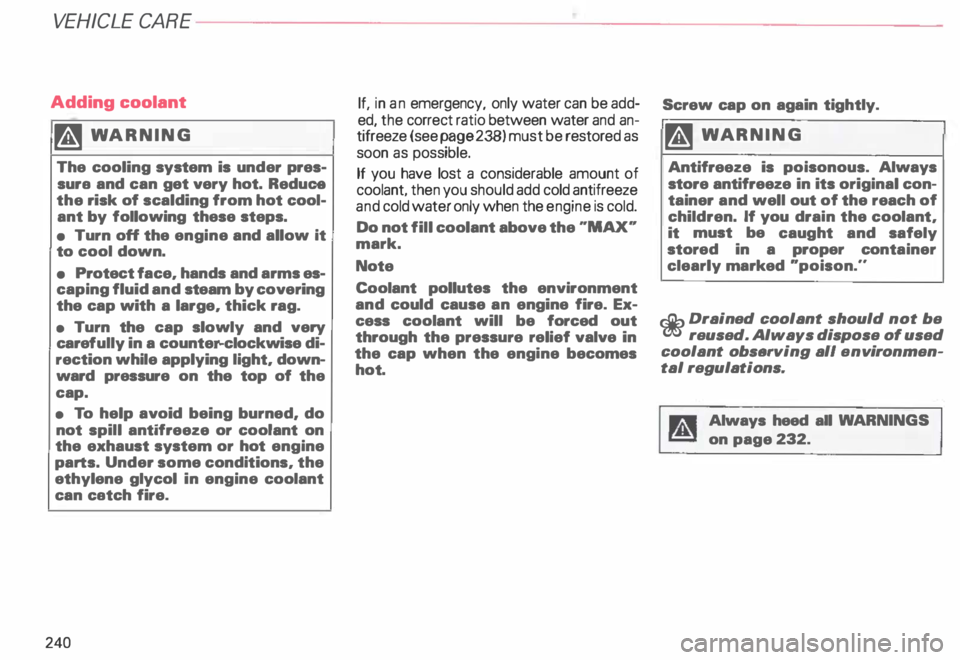
240 If,
in an emergency, only water can be add
ed, the correct ratio between water and an
tifreeze (see page 238) must be restored as
soon as possible.
If you have lost a considerable amount of
coolant. then you should add cold antifreeze
and cold water only when the engine is cold.
Do not fill coolant above the "MAX"
mark.
Note
Coolant pollutes the environment
and could cause an engine fire. Ex
cess coolant will be forced out
through the pressure relief valve in
the cap when the engine becomes
hot. Screw cap
on again tightly.
� WARNING
Antifreeze is poisonous. Always
store antifreeze in its original con
tainer and well out of the reach of
children. If you drain the coolant,
it must be caught and safely
stored in a proper container
clearly marked "poison ...
<£> Drained coolant should not be
reused. Always dispose of used
coolant observing all env ironmen
tal regulations.
Always heed all WARNINGS
on page 232.
Page 243 of 306
VE
HICLE CA
RE----------------------------------------------------
Brake fluid
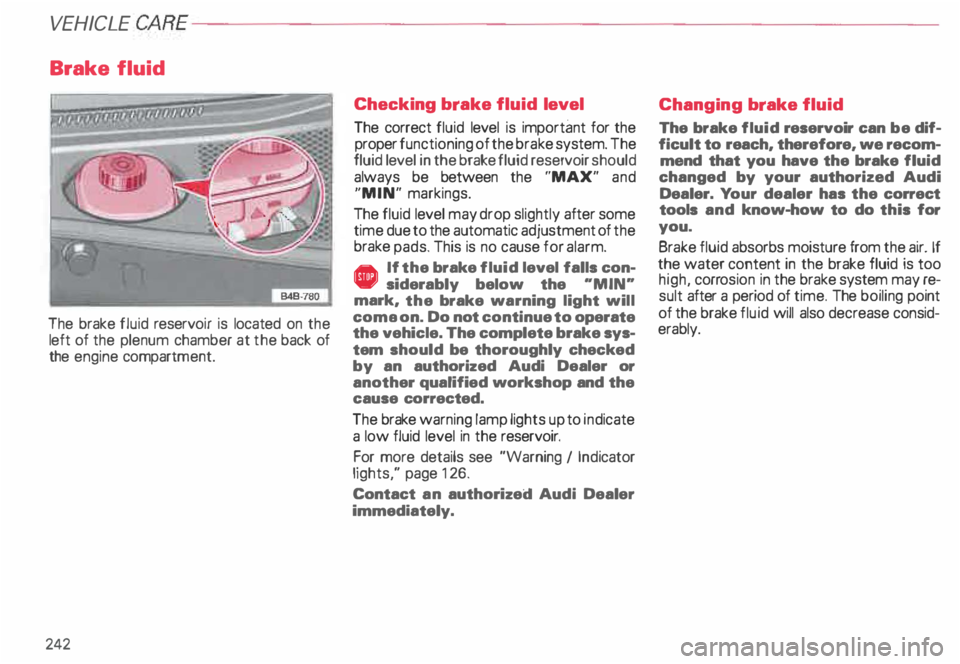
The brake fluid reservo ir is located on the
left of the plenum chamber at the back of
the engine compartm ent.
242 Checking
brake fluid level
The correct fluid level is important for the
proper functioning of the brake system. The
fluid level in the brake fluid reservoir should
always be between the "MAX" and
"MIN" markings.
The fluid level may drop slightly after some
time due to the automatic adjustment of the
brake pads. This is no cause for alarm.
• If the brake fluid level falls con
siderably below the "MIN"
mark, the brake warning light will
coma on. Do not continue to operate
the vehicle. The complete brake sys
tem should be thoroughly checked
by an authorized Audi Dealer or
another qualified workshop and the
cause corrected.
The brake warning lamp lights up to indicate
a low fluid level in the reservoir.
For more details see "Warning I Ind icator
lights," page 126.
Contact an authorized Audi Dealer
immediately. Changing
brake fluid
The brake fluid reservoir can be dif
ficult to reach, therefore, we recom
mend that you have the brake fluid
changed by your authorized Audi
Dealer. Your dealer has the correct
tools and know-how to do this for
you.
Brake fluid absorbs moisture from the air. If
the water content in the brake fluid is too
high, corrosion in the brake system may re
sult after a period of time. The boiling point
of the brake fluid will also decrease consid
erably.
Page 260 of 306
-------------------------VEHICLE
CARE
Te mperature
The temperature grades are A (the highest),
8, and C, repres enting the tire's resistance to
the generation of heat and its ability to dissi
pate heat when tested under contro lled con
ditions on a specified indoor laboratory test
wheel. Sustained high temJ)erature can
cause the material of the tire to degenerate
and reduce tire life, and excessive tempera
ture can lead to sudden tire failure. The
grade C corres ponds to a level of perfor
mance which all passenger car tires must
meet under the Federal Motor Vehicle Safety
Sta ndard No. 1 09. Grades Band A represent
higher levels of performance on the laborato
ry test wheel than the minimum required by
law.
�W ARNIN G
The temperature grade for this tire
is est ablished for a tire that is
properly inflated and not over
loaded. Excessive speed, under
inflation, or excessive loading, ei
ther separately or in combination,
can causa heat buildup and pos
sible tire failure. Wheel
replacement
If you wish to equip your vehicle with tires
or wheels other than those installed at the
factory, please note the following:
• For technical reasons it is not al
ways possible to use wheels from
other vehicles -under certain condi
tions not even wheels from the same
vehicle model.
• Wheel rims and wheel bolts are
matched to fit your Audi. When
installing different wheels (for ax
ample, wheels with winter tires), the
correct wheel bolts with the proper
length and conical shape of the bolt
head must be used. The secure fit of
the wheels and the proper function
ing of the brake system and safety
are dependent upon this.
• Wheel rims and wheal bolts are
matched to fit your Audi. •
Before you plan on exchanging
steel wheels, light alloy wheals, or
winter tires already mounted on
wheel rims, consult your authorized
Audi Dealer. They have the technical
information necessary to advise you
which wheal rims and wheel bolts
are compatible with the original fac
tory installations.
1ft WARNING
• Incorrect tire/wheel parts may
cause an accident and personal in
jury. Such parts will adversely af
fect the safe operation of your ve
hicle. Always use tires, wheel rims
and wheel bolts that meat specifi
cations of the original factory
installed equipment.
• If wheel trim discs or a front
spoiler are Installed, make sura the
airflow for cooling the brakes is
not obstructed.
259
Page 275 of 306
DO-IT-YOURSELF
SERVICE----------------------
Fuses
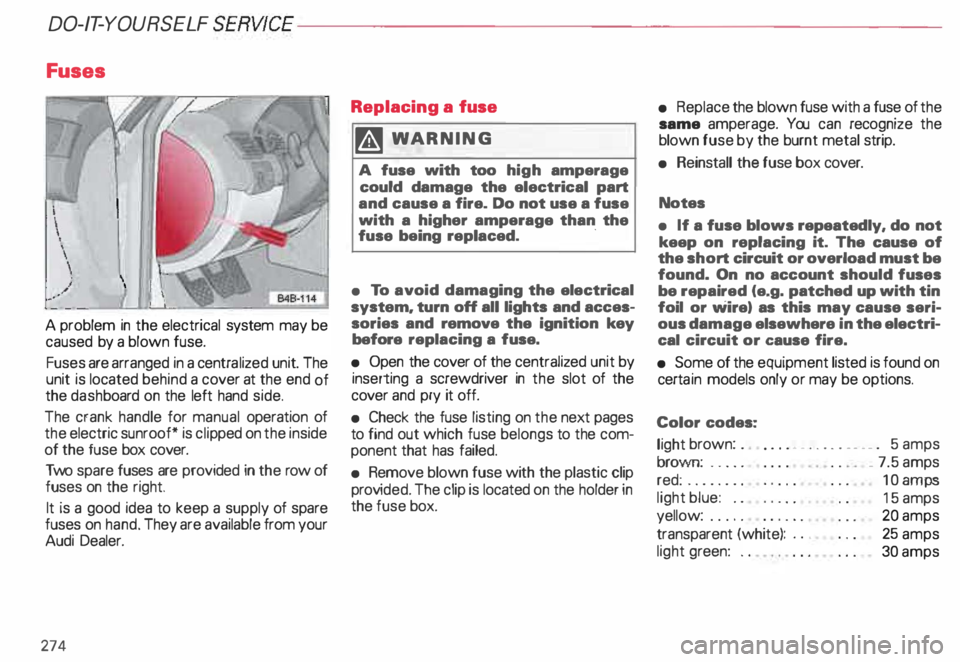
A problem in the electrical system may be
caused by a blown fuse.
Fuses are arranged in a centra lized unit. The
unit is located behind a cover at the end of
the dash board on the left hand side.
The crank handle for manual operation of
the electric sunroof* is cli pped on the inside
of the fuse box cover.
Two spare fuses are provided in the row of
fuses on the right.
It is a good idea to keep a supply of spare
fuses on hand. They are available from your
Audi Dealer.
274 Replacing
a fuse
� WARNING
A fuse with too high amperage
could damage the electrical part
and cause a fire. Do not use a fuse
with a higher amperage than the
fuse being replaced. ·
• To avoid damaging the electrical
system. turn off all lights and acces
sories and remove the ignition key
before replacing a fuse.
• Open the cover of the centralized unit by
inserting a screwdriver in the slot of the
cover and pry it off.
• Check the fuse listing on the next pages
to find out which fuse belongs to the com
ponent that has failed.
• Remove blown fuse with the plastic clip
prov ided. The clip is located on the holder in
the fuse box. •
Replace the blown fuse with a fuse of the
same amperage. You can recognize the
blown fuse by the burnt metal strip.
• Reinstall the fuse box cover.
Notes
• If a fuse blows repeatedly. do not
keep on replacing it. The cause of
the short circuit or overload must be
found. On no account should fuses
be repaired (e.g. patched up with tin
foil or wire) as this may cause seri
ous damage elsewhere in the electri
cal circuit or cause fire.
• Some of the equipment listed is found on
certa in models only or may be options.
Color codes:
light brown: . .
... • _ .. .. . __ . _ . 5 amps
brown: .... .
red: ....... .
light blue: ..
yellow: .....
transparent (white): ..•
light green: .. _
7.5 amps
10 amps
15 amps
20 amps
25 amps
30 amps
Page 276 of 306

Fuse
arrangement
No. 1 - Heated washer jets !
B45-087C I
A 11
- .. 5
2 - Turn signals . . . . . . . . .
. 10
3 - Headlight washer (relay)
illum ination for glove compartment,
climate control, Automatic
Tr ansmission, instrument cluster ... 5
4 - License plate light . . . 5
l) Amps No.
A1l
5 - Ins trument cluster, seat heating,
test connection for cruise control,
bulb monitor, Automatic
Tr ansmis sion display, switch lighting,
mirror switches and actuators,
airbag warning light, outside
temperature indicator, climate
control, solar roof, acoustic parking
assistance system, navigation
system, car telephone, 4 Level Air
Suspension ............ .. ...... 1 0
6 - Power locking system . . . . . . . . . 5
7 - Anti-lock brake system (ABS),
brake light switch . . . . . . . . . . . . 1 0
8 - Car telephone . . . . . . . . . . . . . . .
. 5
9 - Heated mirrors . . . . . . . . . . . . . . 1 0
1 0- Automatic headlight adjustment
. 5
11 -Cruise control
(Automatic Transmission) . . .
1 0
12- On Board Diagnostic system .... _ 10
13 -Brake lights . . . . . . 1 0 DO-IT-YOURSELF
SERVICE
No. 14 -Interior lights, reading lights,
anti-theft alarm system,
vanity mirror, seat memory ....... 10
15 -Instrument cluster, climate control,
mirror and seat mem ory, .
navigation system . . . . . . . . . . . . . . 1 0
16- Electronic Stability Programm ..... 5
17 -Navigation system, 4 Level Air
Suspension, automatic headlight
adjustment .............. ...... 10
18-Hig h-beam, right ......... ....... 10
19 -H igh-beam, left . . . . . . . . . . . . .. 1 0
20 � Low beam, right, headlight
adjustment . . . . . . . . . . . . . . . • . .
15
21 -Low beam, left, headlight
adjustment . . . . . . . . . . . . . . . .. 15
22 -Side marker and tail light, right . 5
23 -Side marker and tail light, left . . . . . 5
24 -Wiper and washer system . . 25
25 -Blower for heating (climate
control), solar roof 30
275
Page 278 of 306
----------------------DO-IT-YOURSELF SERVICE
Replacing bulbs
It is becoming increasingly more and more
difficult to replace vehicle light bulbs since
in many cases, other parts of the car must
first be removed before you are able to get
to the bulb. This applies especially to the
light bulbs in the front of your car which you
can only reach through the engine compart
ment.
For your safety, we recommend that you
have your authorized Audi Dealer replace
any bulbs for you, since your dealer has nec
essary tools, the correct bulbs and the ex
pertise.
g Always heed all WARNINGS
� on page 232. Gas
discharge lamps
(Xenon lights)•
Yo ur vehicle may be equipped with gas dis
charge lamps. Due to the high elec trical
voltage, have the bulbs exchanged by a
qualified technician.
Headlights with xenon light are identified by
the high voltage sticker(see symbol above).
� WARNING
Only your authorized Audi Dealer
or a qualified workshop should
change the bulbs in gas discharge
lamps (xenon light). Due to the
high voltage, improper handling
can cause serious personal injury. Insta
lling I
replacing a radio
f you wish to install a radio or replace the
factory installed radio, please note the fol
lowing:
• The factory installed radio connectors are
designed for Genuine Audi Radios.
When installing a different radio, difficulties
could arise such as:
- the radio may not fit into the space pro
vided
- the electrical connections may not be
compat ible
- different connector terminals may be
needed.
• Therefore, we recommend that you have
your authorized Audi Dealer install or re
place the radiO.
They are the most familiar with the techni
cal features of your vehicle. They also offer
Genuine Audi Radios with the necessary
installation components and instructions.
� WARNING
Improperly installing a radio could
cause a short circuit.
This could result in an electrical
fire.
277
Page 279 of 306
DO-IT-Y
OURSELF SERVICE----------------------
Emergency starting
Note
Starting by pushing or towing
Yo ur vehicle with automatic trans
mission cannot be started by push
ing or towing.
Star ting with jumper cables
�W ARNING
• Batteries contain electricity.
acid. and gas. Any of these can
cause vary serious or fatal injury.
Follow the instructions below for
safe handling of your vahicle"s bat·
tery.
• Always shield your ayes and
avoid leaning over the battery
whenever possible.
278 �,
WAR NING continued
• A discharged battery can al
ready freeze at temperatures just
below 32 °F (0 °C). Before connect·
ing a jumper cable. the frozen bat
tery must be thawed completely.
otherwise it could explode.
• Do not allow battery acid to con·
tact ayes or skin. Flush any con
tacted area with water immediate
ly.
• Improper use of a booster bat
tery to start a vehicle may cause an
explosion.
• Vehicle batteries generate ex
plosive gases. Keep sparks. flame
and lighted cigarettes away from
batteries.
• Do not try to jump start any ve
hicle with a low acid level in the
battery. ,Al
WARNING continued
• The voltage of the booster bat
tery must also have a 12- Volt rat
ing.
The capacity (Ah) of the booster
battery should not be lower than
that of the discharged battery. Use
of batteries of different voltage or
substantially different Ah rating
may cause an explosion and per
sonal injur y.
• Use of batteries of different
voltage or substantially different
amp. (Ah) rating may causa an ex
plosion and Injury. The capacity
(Ah) of the booster battery should
not be lower than that of the dis
charged battery.