2000 AUDI ALLROAD change time
[x] Cancel search: change timePage 157 of 306
CONTROLS
AND EQUIPMENT---------------------
Turn signals, headlight dimmer switch lever
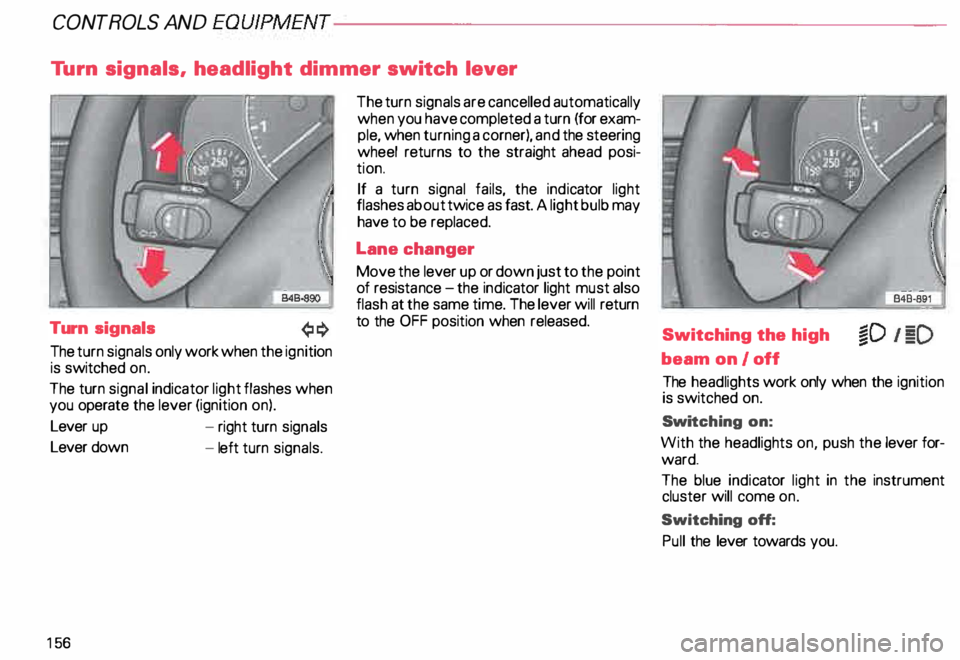
Turn signals
The turn signals only work when the ignition
is switched on.
The turn signal indicator light flashes when
you operate the lever (ignition on).
Lever up
Lever down
15 6 -
right turn signals
- left turn signals. The
turn signals are cancelled automatically
when you have completed a turn (for exam
ple, when turning a corner), and the steering
wheel returns to the straight ahead posi
tion.
If a turn signal fails, the indicator light
flashes about twice as fast. A light bulb may
have to be replaced.
Lane changer
Move the lever up or down just to the point
of resista nce-the ind icator light must also
flash at the same time. The lever will return
to the OFF position when released.
Switching the high
beam on/off
The headlights work only when the ignition
is switched on.
Swi tching on:
With the headlights on, push the lever for
ward.
The blue indicator light in the instrument
cluster will come on.
Switching off:
Pull the lever towards you.
Page 163 of 306
CONTROLS AND EQUIPMENT---------------------
Cli
mate controls
�W ARNING
• For clear visibility and safe driv
ing, it is extremely important that
you follow the operating instruc
tions on the proper use and func
tion of the ventilation/heating, de
fogg ing{defr osting and air condi
tioning system in this manual. If in
doubt, consult your authorized
Audi Dealer.
• Good visibility comas with
clean windows free of fog, con
densation and frost.
• Maximum heating output and
fast defro sting will occur only af
ter the engine has reached operat
ing temperature. Wait until you
have good visibility before moving
your vehicle.
16 2 The
air conditioner is fully auto
matic, and is designed to maintain a com
fortable and uniform climate inside the ve
hicle .
The temperature of the air supplied to the in
terior, the fan speed, air distribution and vol
ume of air delivery are regulated automati
cally.
This automatic climate control program can
also be adjusted manually by the driver and
the front passenger.
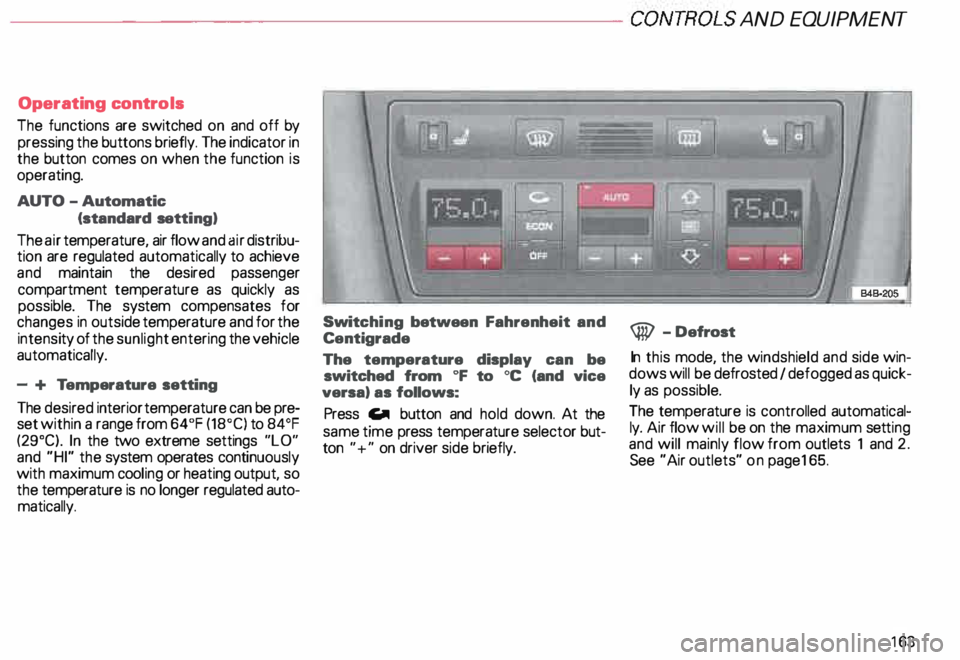
The illustration on the next page shows the
controls for the driver and front passenger
in the center console. The left display indi
cates the temperature selected for the driv
er's side and the right display the tempera
ture selected for the front passenger's side.
The temperature is selected by pressing the
"+" or "-" buttons beneath the respective
displays. Recommended
standard setting for
all-year operation:
After switching on the ignition
• Select a temperature of
75 oF (23°C) and
• Press AUTO button.
With this setting, you attain maximum com
fort in the least amount of time.
You only need to change this setting to
meet your personal needs.
Air outlets - see page 165.
Page 164 of 306
---------------------CONTROLS AND EQUIPMENT
Operating controls
The functions are switched on and off by
pressing the buttons briefly. The indicator in
the button comes on when the function is
operating.
AUTO -Automatic
(standard setting)
The air temperature, air flow and air distribu
tion are regulated automatically to achieve
and maintain the desired passenger
compartment temperature as quickly as
possible. The system compensates for
changes in outside temperature and for the
intensi ty of the sunlight entering the vehicle
automatically.
- + Temperature setting
The desired interior temperature can be pre
set within a range from 64°F (18°C) to 84°F
(29°C). In the two extreme settings "LO"
and "HI" the system operates continuously
with maximum cooling or heating output, so
the temperature is no longer regulated auto
matically. Swit
ching between Fahrenheit and
Centigrade
The temperature display can be
switched from oF to oc (and vice
versa) as follows:
Press Gill button and hold down. At the
same time press temperature selector but
ton "+" on driver side briefly. @
-Defrost
In this mode, the windshield and side win
dows will be defrosted I defogged as quick
ly as possible.
The temperature is controlled automatical
ly. Air flow will be on the maximum setting
and will mainly flow from outlets 1 and 2.
See "Air outlets" on pag e165.
163
Page 224 of 306
Refu
elling the vehicle
Yo ur vehicle fuel tank has an on-board refu
elling vapor recovery system. This feature
helps to prevent fuel vapors from escaping
from the tank and polluting the environment
while you refuel your vehicle.
In order to fill your tank properly while pro
tecting the environment. please follow this
refueling procedure carefully:
• Turn off the engine.
• Remove the fuel filler cap by turning it
slowly counter clockwise allowing fuel
pressure to dissi pate.
• Insert the fuel nozzle from the gasoline
pump into the fuel filler neck as far as it will
go.
Select a medium refuelling rate, when filling
your tank. �W
ARNING
Failure to shut the engine off while
re fueling and I or to insert the
pump nozzle fully into the car's
filler neck could cause fuel over
flow and fuel spray which can
cause fire or serious injury.
• Stop refueling when the fuel pump shuts
off automatical ly - do not add more fuel or
"top off". dih As soon as the correctly oper� ated nozzle switches off auto
matically for the first time, the tank
is full. Do not try to add more fuel,
because fuel may spill out. In addi
tion, the expansion space in the fuel
tank will be filled -causing the fuel
to overflow when it becomes warm
and pollute the environment.
• After filling your tank, turn the fuel filler
cap clockwise until you hear a definite click.
To avoid fuel spilling or evapor ating from the
fue I tank a I ways close fuel filler cap properly
and completely. VE
HICL E CA RE
Notes
• If you cannot fully insert the pump nozzle,
use another fuel pump or change gas sta
tions.
• Do not refuel your vehicle with the igni
tion switched on. The fuel gauge may other
wise not indicate the exact fuel level after
refu elling.
223
Page 228 of 306
----------------------------------------------------VEHICLE
CARE
Seasonally adjusted gasoline
Many gasolines are blended to perform es
pecially well for winter or summer driving.
During seasonal change-over , we suggest
that you fill up at busy gas stations where
the seasonal adjustment is more likely to be
made in time. Gasoline
additives
A major concern among many auto
manufacturers is carbon deposit build-up
caused by the type of gasoline you use.
Although gasolines differ from one
man ufacturer to another, they have certain
things in common. All gasolines contain
properties that can cause deposits to col
lect on vital engine components, such as
fuel injectors and intake valves. Although
most gasoline brands include additives to
keep engine and fuel systems clean, they
are not equally effective.
After an extended period of using inade
quate fuels, built-up carbon deposits can
rob your engine of peak performance. Note
Damage or malfunction due to poor
fuel quality is not covered by the
Audi New Vehicle Limited Warranty.
227
Page 237 of 306
VEHICLE CA
RE---------------------------------------------------
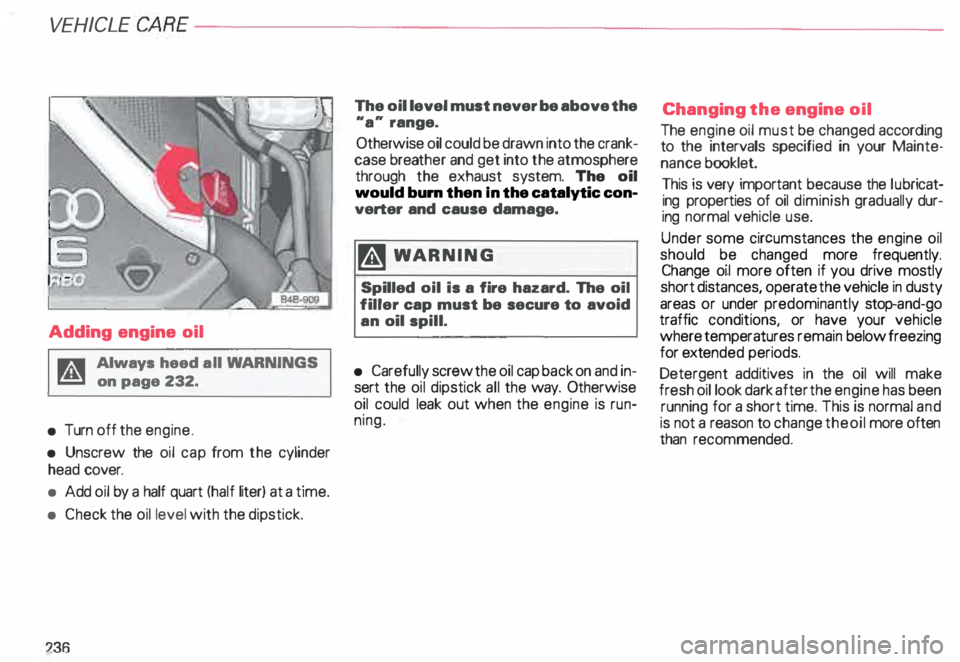
Adding engine oil
A Always heed all WA RNINGS
r!!J on page 232.
• Turn off the engine.
• Unscrew the oil cap from the cylinder
head cover.
• Add oil by a half quart (half liter) at a time.
• Check the oil level with the dipstick.
:236 The
oil level must never be above the
"a .. range.
Otherwise oil could be drawn into the crank
case breather and get into the atmosphere
through the exhaust system. The oil
would bum then In the catalytic con
verter and cause damage.
� WARNING
Spilled oil is a fire hazard. The oil
filler cap must be secure to avoid
an oil spill.
• Carefully screw the oil cap back on and in
sert the oil dipstick all the way. Otherwise
oil could leak out when the engine is run
ning. Changing
the engine oil
The engine oil must be changed according
to the intervals specified in your Mainte
nance booklet.
This is very important because the lubricat
ing properties of oil diminish gradually dur
ing normal vehicle use.
Under some circumstances the engine oil
should be changed more frequently.
Change oil more often if you drive mostly
short distances, operate the vehicle in dusty
areas or under predominantly stop-and-go
traffic conditions, or have your vehicle
where temperatures remain below freezing
for exte nded periods.
Detergent additives in the oil will make
fresh oil look dark after the engine has been
running for a short time. This is normal and
is not a reason to change the oil more often
than recommended.
Page 243 of 306
VE
HICLE CA
RE----------------------------------------------------
Brake fluid
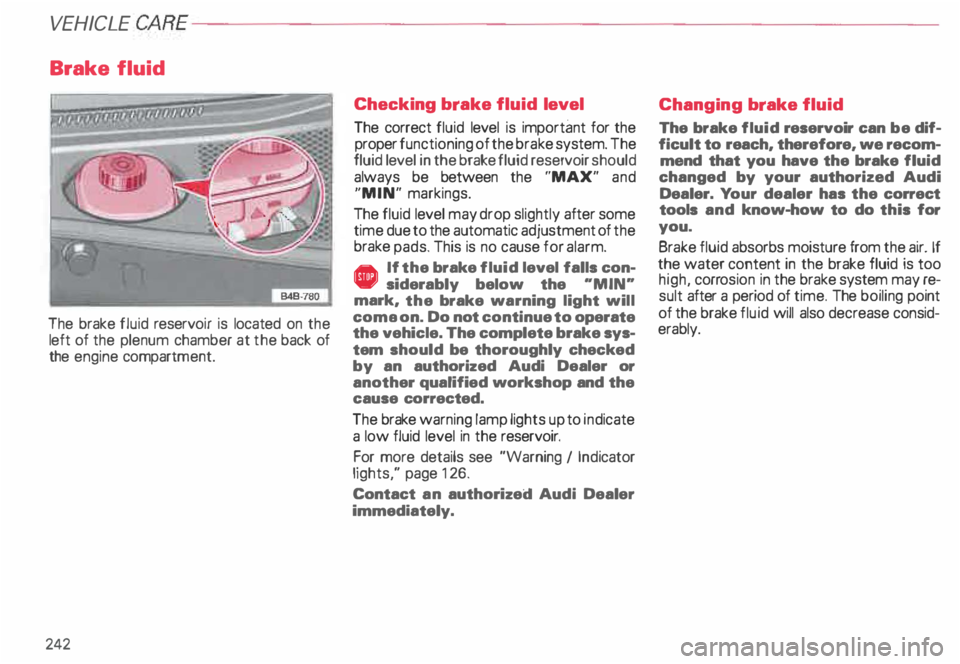
The brake fluid reservo ir is located on the
left of the plenum chamber at the back of
the engine compartm ent.
242 Checking
brake fluid level
The correct fluid level is important for the
proper functioning of the brake system. The
fluid level in the brake fluid reservoir should
always be between the "MAX" and
"MIN" markings.
The fluid level may drop slightly after some
time due to the automatic adjustment of the
brake pads. This is no cause for alarm.
• If the brake fluid level falls con
siderably below the "MIN"
mark, the brake warning light will
coma on. Do not continue to operate
the vehicle. The complete brake sys
tem should be thoroughly checked
by an authorized Audi Dealer or
another qualified workshop and the
cause corrected.
The brake warning lamp lights up to indicate
a low fluid level in the reservoir.
For more details see "Warning I Ind icator
lights," page 126.
Contact an authorized Audi Dealer
immediately. Changing
brake fluid
The brake fluid reservoir can be dif
ficult to reach, therefore, we recom
mend that you have the brake fluid
changed by your authorized Audi
Dealer. Your dealer has the correct
tools and know-how to do this for
you.
Brake fluid absorbs moisture from the air. If
the water content in the brake fluid is too
high, corrosion in the brake system may re
sult after a period of time. The boiling point
of the brake fluid will also decrease consid
erably.
Page 256 of 306
Only
when tires show unusual wear such as
feather-e dging should they be rotated diag
� nall y. Yo ur vehicle may be equipped with
trres which have a specified rotation direc
tion. The rotation direction is identified by
arrow markings on the sides of the tires.
The rotation direction must not be revers ed.
Therefore, these tires cannot be switched
diagonally. If in doubt, discuss any unusual
tire wear with your authorized Audi Dealer's
service department.
After rotation adjust tire pressure and
torque wheel bolts diagonally to 90 tt lb
(120 Nm). Refer to "Changing a wheel" on
page 267 for details. Tire
replacement
Wheels and tires approved by the manu fac
turer have been specially matched to your
vehicle and contribute greatly to the road
holding, driving characteristics and safety of
the vehicle.
Make sure that the new tires also meet the
specifications listed on the label located on
the inside of the fuel filler flap or on the driv
er's door lock jamb.
It's �mporta nt to remember that in spite of
h �vrng the same tire designation, the actual
s1ze of a tire can vary from tire man ufacturer
to tire man ufacturer. Using different tire and
wheel rim combinations can result in re
duced clearance between the tire and the
vehicle body.
Therefore, never mount tires that
are of a different designation or
have different dimensions from
those of the factory supplied tires
which came equipped on your ve
hicle. VE
HICLE CARE
• If you must replace tires different from
those which were originally factory supplied
on your vehicle, always use the specific
brands, specifications and dimensions
which were specified by Audi for your ve
hicle.
Yo ur authorized Audi dealer or Audi Client
Relations have information regarding the
t1res and wheel rims specified for your car,
and can tell you which tires and tire
man ufacturers were approved by the fac
tory for original equipment installation.
• We recommend that you have your tires
changed by an authorized Audi Dealer, be
cause they have the special tools and nec
essary expertis e.
Furthermore, your authorized Audi Dealer
stocks a range of tires and wheels.
• If the spare tire is different from the tires
that you have mounted on your vehicle (for
example winter tires or wide profile tires),
then use the spare tire for a short period of
time only and drive with extra care. Replace
the flat tire with a tire matching the others
on your vehicle as soon as possible.
255