Page 17 of 55
20-69
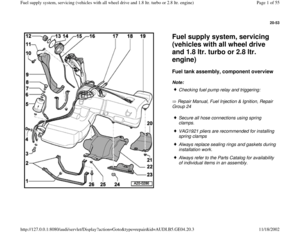
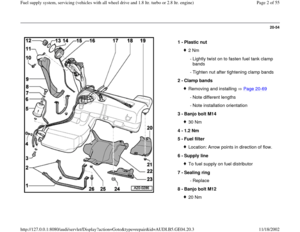
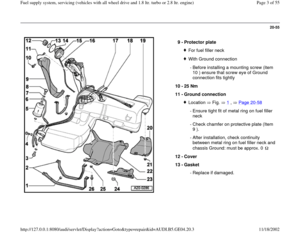
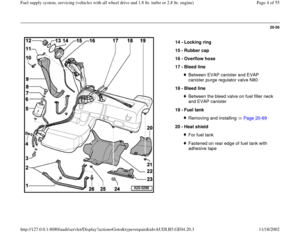
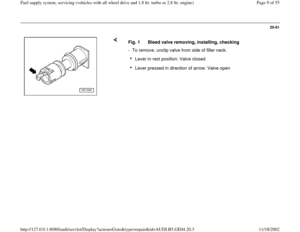
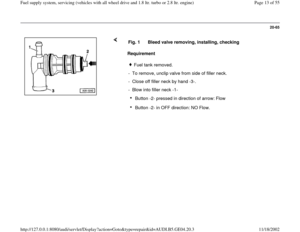
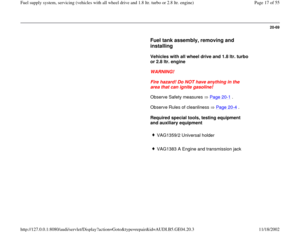
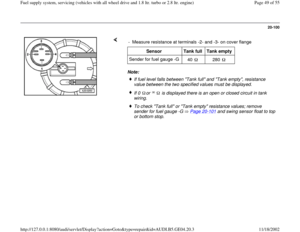
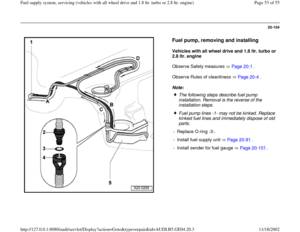
Fuel tank assembly, removing and
installing
Vehicles with all wheel drive and 1.8 ltr. turbo
or 2.8 ltr. engine
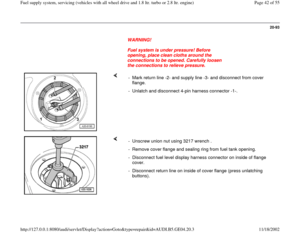
WARNING!
Fire hazard! Do NOT have anything in the
area that can ignite gasoline!
Observe Safety measures Page 20
-1 .
Observe Rules of cleanliness Page 20
-4 .
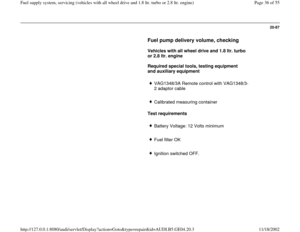
Required special tools, testing equipment
and auxiliary equipment
VAG1359/2 Universal holder
VAG1383 A Engine and transmission jack
Pa
ge 17 of 55 Fuel su
pp
ly system, servicin
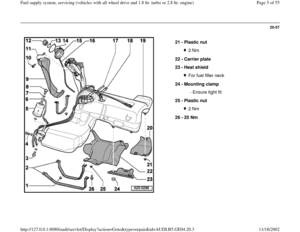
g (vehicles with all wheel drive and 1.8 ltr. turbo or 2.8 ltr. en
gine
)
11/18/2002 htt
p://127.0.0.1:8080/audi/servlet/Dis
play?action=Goto&t
yp
e=re
pair&id=AUDI.B5.GE04.20.3
Page 18 of 55
20-70
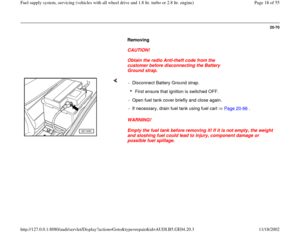
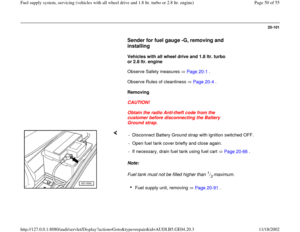
Removing
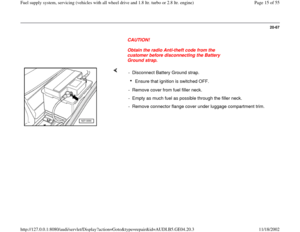
CAUTION!
Obtain the radio Anti-theft code from the
customer before disconnecting the Battery
Ground strap.
WARNING!
Empty the fuel tank before removing it! If it is not empty, the weight
and sloshing fuel could lead to injury, component damage or
possible fuel spillage. - Disconnect Battery Ground strap.
First ensure that ignition is switched OFF.
- Open fuel tank cover briefly and close again.
- If necessary, drain fuel tank using fuel cart Page 20
-66
.
Pa
ge 18 of 55 Fuel su
pp
ly system, servicin
g (vehicles with all wheel drive and 1.8 ltr. turbo or 2.8 ltr. en
gine
)
11/18/2002 htt
p://127.0.0.1:8080/audi/servlet/Dis
play?action=Goto&t
yp
e=re
pair&id=AUDI.B5.GE04.20.3
Page 19 of 55
20-71
Note:
For weight reasons, fuel tank must be empty
before removing.
- Remove rear axle.
Repair Manual, Suspension, Wheels,
Steering, Repair Group 42
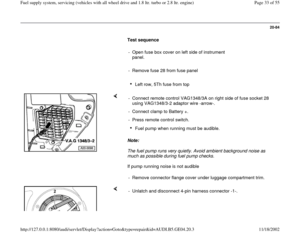
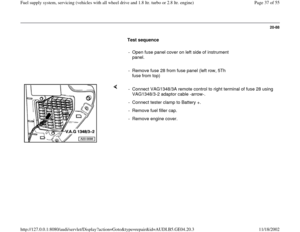
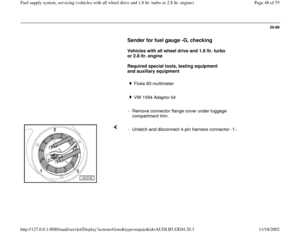
- Remove connector flange cover under luggage
compartment trim.
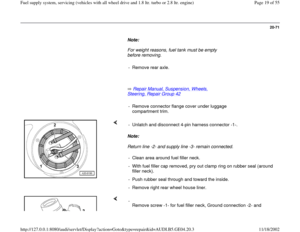
Note:
Return line -2- and supply line -3- remain connected. - Unlatch and disconnect 4-pin harness connector -1-.
- Clean area around fuel filler neck.
- With fuel filler cap removed, pry out clamp ring on rubber seal (around
filler neck).
- Push rubber seal through and toward the inside.
- Remove right rear wheel house liner.
-
Remove screw -1- for fuel filler neck, Ground connection -2- and
Pa
ge 19 of 55 Fuel su
pp
ly system, servicin
g (vehicles with all wheel drive and 1.8 ltr. turbo or 2.8 ltr. en
gine
)
11/18/2002 htt
p://127.0.0.1:8080/audi/servlet/Dis
play?action=Goto&t
yp
e=re
pair&id=AUDI.B5.GE04.20.3
Page 20 of 55
protective plate -3- under the wheel house shell.
Pa
ge 20 of 55 Fuel su
pp
ly system, servicin
g (vehicles with all wheel drive and 1.8 ltr. turbo or 2.8 ltr. en
gine
)
11/18/2002 htt
p://127.0.0.1:8080/audi/servlet/Dis
play?action=Goto&t
yp
e=re
pair&id=AUDI.B5.GE04.20.3
Page 21 of 55
20-72
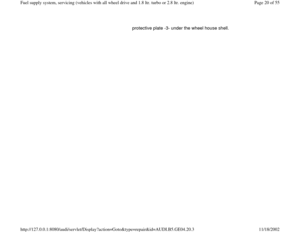
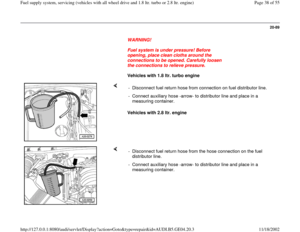
WARNING!
Fuel system is under pressure! Before
opening, place clean cloths around the
connections to be opened. Carefully loosen
the connections to relieve pressure.
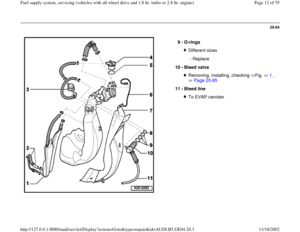
- From bottom of vehicle, mark supply line -1-, return line -3- and bleed
line to EVAP canister and disconnect -2-.
- Remove the EVAP canister cover near bottom of spare wheel well
Page 20
-130
.
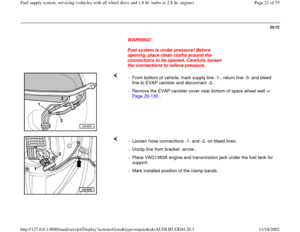
- Loosen hose connections -1- and -2- on bleed lines.
- Unclip line from bracket -arrow-.
- Place VAG1383A engine and transmission jack under the fuel tank for
support.
- Mark installed position of the clamp bands.
Pa
ge 21 of 55 Fuel su
pp
ly system, servicin
g (vehicles with all wheel drive and 1.8 ltr. turbo or 2.8 ltr. en
gine
)
11/18/2002 htt
p://127.0.0.1:8080/audi/servlet/Dis
play?action=Goto&t
yp
e=re
pair&id=AUDI.B5.GE04.20.3
Page 22 of 55
20-73
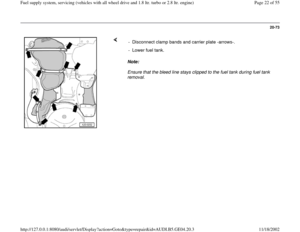
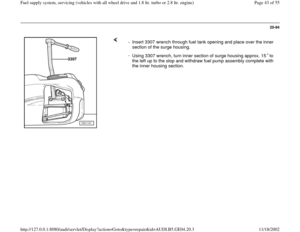
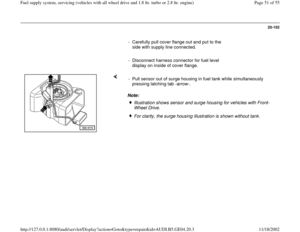
Note:
Ensure that the bleed line stays clipped to the fuel tank during fuel tank
removal. - Disconnect clamp bands and carrier plate -arrows-.
- Lower fuel tank.
Pa
ge 22 of 55 Fuel su
pp
ly system, servicin
g (vehicles with all wheel drive and 1.8 ltr. turbo or 2.8 ltr. en
gine
)
11/18/2002 htt
p://127.0.0.1:8080/audi/servlet/Dis
play?action=Goto&t
yp
e=re
pair&id=AUDI.B5.GE04.20.3
Page 23 of 55
20-74
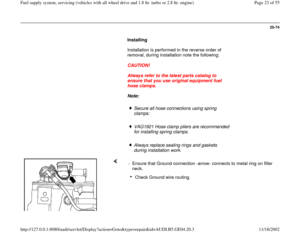
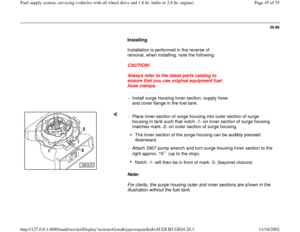
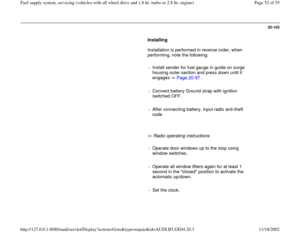
Installing
Installation is performed in the reverse order of
removal, during installation note the following:
CAUTION!
Always refer to the latest parts catalog to
ensure that you use original equipment fuel
hose clamps.
Note:
Secure all hose connections using spring
clamps:
VAG1921 Hose clamp pliers are recommended
for installing spring clamps.
Always replace sealing rings and gaskets
during installation work.
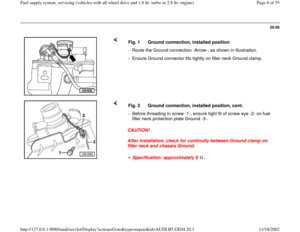
- Ensure that Ground connection -arrow- connects to metal ring on filler
neck.
Check Ground wire routing.
Pa
ge 23 of 55 Fuel su
pp
ly system, servicin
g (vehicles with all wheel drive and 1.8 ltr. turbo or 2.8 ltr. en
gine
)
11/18/2002 htt
p://127.0.0.1:8080/audi/servlet/Dis
play?action=Goto&t
yp
e=re
pair&id=AUDI.B5.GE04.20.3
Page 24 of 55
20-75
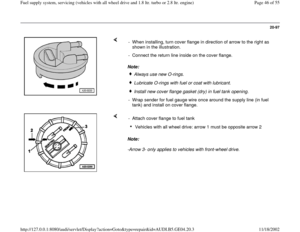
- Loosely fasten clamp bands and carrier plate to
fuel tank.
- Position fuel tank on floor pan complete with
clamp bands and carrier plate using VAG1383 A
engine transmission jack.
CAUTION!
Ensure that Ground connection is surrounded with a protective
shield and connector on fuel filler neck is securely attached.
Installed position Fig. 1
, Page 20
-58
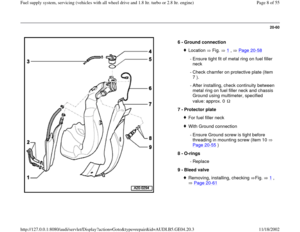
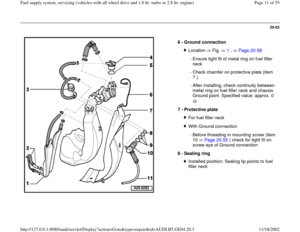
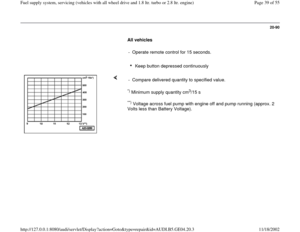
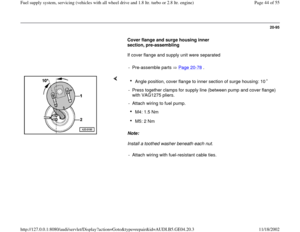
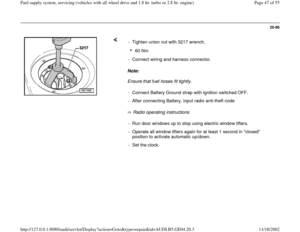
. - Before threading in mounting screw -1- ensure tight fit (chamfer) of
screw eye -2- on protective plate Ground connection -3- for fuel filler
neck.
- Screw the clamp bands and carrier plate tight -arrows-.
- Tighten plastic nuts on clamp bands and carrier plate.
Pa
ge 24 of 55 Fuel su
pp
ly system, servicin
g (vehicles with all wheel drive and 1.8 ltr. turbo or 2.8 ltr. en
gine
)
11/18/2002 htt
p://127.0.0.1:8080/audi/servlet/Dis
play?action=Goto&t
yp
e=re
pair&id=AUDI.B5.GE04.20.3


11/18/2002 htt
p://127.0.0.1:")


