Page 250 of 345
1. Front Seat
S5M0440A
(1) Lumbar lever
(2) Lumbar cover
(3) Lumbar unit
(4) Headrest
(5) Backrest
(6) Cushion
(7) Cushion frame(8) Lifter dial
(9) Hinge cover OUT
(10) Reclining lever
(11) Hinge ASSY
(12) Hinge spring cover
(13) Slide rail ASSY IN
(14) Connecting wire(15) Slide rail ASSY OUT
(16) Bracket
Tightening torque: N´m (kg-m, ft-lb)
T1:
18+10/0(1.8+1/0,13+7/0)
T2:52±10 (5.3±1.0, 38±7)
2
5-3[C100]COMPONENT PARTS
1. Front Seat
Page 256 of 345

1. Front Seat
A: REMOVAL
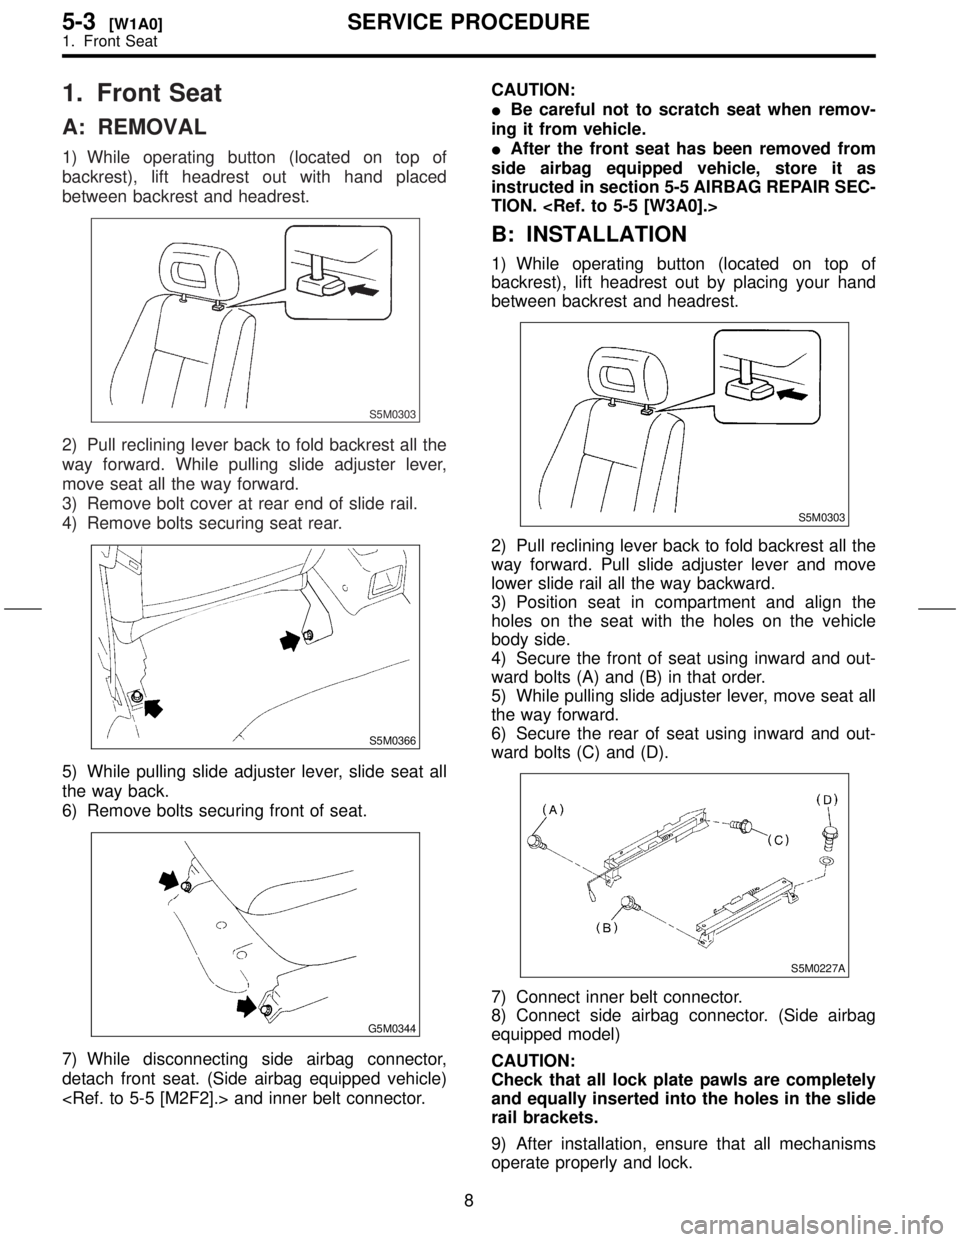
1) While operating button (located on top of
backrest), lift headrest out with hand placed
between backrest and headrest.
S5M0303
2) Pull reclining lever back to fold backrest all the
way forward. While pulling slide adjuster lever,
move seat all the way forward.
3) Remove bolt cover at rear end of slide rail.
4) Remove bolts securing seat rear.
S5M0366
5) While pulling slide adjuster lever, slide seat all
the way back.
6) Remove bolts securing front of seat.
G5M0344
7) While disconnecting side airbag connector,
detach front seat. (Side airbag equipped vehicle)
and inner belt connector.CAUTION:
IBe careful not to scratch seat when remov-
ing it from vehicle.
IAfter the front seat has been removed from
side airbag equipped vehicle, store it as
instructed in section 5-5 AIRBAG REPAIR SEC-
TION.
B: INSTALLATION
1) While operating button (located on top of
backrest), lift headrest out by placing your hand
between backrest and headrest.
S5M0303
2) Pull reclining lever back to fold backrest all the
way forward. Pull slide adjuster lever and move
lower slide rail all the way backward.
3) Position seat in compartment and align the
holes on the seat with the holes on the vehicle
body side.
4) Secure the front of seat using inward and out-
ward bolts (A) and (B) in that order.
5) While pulling slide adjuster lever, move seat all
the way forward.
6) Secure the rear of seat using inward and out-
ward bolts (C) and (D).
S5M0227A
7) Connect inner belt connector.
8) Connect side airbag connector. (Side airbag
equipped model)
CAUTION:
Check that all lock plate pawls are completely
and equally inserted into the holes in the slide
rail brackets.
9) After installation, ensure that all mechanisms
operate properly and lock.
8
5-3[W1A0]SERVICE PROCEDURE
1. Front Seat
Page 257 of 345

10) If any mechanism does not function properly,
loosen bolts (C) and (D), slide seat as required,
insert all lock plate pawls into holes in slide rail
brackets, and tighten bolts (C) and (D) in that
order.
11) Install bolt cover on rear end of slide rail.
12) Install headrest on backrest.
NOTE:
Tighten bolts in the designated order.2. Rear Seat
A: REMOVAL AND INSTALLATION
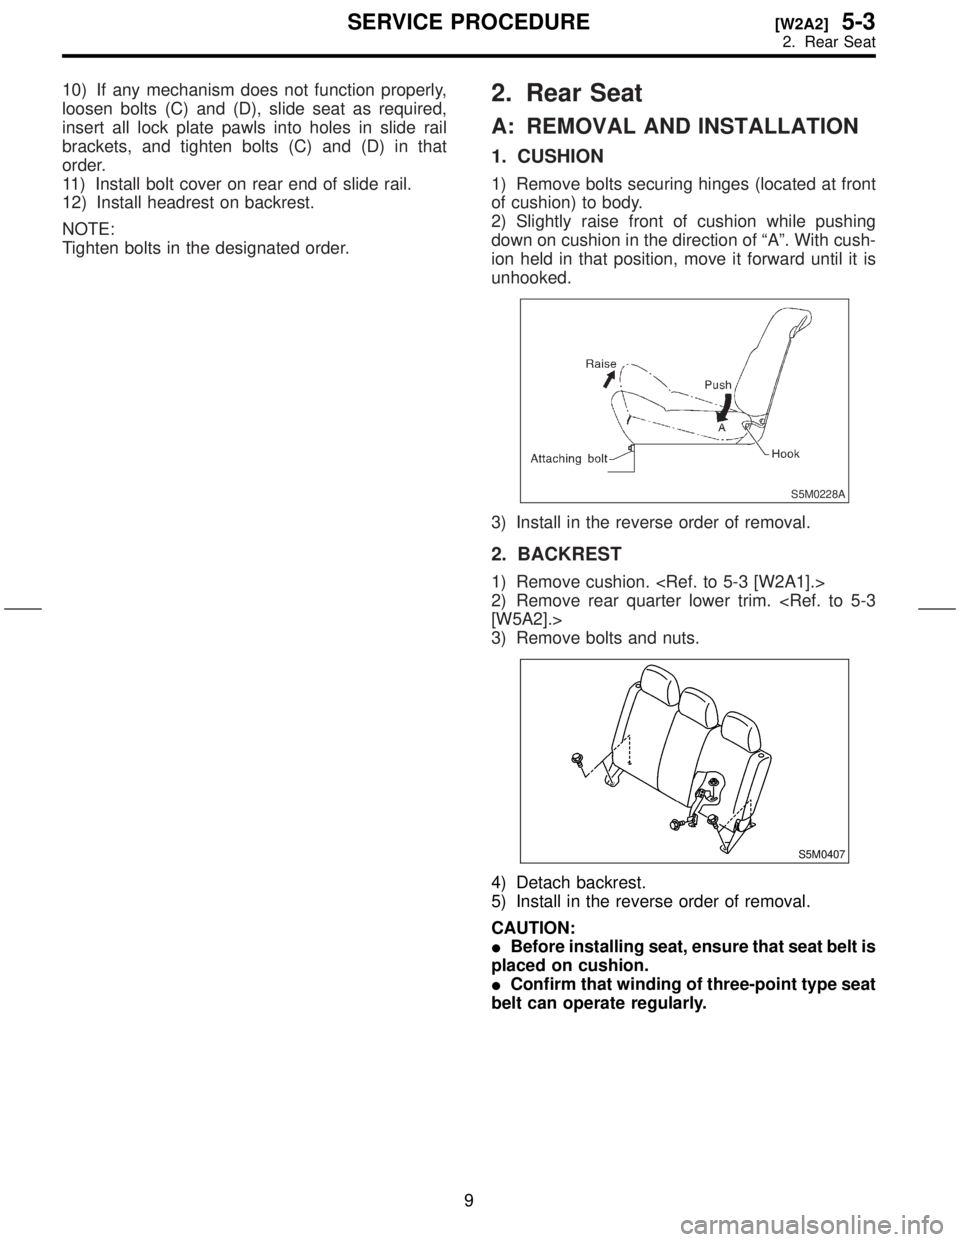
1. CUSHION
1) Remove bolts securing hinges (located at front
of cushion) to body.
2) Slightly raise front of cushion while pushing
down on cushion in the direction of ªAº. With cush-
ion held in that position, move it forward until it is
unhooked.
S5M0228A
3) Install in the reverse order of removal.
2. BACKREST
1) Remove cushion.
2) Remove rear quarter lower trim.
[W5A2].>
3) Remove bolts and nuts.
S5M0407
4) Detach backrest.
5) Install in the reverse order of removal.
CAUTION:
IBefore installing seat, ensure that seat belt is
placed on cushion.
IConfirm that winding of three-point type seat
belt can operate regularly.
9
[W2A2]5-3SERVICE PROCEDURE
2. Rear Seat