Page 259 of 376
yellowblue
6-3
CAUTION:
You can be injured and your vehicle could be
damaged if you try to do service work on a
vehicle without knowing enough about it.
�Be sure you have sufficient knowledge,
experience, the proper replacement parts
and tools before you attempt any vehicle
maintenance task.
�Be sure to use the proper nuts, bolts and
other fasteners. ªEnglishº and ªmetricº
fasteners can be easily confused. If you use
the wrong fasteners, parts can later break
or fall off. You could be hurt.
Adding Equipment to the Outside of
Your Vehicle
Things you might add to the outside of your vehicle can
affect the airflow around it. This may cause wind noise
and affect windshield washer performance. Check with
your dealer before adding equipment to the outside of
your vehicle.
Fuel
The 8th digit of your vehicle identification number
(VIN) shows the code letter for your engine. You will
find the VIN at the top left of your instrument panel.
(See ªVehicle Identification Numberº in the Index.)
If you have the 3100 V6 engine (VIN Code M) or
3800 V6 engine (VIN Code K), use regular unleaded
gasoline rated at 87 octane or higher. If you're using fuel
rated at the recommended octane or higher and you hear
heavy knocking, your engine needs service. But don't
worry if you hear a little pinging noise when you're
accelerating or driving up a hill. That's normal, and you
don't have to buy a higher octane fuel to get rid of
pinging. It's the heavy, constant knock that means you
have a problem.
If you have the 3800 Supercharged V6 engine (VIN
Code 1), use premium unleaded gasoline rated at
91 octane or higher. With the 3800 Supercharged
engine, in an emergency, you may be able to use a lower
octane
-- as low as 87 -- if heavy knocking does
not occur. If you are using 91 or higher octane unleaded
gasoline and you hear heavy knocking, your engine
needs service.
Page 276 of 376
yellowblue
6-20
Engine Air Cleaner/Filter
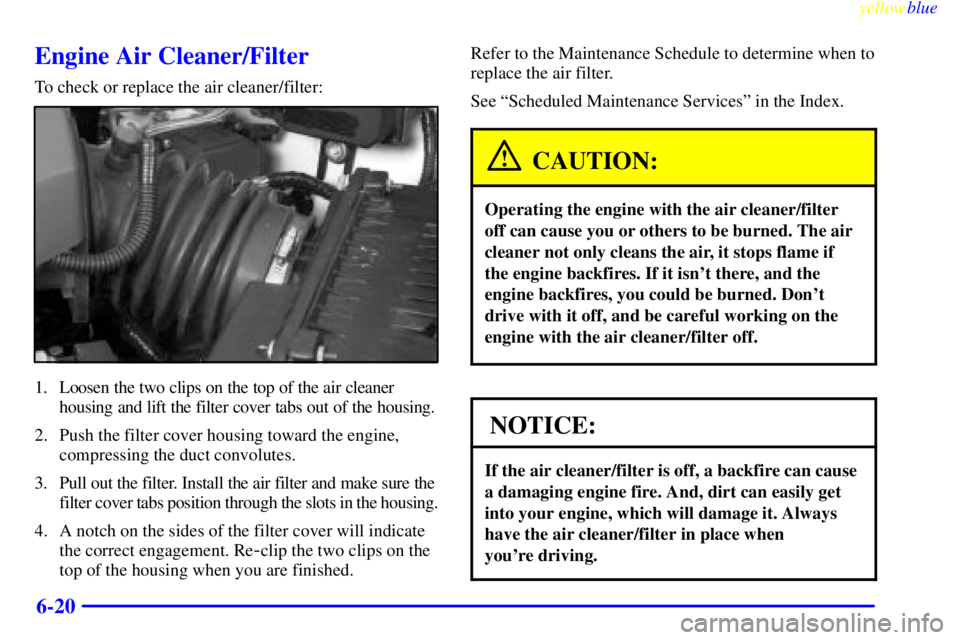
To check or replace the air cleaner/filter:
1. Loosen the two clips on the top of the air cleaner
housing and lift the filter cover tabs out of the housing.
2. Push the filter cover housing toward the engine,
compressing the duct convolutes.
3. Pull out the filter. Install the air filter and make sure the
filter cover tabs position through the slots in the housing.
4. A notch on the sides of the filter cover will indicate
the correct engagement. Re
-clip the two clips on the
top of the housing when you are finished.Refer to the Maintenance Schedule to determine when to
replace the air filter.
See ªScheduled Maintenance Servicesº in the Index.
CAUTION:
Operating the engine with the air cleaner/filter
off can cause you or others to be burned. The air
cleaner not only cleans the air, it stops flame if
the engine backfires. If it isn't there, and the
engine backfires, you could be burned. Don't
drive with it off, and be careful working on the
engine with the air cleaner/filter off.
NOTICE:
If the air cleaner/filter is off, a backfire can cause
a damaging engine fire. And, dirt can easily get
into your engine, which will damage it. Always
have the air cleaner/filter in place when
you're driving.
Page 277 of 376
yellowblue
6-21
Supercharger Oil
Unless you are technically qualified and have the proper
tools, you should let your dealer or a qualified service
center perform this maintenance.
When to Check
Check oil level every 30,000 miles (50 000 km) or every
36 months, whichever occurs first.
What Kind of Oil to Use
See ªRecommended Fluids and Lubricantsº in the Index
and use only the recommended oil.
How to Check and Add Oil
Check oil only when the engine is cold. Allow the
engine to cool two to three hours after running.
CAUTION:
If you remove the supercharger oil fill plug while
the engine is hot, pressure may cause hot oil to
blow out of the oil fill hole. You may be burned.
Do not remove the plug until the engine cools.
1. Clean the area around the oil fill plug before
removing it.
2. Remove the oil fill plug using a 3/16 inch
Allen wrench.
3. The oil level is correct when it just reaches the
bottom of the threads of the inspection hole.
4. Replace the oil plug with the O
-ring in place. Torque
to 88 lb
-in (10 N´m).
Page 278 of 376
yellowblue
6-22
Automatic Transaxle Fluid
When to Check and Change
A good time to check your automatic transaxle fluid
level is when the engine oil is changed.
Change both the fluid and filter every 50,000 miles
(83 000 km) if the vehicle is mainly driven under one or
more of these conditions:
�In heavy city traffic where the outside temperature
regularly reaches 90�F (32�C) or higher.
�In hilly or mountainous terrain.
�When doing frequent trailer towing.
�Uses such as found in taxi, police or delivery service.
If you do not use your vehicle under any of
these conditions, change the fluid and filter at
100,000 miles (166 000 km).
See ªScheduled Maintenance Servicesº in the Index.
How to Check
Because this operation can be a little difficult, you
may choose to have this done at the dealership
service department.
If you do it yourself, be sure to follow all the
instructions here, or you could get a false reading on
the dipstick.
NOTICE:
Too much or too little fluid can damage your
transaxle. Too much can mean that some of the
fluid could come out and fall on hot engine parts
or exhaust system parts, starting a fire. Be sure to
get an accurate reading if you check your
transaxle fluid.
Page 280 of 376
yellowblue
6-24
2. Push it back in all the way, wait three seconds and
then pull it back out again.
3100 Engine
3800 or 3800 Supercharged Engine
3. Check both sides of the dipstick, and read the lower
level. The fluid level must be in the cross
-hatched area.
4. If the fluid level is in the acceptable range, push the
dipstick back in all the way.
How to Add Fluid
Refer to the Maintenance Schedule to determine what
kind of transaxle fluid to use. See ªRecommended
Fluids and Lubricantsº in the Index.
Page 289 of 376
yellowblue
6-33
What to Add
When you do need brake fluid, use only DOT
-3 brake
fluid. Use new brake fluid from a sealed container only.
Refer to ªRecommended Fluids and Lubricantsº in the
Maintenance Schedule.
Always clean the brake fluid reservoir cap and the area
around the cap before removing it. This will help keep
dirt from entering the reservoir.
CAUTION:
With the wrong kind of fluid in your brake
system, your brakes may not work well, or they
may not even work at all. This could cause a
crash. Always use the proper brake fluid.
NOTICE:
�Using the wrong fluid can badly damage
brake system parts. For example, just a few
drops of mineral
-based oil, such as engine
oil, in your brake system can damage brake
system parts so badly that they'll have to be
replaced. Don't let someone put in the
wrong kind of fluid.
�If you spill brake fluid on your vehicle's
painted surfaces, the paint finish can be
damaged. Be careful not to spill brake fluid
on your vehicle. If you do, wash it off
immediately. See ªAppearance Careº in
the Index.
Page 290 of 376

yellowblue
6-34 Brake Wear
Your vehicle has four-wheel disc brakes.
Disc brake pads have built
-in wear indicators that make a
high
-pitched warning sound when the brake pads are worn
and new pads are needed. The sound may come and go or
be heard all the time your vehicle is moving (except when
you are pushing on the brake pedal firmly).
CAUTION:
The brake wear warning sound means that soon
your brakes won't work well. That could lead to
an accident. When you hear the brake wear
warning sound, have your vehicle serviced.
NOTICE:
Continuing to drive with worn-out brake pads
could result in costly brake repair.
Some driving conditions or climates may cause a brake
squeal when the brakes are first applied or lightly
applied. This does not mean something is wrong with
your brakes.
Properly torqued wheel nuts are necessary to help
prevent brake pulsation. When tires are rotated, inspect
brake pads for wear and evenly torque wheel nuts in the
proper sequence to GM specifications.
Brake linings should always be replaced as complete
axle sets.
See ªBrake System Inspectionº in Section 7 of this manual
under Part C ªPeriodic Maintenance Inspections.º
Brake Pedal Travel
See your dealer if the brake pedal does not return to
normal height, or if there is a rapid increase in pedal
travel. This could be a sign of brake trouble.
Brake Adjustment
Every time you apply the brakes, with or without the
vehicle moving, your brakes adjust for wear.
Page 298 of 376
yellowblue
6-42
7. Remove the bulb.
8. Place the new bulb into the socket.
9. Turn the lamp socket a quarter of a turn clockwise
to replace it.
10. Carefully replace the taillamp assembly. Be careful
to avoid scratching or chipping the vehicle paint.
11. Reverse Steps 1 through 4.
12. Close the rear compartment.
Windshield Wiper
Blade Replacement
Windshield wiper blades should be inspected as least
twice a year for wear or cracking. See ªWiper Blade
Checkº in Section 7 of this manual under Part B ªOwner
Checks and Servicesº for more information.
Replacement blades come in different types and are
removed in different ways. For the proper type and
length, see ªNormal Maintenance and Replacement
Partsº in the Index.
Here's how to remove the wiper blade: