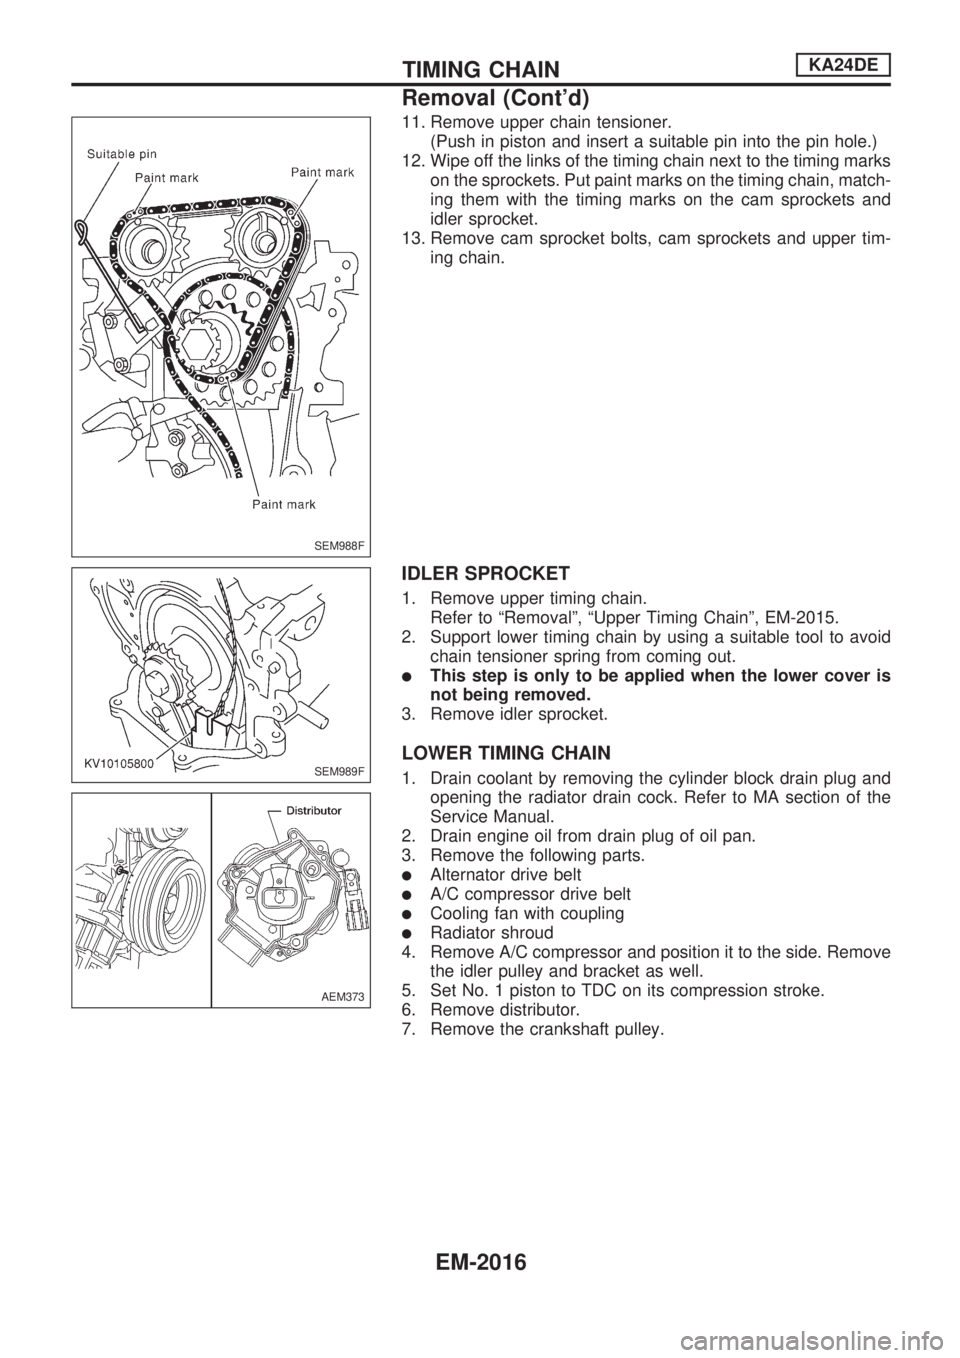
11. Remove upper chain tensioner.
(Push in piston and insert a suitable pin into the pin hole.)
12. Wipe off the links of the timing chain next to the timing marks
on the sprockets. Put paint marks on the timing chain, match-
ing them with the timing marks on the cam sprockets and
idler sprocket.
13. Remove cam sprocket bolts, cam sprockets and upper tim-
ing chain.
IDLER SPROCKET
1. Remove upper timing chain.
Refer to ªRemovalº, ªUpper Timing Chainº, EM-2015.
2. Support lower timing chain by using a suitable tool to avoid
chain tensioner spring from coming out.
lThis step is only to be applied when the lower cover is
not being removed.
3. Remove idler sprocket.
LOWER TIMING CHAIN
1. Drain coolant by removing the cylinder block drain plug and
opening the radiator drain cock. Refer to MA section of the
Service Manual.
2. Drain engine oil from drain plug of oil pan.
3. Remove the following parts.
lAlternator drive belt
lA/C compressor drive belt
lCooling fan with coupling
lRadiator shroud
4. Remove A/C compressor and position it to the side. Remove
the idler pulley and bracket as well.
5. Set No. 1 piston to TDC on its compression stroke.
6. Remove distributor.
7. Remove the crankshaft pulley.
SEM988F
SEM989F
AEM373
TIMING CHAINKA24DE
Removal (Cont'd)
EM-2016
WARNING:
lPosition vehicle on a flat and solid surface.
lPlace chocks at front and back of rear wheels.
lDo not remove engine until exhaust system has com-
pletely cooled off.
Otherwise, you may burn yourself and/or fire may break
out in fuel line.
lBefore disconnecting fuel hose, release fuel pressure.
Refer to EC section (ªFuel Pressure Releaseº, ªBASIC
SERVICE PROCEDUREº).
lBe sure to hoist engine and transmission in a safe man-
ner.
lFor engines not equipped with engine slingers, attach
proper slingers and bolts described in PARTS CATA-
LOG.
CAUTION:
lWhen lifting engine, be sure to clear surrounding parts.
Take special care near accelerator wire casing, brake
lines and brake master cylinder.
lIn hoisting the engine, always use engine slingers in a
safe manner.
lFor 4WD models, apply sealant between engine and
transmission. Refer to MT section (ªRemoval and Instal-
lationº).
Removal
1. Drain coolant from engine block and radiator. Refer to MA
section (ªChanging Engine Coolantº, ªENGINE MAINTE-
NANCEº).
2. Release fuel pressure. Refer to EC section (ªFuel Pressure
Releaseº, ªBASIC SERVICE PROCEDUREº).
3. Remove negative battery cable.
4. Remove hood. Refer to BT section.
5. Remove air cleaner and air duct.
6. Remove power steering drive belt, alternator drive belt and
A/C compressor drive belt.
7. Remove radiator. Refer to LC section (ªRadiatorº, ªENGINE
COOLING SYSTEMº).
8. Remove exhaust manifold heat shield.
9. Disconnect exhaust system from exhaust manifold.
10. Remove A/C compressor from bracket. Refer to HA section
(ªCompressor Mountingº, ªSERVICE PROCEDURESº).
11. Disconnect accelerator wire, vacuum hoses, electrical
connectors, heater hoses and vacuum booster hose.
ENGINE REMOVALKA24DE
EM-2036