Page 76 of 247
device must accept any interference re-
ceived including interference that may
cause undesired operation of the device.
WARNING
IMake sure the hood is completely
closed and latched before driving.
Failure to do so could cause the
hood to fly open and result in an
accident.
IIf you see steam or smoke coming
from the engine compartment, to
avoid injury do not open the hood.
1. Pull the hood lock release handle located
below the driver side instrument panel;
the hood then springs up slightly.2. Lift the lever at the front of the hood with
your fingertips and raise the hood.
3. Insert the support rod into the slot in the
front edge of the hood.
4. When closing the hood, reset the support
rod to its original position, lower the hood
to approximately 12 inches above the
latch and release it. This allows proper
engagement of the hood latch.
APD1036
HOOD RELEASE
3-8Pre-driving checks and adjustments
ZX
Page 77 of 247

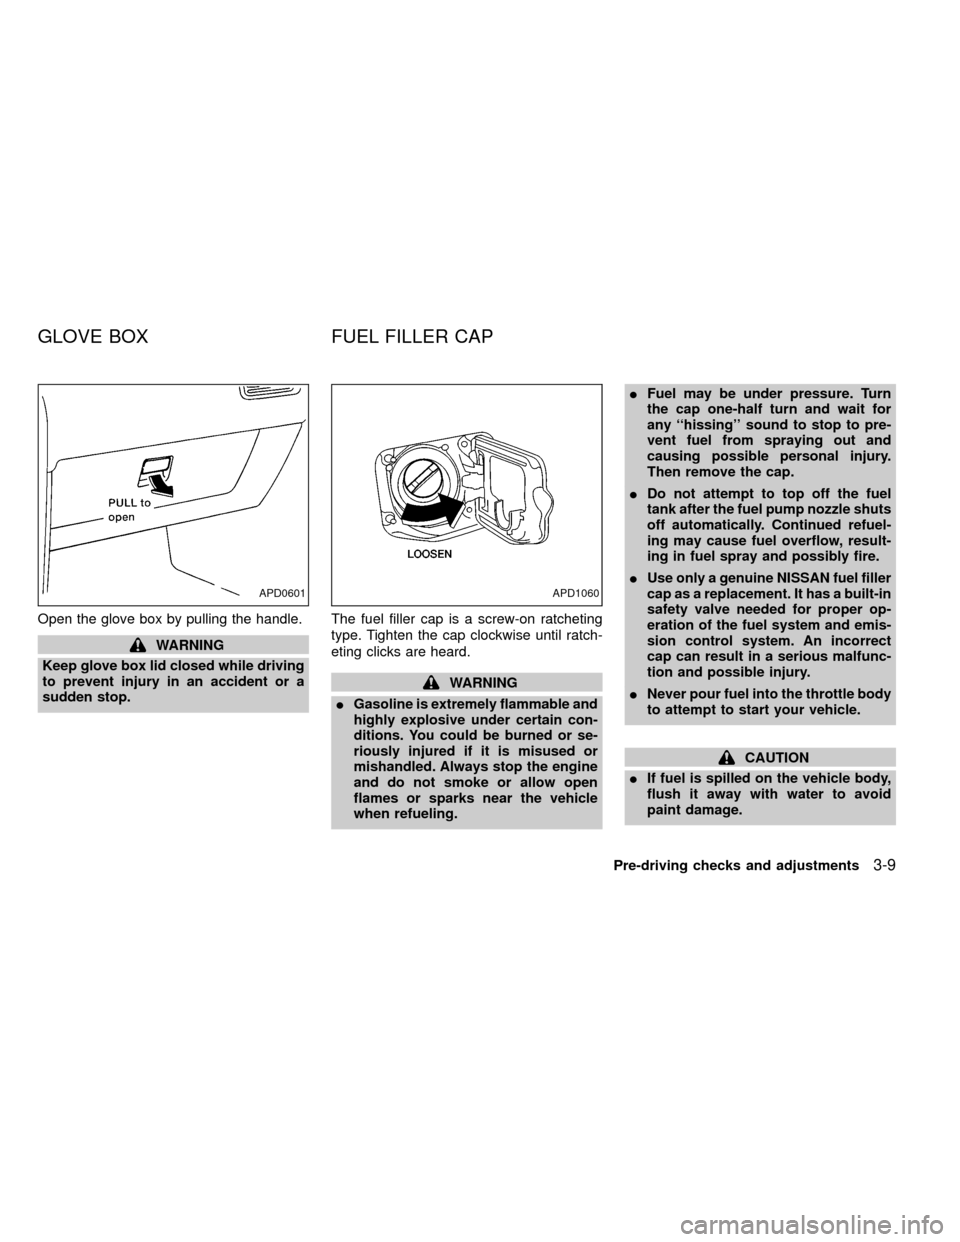
Open the glove box by pulling the handle.
WARNING
Keep glove box lid closed while driving
to prevent injury in an accident or a
sudden stop.The fuel filler cap is a screw-on ratcheting
type. Tighten the cap clockwise until ratch-
eting clicks are heard.
WARNING
IGasoline is extremely flammable and
highly explosive under certain con-
ditions. You could be burned or se-
riously injured if it is misused or
mishandled. Always stop the engine
and do not smoke or allow open
flames or sparks near the vehicle
when refueling.IFuel may be under pressure. Turn
the cap one-half turn and wait for
any ``hissing'' sound to stop to pre-
vent fuel from spraying out and
causing possible personal injury.
Then remove the cap.
IDo not attempt to top off the fuel
tank after the fuel pump nozzle shuts
off automatically. Continued refuel-
ing may cause fuel overflow, result-
ing in fuel spray and possibly fire.
IUse only a genuine NISSAN fuel filler
cap as a replacement. It has a built-in
safety valve needed for proper op-
eration of the fuel system and emis-
sion control system. An incorrect
cap can result in a serious malfunc-
tion and possible injury.
INever pour fuel into the throttle body
to attempt to start your vehicle.
CAUTION
IIf fuel is spilled on the vehicle body,
flush it away with water to avoid
paint damage.
APD0601APD1060
GLOVE BOX FUEL FILLER CAP
Pre-driving checks and adjustments3-9
ZX
Page 79 of 247
To open the tailgate to the lowest position,
lift the tailgate to a 45 degree angle, then
release the support cables.
Do not drive the vehicle with the tailgate
down.
WARNING
IIt is extremely dangerous to ride in a
cargo area inside a vehicle. In a
collision, people riding in these ar-
eas are more likely to be seriously
injured or killed.IDo not allow people to ride in any
area of your vehicle that is not
equipped with seats and seat belts.
IBe sure everyone in your vehicle is
in a seat and using a seat belt
properly.
Removing the tailgate
1. Release the tailgate support cables.
2. Hold the tailgate at a 45 degree angle.
3. Pull the tailgate out from the left side
hinge.
4. Remove the tailgate from the right side
hinge.
Installing the tailgate
1. Insert the tailgate into the right side
hinge.
2. Hold the tailgate at a 45 degree angle
and insert left side hinge.
APD1038IC0175
Pre-driving checks and adjustments3-11
ZX
Page 80 of 247
3. Continue to hold tailgate at a 45 degree
angle and attach the tailgate support
cables.
4. Close the tailgate securely.
CAUTION
The tailgate is heavy. Be careful not to
drop it during removal.
For your convenience, tie down hooks are
placed at each corner of the truck box.
These may be used to help secure cargo
loaded into the truck box.
IThe weight of the cargo load must be
evenly distributed over both the front and
rear axles.
IAll cargo should be securely fastened
with ropes or straps to prevent it from
shifting or sliding within the vehicle.
WARNING
IProperly secure all cargo with ropes
or straps to help prevent it from
sliding or shifting. In a sudden stop
or collision, unsecured cargo could
cause personal injury.
IDo not place cargo higher than the
seatbacks. In a sudden stop or colli-
sion, unsecured cargo could cause
personal injury.
ATI1020
TIE DOWN HOOKS
3-12Pre-driving checks and adjustments
ZX
Page 81 of 247
Tilt operation
Pull the lock lever down and adjust the
steering wheel up or down to the desired
position.
Push the lock lever up firmly to lock the
steering wheel in place.
WARNING
Do not adjust the steering wheel while
driving. You could lose control of your
vehicle and cause an accident.Push the right or left side of the switch to
adjust the right or left side mirror, then
control the lever.
The ignition switch must be in the ON or
ACC position for the power mirrors to oper-
ate.
WARNING
Objects viewed in the outside mirror on
the passenger side are closer than they
appear. Be careful when moving to the
right. Using only this mirror could cause
an accident. Use the inside mirror or
glance over your shoulder to properly
judge distances to other objects.
PD1238MAPD1039
TILTING STEERING WHEEL
(if so equipped)OUTSIDE MIRROR REMOTE
CONTROL (if so equipped)
Pre-driving checks and adjustments3-13
ZX
Page 82 of 247
Folding outside mirror
Push the mirror backward to fold it.The night position reduces glare from the
headlights of vehicles behind you at night.WARNING
Use the night position only when nec-
essary because it reduces rear view
clarity.
IC0266MIC0248MAIC0703
OUTSIDE MIRRORS INSIDE MIRROR
3-14Pre-driving checks and adjustments
ZX
Page 87 of 247

WARNING
IThe air conditioner cooling function
operates only when the engine is
running.
IDo not leave children, unreliable
adults, or pets alone in your vehicle.
On hot sunny days, temperatures in
a closed vehicle could quickly be-
come high enough to cause severe
or possibly fatal injuries to people or
animals.
IDo not use the recirculation mode
for long periods as it may cause theinterior air to become stale and the
windows to fog up.
IPositioning of the heating or air con-
ditioning controls should not be
done while driving, so that full atten-
tion may be given to the driving
operation.
CONTROLS
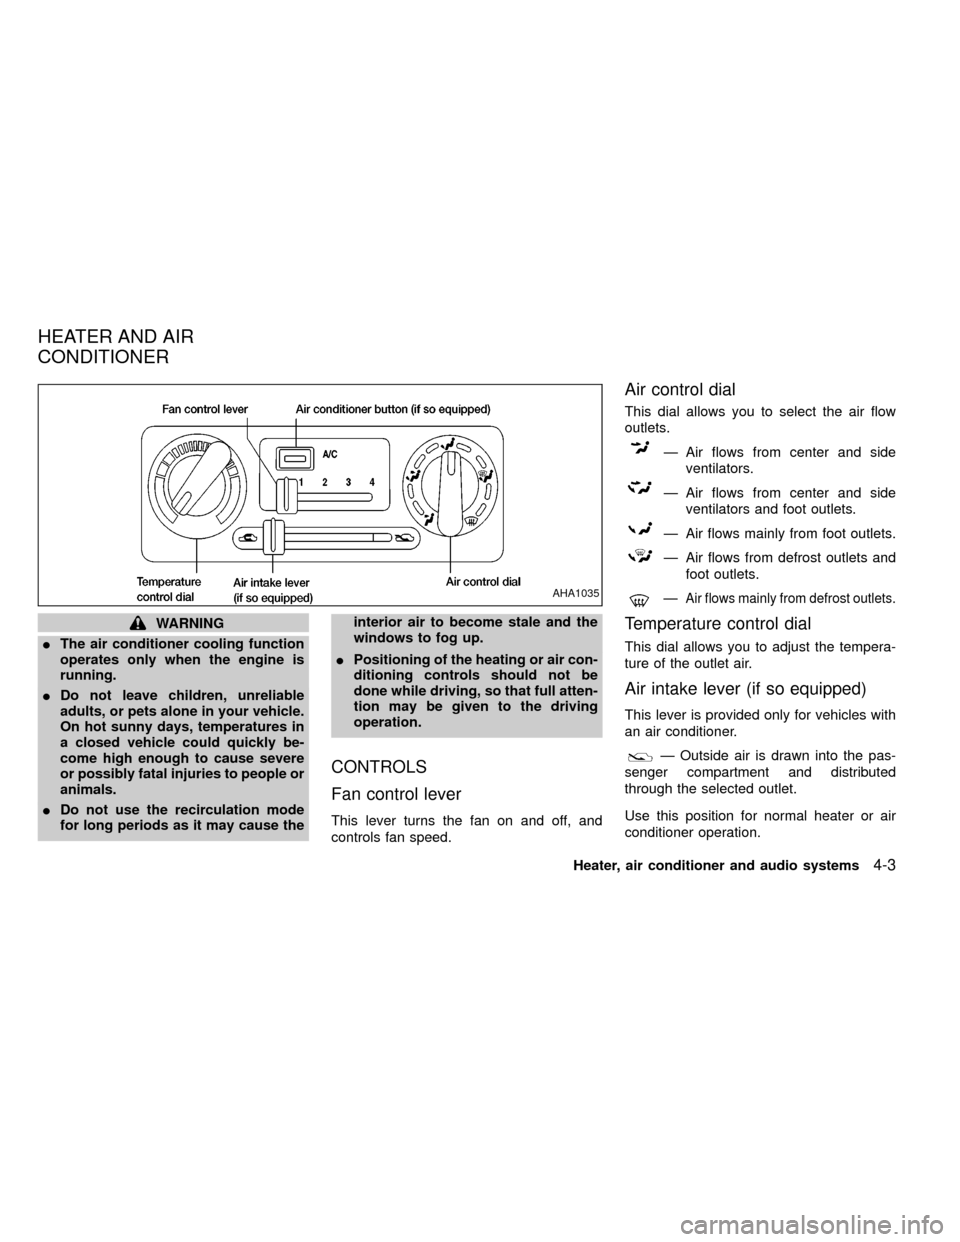
Fan control lever
This lever turns the fan on and off, and
controls fan speed.
Air control dial
This dial allows you to select the air flow
outlets.
Ð Air flows from center and side
ventilators.
Ð Air flows from center and side
ventilators and foot outlets.
Ð Air flows mainly from foot outlets.
Ð Air flows from defrost outlets and
foot outlets.
ÐAir flows mainly from defrost outlets.
Temperature control dial
This dial allows you to adjust the tempera-
ture of the outlet air.
Air intake lever (if so equipped)
This lever is provided only for vehicles with
an air conditioner.
Ð Outside air is drawn into the pas-
senger compartment and distributed
through the selected outlet.
Use this position for normal heater or air
conditioner operation.
AHA1035
HEATER AND AIR
CONDITIONER
Heater, air conditioner and audio systems4-3
ZX
Page 94 of 247
Servicing air conditioner
The air conditioner system in your NISSAN
is charged with a refrigerant designed with
the environment in mind.
This refrigerant does not harm the
earth's ozone layer.
Special charging equipment and lubricant is
required when servicing your NISSAN air
conditioner. Using improper refrigerants or
lubricants causes severe damage to your
air conditioner system. See ªAir conditioner
system refrigerant and lubricant recommen-
dationsº in the ``Technical and consumer
information'' section of this manual.
An authorized NISSAN dealer will be able to
service your environmentally ``friendly'' air
conditioner system.
WARNING
The air conditioner system contains
refrigerant under high pressure. To
avoid personal injury, any air condi-
tioner service should be done by an
experienced technician with proper
equipment.
4-10Heater, air conditioner and audio systems
ZX