1999 NISSAN FRONTIER light
[x] Cancel search: lightPage 78 of 247
ITighten until the cap clicks. Failure
to tighten the fuel cap properly may
cause the
malfunction indica-
tor light (MIL) to illuminate. If this
occurs, securely close the fuel filler
cap. After driving for a while, the
light should remain off. If the light
remains on, have the vehicle in-
spected by an authorized NISSAN
dealer.
For additional information, see the
²Malfunction indicator light (MIL)²in
the²Instruments and Controls²sec-
tion.
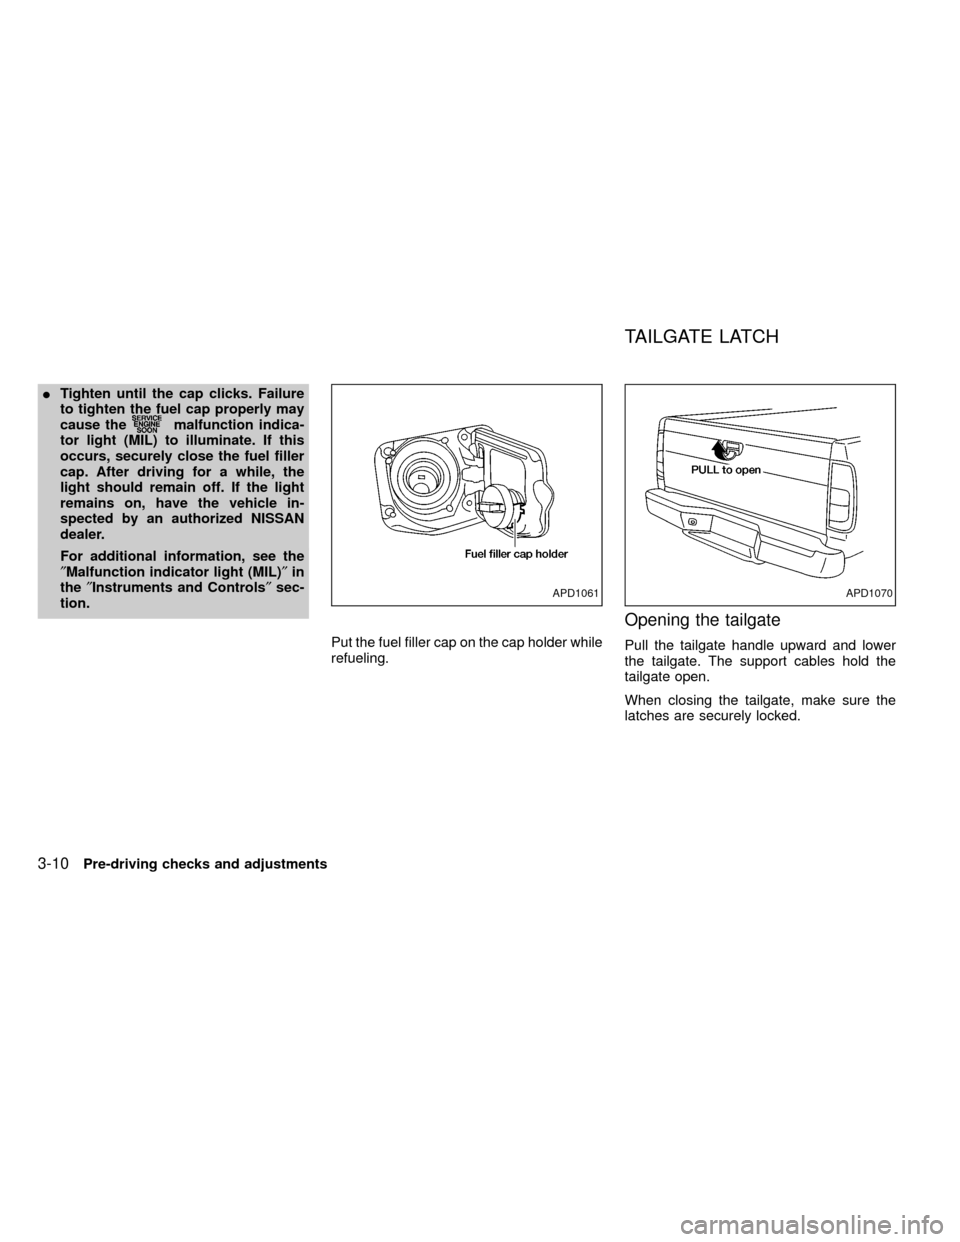
Put the fuel filler cap on the cap holder while
refueling.
Opening the tailgate
Pull the tailgate handle upward and lower
the tailgate. The support cables hold the
tailgate open.
When closing the tailgate, make sure the
latches are securely locked.
APD1061APD1070
TAILGATE LATCH
3-10Pre-driving checks and adjustments
ZX
Page 82 of 247
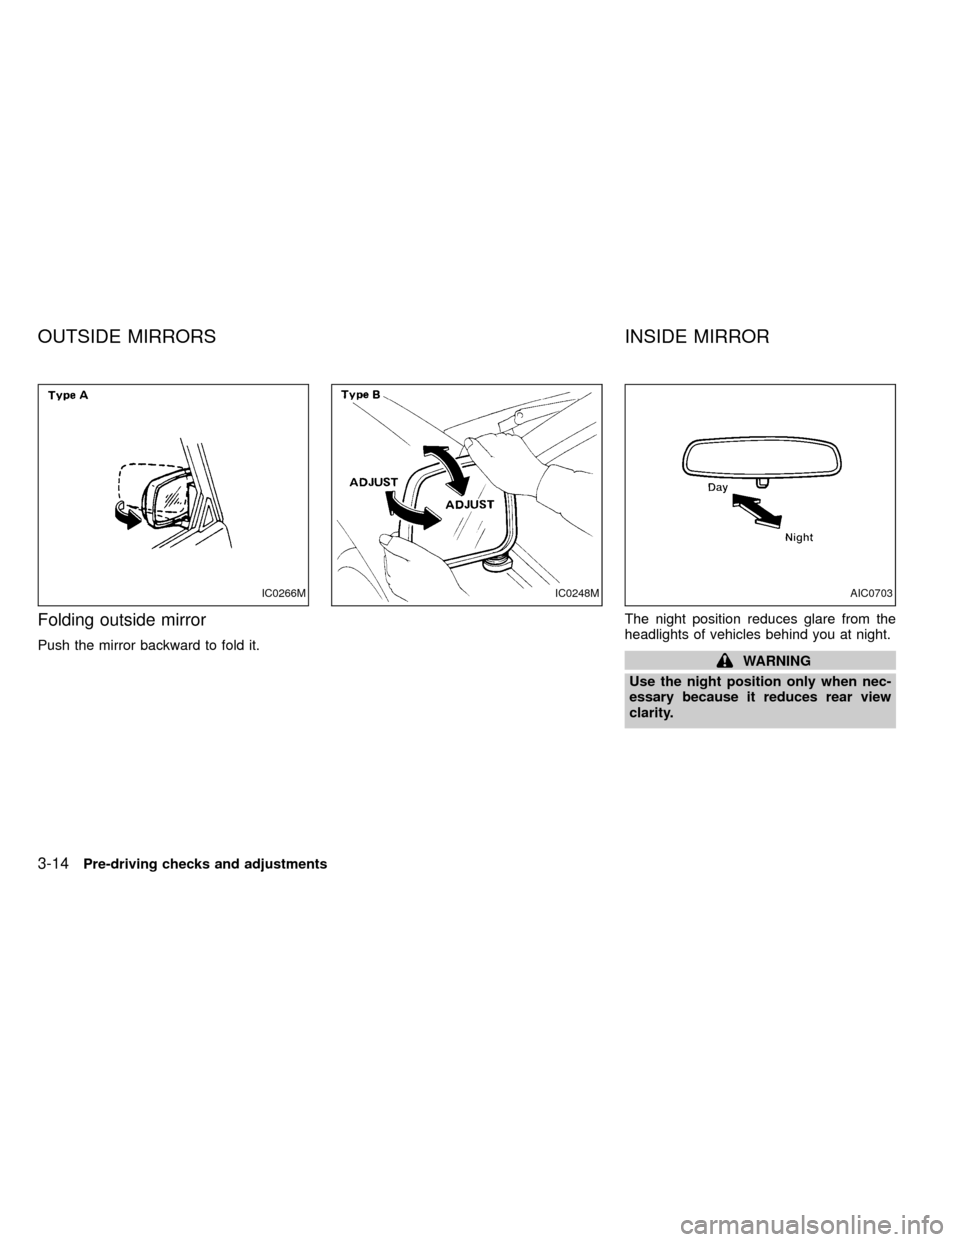
Folding outside mirror
Push the mirror backward to fold it.The night position reduces glare from the
headlights of vehicles behind you at night.WARNING
Use the night position only when nec-
essary because it reduces rear view
clarity.
IC0266MIC0248MAIC0703
OUTSIDE MIRRORS INSIDE MIRROR
3-14Pre-driving checks and adjustments
ZX
Page 88 of 247

Ð Interior air is recirculated inside the
vehicle.
Move the air intake lever to the
position:
Iwhen driving on a dusty road.
Ito prevent traffic fumes from entering the
passenger compartment.
Ifor maximum cooling when using the air
conditioner.
Air conditioner switch
(if so equipped)
This switch is present only in vehicles
equipped with an air conditioner.
Start the engine, push the air conditioner
switch and move the fan control lever to the
desired speed. The indicator light comes on
when the air conditioner is operating.
HEATER OPERATION
Heating
This mode directs heated air from the foot
outlets. A small amount of air is also di-
rected from the defrost outlets.
1. Move the air intake lever to the
position for normal heating.
2. Turn the air control dial to theposition.
3. Move the fan control lever to the desired
speed.
4. Turn the temperature control dial clock-
wise until it stops or to the desired posi-
tion.
Ventilation
This mode directs outside air from the side
and center ventilators.
1. Move the air intake lever to the
position.
2. Turn the air control dial to the
position.
3. Move the fan control lever to the desired
speed.
4. Turn the temperature control dial to the
desired position.
Defrosting/defogging
This mode directs heated air from the
defrosting/defogging outlets.
1. Move the air intake lever to the
position.2. Turn the air control dial to the
position.
3. Move the fan control lever to the desired
speed.
4. Turn the temperature control dial clock-
wise until it stops or to the desired posi-
tion.
If it is difficult to defog the windshield,
push the air conditioner switch (if so
equipped) on. This dehumidifies the air,
which helps defog the windshield.
To quickly remove ice or fog from the
windows, move the fan control lever to 4
and the temperature control dial to the
full clockwise position.
Bi-level heating/cooling
This mode directs air from the side and
center ventilators and from the foot outlets.
1. Move the air intake lever to the
position.
2. Turn the air control dial to the
position.
3. Move the fan control lever to the desired
speed.
4-4Heater, air conditioner and audio systems
ZX
Page 89 of 247

4. Turn the temperature control dial to the
desired position.
Heating and defrosting/defogging
This mode directs heated air from the foot
outlets and defrosts/defogs the windshield.
1. Move the air intake lever to the
position.
2. Turn the air control dial to the
position.
3. Move the fan control lever to the desired
speed.
4. Turn the temperature control dial clock-
wise until it stops or to the desired posi-
tion.
If it is difficult to defog the windshield,
push the air conditioner switch (if so
equipped) on. This dehumidifies the air,
which helps defog the windshield.
Operating tips
Clear snow and ice from the wiper blades
and air inlet in front of the windshield. This
improves heater and defroster operation.
AIR CONDITIONER OPERATION
(if so equipped)
Start the engine, move the fan control lever
to the desired (one to four) position, and
push in the air conditioner switch to activate
the air conditioner. When the air conditioner
is on, cooling and dehumidifying functions
are added to the heater operation.
The air conditioner cooling function op-
erates only when the engine is running.
Cooling
This mode directs cool, dehumudified air
from the side and center ventilators.
1. Move the air intake lever to the
position.
2. Turn the air control dial to the
position.
3. Move the fan control lever to the desired
position.
4. Push in the air conditioner switch. The
indicator light comes on.
5. Turn the temperature control dial to the
desired position.
IFor quick cooling when the outside tem-
perature is high, move the air intake leverto the
position. Be sure to return
the air intake lever to theposition
for normal cooling.
Dehumidified heating
This mode directs heated, dehumidfied air
from the defrosting/defogging outlets.
1. Move the air intake lever to the
position.
2. Turn the air control dial to the
position.
3. Move the fan control lever to the desired
position.
4. Push in the air conditioner switch. The
indicator light comes on.
5. Turn the temperature control dial clock-
wise until it stops or to the desired posi-
tion.
Dehumidified defrosting/defogging
This mode directs heated, dehumidified air
from the defrosting/ defogging outlets.
1. Turn the air intake lever to the
po-
sition.
Heater, air conditioner and audio systems
4-5
ZX
Page 90 of 247

2. Move the air control dial to the,
, or the position in between.
3. Move the fan control lever to the desired
position.
4. Push in the air conditioner switch. The
indicator light comes on.
5. Turn the temperature control dial to the
desired position.
Operating tips
IKeep windows and sunroof closed while
operating the air conditioner.
IAfter parking in the sun, drive for two or
three minutes with the windows open to
vent hot air from the passenger compart-
ment. Then, close the windows. This
allows the air conditioner to cool the
interior more quickly.
IThe air conditioning system should be
operated for about ten minutes at least
once a month, especially in winter. This
helps prevent damage to the system due
to lack of lubrication.
IIf the coolant temperature gauge ex-
ceeds the (hot) position, turn the air
conditioner off. Have your vehicle in-spected by a NISSAN dealer. See ``If
your vehicle overheats'' in the ``In case of
emergency'' section for additional infor-
mation.
4-6Heater, air conditioner and audio systems
ZX
Page 98 of 247
is set to the desired level, press the AUDIO
button repeatedly until the radio or cassette
tape display appears.
CASSETTE TAPE OPERATION
Turn the ignition key to ACC or ON and
carefully insert a cassette tape into the tape
door. The cassette tape automatically pulls
into the player.
The word TAPE and moving digital squares
illuminate on the right side of the display
window. If the radio is already operating it
automatically turns off and the cassette tape
begins to play.
CAUTION
Do not force the cassette tape into the
tape door. This could cause player
damage.
The cassette tape automatically changes
directions to play the other side when the
first side is complete. At this time, the mov-
ing digital squares illuminate on the left side
of the display window.
Precautions on cassette player op-
erations
ITo maintain good quality sound, NIS-
SAN recommends using cassette tapes
of 60 minutes or shorter in length.
ICassette tapes should be removed
from the player when not in use. Store
cassettes in their protective cases
and away from direct sunlight, heat,
dust, moisture and magnetic sources.
IDirect sunlight can cause the cassette
to become deformed. The use of de-
formed cassettes may cause the cas-
sette to jam in the player.
IDo not use cassettes with labels
which are peeling and loose. If used,
the label could jam in the player.
IIf a cassette has loose tape, insert a
pencil through one of the cassette
hubs and rewind the tape firmly
around the hubs. Loose tape may
cause tape jamming and wavering
sound quality.
IOver a period of time, the playback
head, capstan and pinch roller may
collect a tape coating residue as thetape is played. This residue accumu-
lation can cause weak or wavering
sound, and should be removed peri-
odically with a head cleaning tape. If
the residue is not removed periodi-
cally, the player may need to be disas-
sembled for cleaning.Fast forwarding or rewinding the
tape
Push either theorbutton for
the desired direction.
The FF or REW symbol illuminates in the
display.
To stop the FF or REW function, press the
oragain, or thebutton.
Automatic Program Search (APS)
fast forwarding or APS rewinding
the tape
Push either theorbutton
while the cassette tape is playing. The tape
runs quickly, stops, then plays the next
selection from the beginning. Either the FF
or REW symbol flashes in the display while
searching for the selection.
4-14Heater, air conditioner and audio systems
ZX
Page 104 of 247
CASSETTE TAPE OPERATION
Turn the ignition key to the ACC or ON
position, and carefully insert a cassette tape
into the tape door. The cassette tape auto-
matically pulls into the player. The word
TAPE illuminates in the display.
CAUTION
Do not force the cassette tape into the
tape door. This could cause player
damage.
ITo maintain good quality sound,
NISSAN recommends using cassette
tapes of 60 minutes or shorter in
length.
ICassette tapes should be removed
from the player when not in use. Store
cassettes in their protective cases
and away from direct sunlight, heat,
dust, moisture or magnetic sources.
IDirect sunlight can cause the cassette
to become deformed. The use of de-
formed cassettes may cause the cas-
sette to jam in the player.
IDo not use cassettes that have peel-
ing or loose labels. If used, the labelcould jam in the player.
IIf a cassette has loose tape, insert a
pencil through one of the cassette
hubs and rewind the tape firmly.
Loose tape may cause jamming and
wavering sound quality.
IOver a period of time, the playback
head, capstan and pinch roller may
gather a tape coating residue as the
tape is played. This residue accumu-
lation can cause a weak or wavering
sound and should be removed peri-
odically with a head cleaning tape. If
the residue is not removed periodi-
cally, the player may need to be disas-
sembled for cleaning.
PLAY/STOP TAPE button
When thebutton is pushed with the
system turned off and a tape loaded, the
system comes on and the tape plays.
The word tape illuminates.
When the
button is pushed with either
the radio or compact disc turned on and a
tape loaded, the compact disc or the radio
turns off and the tape plays.
While the tape is playing, pushing the
button stops tape play. Pushing thebutton again resumes tape play.
FF (fast forward) and REW (rewind)
buttons
Push thebutton to fast forward the
tape. Push thebutton to rewind the
tape. Either REW or FF illuminates in the
display. To stop the FF or REW function,
press the
,,orbuttons.
Automatic Program Search (APS)
FF and REW buttons
When thebutton is pushed while the
tape is being played, the tape runs quickly,
stops, then plays the next selection from the
beginning. Push the
button several
times to skip several selections. Each time
the button is pushed, the tape fast forwards
one additional selection. This number ap-
pears in the display window. The tape can
be fast forwarded through up to nine selec-
tions. (for example: 7 in the display indi-
cates that the
button has been
pushed seven times to skip forward through
seven selections).
When the
button is pushed, the se-
lection being played starts again from the
4-20Heater, air conditioner and audio systems
ZX
Page 106 of 247
lowing the present one starts to play from
the beginning. Push the
button sev-
eral times to skip several selections. Each
time the button is pushed, the CD advances
one additional selection. The number ap-
pears in the display window. (When the last
selection on the compact disc is skipped,
the first selection is played.)
When the
button is pushed, the se-
lection being played returns to the begin-
ning. Push the
button several times
to skip back several selections. Each time
the button is pushed, the CD moves back
one selection.
PROG (program) button
When thebutton is pushed while the
compact disc is playing, the play pattern
changes as follows.
1.The current selection is repeated.
RANDOM:Selections are played at ran-
dom, not following the sequence on the
compact disc. The same program may be
repeated twice.
Blank(no symbol): All selections are played
repeatedly in sequence.
When a new compact disc is inserted,the play pattern automatically changes
to ALL.
CD EJECT button
When thebutton is pushed with a com-
pact disc loaded, the compact disc ejects.
When the
button is pushed while the
compact disc is playing, the compact disc
ejects and the system turns off.
If the compact disc ejects and is not
removed within 10 seconds, it is pulled
back into the slot.
CD (DISC) indicator light
This light comes on when a compact disc is
loaded into the player.
CAUTION
IDuring cold weather or rainy days,
the player may malfunction due to
the humidity. If this occurs, remove
the CD and dehumidify or ventilate
the player completely.
IThe player may skip while driving on
rough roads.
IThe CD player sometimes cannot
function when the compartment tem-
perature is extremely high. Decrease
the temperature before use.
IDo not expose the CD to direct sun-
light.
4-22Heater, air conditioner and audio systems
ZX