1999 NISSAN FRONTIER glove box
[x] Cancel search: glove boxPage 69 of 247

3 Pre-driving checks and adjustments
Key .........................................................................3-2
Door locks ..............................................................3-2
Power door lock (if so equipped) ...........................3-3
Multi-remote control system (if so equipped).........3-4
Battery replacement ...............................................3-7
Hood release ..........................................................3-8
Glove box ...............................................................3-9
Fuel filler cap ..........................................................3-9Tailgate latch ........................................................3-10
Tie down hooks ....................................................3-12
Tilting steering wheel (if so equipped) .................3-13
Outside mirror remote control (if so equipped) ....3-13
Outside mirrors .....................................................3-14
Inside mirror .........................................................3-14
Vanity mirror (if so equipped)...............................3-15
ZX
Page 77 of 247
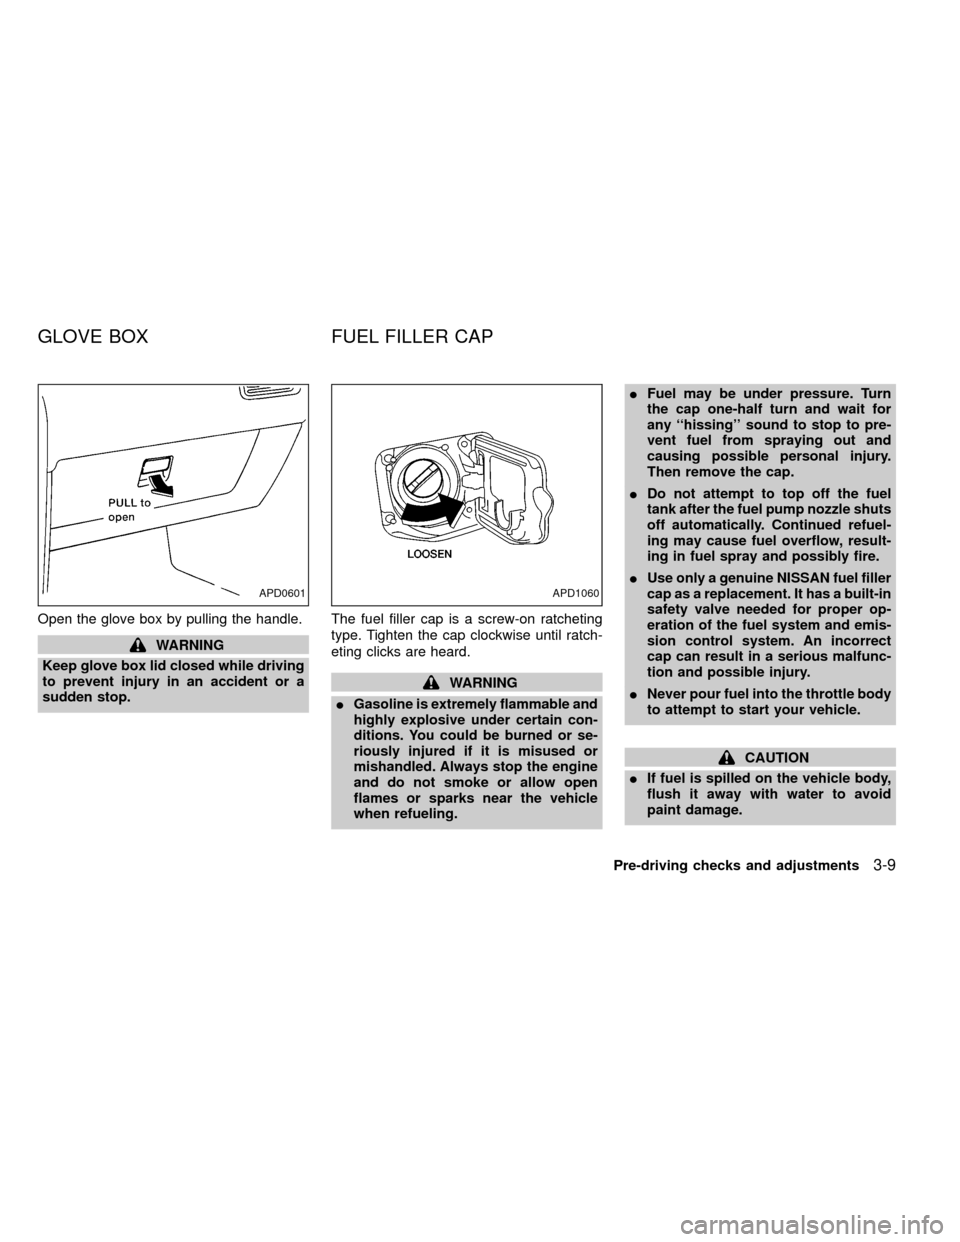
Open the glove box by pulling the handle.
WARNING
Keep glove box lid closed while driving
to prevent injury in an accident or a
sudden stop.The fuel filler cap is a screw-on ratcheting
type. Tighten the cap clockwise until ratch-
eting clicks are heard.
WARNING
IGasoline is extremely flammable and
highly explosive under certain con-
ditions. You could be burned or se-
riously injured if it is misused or
mishandled. Always stop the engine
and do not smoke or allow open
flames or sparks near the vehicle
when refueling.IFuel may be under pressure. Turn
the cap one-half turn and wait for
any ``hissing'' sound to stop to pre-
vent fuel from spraying out and
causing possible personal injury.
Then remove the cap.
IDo not attempt to top off the fuel
tank after the fuel pump nozzle shuts
off automatically. Continued refuel-
ing may cause fuel overflow, result-
ing in fuel spray and possibly fire.
IUse only a genuine NISSAN fuel filler
cap as a replacement. It has a built-in
safety valve needed for proper op-
eration of the fuel system and emis-
sion control system. An incorrect
cap can result in a serious malfunc-
tion and possible injury.
INever pour fuel into the throttle body
to attempt to start your vehicle.
CAUTION
IIf fuel is spilled on the vehicle body,
flush it away with water to avoid
paint damage.
APD0601APD1060
GLOVE BOX FUEL FILLER CAP
Pre-driving checks and adjustments3-9
ZX
Page 134 of 247
CAUTION
Always use tires of the same size,
brand, construction (bias, bias-belted
or radial), and tread pattern on all four
wheels. A spare tire of the same size,
brand, construction and tread pattern
must also be used. Failure to do so may
result in a circumference difference be-
tween tires on the front and rear axles
which will cause excessive tire wear
and may damage the transmission,
transfer case and differential gears.
If excessive tire wear is found, it is recom-
mended that all four tires be replaced with
tires of the same size, brand, construction
and tread pattern. The tire pressure and
wheel alignment should also be checked
and corrected as necessary. Contact an
authorized NISSAN dealer.
Snow tires
If you install snow tires, they must also be
the same size, brand, construction and
tread pattern on all four wheels.
Tire inflation pressure
Periodically check the pressure in all tires,
including the spare, with a gauge. Adjust to
the specified pressure if necessary. Tire
pressures are shown on the tire placard
affixed to the glove box.
Tire chain
Tire chains must be installed only on the
rear wheels and not on the front wheels.
Do not drive with tire chains on paved roads
which are clear of snow. Driving with chains
in such conditions can cause damage to the
various mechanisms of the vehicle due to
some overstress. When driving on clear
paved roads, be sure to change to 2WD.
TIRES OF FOUR-WHEEL
DRIVE
5-26Starting and driving
ZX
Page 147 of 247
it-yourself'' section of this owner's
manual.
1. Clean any mud or dirt from the surface
between the wheel and hub.
2. Carefully put the spare tire on and tighten
the wheel nuts finger tight.
3. With the wheel nut wrench, tighten the
wheel nuts alternately and evenly until
they are tight.
4. Lower the vehicle slowly until the tire
touches the ground. Then, with the wheel
nut wrench, tighten the wheel nuts se-
curely in the sequence as illustrated.
Lower the vehicle completely.
As soon as possible, tighten the wheel
nuts to the specified torque with a torque
wrench.
Wheel nut tightening torque:
87 to 108 ft-lb (118 to 147 N×m)
The wheel nuts must be kept tightened to
specification at all times. It is recom-
mended that wheel nuts be tightened to
specification at each lubrication interval.
Adjust tire pressure to the COLD pres-
sure.COLD pressure:
After vehicle has been parked for three
hours or more or driven less than 1 mile
(1.6 km).
COLD tire pressures are shown on the
tire placard affixed to the inside of the
glove box lid.
IRetighten the wheel nuts when the
vehicle has been run for 600 miles
(965 km).
5. Securely store the flat tire and jacking
equipment in the vehicle.
WARNING
IAlways make sure that the spare tire
and jacking equipment are properly
secured after use. Such items can
become dangerous projectiles in an
accident or sudden stop.
IThe spare tire is designed for emer-
gency use. See specific instructions
under the heading ``Wheels and
tires'' in the ``Do-it-yourself'' section
of this manual.
In case of emergency
6-7
ZX
Page 192 of 247
If you have a flat tire, see the ``In case of
emergency'' section of this manual.
Maximum inflation pressure
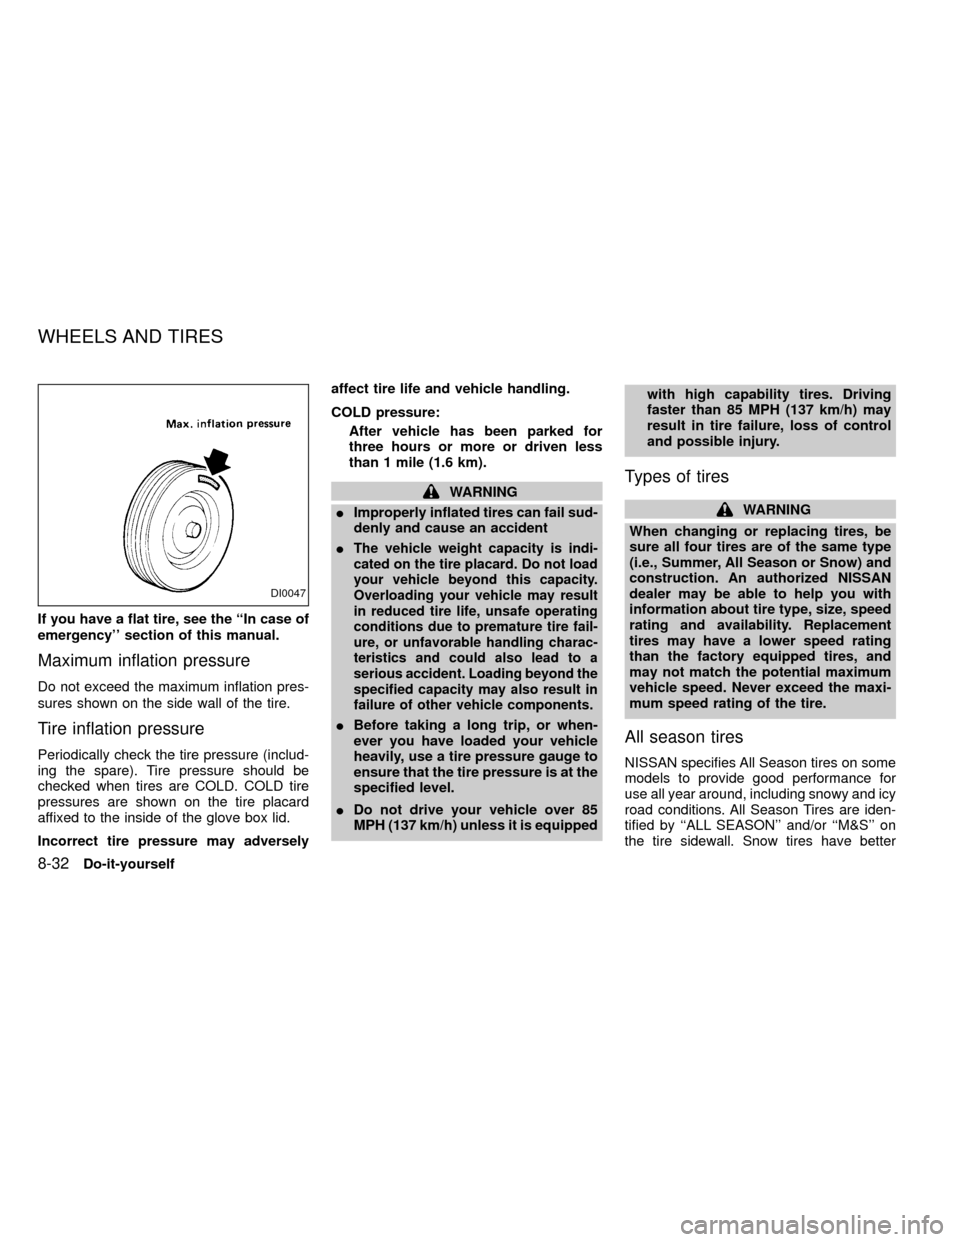
Do not exceed the maximum inflation pres-
sures shown on the side wall of the tire.
Tire inflation pressure
Periodically check the tire pressure (includ-
ing the spare). Tire pressure should be
checked when tires are COLD. COLD tire
pressures are shown on the tire placard
affixed to the inside of the glove box lid.
Incorrect tire pressure may adverselyaffect tire life and vehicle handling.
COLD pressure:
After vehicle has been parked for
three hours or more or driven less
than 1 mile (1.6 km).
WARNING
IImproperly inflated tires can fail sud-
denly and cause an accident
I
The vehicle weight capacity is indi-
cated on the tire placard. Do not load
your vehicle beyond this capacity.
Overloading your vehicle may result
in reduced tire life, unsafe operating
conditions due to premature tire fail-
ure, or unfavorable handling charac-
teristics and could also lead to a
serious accident. Loading beyond the
specified capacity may also result in
failure of other vehicle components.
IBefore taking a long trip, or when-
ever you have loaded your vehicle
heavily, use a tire pressure gauge to
ensure that the tire pressure is at the
specified level.
IDo not drive your vehicle over 85
MPH (137 km/h) unless it is equippedwith high capability tires. Driving
faster than 85 MPH (137 km/h) may
result in tire failure, loss of control
and possible injury.
Types of tires
WARNING
When changing or replacing tires, be
sure all four tires are of the same type
(i.e., Summer, All Season or Snow) and
construction. An authorized NISSAN
dealer may be able to help you with
information about tire type, size, speed
rating and availability. Replacement
tires may have a lower speed rating
than the factory equipped tires, and
may not match the potential maximum
vehicle speed. Never exceed the maxi-
mum speed rating of the tire.
All season tires
NISSAN specifies All Season tires on some
models to provide good performance for
use all year around, including snowy and icy
road conditions. All Season Tires are iden-
tified by ``ALL SEASON'' and/or ``M&S'' on
the tire sidewall. Snow tires have better
DI0047
WHEELS AND TIRES
8-32Do-it-yourself
ZX
Page 196 of 247
IClean the inner side of the wheels when
the wheel is changed or the underside of
the vehicle is washed.
IDo not use abrasive cleaners when
washing the wheels.
IInspect wheel rims regularly for dents or
corrosion. This may cause loss of pres-
sure or damage the tire bead.
INISSAN recommends waxing the road
wheels to protect against road salt in
areas where it is used during winter.
Spare tire
Your vehicle may be equipped with a TEM-
PORARY USE ONLY spare tire.
To avoid property damage or personal injury
when using the TEMPORARY USE ONLY
spare tire, observe the following cautions:
WARNING
IThe spare tire should be used for
emergency use only. It should be
replaced by the standard tire at the
first opportunity to avoid possible
tire or differential damage.IDrive carefully while the TEMPO-
RARY USE ONLY spare tire is in-
stalled. Avoid sharp turns and
abrupt braking while driving.
IPeriodically check spare tire infla-
tion pressure. Always keep the pres-
sure of the T135/70R16 spare tire at
60 psi (420 kPa, 4.2 bar). For the full
size spare tire pressure, check the
tire placecard located on the inside
of the glovebox lid.
IDo not drive the vehicle at speeds
faster than 50 MPH (80 km/h).
I
When driving on roads covered with
snow or ice, the TEMPORARY USE
ONLY spare tire should be used on
the front wheels and the original tire
used on the rear wheels (drive
wheels). Use tire chains only on the
two rear original tires.
ITire tread of the TEMPORARY USE
ONLY spare tire will wear at a faster
rate than the standard tire. Replace
the TEMPORARY USE ONLY spare
tire as soon as the tread wear indi-
cators appear.IDo not use the TEMPORARY USE
ONLY spare tire on other vehicles.
IDo not use more than one TEMPO-
RARY USE ONLY spare tire at the
same time.
IDo not tow a trailer when the TEM-
PORARY USE ONLY T135/70R16
spare is installed.
CAUTION
I
The transfer control lever must
be in the 2H position to prevent the
transfer case and differential gears
from being damaged.
IDo not use tire chains on a TEMPO-
RARY USE ONLY spare tire. Tire
chains will not fit properly on a TEM-
PORARY USE ONLY spare tire and
may cause damage to the vehicle.
I
Because the TEMPORARY USE ONLY
spare tire is smaller than the original
tire, ground clearance is reduced. To
avoid damage to the vehicle, do not
drive over obstacles. Also, do not
drive the vehicle through an automatic
car wash since it might get caught.
8-36Do-it-yourself
ZX
Page 224 of 247
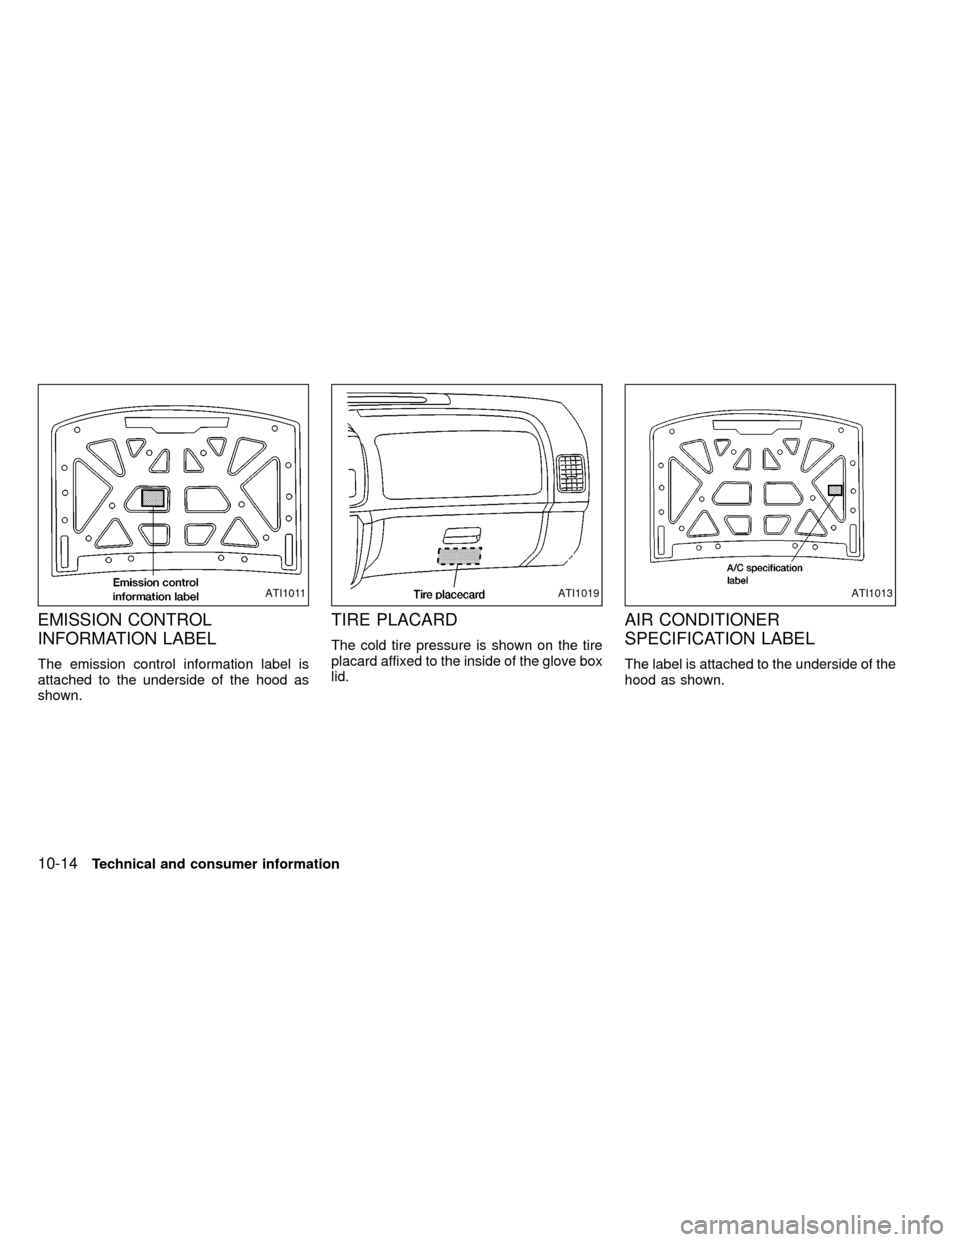
EMISSION CONTROL
INFORMATION LABEL
The emission control information label is
attached to the underside of the hood as
shown.
TIRE PLACARD
The cold tire pressure is shown on the tire
placard affixed to the inside of the glove box
lid.
AIR CONDITIONER
SPECIFICATION LABEL
The label is attached to the underside of the
hood as shown.
ATI1011ATI1019ATI1013
10-14Technical and consumer information
ZX
Page 225 of 247
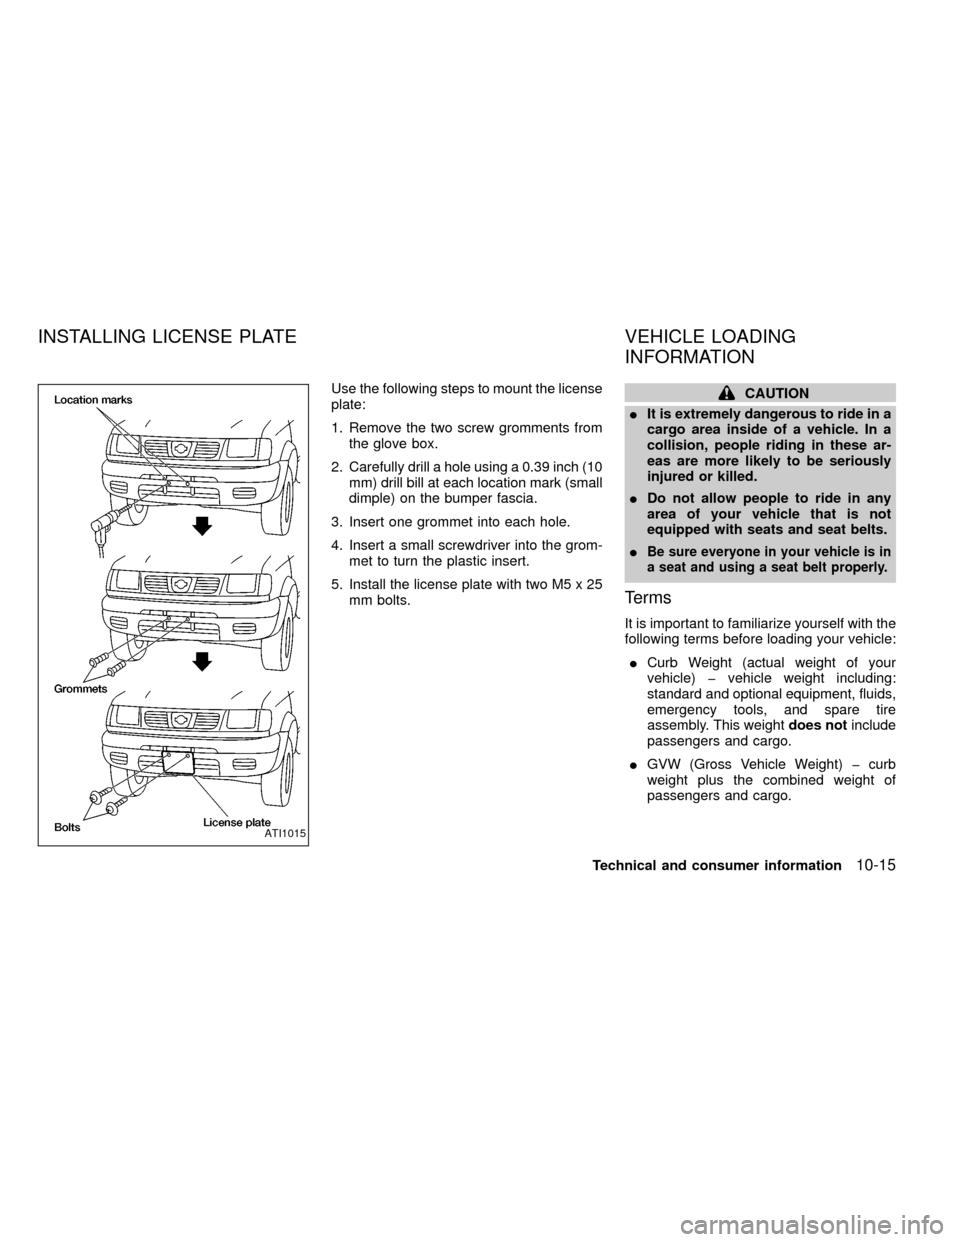
Use the following steps to mount the license
plate:
1. Remove the two screw gromments from
the glove box.
2. Carefully drill a hole using a 0.39 inch (10
mm) drill bill at each location mark (small
dimple) on the bumper fascia.
3. Insert one grommet into each hole.
4. Insert a small screwdriver into the grom-
met to turn the plastic insert.
5. Install the license plate with two M5 x 25
mm bolts.CAUTION
IIt is extremely dangerous to ride in a
cargo area inside of a vehicle. In a
collision, people riding in these ar-
eas are more likely to be seriously
injured or killed.
IDo not allow people to ride in any
area of your vehicle that is not
equipped with seats and seat belts.
I
Be sure everyone in your vehicle is in
a seat and using a seat belt properly.
Terms
It is important to familiarize yourself with the
following terms before loading your vehicle:
ICurb Weight (actual weight of your
vehicle) þ vehicle weight including:
standard and optional equipment, fluids,
emergency tools, and spare tire
assembly. This weightdoes notinclude
passengers and cargo.
IGVW (Gross Vehicle Weight) þ curb
weight plus the combined weight of
passengers and cargo.
ATI1015
INSTALLING LICENSE PLATE VEHICLE LOADING
INFORMATION
Technical and consumer information10-15
ZX