Page 37 of 247
2. Route the seat belt tongue through the
child restraint and insert the belt tongue
into the buckle until you hear and feel the
latch engage. Be sure to follow the child
restraint manufacturer's instructions for
belt routing.3. Pull on the shoulder belt until all of the
belt is fully extended. At this time, the
retractor is in the automatic locking mode
(child restraint mode). It reverts back to
emergency locking mode when the belt is
fully retracted.4. Allow the belt to retract. Pull up on the
belt to remove any slack in the belt.
ARS1073ARS1034ARS1074
Seats, restraints and supplemental air bag systems1-31
ZX
Page 38 of 247

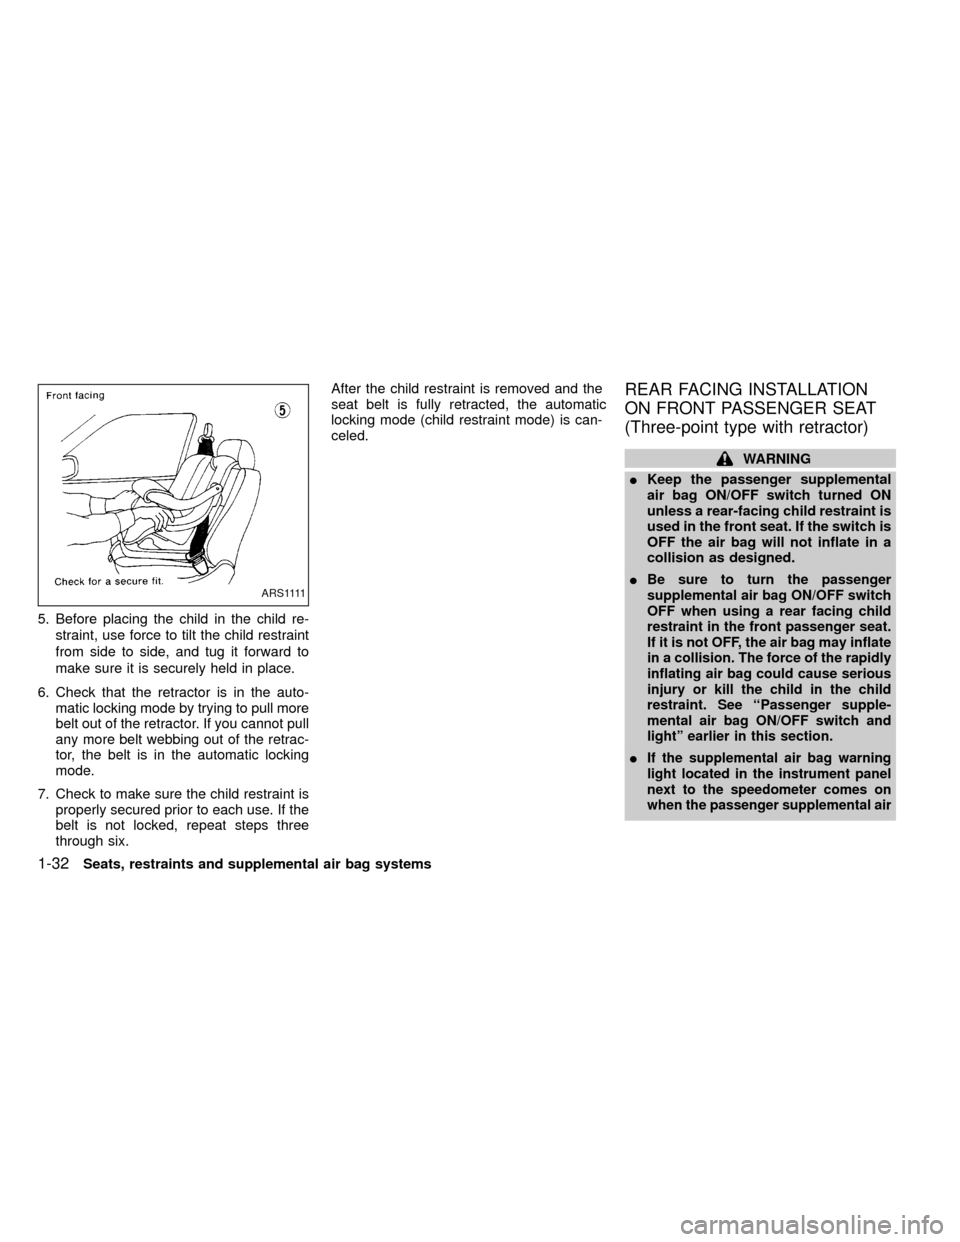
5. Before placing the child in the child re-
straint, use force to tilt the child restraint
from side to side, and tug it forward to
make sure it is securely held in place.
6. Check that the retractor is in the auto-
matic locking mode by trying to pull more
belt out of the retractor. If you cannot pull
any more belt webbing out of the retrac-
tor, the belt is in the automatic locking
mode.
7. Check to make sure the child restraint is
properly secured prior to each use. If the
belt is not locked, repeat steps three
through six.After the child restraint is removed and the
seat belt is fully retracted, the automatic
locking mode (child restraint mode) is can-
celed.
REAR FACING INSTALLATION
ON FRONT PASSENGER SEAT
(Three-point type with retractor)
WARNING
IKeep the passenger supplemental
air bag ON/OFF switch turned ON
unless a rear-facing child restraint is
used in the front seat. If the switch is
OFF the air bag will not inflate in a
collision as designed.
I
Be sure to turn the passenger
supplemental air bag ON/OFF switch
OFF when using a rear facing child
restraint in the front passenger seat.
If it is not OFF, the air bag may inflate
in a collision. The force of the rapidly
inflating air bag could cause serious
injury or kill the child in the child
restraint. See ``Passenger supple-
mental air bag ON/OFF switch and
light'' earlier in this section.
IIf the supplemental air bag warning
light located in the instrument panel
next to the speedometer comes on
when the passenger supplemental air
A R S 1111
1-32Seats, restraints and supplemental air bag systems
ZX
Page 39 of 247

bag OFF indicator light is also illumi-
nated, something may be wrong with
the air bag system. Do not use a child
restraint in the front passenger seat
until the system is checked by your
NISSAN dealer.
IThe passenger three-point seat belt
is equipped with an automatic lock-
ing mode retractor which must be
used when installing a child re-
straint.
IFailure to use the automatic locking
mode will result in the child restraint
not being properly secured. The re-
straint could tip over or otherwise be
unsecured and cause injury to the
child in a sudden stop or collision.If you choose to install a child restraint,
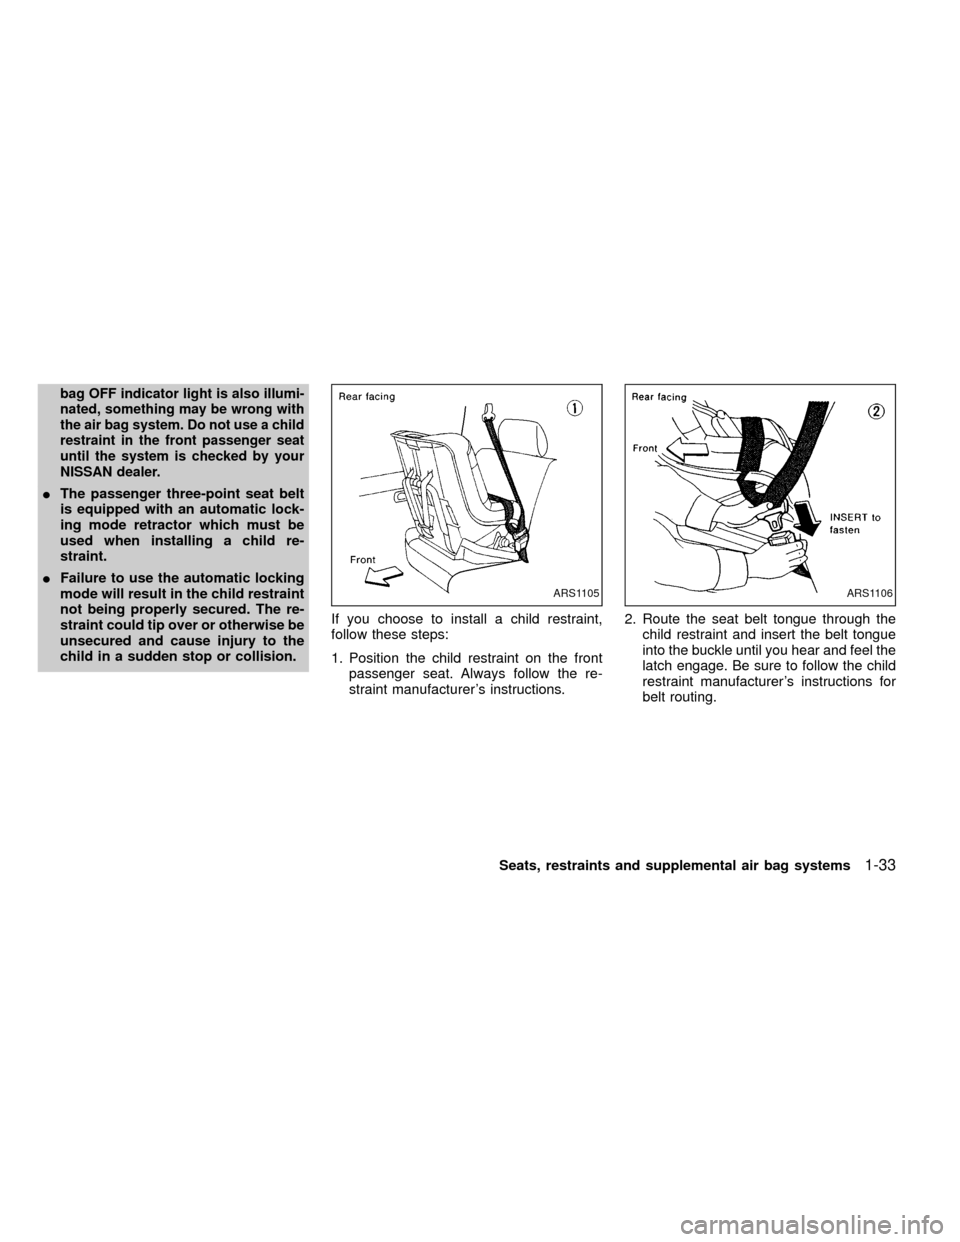
follow these steps:
1. Position the child restraint on the front
passenger seat. Always follow the re-
straint manufacturer's instructions.2. Route the seat belt tongue through the
child restraint and insert the belt tongue
into the buckle until you hear and feel the
latch engage. Be sure to follow the child
restraint manufacturer's instructions for
belt routing.
ARS1105ARS1106
Seats, restraints and supplemental air bag systems1-33
ZX
Page 40 of 247
3. Pull on the shoulder belt until all of the
belt is fully extended. At this time, the belt
retractor is in the automatic locking mode
(child restraint mode). It reverts back to
emergency locking mode when the belt is
fully retracted.4. Allow the belt to retract. Pull up on the
belt to remove any slack in the belt.5. Before placing the child in the child re-
straint, use force to tilt the child restraint
from side to side, and tug it forward to
make sure it is securly held in place.
6. Ensure the retractor is in the automatic
locking mode by trying to pull more belt
out of the retractor. If you cannot pull any
more belt webbing out of the retractor,
the belt is in the automatic locking mode.
7. Check to make sure the child restraint is
properly secured prior to each use. If the
lap belt is not locked, repeat steps three
through six.
ARS1092ARS1107ARS1108
1-34Seats, restraints and supplemental air bag systems
ZX
Page 41 of 247

After the child restraint is removed and the
seat belt is fully retracted the automatic
locking mode (child restraint mode) is can-
celed.
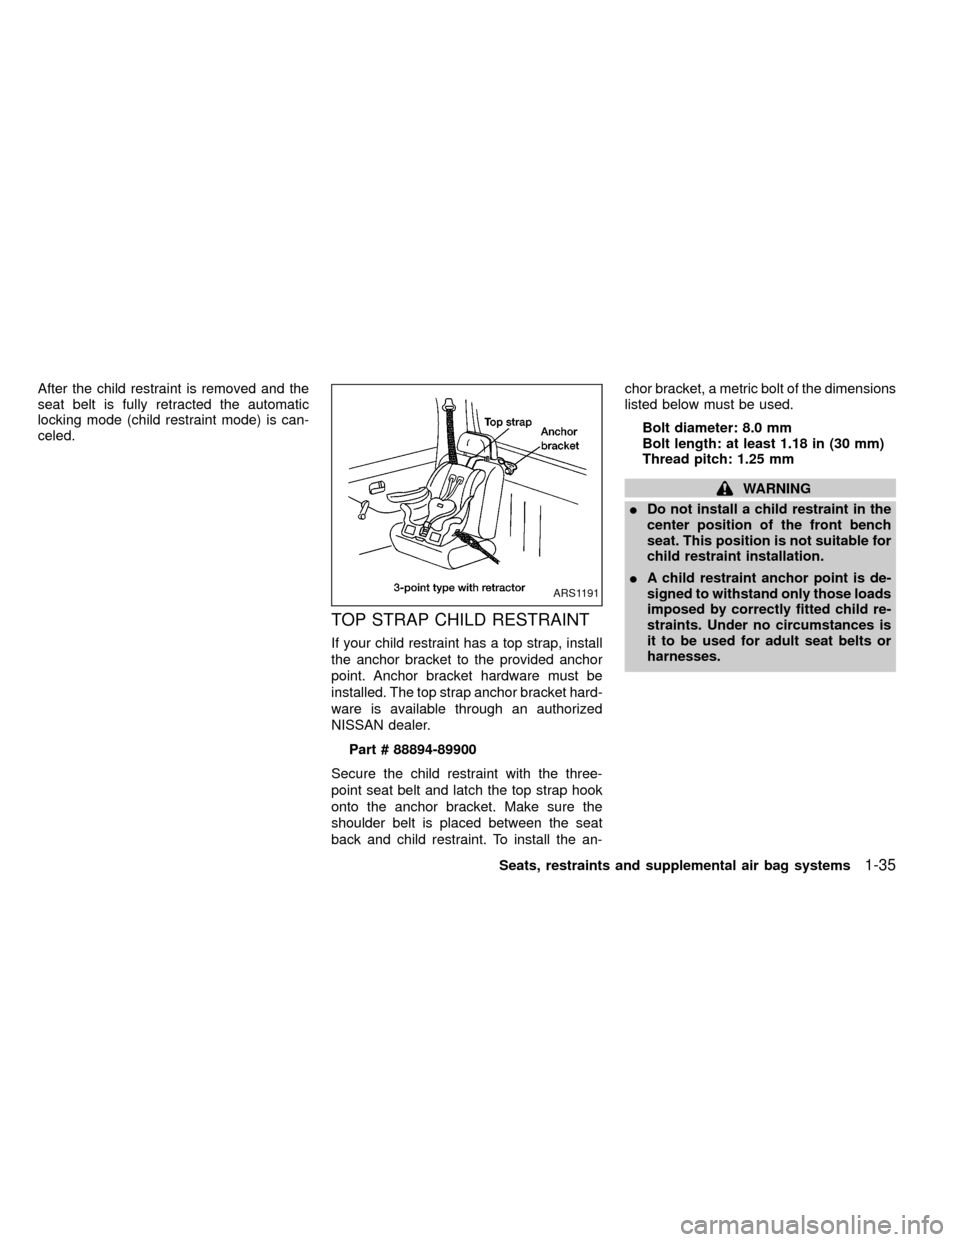
TOP STRAP CHILD RESTRAINT
If your child restraint has a top strap, install
the anchor bracket to the provided anchor
point. Anchor bracket hardware must be
installed. The top strap anchor bracket hard-
ware is available through an authorized
NISSAN dealer.
Part # 88894-89900
Secure the child restraint with the three-
point seat belt and latch the top strap hook
onto the anchor bracket. Make sure the
shoulder belt is placed between the seat
back and child restraint. To install the an-chor bracket, a metric bolt of the dimensions
listed below must be used.
Bolt diameter: 8.0 mm
Bolt length: at least 1.18 in (30 mm)
Thread pitch: 1.25 mm
WARNING
IDo not install a child restraint in the
center position of the front bench
seat. This position is not suitable for
child restraint installation.
IA child restraint anchor point is de-
signed to withstand only those loads
imposed by correctly fitted child re-
straints. Under no circumstances is
it to be used for adult seat belts or
harnesses.
ARS1191
Seats, restraints and supplemental air bag systems1-35
ZX
Page 42 of 247
Anchor point location
An anchor point is located under the rear
window. The back panel carpet is perforated
to allow access to the anchor point.
An authorized NISSAN dealer can assist
you with the installation of your child re-
straint.
ARS1129
1-36Seats, restraints and supplemental air bag systems
ZX
Page 66 of 247
Tilting up
Pull the handle down, then push the handle
up to the fully tilted position.
WARNING
IIn an accident you could be thrown
from the vehicle through an open
sunroof. Always use seat belts and
child restraints.IDo not allow anyone to stand up or
extend any portion of their body out
of the sunroof opening while the
vehicle is in motion or while the
sunroof is closing.
CAUTION
IRemove water drops, snow, ice or
sand from the sunroof before open-
ing.
IDo not place heavy objects on the
sunroof or surrounding area.
Closing
Pull the handle forward to unlock, then push
the handle up completely to lock the sunroof
closed.
IC0197IC0198
SUNROOF
(if so equipped)
2-24Instruments and controls
ZX
Page 70 of 247

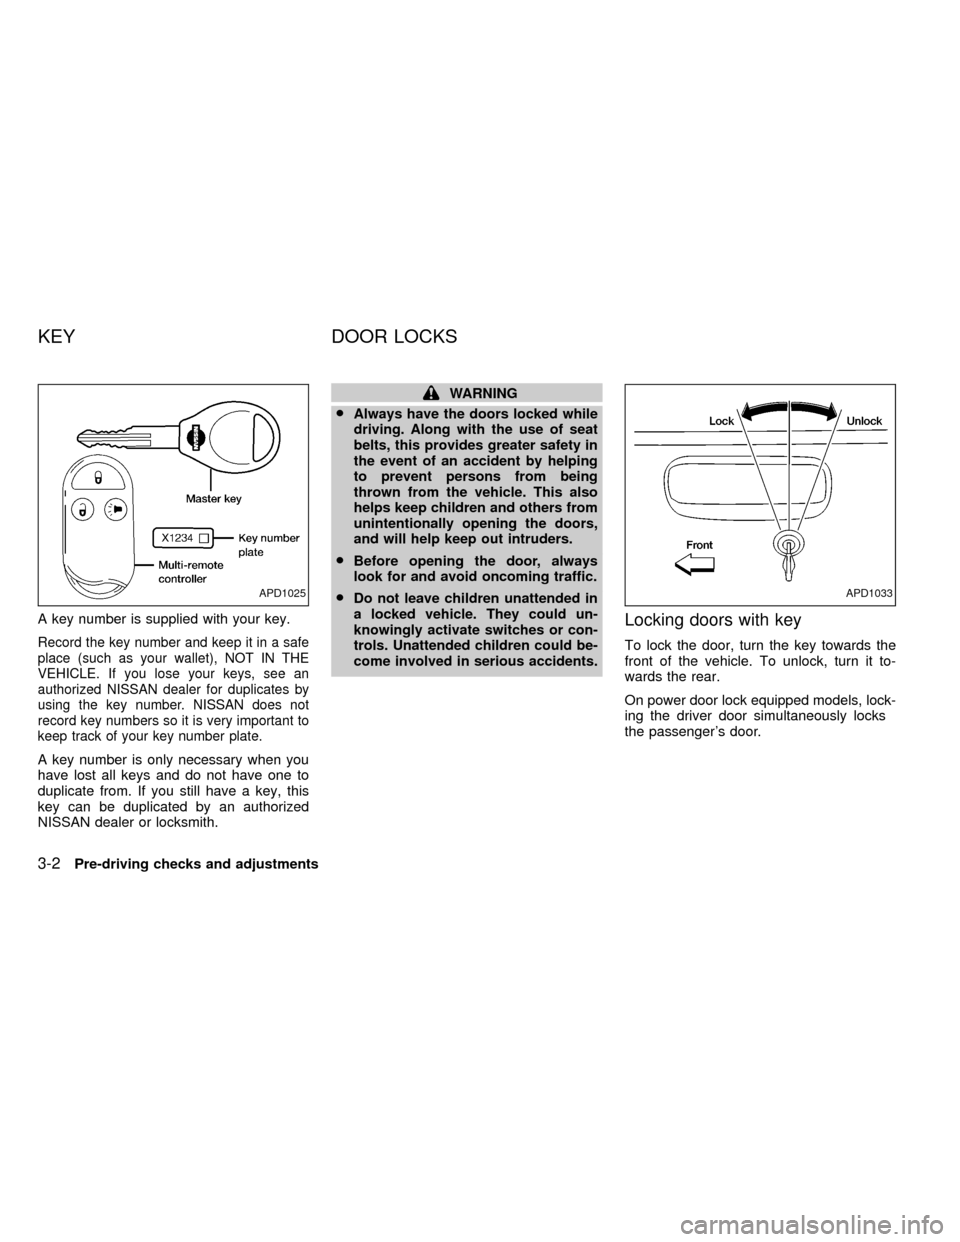
A key number is supplied with your key.
Record the key number and keep it in a safe
place (such as your wallet), NOT IN THE
VEHICLE. If you lose your keys, see an
authorized NISSAN dealer for duplicates by
using the key number. NISSAN does not
record key numbers so it is very important to
keep track of your key number plate.
A key number is only necessary when you
have lost all keys and do not have one to
duplicate from. If you still have a key, this
key can be duplicated by an authorized
NISSAN dealer or locksmith.
WARNING
I
Always have the doors locked while
driving. Along with the use of seat
belts, this provides greater safety in
the event of an accident by helping
to prevent persons from being
thrown from the vehicle. This also
helps keep children and others from
unintentionally opening the doors,
and will help keep out intruders.
I
Before opening the door, always
look for and avoid oncoming traffic.
I
Do not leave children unattended in
a locked vehicle. They could un-
knowingly activate switches or con-
trols. Unattended children could be-
come involved in serious accidents.
Locking doors with key
To lock the door, turn the key towards the
front of the vehicle. To unlock, turn it to-
wards the rear.
On power door lock equipped models, lock-
ing the driver door simultaneously locks
the passenger's door.
APD1025APD1033
KEY DOOR LOCKS
3-2Pre-driving checks and adjustments
ZX
Page:
< prev 1-8 9-16 17-24