1999 NISSAN FRONTIER ECU
[x] Cancel search: ECUPage 53 of 247

system checked by an authorized NISSAN
dealer.
If an abnormality occurs in the system, the
anti-lock function ceases but the ordinary
brakes continue to operate normally.
If the light comes on while you are driving,
contact an authorized NISSAN dealer for
repair.
Overdrive off indicator light
(if so equipped)
This light comes on when the overdrive
switch is pushed to the OFF position.
Key reminder chime
The chime sounds when the driver's door is
opened and the key is left in the ignition
switch. Take the ignition key when you leave
the vehicle.
Light reminder chime
A chime sounds if the driver's door is
opened with the headlight switch on unless
the ignition key is in the ON position. Turn
the headlight switch off when you leave the
vehicle.
Brake pad wear warning
The disc brake pads have audible wear
warnings. When a brake pad requires re-
placement, it makes a high pitched scraping
sound when the vehicle is in motion whether
or not the brake pedal is depressed. Have
the brakes checked as soon as possible if
the warning sound is heard.
Malfunction indicator light
(MIL)
If the malfunction indicator light comes on
steady or blinks while the engine is running,
it may indicate a potential emission control
problem.
The malfunction indicator light may also
come on steady or blink if the fuel filler cap
has not been closed tightly or if the fuel tank
is nearly empty. Check to make sure the fuel
cap is secure and that you have at least
three gallons (14 liters) of fuel in the fuel
tank.
Operation
After driving for a while, the light should
remain off if no other potential emisssion
control system problem exists.The malfunction indicator light will come on
in one of two ways:
IMalfunction indicator light on steady þ An
emission control system malfunction has
been detected. Have the vehicle in-
spected by an authorized NISSAN
dealer. You do not need to have your
vehicle towed to the dealer.
IMalfunction indicator light blinking þ An
engine misfire has been detected which
may damage the emission control sys-
tem. To reduce or avoid emission control
system damage:
Ido not drive at speeds above 45 MPH
(72 km/h).
I
avoid hard acceleration or deceleration.
Iavoid steep uphill grades.
Iif possible, reduce the amount of cargo
being hauled or towed.
The malfunction indicator light may stop
blinking and come on steady.
Have the vehicle inspected by an autho-
rized NISSAN dealer. You do not need to
have your vehicle towed to the dealer.
Instruments and controls
2-11
ZX
Page 55 of 247
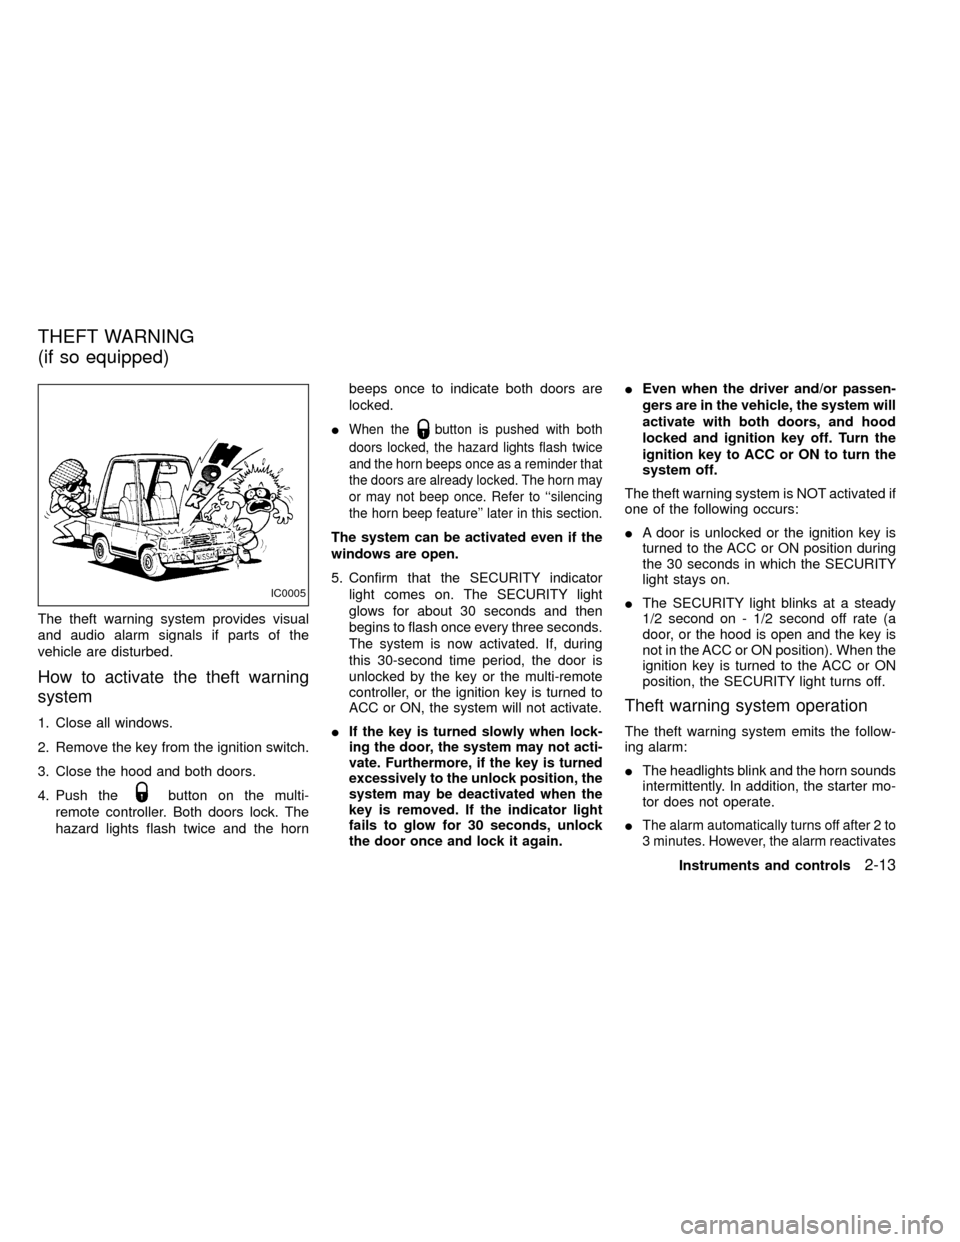
The theft warning system provides visual
and audio alarm signals if parts of the
vehicle are disturbed.
How to activate the theft warning
system
1. Close all windows.
2. Remove the key from the ignition switch.
3. Close the hood and both doors.
4. Push the
button on the multi-
remote controller. Both doors lock. The
hazard lights flash twice and the hornbeeps once to indicate both doors are
locked.
I
When thebutton is pushed with both
doors locked, the hazard lights flash twice
and the horn beeps once as a reminder that
the doors are already locked. The horn may
or may not beep once. Refer to ``silencing
the horn beep feature'' later in this section.
The system can be activated even if the
windows are open.
5.
Confirm that the SECURITY indicator
light comes on. The SECURITY light
glows for about 30 seconds and then
begins to flash once every three seconds.
The system is now activated. If, during
this 30-second time period, the door is
unlocked by the key or the multi-remote
controller, or the ignition key is turned to
ACC or ON, the system will not activate.
IIf the key is turned slowly when lock-
ing the door, the system may not acti-
vate. Furthermore, if the key is turned
excessively to the unlock position, the
system may be deactivated when the
key is removed. If the indicator light
fails to glow for 30 seconds, unlock
the door once and lock it again.
IEven when the driver and/or passen-
gers are in the vehicle, the system will
activate with both doors, and hood
locked and ignition key off. Turn the
ignition key to ACC or ON to turn the
system off.
The theft warning system is NOT activated if
one of the following occurs:
IA door is unlocked or the ignition key is
turned to the ACC or ON position during
the 30 seconds in which the SECURITY
light stays on.
IThe SECURITY light blinks at a steady
1/2 second on - 1/2 second off rate (a
door, or the hood is open and the key is
not in the ACC or ON position). When the
ignition key is turned to the ACC or ON
position, the SECURITY light turns off.
Theft warning system operation
The theft warning system emits the follow-
ing alarm:
IThe headlights blink and the horn sounds
intermittently. In addition, the starter mo-
tor does not operate.
I
The alarm automatically turns off after 2 to
3 minutes. However, the alarm reactivates
IC0005
THEFT WARNING
(if so equipped)
Instruments and controls2-13
ZX
Page 67 of 247
WARNING
Do not remove or install the sun shade
while driving so that full attention may
be given to the driving operation.
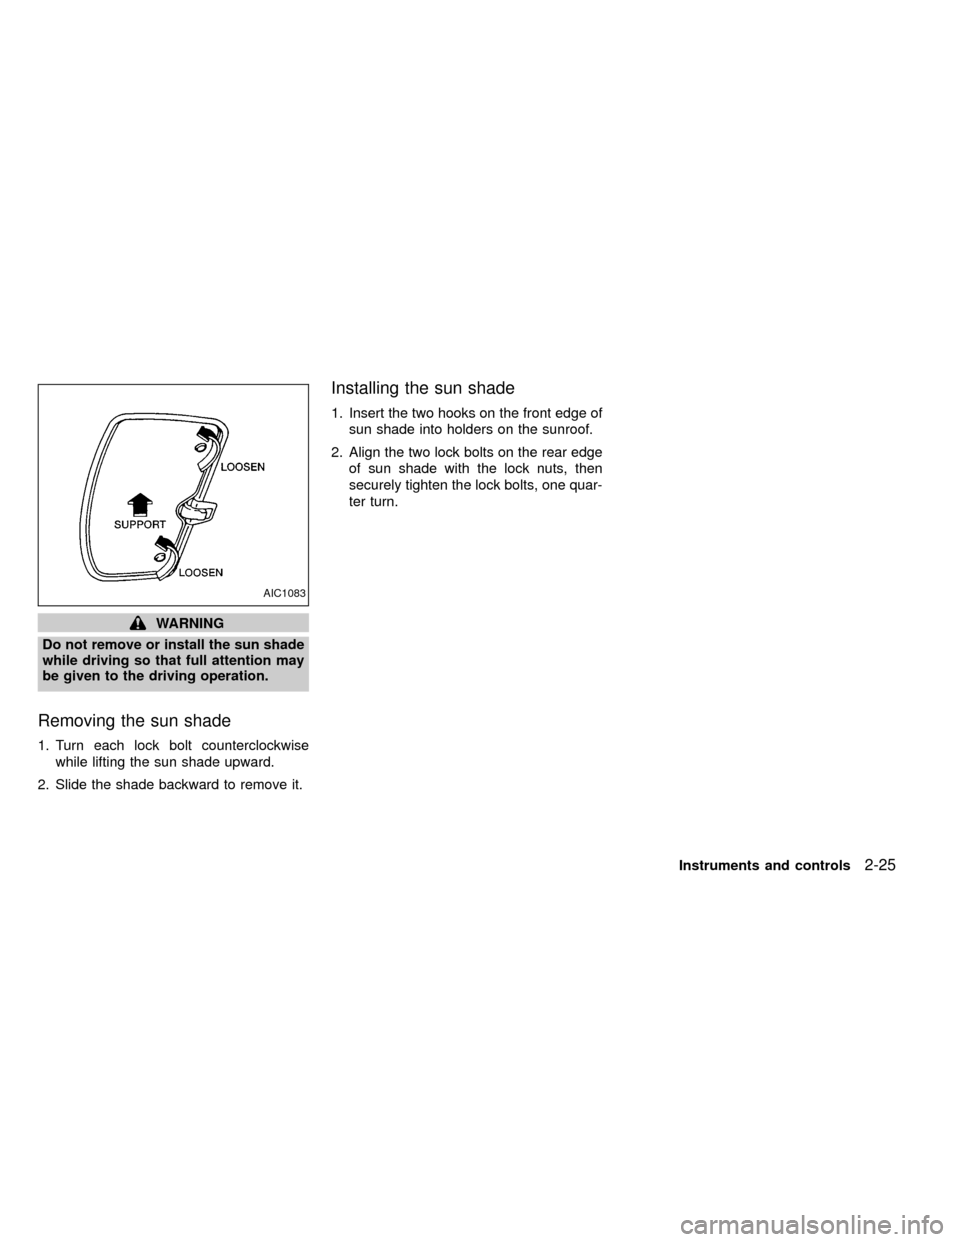
Removing the sun shade
1. Turn each lock bolt counterclockwise
while lifting the sun shade upward.
2. Slide the shade backward to remove it.
Installing the sun shade
1. Insert the two hooks on the front edge of
sun shade into holders on the sunroof.
2. Align the two lock bolts on the rear edge
of sun shade with the lock nuts, then
securely tighten the lock bolts, one quar-
ter turn.
AIC1083
Instruments and controls2-25
ZX
Page 68 of 247
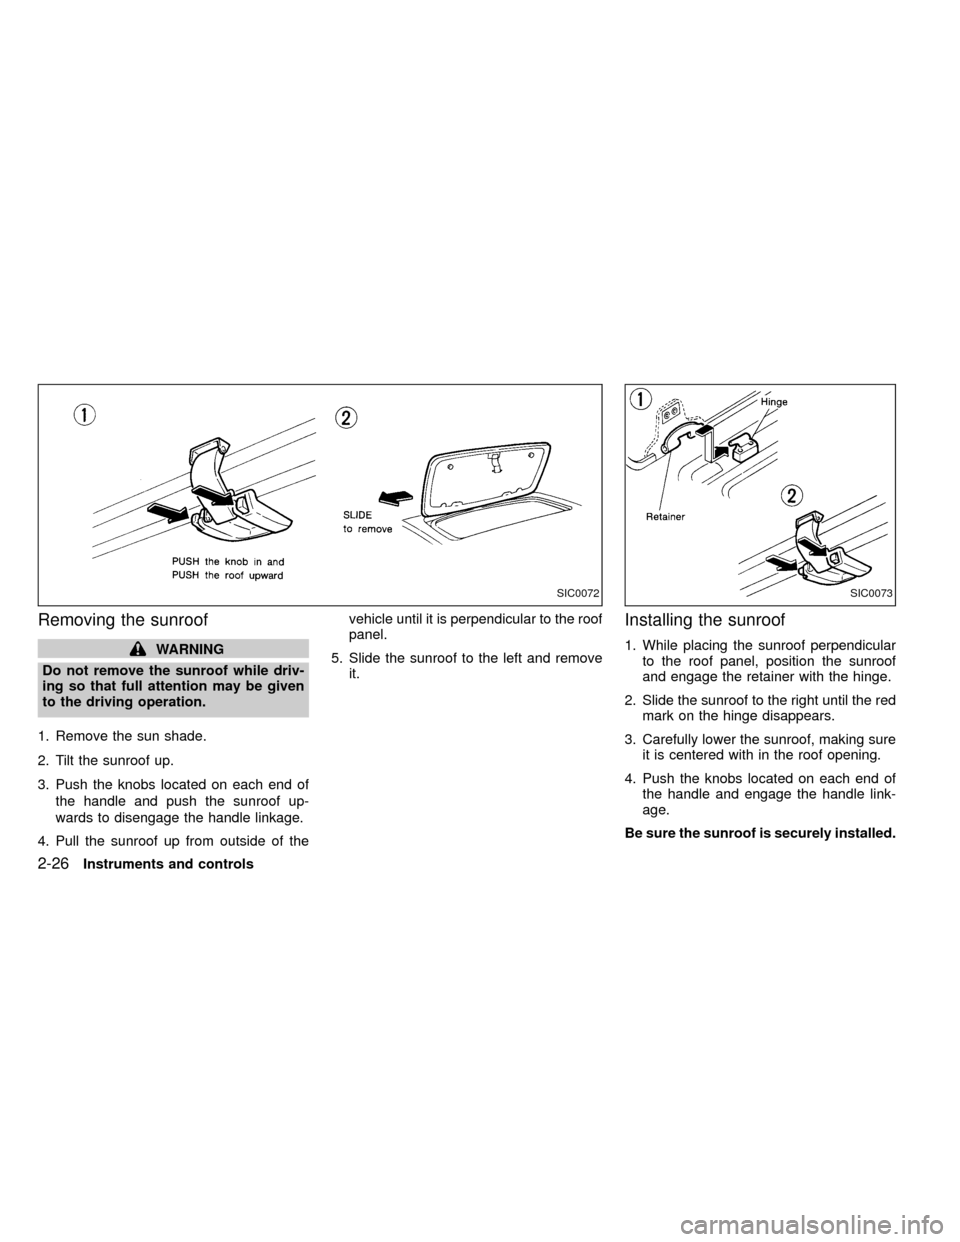
Removing the sunroof
WARNING
Do not remove the sunroof while driv-
ing so that full attention may be given
to the driving operation.
1. Remove the sun shade.
2. Tilt the sunroof up.
3. Push the knobs located on each end of
the handle and push the sunroof up-
wards to disengage the handle linkage.
4. Pull the sunroof up from outside of thevehicle until it is perpendicular to the roof
panel.
5. Slide the sunroof to the left and remove
it.
Installing the sunroof
1. While placing the sunroof perpendicular
to the roof panel, position the sunroof
and engage the retainer with the hinge.
2. Slide the sunroof to the right until the red
mark on the hinge disappears.
3. Carefully lower the sunroof, making sure
it is centered with in the roof opening.
4. Push the knobs located on each end of
the handle and engage the handle link-
age.
Be sure the sunroof is securely installed.
SIC0072SIC0073
2-26Instruments and controls
ZX
Page 75 of 247
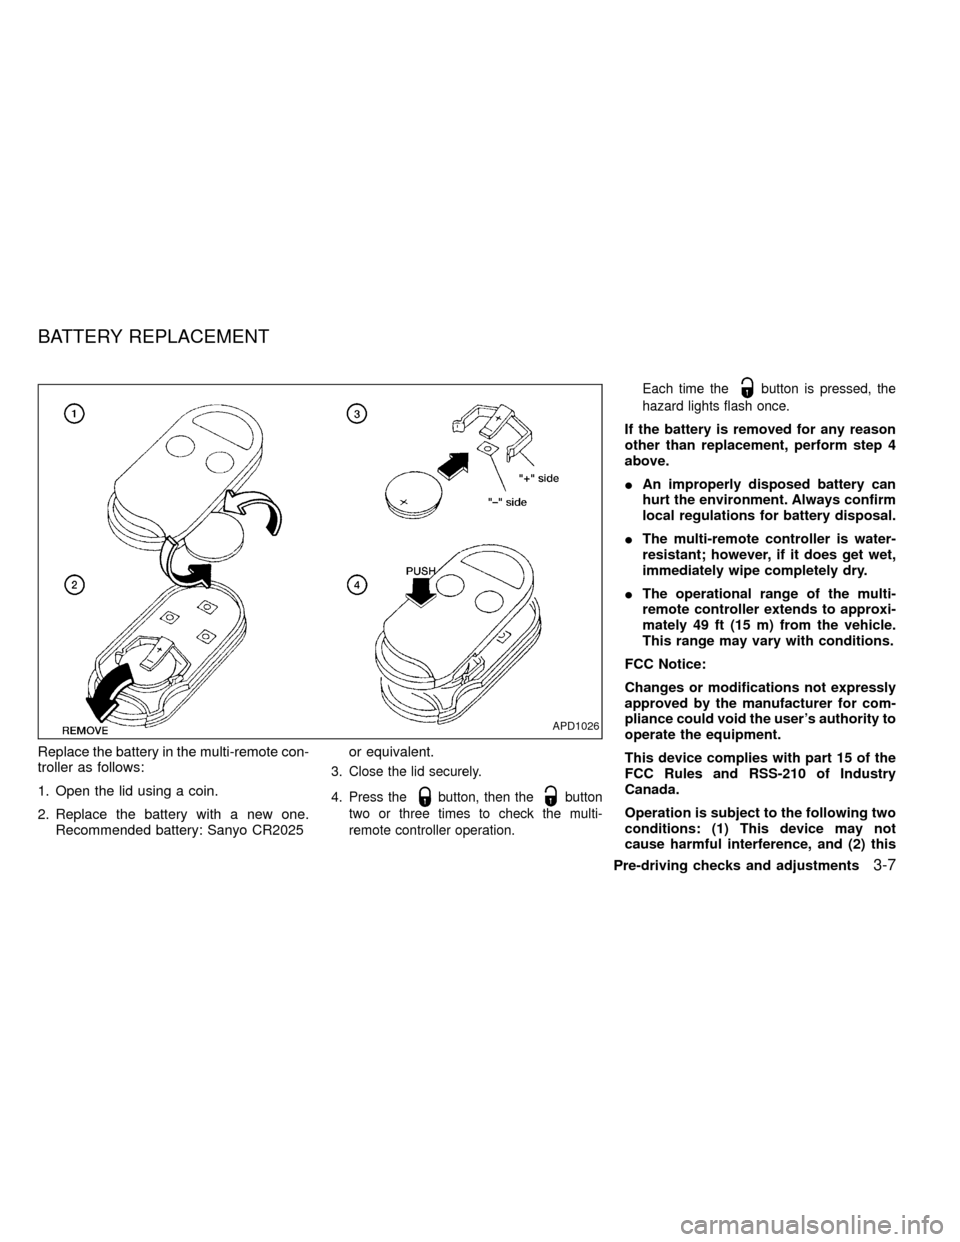
Replace the battery in the multi-remote con-
troller as follows:
1. Open the lid using a coin.
2. Replace the battery with a new one.
Recommended battery: Sanyo CR2025or equivalent.
3. Close the lid securely.
4. Press the
button, then thebutton
two or three times to check the multi-
remote controller operation.Each time the
button is pressed, the
hazard lights flash once.
If the battery is removed for any reason
other than replacement, perform step 4
above.
IAn improperly disposed battery can
hurt the environment. Always confirm
local regulations for battery disposal.
IThe multi-remote controller is water-
resistant; however, if it does get wet,
immediately wipe completely dry.
IThe operational range of the multi-
remote controller extends to approxi-
mately 49 ft (15 m) from the vehicle.
This range may vary with conditions.
FCC Notice:
Changes or modifications not expressly
approved by the manufacturer for com-
pliance could void the user's authority to
operate the equipment.
This device complies with part 15 of the
FCC Rules and RSS-210 of Industry
Canada.
Operation is subject to the following two
conditions: (1) This device may not
cause harmful interference, and (2) this
APD1026
BATTERY REPLACEMENT
Pre-driving checks and adjustments3-7
ZX
Page 78 of 247
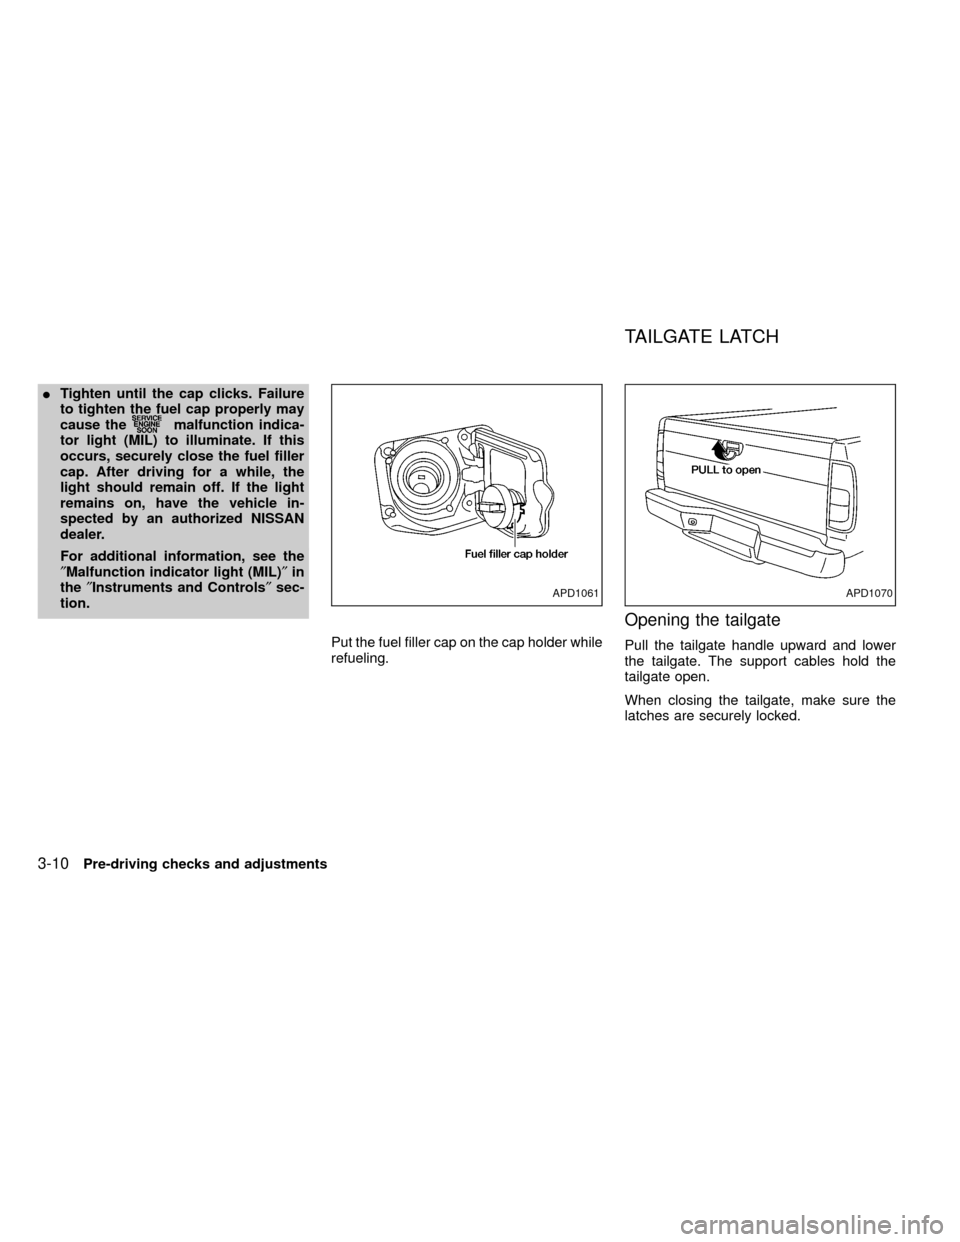
ITighten until the cap clicks. Failure
to tighten the fuel cap properly may
cause the
malfunction indica-
tor light (MIL) to illuminate. If this
occurs, securely close the fuel filler
cap. After driving for a while, the
light should remain off. If the light
remains on, have the vehicle in-
spected by an authorized NISSAN
dealer.
For additional information, see the
²Malfunction indicator light (MIL)²in
the²Instruments and Controls²sec-
tion.
Put the fuel filler cap on the cap holder while
refueling.
Opening the tailgate
Pull the tailgate handle upward and lower
the tailgate. The support cables hold the
tailgate open.
When closing the tailgate, make sure the
latches are securely locked.
APD1061APD1070
TAILGATE LATCH
3-10Pre-driving checks and adjustments
ZX
Page 80 of 247
3. Continue to hold tailgate at a 45 degree
angle and attach the tailgate support
cables.
4. Close the tailgate securely.
CAUTION
The tailgate is heavy. Be careful not to
drop it during removal.
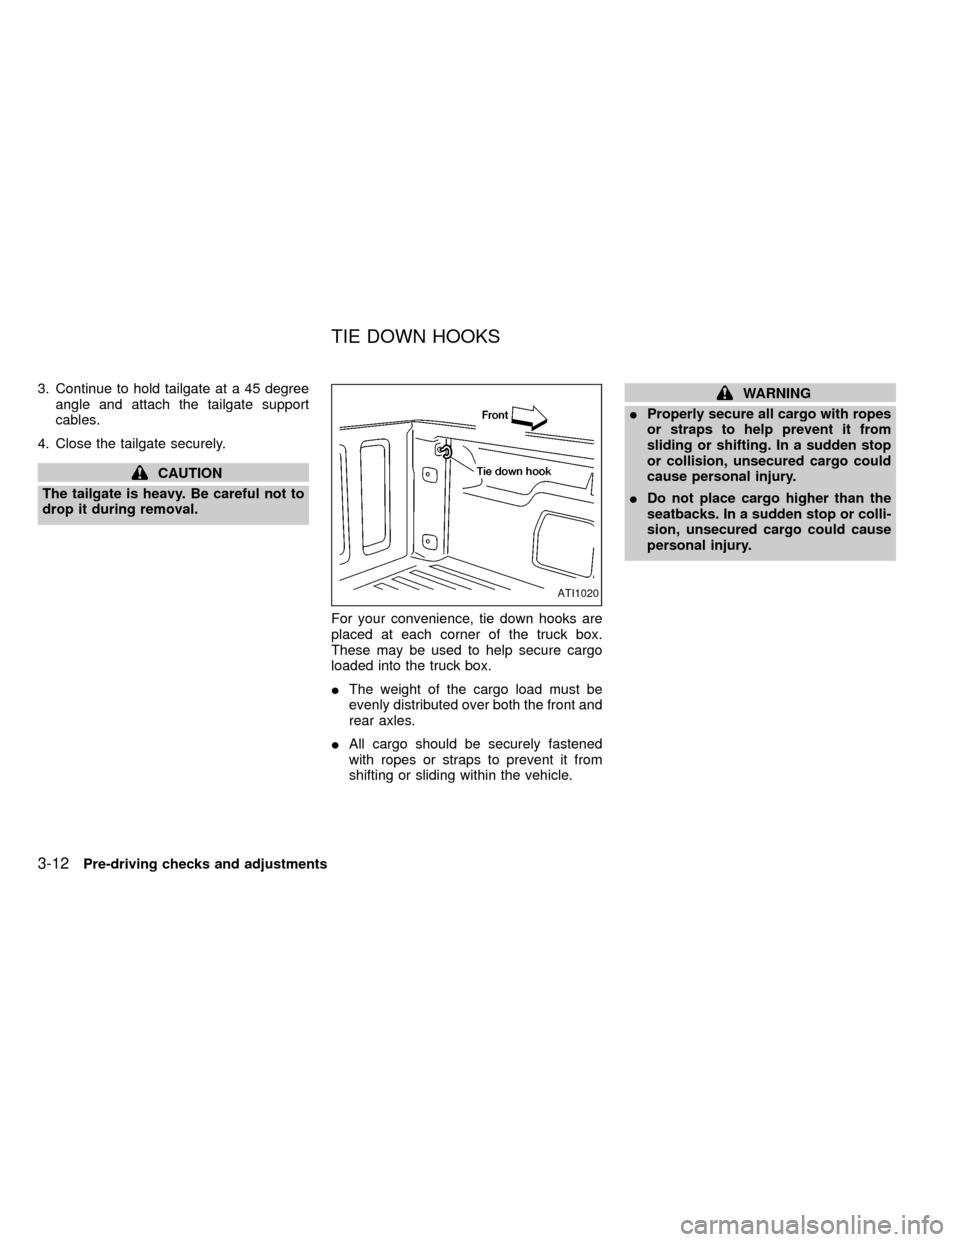
For your convenience, tie down hooks are
placed at each corner of the truck box.
These may be used to help secure cargo
loaded into the truck box.
IThe weight of the cargo load must be
evenly distributed over both the front and
rear axles.
IAll cargo should be securely fastened
with ropes or straps to prevent it from
shifting or sliding within the vehicle.
WARNING
IProperly secure all cargo with ropes
or straps to help prevent it from
sliding or shifting. In a sudden stop
or collision, unsecured cargo could
cause personal injury.
IDo not place cargo higher than the
seatbacks. In a sudden stop or colli-
sion, unsecured cargo could cause
personal injury.
ATI1020
TIE DOWN HOOKS
3-12Pre-driving checks and adjustments
ZX
Page 132 of 247
Your NISSAN is designed for both normal
and off-road use. It has a higher ground
clearance and a narrower track to make it
suitable for off-road use. These characteris-
tics give the vehicle a higher center of
gravity than ordinary passenger cars. An
advantage of the higher ground clearance is
a better view of your surroundings, allowing
you to anticipate problems. However, avoid
driving in deep water or mud as your
NISSAN is mainly designed for leisure use,
unlike a conventional off-road vehicle.
Please observe the following precautions:
WARNING
IDrive carefully when off the road and
avoid dangerous areas. Always wear
your seat belts to help keep you and
your passengers in position when
driving over rough terrain.
IDo not drive across steep slopes.
Instead drive either straight up or
straight down the slopes. Off-road
vehicles can tip over sideways much
more easily than they can forward or
backward.IMany hills are too steep for any ve-
hicle. If you drive up them, you may
stall. If you drive down them, you
may not be able to control your
speed. If you drive across them, you
may roll over.
IStay alert when driving to the top of
a hill. At the top there could be a
drop-off or other hazard that could
cause an accident.
IIf your engine stalls or you cannot
make it to the top of a steep hill,
never attempt to turn around. Your
vehicle could tip or roll over. Always
back straight down in reverse gear.
Never back down in N (neutral) or
with the clutch depressed, using
only the brake, as this could cause
loss of control.
I
Heavy braking going down a hill could
cause your brakes to overheat and
fade, resulting in loss of control and
an accident. Apply brakes lightly and
use a low gear to control your speed.
IIf at all possible, avoid sharp turning
maneuvers, particularly at high
speeds. Your NISSAN four-wheel drive
vehicle has a higher center of gravitythan a two-wheel drive vehicle and can
tip over more easily. The vehicle is not
designed for cornering at the same
speeds as conventional two-wheel
drive vehicles any more than low-
slung sports cars are designed to per-
form satisfactorily under off-road con-
ditions. Failure to operate this vehicle
correctly could result in loss of con-
trol and/or a rollover accident.
IUnsecured cargo can be thrown
around when driving over rough ter-
rain. Properly secure it so that it will
not be thrown forward and cause
injury to you or your passengers.
IAvoid raising the center of gravity by
loading things on the roof or equip-
ping the vehicle with tires larger than
specified in this manual. This could
cause your vehicle to roll over. Put
heavy loads in the cargo area as far
forward and as low as possible.
IDo not grip the inside or spokes of
the steering wheel when driving off-
road. The steering wheel could jerk
and injure your hands. Instead drive
with your fingers and thumbs on the
outside of the rim.
DRIVING YOUR
FOUR-WHEEL DRIVE SAFELY
5-24Starting and driving
ZX