1999 NISSAN FRONTIER instrument panel
[x] Cancel search: instrument panelPage 15 of 247
This Supplemental Restraint System section
contains important information concerning
the driver and passenger supplemental air
bags. The Supplemental Restraint System
Air Bags can help reduce impact force to the
driver and front passenger in certain frontal
collisions. The supplemental air bags are
designed tosupplementthe crash protec-
tion provided by the driver and front passen-
ger seat belts and arenot a substitutefor
them. The seat belts should always be cor-
rectly worn and the driver and front passen-
ger seated a suitable distance away from the
steering wheel and instrument panel. See
``Seat belts'' for instructions and precautions
on seat belt usage later in this section.
The supplemental air bags operate only
when the ignition switch is in the ON or
START position.
WARNING
IThe supplemental air bags ordinarily
will not inflate in the event of a side
impact, rear impact, roll over, or
lower severity frontal collision. Al-
ways wear your seat belts to help
reduce the risk or severity of injury
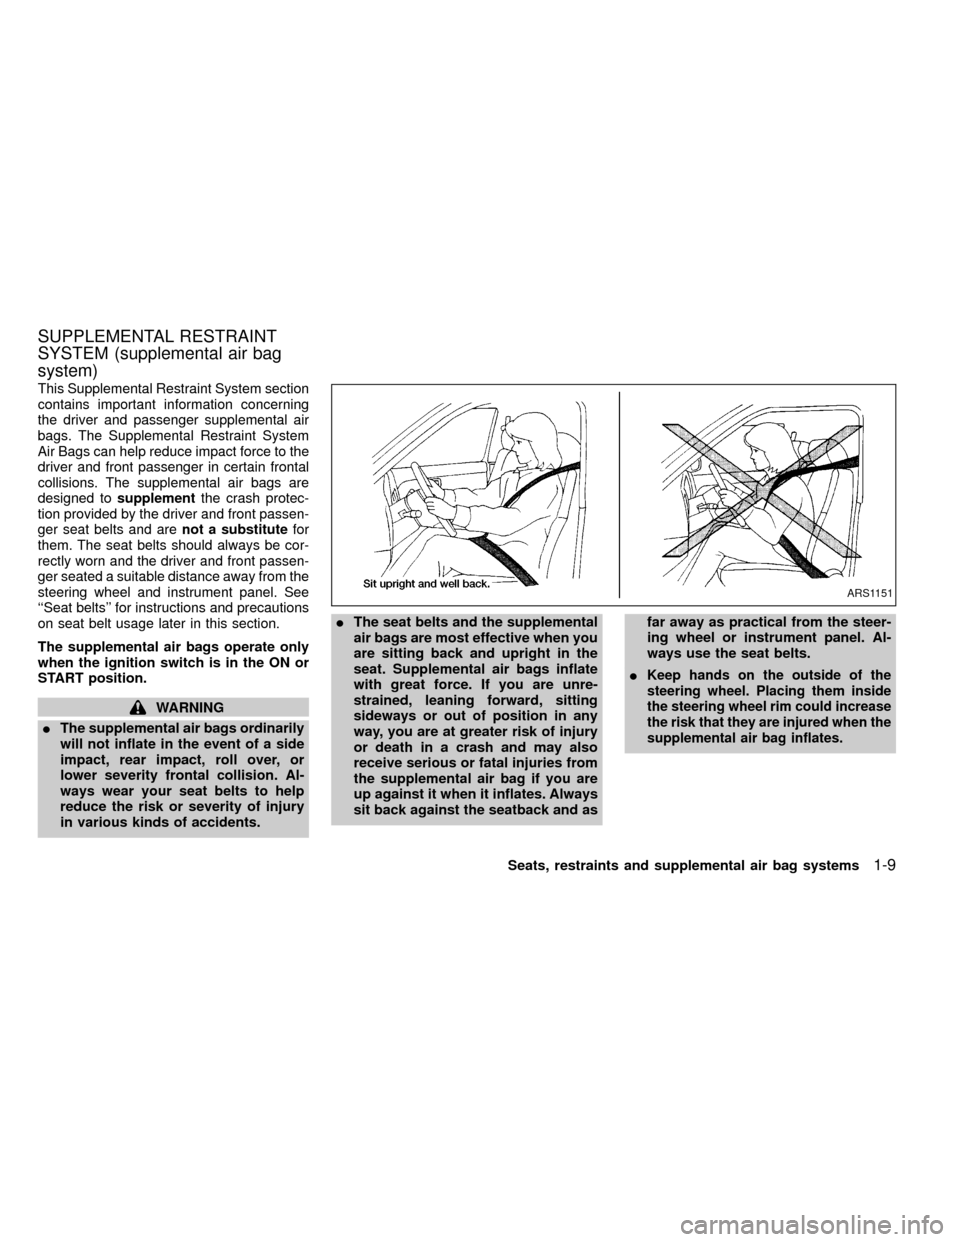
in various kinds of accidents.IThe seat belts and the supplemental
air bags are most effective when you
are sitting back and upright in the
seat. Supplemental air bags inflate
with great force. If you are unre-
strained, leaning forward, sitting
sideways or out of position in any
way, you are at greater risk of injury
or death in a crash and may also
receive serious or fatal injuries from
the supplemental air bag if you are
up against it when it inflates. Always
sit back against the seatback and asfar away as practical from the steer-
ing wheel or instrument panel. Al-
ways use the seat belts.
I
Keep hands on the outside of the
steering wheel. Placing them inside
the steering wheel rim could increase
the risk that they are injured when the
supplemental air bag inflates.
ARS1151
SUPPLEMENTAL RESTRAINT
SYSTEM (supplemental air bag
system)
Seats, restraints and supplemental air bag systems1-9
ZX
Page 18 of 247
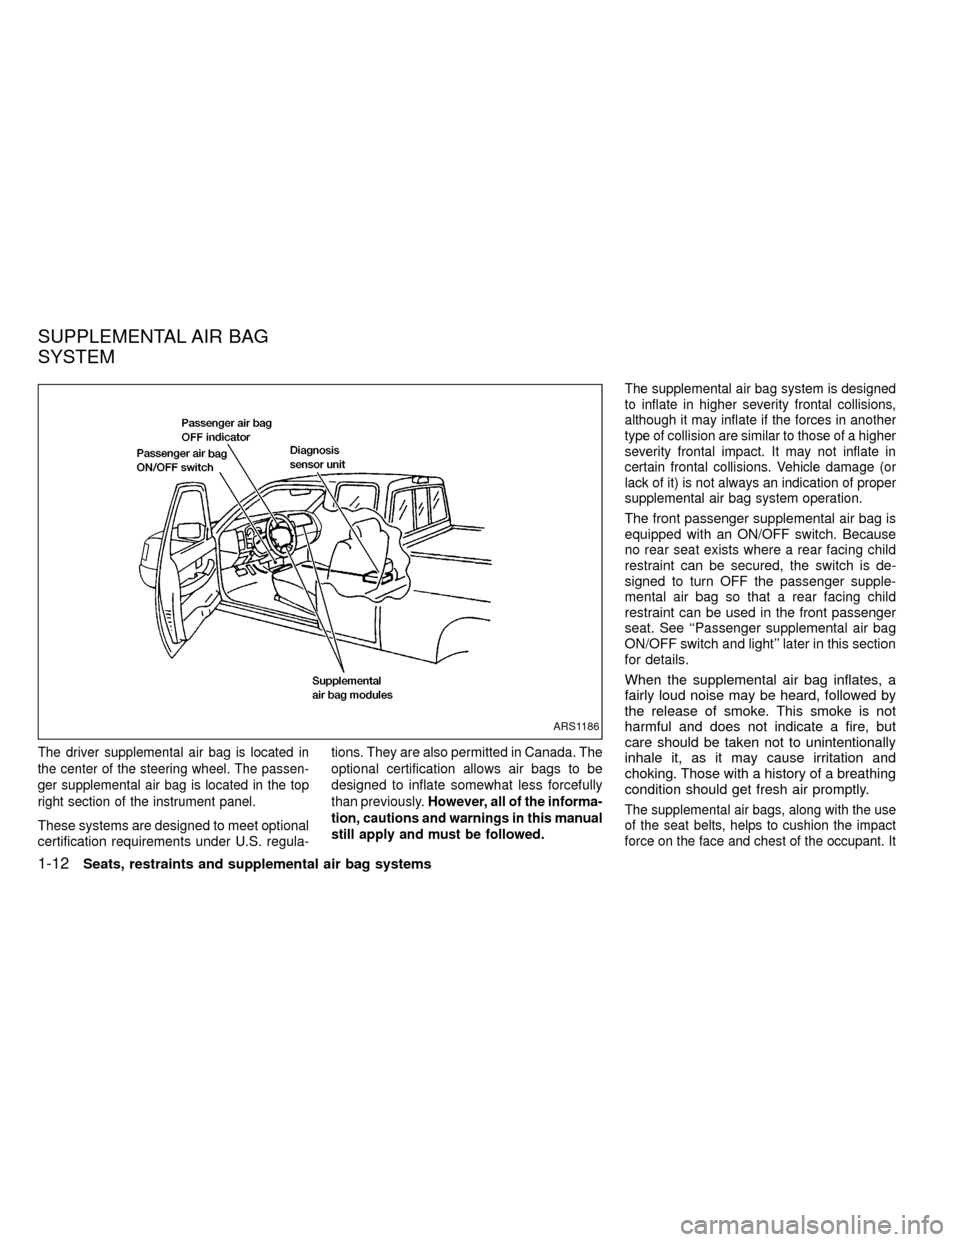
The driver supplemental air bag is located in
the center of the steering wheel. The passen-
ger supplemental air bag is located in the top
right section of the instrument panel.
These systems are designed to meet optional
certification requirements under U.S. regula-tions. They are also permitted in Canada. The
optional certification allows air bags to be
designed to inflate somewhat less forcefully
than previously.However, all of the informa-
tion, cautions and warnings in this manual
still apply and must be followed.
The supplemental air bag system is designed
to inflate in higher severity frontal collisions,
although it may inflate if the forces in another
type of collision are similar to those of a higher
severity frontal impact. It may not inflate in
certain frontal collisions. Vehicle damage (or
lack of it) is not always an indication of proper
supplemental air bag system operation.
The front passenger supplemental air bag is
equipped with an ON/OFF switch. Because
no rear seat exists where a rear facing child
restraint can be secured, the switch is de-
signed to turn OFF the passenger supple-
mental air bag so that a rear facing child
restraint can be used in the front passenger
seat. See ``Passenger supplemental air bag
ON/OFF switch and light'' later in this section
for details.
When the supplemental air bag inflates, a
fairly loud noise may be heard, followed by
the release of smoke. This smoke is not
harmful and does not indicate a fire, but
care should be taken not to unintentionally
inhale it, as it may cause irritation and
choking. Those with a history of a breathing
condition should get fresh air promptly.
The supplemental air bags, along with the use
of the seat belts, helps to cushion the impact
force on the face and chest of the occupant. It
ARS1186
SUPPLEMENTAL AIR BAG
SYSTEM
1-12Seats, restraints and supplemental air bag systems
ZX
Page 19 of 247
can help save lives and reduce serious inju-
ries. However, an inflating supplemental air
bag may cause facial abrasions or other inju-
ries. Supplemental air bags do not provide
restraint to the lower body.
Seat belts should be correctly worn and the
driver and passenger seated upright as far
as practical away from the steering wheel or
instrument panel. Since the supplemental
air bags inflate quickly in order to help
protect the front occupants, the force of the
supplemental air bag inflating can increase
the risk of injury if the occupant is too close
to or against the supplemental air bag mod-
ule during inflation.
The supplemental air bags deflate quickly
after a collision.
The supplemental air bags operate only
when the ignition switch is in the ON or
START position.
WARNING
IDo not attach any objects to the
steering wheel pad or on the instru-
ment panel. Also, do not place any
objects between any occupant and
the steering wheel or on the instru-
ment panel. Such objects maybecome dangerous projectiles and
cause injury if the supplemental air
bag inflates.
IRight after inflation, several supple-
mental air bag system components
will be hot. Do not touch them; you
may severely burn yourself.
I
No unauthorized changes should be
made to any components or wiring of
the supplemental air bag system. This
is to prevent accidental inflation of
the supplemental air bag or damage
to the supplemental air bag system.
IDo not make unauthorized changes to
your vehicle's electrical system, sus-
pension system or front end structure.
This could affect proper operation of
the supplemental air bag system.
ITampering with the supplemental air
bag system may result in serious per-
sonal injury. Tampering includes
changes to the steering wheel and the
instrument panel assembly by placing
material over the steering wheel pad,
above the dashboard, or by installing
additional trim material around the
supplemental air bag system.IWork around and on the supplemental
air bag system should be done by an
authorized NISSAN dealer. Installa-
tion of electrical equipment should
also be done by an authorized NIS-
SAN dealer. The yellow SRS wiring-
should not be modified or discon-
nected. Unauthorized electrical test
equipment and probing devices
should not be used on the supple-
mental air bag system.
ISRS wiring harnesses are covered
with yellow insulation either just be-
fore the harness connectors or over
the complete harness for easy iden-
tification.
When selling your vehicle, we request that
you inform the buyer about the supplemental
air bag system and guide the buyer to the
appropriate sections in this owner's manual.
Seats, restraints and supplemental air bag systems1-13
ZX
Page 20 of 247
PASSENGER SUPPLEMENTAL
AIR BAG ON/OFF SWITCH AND
LIGHT
WARNING
Air bags and seat belts are designed to
work as a unit. Do not switch the air bag
OFF unless you meet federal govern-
ment criteria. Switching off the air bag
may increase the risk of serious or fatal
injuries in a collision where the air bag
would have inflated.
In rare instances, some passengers are
exposed to serious injury risks from inflating
air bags, especially if not properly re-
strained. The U.S. and Canadian federal
governments recognize other limited circum-
stances in which an air bag could reduce
safety. The passenger air bag ON/OFF
switch is, therefore, allowed in this vehicle.
Because the overall benefits of air bags are
great, in most situations air bags should not
be switched off unless special government
criteria exist.
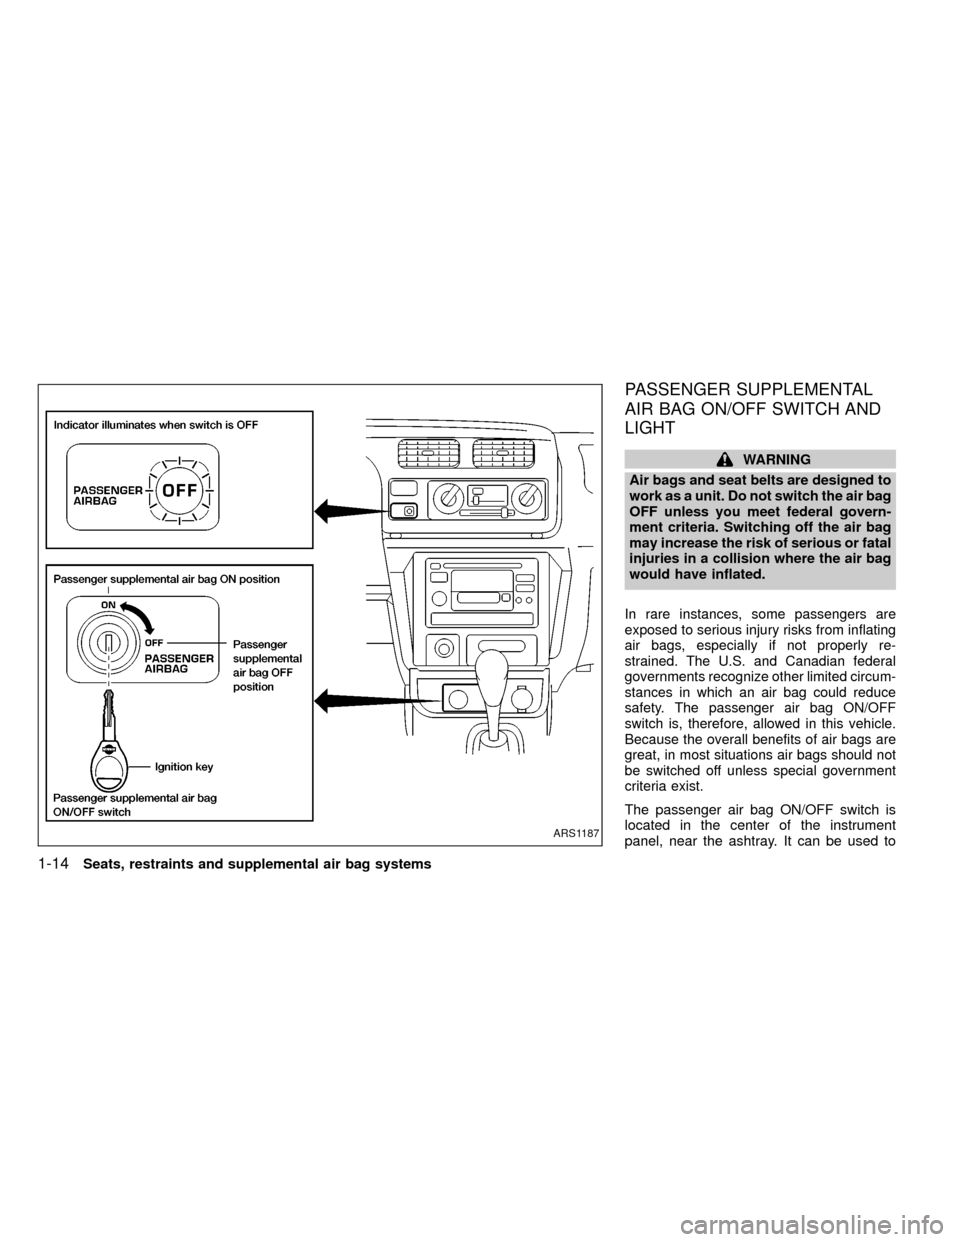
The passenger air bag ON/OFF switch is
located in the center of the instrument
panel, near the ashtray. It can be used to
ARS1187
1-14Seats, restraints and supplemental air bag systems
ZX
Page 22 of 247
IKeep the passenger supplemental
air bag ON/OFF switch turned ON
unless
a rear-facing child restraint
must be used in the front seat, if
children ages 1-12 must be placed in
the front seat, or if the passenger
has a medical condition, which, ac-
cording to a physician, causes the
air bag to pose a special risk of harm
(the federal government criteria). If
the switch is OFF, the air bag will not
inflate in a collision as designed and
the extra protection provided by the
air bag may be lost.
IBe sure to turn the passenger
supplemental air bag ON/OFF switch
OFF when using a rear facing child
restraint in the front passenger seat.
If it is not OFF, the air bag may inflate
in a collision. The force of the rapidly
inflating air bag could cause serious
injury or kill the child in the child
restraint. Children ages 1-12 and
persons with special medical condi-
tions may also be at risk from an
inflating air bag.IIf the supplemental air bag warning
light located in the instrument panel
next to the speedometer comes on
when the passenger supplemental
air bag OFF light is also illuminated,
something may be wrong with the air
bag system. Infants, children ages
1-12 or persons with special medical
conditions should not use the front
passenger seat until the system is
checked by your NISSAN dealer.
1-16Seats, restraints and supplemental air bag systems
ZX
Page 23 of 247
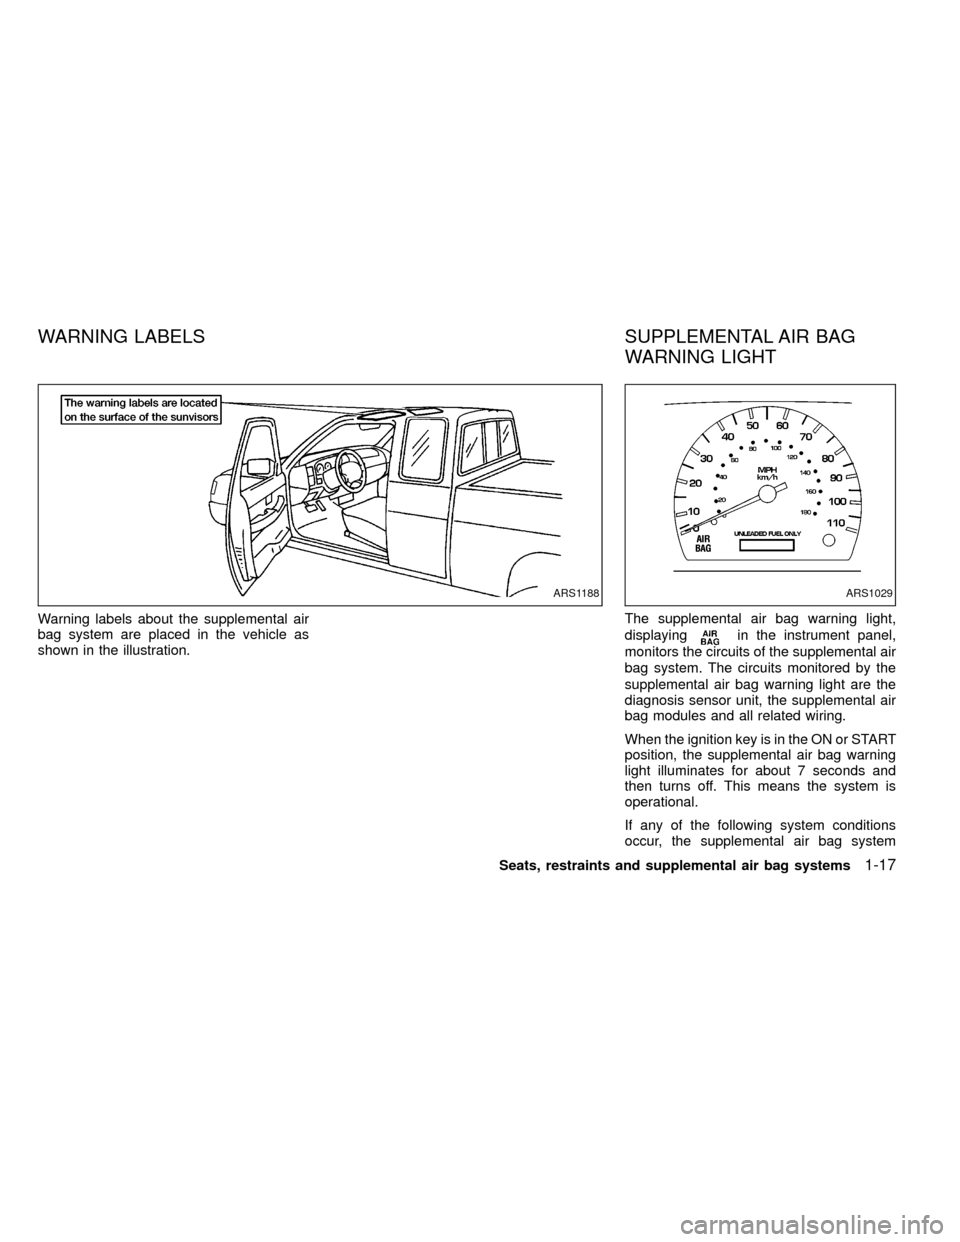
Warning labels about the supplemental air
bag system are placed in the vehicle as
shown in the illustration.The supplemental air bag warning light,
displaying
in the instrument panel,
monitors the circuits of the supplemental air
bag system. The circuits monitored by the
supplemental air bag warning light are the
diagnosis sensor unit, the supplemental air
bag modules and all related wiring.
When the ignition key is in the ON or START
position, the supplemental air bag warning
light illuminates for about 7 seconds and
then turns off. This means the system is
operational.
If any of the following system conditions
occur, the supplemental air bag system
ARS1188ARS1029
WARNING LABELS SUPPLEMENTAL AIR BAG
WARNING LIGHT
Seats, restraints and supplemental air bag systems1-17
ZX
Page 36 of 247
IThe three-point belt in your vehicle
is equipped with an automatic lock-
ing mode retractor which must be
used when installing a child re-
straint.
IFailure to use the retractor's locking
mode will result in the child restraint
not being properly secured. The re-
straint could tip over or otherwise be
unsecured and cause injury to the
child in a sudden stop or collision.
IBe sure to turn the passenger
supplemental air bag ON/OFF switch
OFF when using a rear facing child
restraint in the front passenger seat.
If it is not OFF, the air bag may inflate
in a collision. The force of the rapidly
inflating air bag could cause serious
injury or kill the child in the child
restraint.
I
If the supplemental air bag warning
light located in the instrument panel
next to the speedometer comes on
when the passenger supplemental air
bag OFF indicator light is also illumi-
nated, something may be wrongwith the supplemental air bag sys-
tem. Do not use a child restraint in the
front passenger seat until the system
is checked by your NISSAN dealer.
WARNING
When installing a rear facing child re-
straint, the passenger supplemental air
bag must be disabled using the ON/OFF
switch. See ``Passenger supplemental
air bag ON/OFF switch and light'' earlier
in this section.
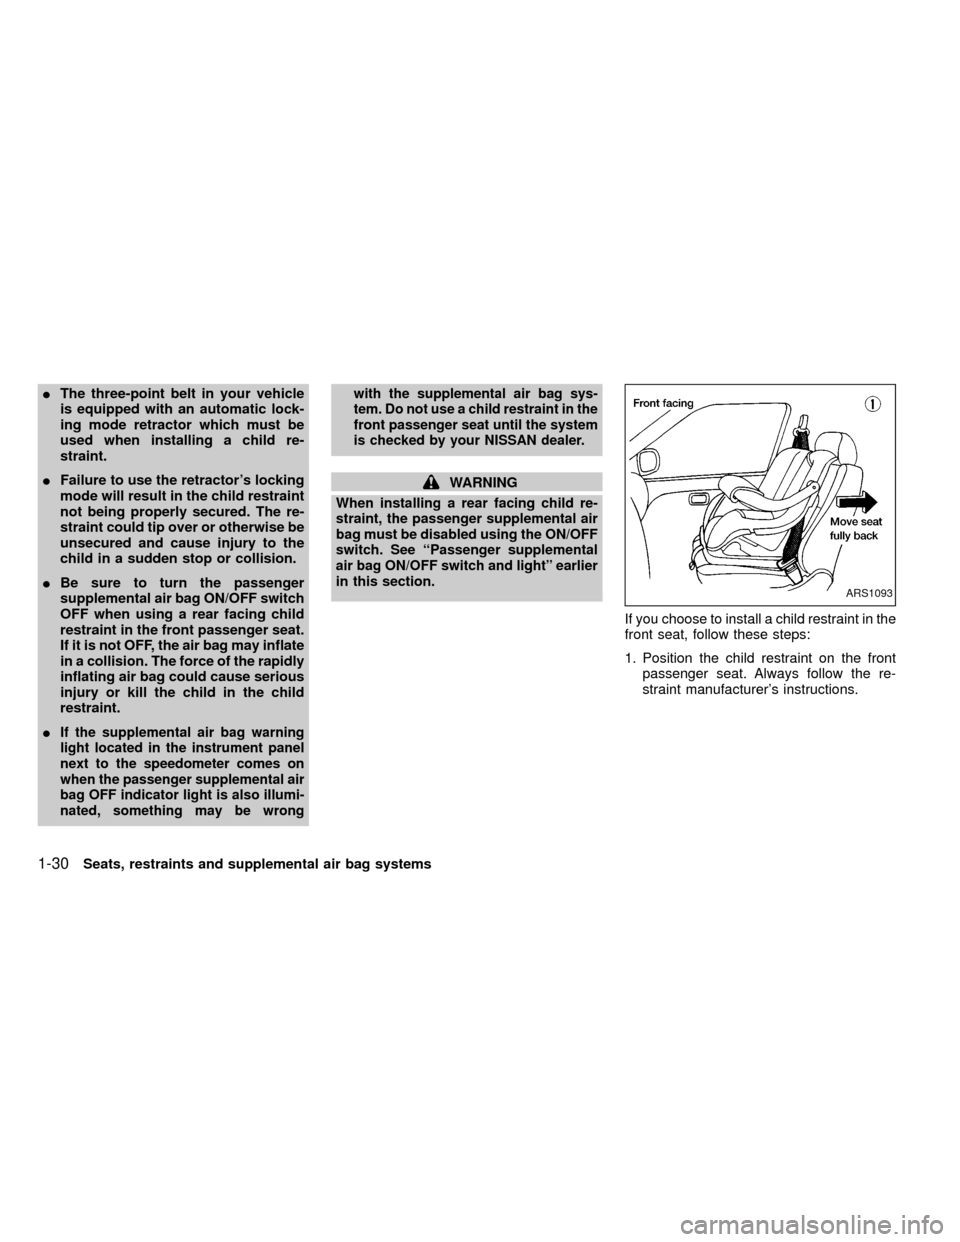
If you choose to install a child restraint in the
front seat, follow these steps:
1. Position the child restraint on the front
passenger seat. Always follow the re-
straint manufacturer's instructions.
ARS1093
1-30Seats, restraints and supplemental air bag systems
ZX
Page 38 of 247
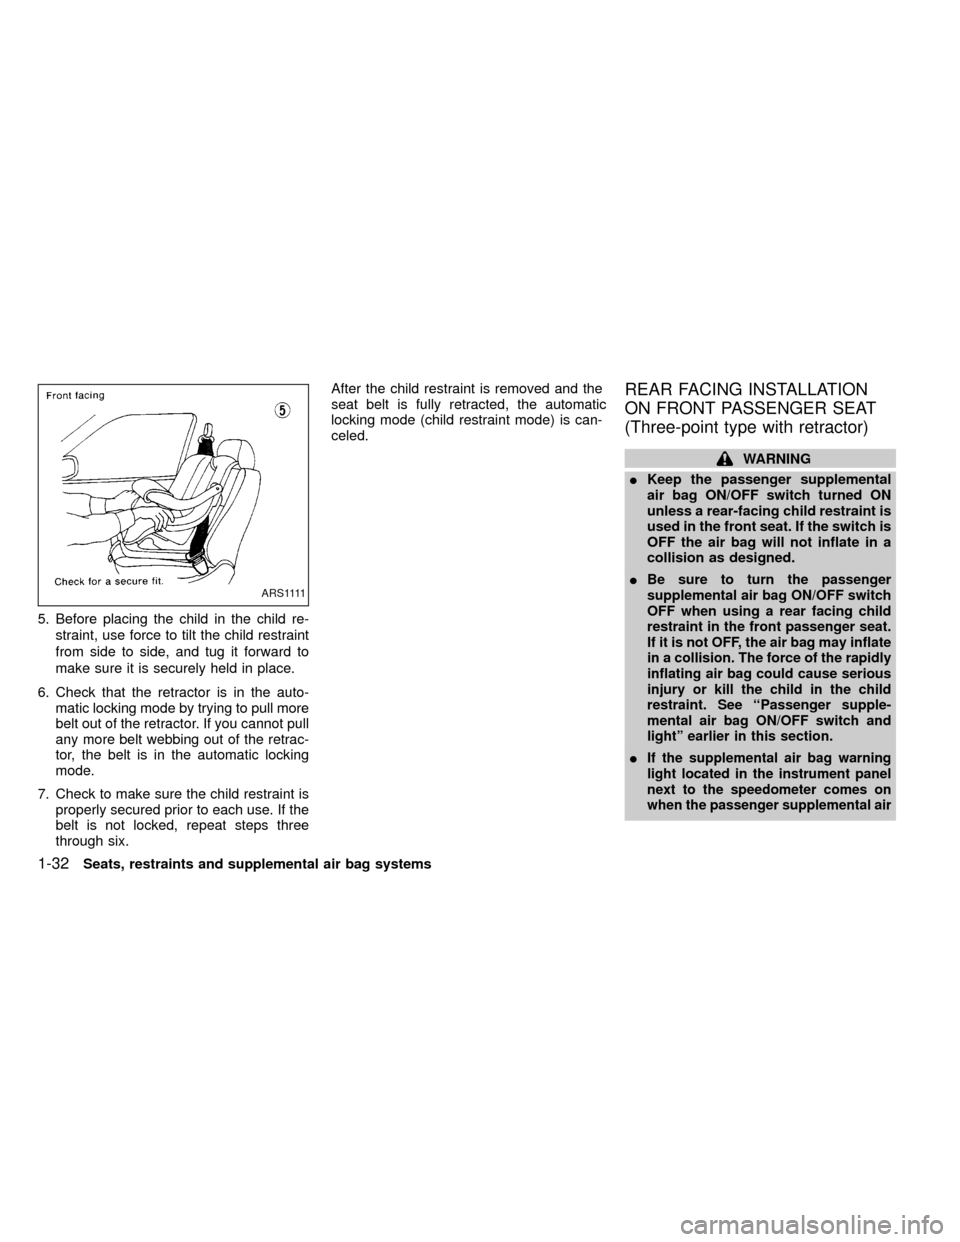
5. Before placing the child in the child re-
straint, use force to tilt the child restraint
from side to side, and tug it forward to
make sure it is securely held in place.
6. Check that the retractor is in the auto-
matic locking mode by trying to pull more
belt out of the retractor. If you cannot pull
any more belt webbing out of the retrac-
tor, the belt is in the automatic locking
mode.
7. Check to make sure the child restraint is
properly secured prior to each use. If the
belt is not locked, repeat steps three
through six.After the child restraint is removed and the
seat belt is fully retracted, the automatic
locking mode (child restraint mode) is can-
celed.
REAR FACING INSTALLATION
ON FRONT PASSENGER SEAT
(Three-point type with retractor)
WARNING
IKeep the passenger supplemental
air bag ON/OFF switch turned ON
unless a rear-facing child restraint is
used in the front seat. If the switch is
OFF the air bag will not inflate in a
collision as designed.
I
Be sure to turn the passenger
supplemental air bag ON/OFF switch
OFF when using a rear facing child
restraint in the front passenger seat.
If it is not OFF, the air bag may inflate
in a collision. The force of the rapidly
inflating air bag could cause serious
injury or kill the child in the child
restraint. See ``Passenger supple-
mental air bag ON/OFF switch and
light'' earlier in this section.
IIf the supplemental air bag warning
light located in the instrument panel
next to the speedometer comes on
when the passenger supplemental air
A R S 1111
1-32Seats, restraints and supplemental air bag systems
ZX