Page 111 of 208
Ford recommends the use of a child safety seat having a top tether
strap. Install the child safety seat in a seating position which is capable
of providing a tether anchorage. For more information on top tether
straps, refer toAttaching safety seats with tether straps.
Carefully follow all of the manufacturer's instructions included
with the safety seat you put in your vehicle. If you do not install
and use the safety seat properly, the child may be injured in a sudden
stop or collision.
Installing child safety seats in combination lap and shoulder belt
seating positions
1. Position the child safety seat in a
seat with a combination lap and
shoulder belt.
An air bag can kill or injure a child in a child seat. If you must
use a forward-facing child seat in the front seat, move seat all
the way back.
Children 12 and under should be properly restrained in the rear
seat whenever possible.
Seating and safety restraints
111
Page 114 of 208

Attaching safety seats with tether straps
Some manufacturers make safety seats that include a tether strap that
goes over the back of the vehicle seat and attaches to an anchoring
point. Other manufacturers offer the tether strap as an accessory.
Contact the manufacturer of your child safety seat for information about
ordering a tether strap.
Tether anchorage hardware
All vehicles include a tether anchor
installed at the rear center seating
position for use with child safety
seats. Attachment holes (at each
rear outboard seating position) have
been provided in your vehicle to
attach anchor hardware, if required.
Additional kit can be obtained and
installed at no charge from any Ford or Lincoln-Mercury dealer.
The tether strap anchorage bracket for the rear center seating position
was factory installed and is located directly beneath the rear window
trim panel, which is behind the rear seat back. To use this anchorage, do
the following:
1. Open the hinged cover located at
the front of the high mount stop
light. This cover conceals the tether
strap anchor bracket.
To prevent damage to the hinge, do not raise the hinged cover of the
trim panel beyond its limit.
2. Install the tether strap to the bracket located directly below the cover.
If the center seating position is not being used, the cover should be kept
closed for a neat appearance.
Seating and safety restraints
114
Page 186 of 208
5. Carefully position the headlamp assembly onto the vehicle making sure
the alignment pins are inserted into the proper holes.
6. Hold the headlamp assembly snugly against the vehicle and push down
on the retainer pins to lock the lamp into place.
7. Before reinstalling the protective cover, make sure the cover tabs are
fully seated under the grille molding.
8. Turn the headlamps on and make sure they work properly. If the
headlamp was correctly aligned before you changed the bulb, you should
not need to align it again.
Replacing front parking lamp/turn signal/cornering lamp bulbs
1. Make sure the headlamp control is in the OFF position.
2. Open the hood and remove the protective cover from the top of the
headlamps by lifting up on the rear corners and release the velcro
attachments. Lift the cover and pull towards the windshield.
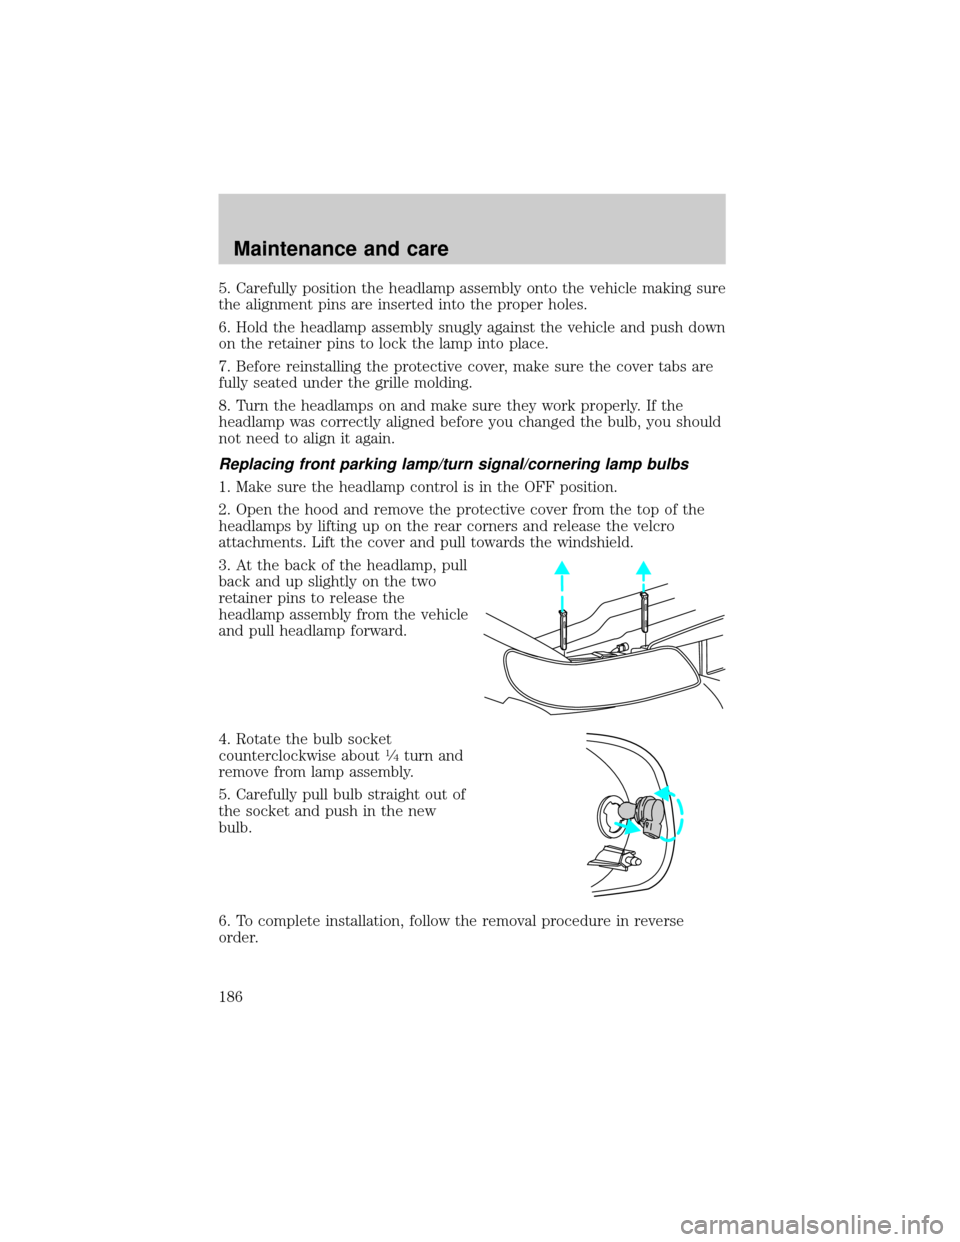
3. At the back of the headlamp, pull
back and up slightly on the two
retainer pins to release the
headlamp assembly from the vehicle
and pull headlamp forward.
4. Rotate the bulb socket
counterclockwise about
1¤4turn and
remove from lamp assembly.
5. Carefully pull bulb straight out of
the socket and push in the new
bulb.
6. To complete installation, follow the removal procedure in reverse
order.
Maintenance and care
186
Page 188 of 208
Function Trade Number
Illuminated visor mirror 74
Overhead console reading lamp (without moon roof) 912
Passenger assist handle (rear seat) 211-2
To replace all instrument panel lights - see your dealer.
AIMING THE HEADLAMPS
Your vehicle is equipped with a Vehicle Headlamp Aim Device (VHAD)
on each headlamp. Each headlamp may be properly aimed in the vertical
(up/down) and the horizontal (left/right) directions using your VHAD
system. The headlamps on your vehicle are properly aimed at the
assembly plant.
A bubble (vertical indicator) that is not centered between the two red
lines does not necessarily indicate out-of-aim headlamps. If your vehicle
is not positioned on a level surface, the slope will be included in the
vertical indication. Therefore, vertical and horizontal headlamp
adjustment should be performed only when the beam direction appears
to be incorrect.
You will need one 4 mm wrench or socket to make the adjustments.
If the vehicle has been in an accident, the vehicle's front structure
should be properly aligned before aiming the headlamps.
Horizontal aim adjustment
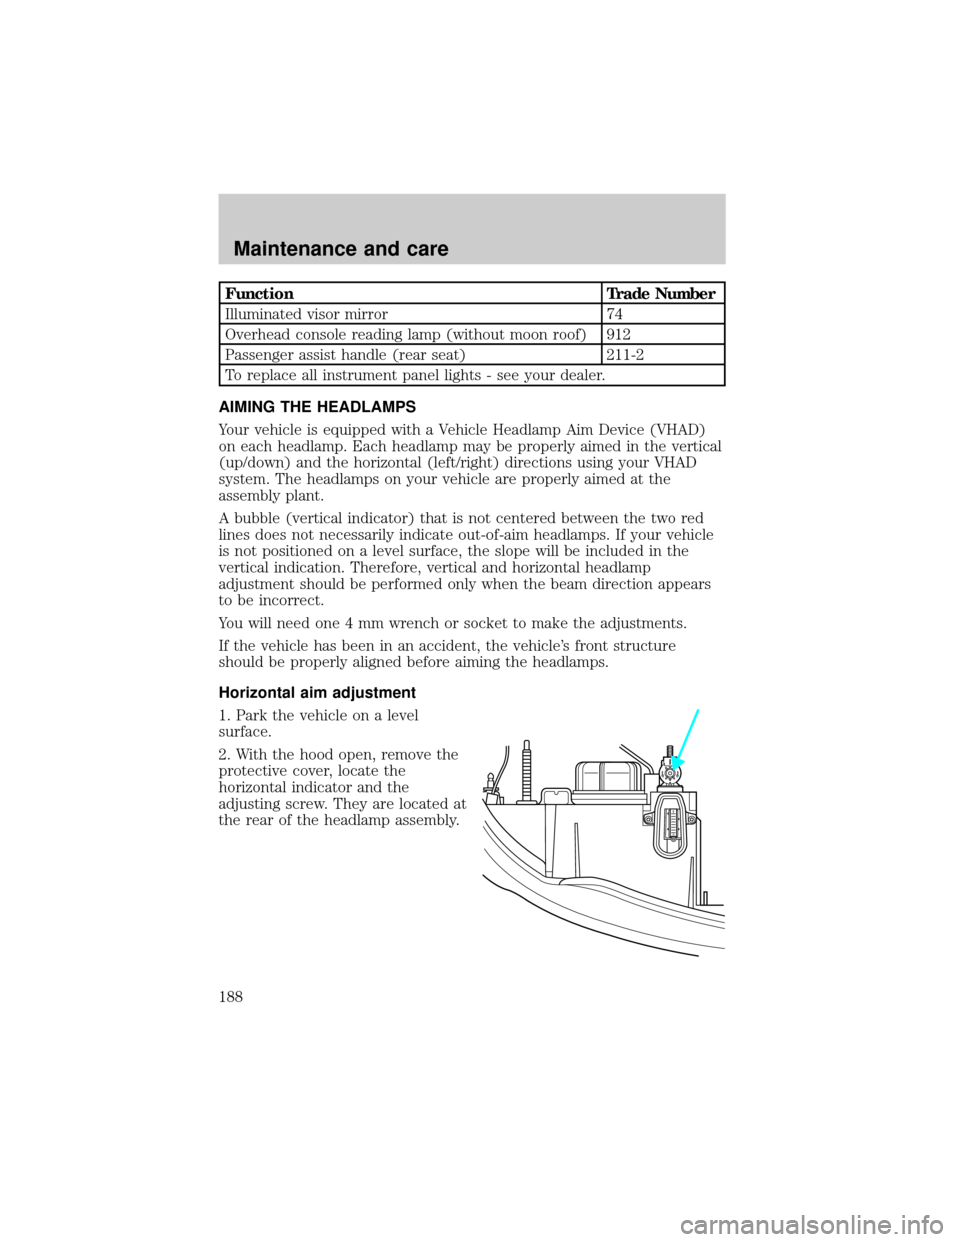
1. Park the vehicle on a level
surface.
2. With the hood open, remove the
protective cover, locate the
horizontal indicator and the
adjusting screw. They are located at
the rear of the headlamp assembly.
U
D
Maintenance and care
188
Page:
< prev 1-8 9-16 17-24
