1999 LINCOLN CONTINENTAL mirror controls
[x] Cancel search: mirror controlsPage 17 of 208

Press the SELECT control to change
these settings while in VEHICLE
HANDLING mode. The combination
of firm ride control (if equipped)
and low steering effort is undesirable and cannot be selected.
MENU
Press this control to change various
convenience settings throughout the
vehicle. Each press of the MENU
control will display a different
convenience setting.
Save to driver (if equipped)
Display appears if the driver is unidentified.
This allows you to select driver setting one, two or off.
Traction control
²Settings: ON or OFF.
²Original setting: ON.
²Setting adjustment is made using the message center MENU/SELECT
controls. (Defults to ON at each start-up.)
Refer toTraction Controlyfor more information.
MEMORY PROFILE
The Memory Profile allows for two primary drivers to save their
individual seat and outside rearview mirror position preferences. The
feature will then be set to the remote entry transmitter, that will
automatically recall the saved individualized preferences when that
individual identifies themselves to the system before entering the vehicle.
The Message Center info allows the driver to program the vehicle
features (listed inMemory profile system)according to their driving
preferences. These feature preferences will be saved as the vehicle
settings. To change a feature setting seeMemory profile featuresin this
section.
Memory Profile System with Driver Select System (if equipped)
Memory Profile System with Driver Select System allows the two primary
drivers to select and save individualized settings for the features listed
SELECT
MENU
Instrumentation
17
Page 18 of 208

under Operator Selectable Features. Refer to ªMessage Centerº in this
chapter for more information on the Message Center controls. The
Message Center has a Driver ID control, which when pressed, allows the
driver to select either Driver 1, Driver 2 or OFF. Selecting OFF will turn
the system OFF.
Operator selectable features
The Memory Profile System and the Memory Profile Systen with Driver
Select System access to the following the vehicle features:
²Express window
²Auto door locks
²Horn chirp
²Easy entry/exit seat access
²Reverse mirrors
²Adjustable ride (Driver Select System only)
²Adjustable steering
²Autolamp on/delay time
²Instrument panel dim control
²Driver's seat position
²Outside mirror position
Basic operation of Memory Profile System
In order for the system to be able to store or recall an individual's seat or
mirror position preferences, the Memory Profile must first recognize who
will be driving the vehicle. Drivers may identify themselves to the system
one of two ways:
²Pressing the unlock control on the appropriate remote transmitter key
(DRIVER MEMORY 1 or DRIVER MEMORY 2 is identified by the
number on the back of the remote transmitter) before opening the
driver's door.
²Entering either the DRIVER MEMORY 1 or DRIVER MEMORY 2
personalized code into the keyless entry keypad before opening the
driver's door. For information on programming personalized codes see
Keyless entry systemin theControl and featuressection.
Pressing OFF will turn the system off.
Instrumentation
18
Page 19 of 208

Once the system has identified the driver (DRIVER MEMORY 1 or
DRIVER MEMORY 2), the seat and mirror will automatically begin to
move to that driver profile. Changes made to the seat or mirror positions
will automatically be saved to that profile.
If the driver should enter the vehicle without first identifying themselves,
all features will remain at their last setting or position and any settings
will be saved as vehicle settings not individualized settings.
If Driver 1 or Driver 2 wishes to
make temporary changes to their
seat or outside mirror positions
without affecting their preferred
positions they may do so by:
²Using the switch on the back of
the remote transmitter to turn
the Memory Profile System OFF
prior to pressing the unlock
control on the remote transmitter.
²Entering the vehicle without
identifying themselves using the
two methods listed above.
This option may be useful to temporarily reposition the driver's seat and
mirrors during an extended drive.
Associated systems
Keyless Entry System
For information on programming personalized codes seeKeyless entry
systemin theControl and featuressection.
The Message Center System
The Message Center is used to display Memory Profile messages and
warning and program many of the Memory Profile System features. Press
the following controls for desired programming:
²The MENU control will display options for the Express Window, Auto
Door Locks, Horn Chirp, Easy Entry/Exit Seat Access and Reverse
Mirror features which can be set by using the SELECT control.
²The VEHICLE HANDLING control will display options for Adjustable
Steering and Adjustable Ride (Driver Select System only) features
which can be set using the SELECT control.
ON OFF
Instrumentation
19
Page 21 of 208

²Vehicle with optional Driver Select System, setting may be saved to
either the DRIVER MEMORY 1 or 2 personalized profiles or as a
vehicle setting.
²Settings-ON or OFF
²Original setting-ON
²Setting adjustment made using: Message Center-MENU/SELECT
controls
Reverse mirrors
²Setting is saved as vehicle setting only.
²Vehicle with optional Driver Select System, setting may be saved to
either the DRIVER MEMORY 1 or 2 personalized profiles or as a
vehicle setting.
²Settings-ON or OFF
²Original setting-ON
²Setting adjustment made using: Message Center-MENU/SELECT
controls
English/Metric
²Setting is saved as vehicle setting only.
²Settings-ENGLISH or METRIC
²Original setting-ON
²Setting adjustment made using: Message Center-MENU/SELECT
controls or Message Center Switch-ENGLISH/METRIC on vehicles not
equipped with the optional Driver Select System.
Adjustable ride
²Not available on vehicles without Driver Select System option.
²Vehicle with optional Driver Select System, setting may be saved to
either the DRIVER MEMORY 1 or 2 personalized profiles or as a
vehicle setting.
²Settings-plush, normal, firm
²Original setting-normal
²Setting adjustment made using: Message Center-VEHICLE
HANDLING/SELECT controls
Instrumentation
21
Page 54 of 208

Never adjust the steering wheel when the vehicle is moving.
INTERIOR LAMPS
Map lamps
To turn on the map lamps, press the
control next to each lamp.
If equipped with a moon roof, the
map lamps are located on the
rearview mirror. Press the control
next to the map lamp to illuminate
the lamp.
Rear courtesy/reading lamps
The courtesy lamp lights when:
²any door is opened.
²the instrument panel dimmer
switch is held up until the
courtesy lamps come on.
²any of the remote entry controls
are pressed and the ignition is
OFF.
With the ignition key in the ACC or ON position, the reading lamp can be
turned on by pressing the rocker control.
Controls and features
54
Page 67 of 208

ILLUMINATED VISOR MIRROR
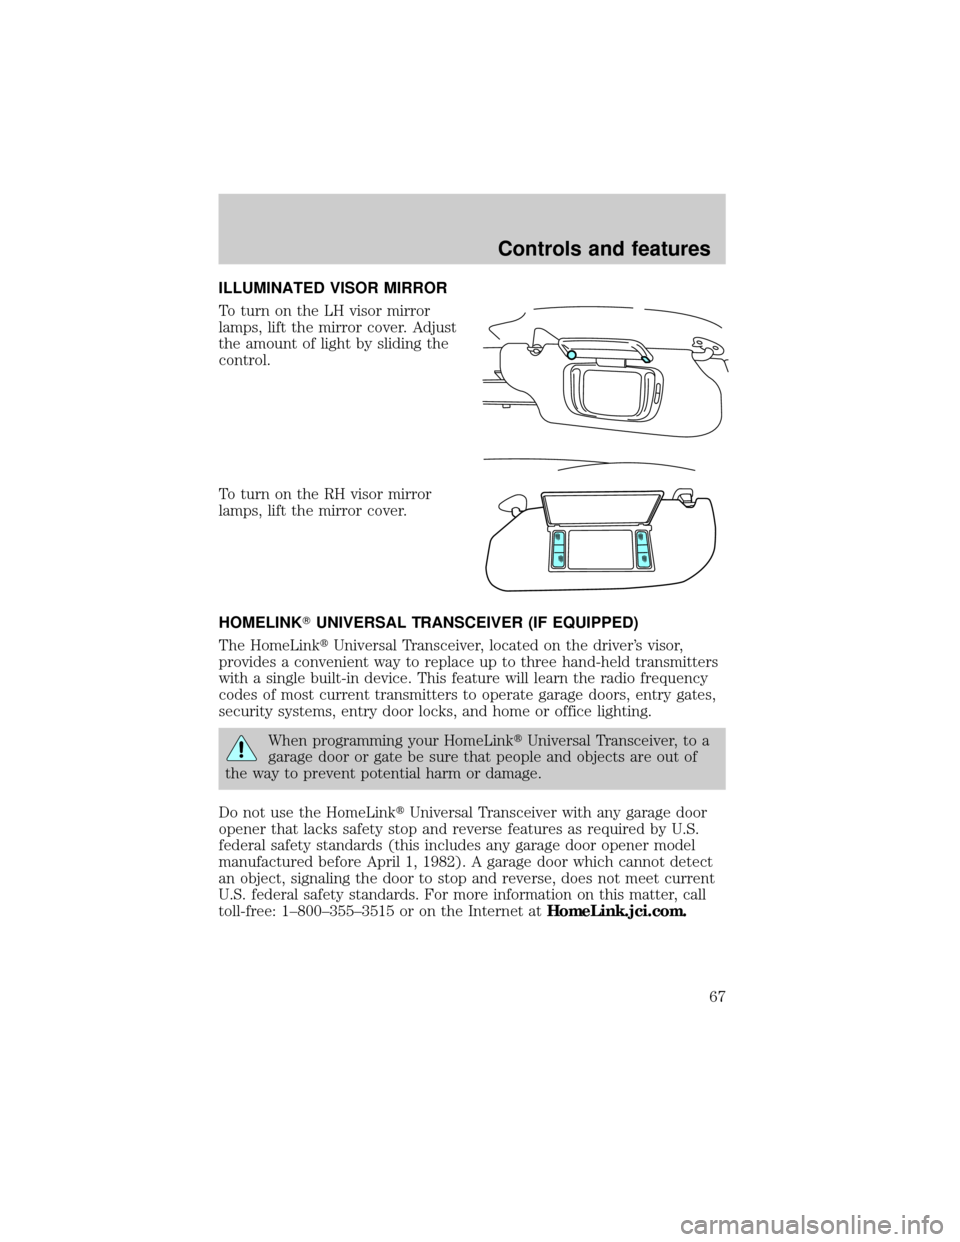
To turn on the LH visor mirror
lamps, lift the mirror cover. Adjust
the amount of light by sliding the
control.
To turn on the RH visor mirror
lamps, lift the mirror cover.
HOMELINKTUNIVERSAL TRANSCEIVER (IF EQUIPPED)
The HomeLinktUniversal Transceiver, located on the driver's visor,
provides a convenient way to replace up to three hand-held transmitters
with a single built-in device. This feature will learn the radio frequency
codes of most current transmitters to operate garage doors, entry gates,
security systems, entry door locks, and home or office lighting.
When programming your HomeLinktUniversal Transceiver, to a
garage door or gate be sure that people and objects are out of
the way to prevent potential harm or damage.
Do not use the HomeLinktUniversal Transceiver with any garage door
opener that lacks safety stop and reverse features as required by U.S.
federal safety standards (this includes any garage door opener model
manufactured before April 1, 1982). A garage door which cannot detect
an object, signaling the door to stop and reverse, does not meet current
U.S. federal safety standards. For more information on this matter, call
toll-free: 1±800±355±3515 or on the Internet atHomeLink.jci.com.
Controls and features
67
Page 72 of 208

2. Locate the compass module
mounted at the base of mirror.
3. Turn the ignition to the ON
position.
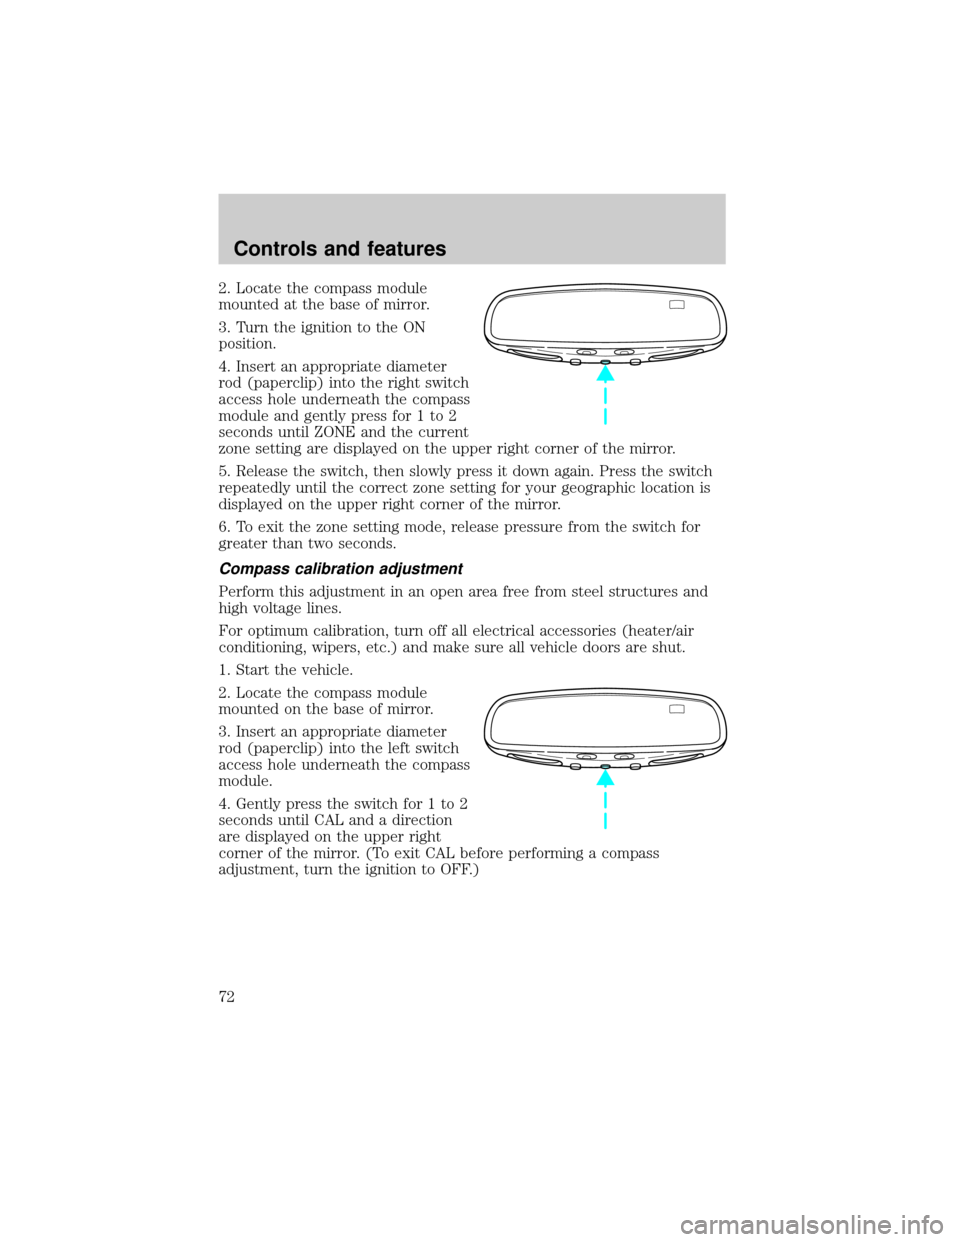
4. Insert an appropriate diameter
rod (paperclip) into the right switch
access hole underneath the compass
module and gently press for 1 to 2
seconds until ZONE and the current
zone setting are displayed on the upper right corner of the mirror.
5. Release the switch, then slowly press it down again. Press the switch
repeatedly until the correct zone setting for your geographic location is
displayed on the upper right corner of the mirror.
6. To exit the zone setting mode, release pressure from the switch for
greater than two seconds.
Compass calibration adjustment
Perform this adjustment in an open area free from steel structures and
high voltage lines.
For optimum calibration, turn off all electrical accessories (heater/air
conditioning, wipers, etc.) and make sure all vehicle doors are shut.
1. Start the vehicle.
2. Locate the compass module
mounted on the base of mirror.
3. Insert an appropriate diameter
rod (paperclip) into the left switch
access hole underneath the compass
module.
4. Gently press the switch for 1 to 2
seconds until CAL and a direction
are displayed on the upper right
corner of the mirror. (To exit CAL before performing a compass
adjustment, turn the ignition to OFF.)
Controls and features
72
Page 73 of 208
![LINCOLN CONTINENTAL 1999 Owners Manual 5. Release pressure from the switch.
6. Slowly drive the vehicle in a circle (less than 5 km/h [3 mph]) until
the CAL indicator turns off. This will take up to five circles to complete
calibration.
7. LINCOLN CONTINENTAL 1999 Owners Manual 5. Release pressure from the switch.
6. Slowly drive the vehicle in a circle (less than 5 km/h [3 mph]) until
the CAL indicator turns off. This will take up to five circles to complete
calibration.
7.](/manual-img/15/6877/w960_6877-72.png)
5. Release pressure from the switch.
6. Slowly drive the vehicle in a circle (less than 5 km/h [3 mph]) until
the CAL indicator turns off. This will take up to five circles to complete
calibration.
7. The compass is now calibrated.
The compass display will remain on for approximately 40-45 minutes
after the ignition key is removed. The battery saver will then shut off the
display.
AUTOMATIC DIMMING INSIDE REAR VIEW MIRROR (IF EQUIPPED)
Your vehicle is equipped with inside and driver side outside rear view
mirrors with an auto-dimming function. The electronic day/night mirrors
will change from the normal state to the non-glare state when bright
lights (glare) reach the mirrors. When the inside rear view mirror detects
bright light from in front of or behind the vehicle, the inside and driver
side outside rear view mirrors will automatically adjust (darken) to
minimize glare.
Press the control to turn the mirror
on or off. The mirror will
automatically return to the normal
state whenever the vehicle is placed
in R (reverse)(when the mirror is
on) to ensure a bright clear view
when backing up.
Do not clean the housing or glass of
any mirror with harsh abrasives, fuel
or other petroleum-based cleaning
products.
On vehicles equipped with a moonroof, the automatic rear view mirror
has two map lamps. Refer toInterior lampsfor more information.
Controls and features
73