Page 153 of 208
Do not start your engine with the air cleaner removed and do
not remove it while the engine is running.
OPENING THE HOOD
1. Inside the vehicle, pull the hood
release handle located under the
bottom of the instrument panel.
2. Go to the front of the vehicle and
release the auxiliary latch that is
located under the front center of
the hood.
3. Lift the hood until the lift
cylinders hold it open.
IDENTIFYING COMPONENTS IN THE ENGINE COMPARTMENT
4.6L DOHC V8 engine
BRAKE RELEASEHOOD
910
5
213
4678
Maintenance and care
153
Page 154 of 208
1. Automatic transmission fluid dipstick
2. Brake fluid reservoir
3. Battery
4. Air filter assembly
5. Engine oil dipstick
6. Engine oil filler cap
7. Power steering fluid reservoir
8. Windshield washer fluid reservoir
9. Engine coolant reservoir
10. Cabin air filter
ENGINE OIL
Checking the engine oil
Refer to the Scheduled Maintenance Guide for the appropriate intervals
for checking the engine oil.
1. Make sure the vehicle is on level ground.
2. Turn the engine off and wait a few minutes for the oil to drain into the
oil pan.
3. Set the parking brake and ensure the gearshift is securely latched in P
(Park).
4. Open the hood. Protect yourself from engine heat.
5. Locate and carefully remove the
engine oil level indicator (dipstick).
MAX MIN
Maintenance and care
154
Page 167 of 208
2. Release and open the hood.
3. Pull the rubber cowl seal
(number 1 in figure) away from the
cowl vent screen. Remove the right
half of the cowl vent screen
(number 2 in figure) by placing your
hand underneath the cowl vent
screen and lifting straight up to
release the four spring clips.
4. Remove the water shield (number
3 in figure) by disengaging the two
water shield locking tabs (number 4
in figure), then sliding the water
shield toward the front of the
vehicle. After the locking tabs are
disengaged from the water shield,
lift the water shield up and away
from the vehicle.
5. Remove the filter. Reverse the
procedure to install the new filter.BRAKE RELEASEHOOD
2
1
34
Maintenance and care
167
Page 186 of 208

5. Carefully position the headlamp assembly onto the vehicle making sure
the alignment pins are inserted into the proper holes.
6. Hold the headlamp assembly snugly against the vehicle and push down
on the retainer pins to lock the lamp into place.
7. Before reinstalling the protective cover, make sure the cover tabs are
fully seated under the grille molding.
8. Turn the headlamps on and make sure they work properly. If the
headlamp was correctly aligned before you changed the bulb, you should
not need to align it again.
Replacing front parking lamp/turn signal/cornering lamp bulbs
1. Make sure the headlamp control is in the OFF position.
2. Open the hood and remove the protective cover from the top of the
headlamps by lifting up on the rear corners and release the velcro
attachments. Lift the cover and pull towards the windshield.
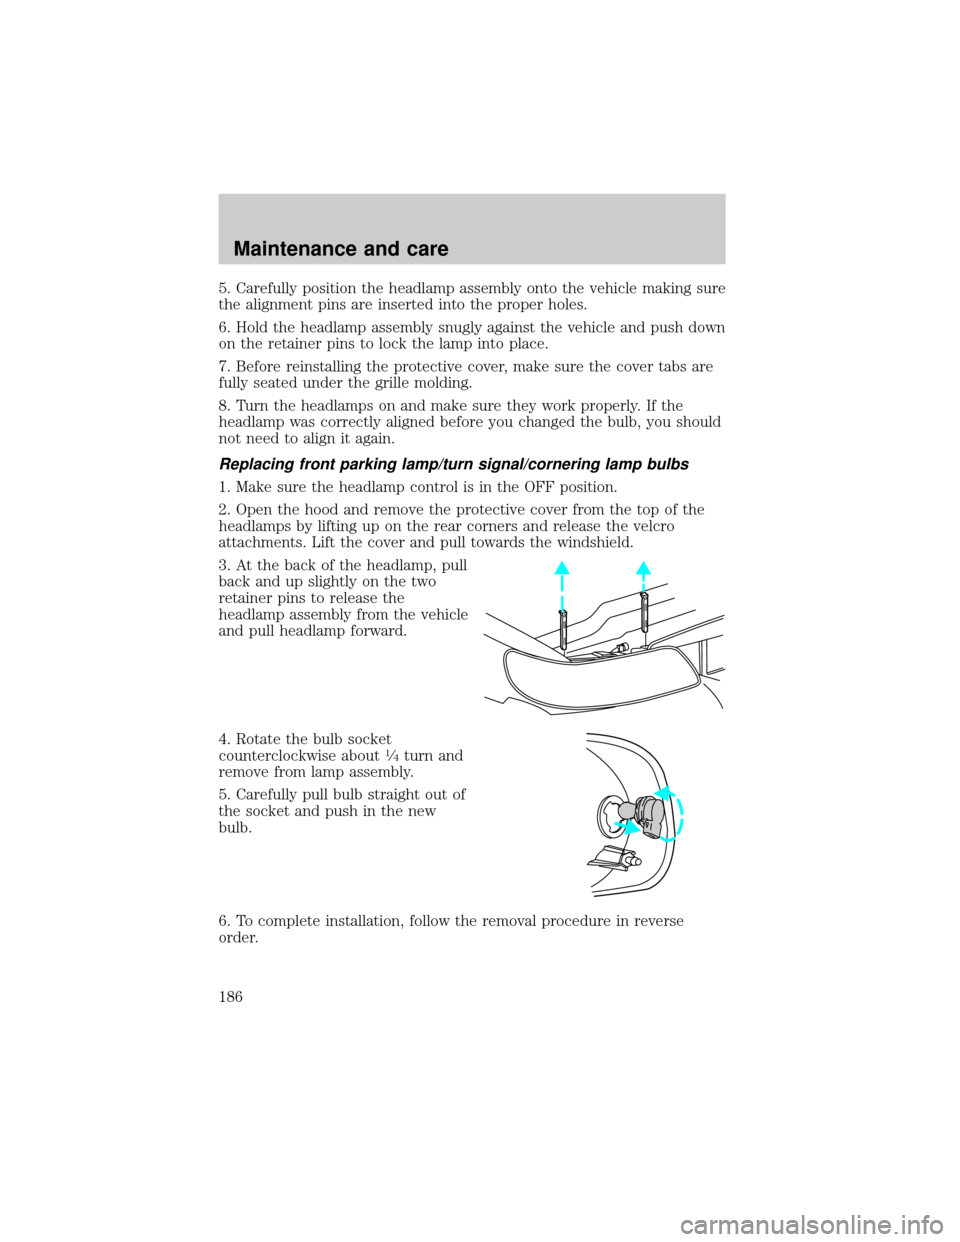
3. At the back of the headlamp, pull
back and up slightly on the two
retainer pins to release the
headlamp assembly from the vehicle
and pull headlamp forward.
4. Rotate the bulb socket
counterclockwise about
1¤4turn and
remove from lamp assembly.
5. Carefully pull bulb straight out of
the socket and push in the new
bulb.
6. To complete installation, follow the removal procedure in reverse
order.
Maintenance and care
186
Page 188 of 208

Function Trade Number
Illuminated visor mirror 74
Overhead console reading lamp (without moon roof) 912
Passenger assist handle (rear seat) 211-2
To replace all instrument panel lights - see your dealer.
AIMING THE HEADLAMPS
Your vehicle is equipped with a Vehicle Headlamp Aim Device (VHAD)
on each headlamp. Each headlamp may be properly aimed in the vertical
(up/down) and the horizontal (left/right) directions using your VHAD
system. The headlamps on your vehicle are properly aimed at the
assembly plant.
A bubble (vertical indicator) that is not centered between the two red
lines does not necessarily indicate out-of-aim headlamps. If your vehicle
is not positioned on a level surface, the slope will be included in the
vertical indication. Therefore, vertical and horizontal headlamp
adjustment should be performed only when the beam direction appears
to be incorrect.
You will need one 4 mm wrench or socket to make the adjustments.
If the vehicle has been in an accident, the vehicle's front structure
should be properly aligned before aiming the headlamps.
Horizontal aim adjustment
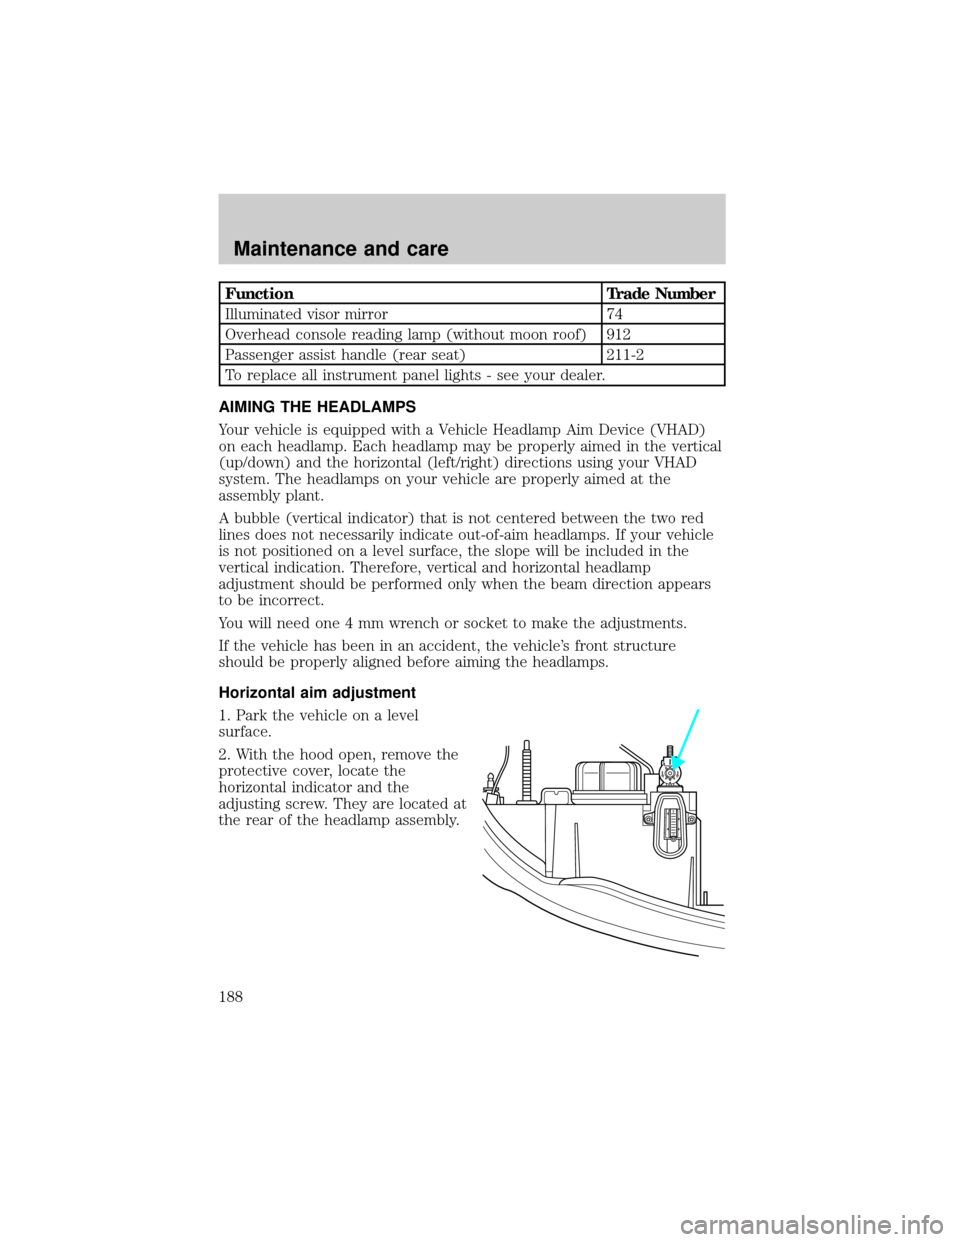
1. Park the vehicle on a level
surface.
2. With the hood open, remove the
protective cover, locate the
horizontal indicator and the
adjusting screw. They are located at
the rear of the headlamp assembly.
U
D
Maintenance and care
188
Page 189 of 208
3.Usea4mmwrench or socket to
turn the horizontal adjusting screw
until the ª0º mark on the yellow dial
lines up with the reference mark on
the marker (as shown) when viewed
directly from above.
Turning the horizontal adjusting
screw in the direction of the arrow
changes the horizontal aim as
shown.
Vertical aim adjustment
1. Park the vehicle on a level
surface.
2. With the hood open, remove the
protective cover, then locate the
bubble level and the vertical
adjustment screw. The adjustment
screw is located on the outboard
side of the headlamp.
U
D
Maintenance and care
189