1999 LAND ROVER DISCOVERY instrument panel
[x] Cancel search: instrument panelPage 1247 of 1529

WIPERS AND WASHERS
84-12 DESCRIPTION AND OPERATION
Rear wiper
The rear wiper is driven directly from an electric motor located inside the tail door. The motor is mounted inside the
tail door with two bolts, lock washers and washers. The motor mounting brackets have rubber inserts to prevent motor
operating noise being transferred to the door structure. The motor spindle is fitted with a seal and protrudes through
a hole in the tail door outer skin panel. The motor spindle is secured to the tail door with a washer and nut.
The motor output spindle has a taper splined shaft which allows for the attachment of the wiper arm which is secured
with a nut. The wiper arm attachment to the splined shaft has a pivot to which the remainder of the arm is attached.
The two parts of the arm are connected by a spring which controls the pressure of the blade on the window to a
predetermined amount.
The wiper blade is attached to the wiper arms with a clip which allows the blade to pivot. The wiper blade comprises
of a number of levers and yokes to which the rubber wiper is attached. The levers and yokes ensure that the pressure
applied by the arm spring is evenly distributed along the full length of the blade. The rubber wiper is held in the yokes
by a pair of stainless steel strips which also contribute to the even distribution of spring pressure along the blade.
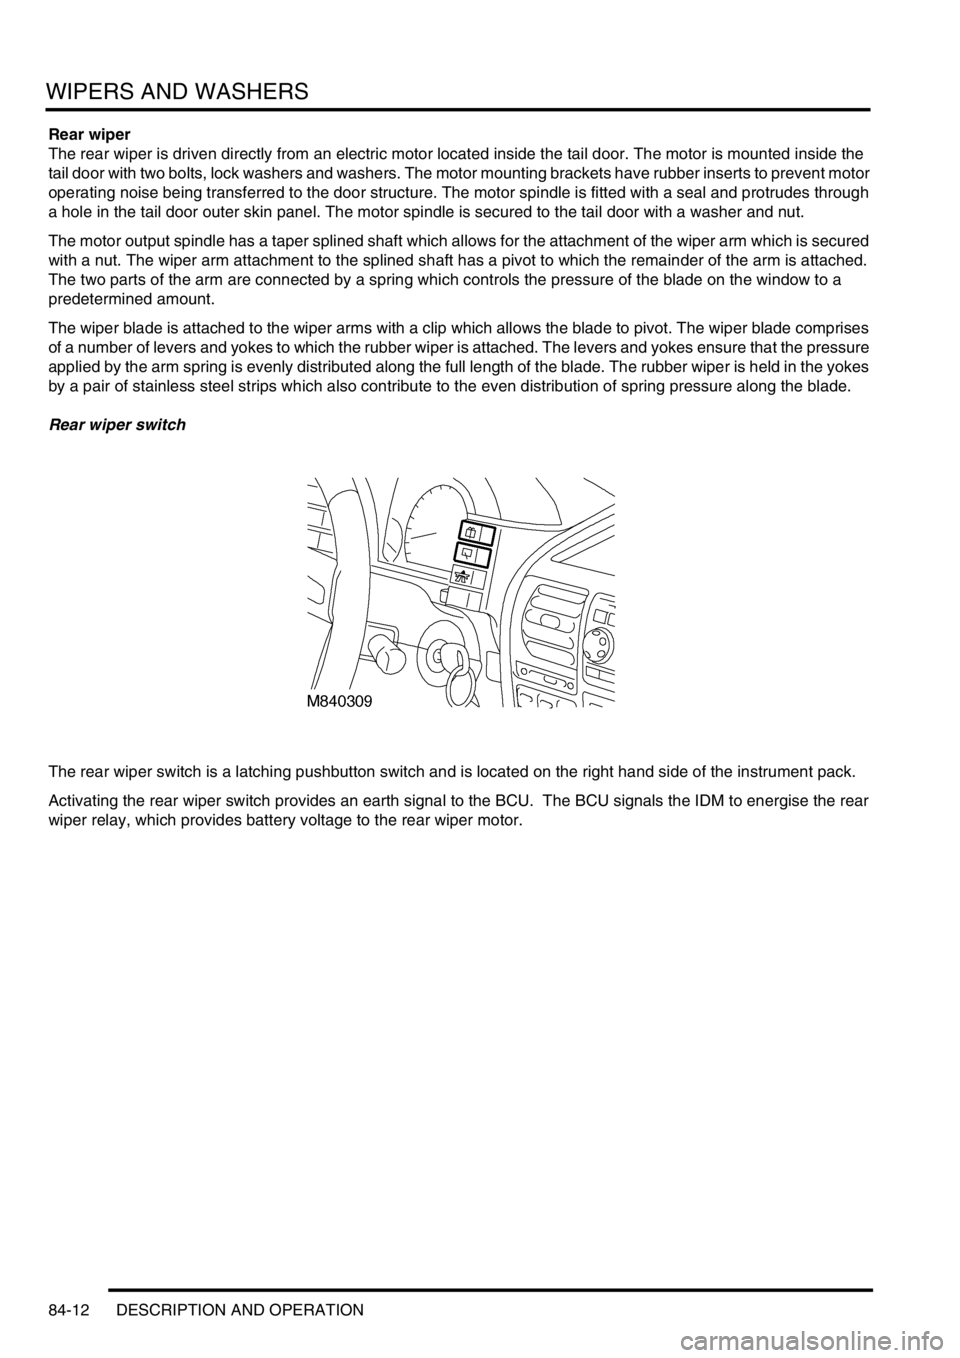
Rear wiper switch
The rear wiper switch is a latching pushbutton switch and is located on the right hand side of the instrument pack.
Activating the rear wiper switch provides an earth signal to the BCU. The BCU signals the IDM to energise the rear
wiper relay, which provides battery voltage to the rear wiper motor.
Page 1285 of 1529

LIGHTING
86-2-12 REPAIRS
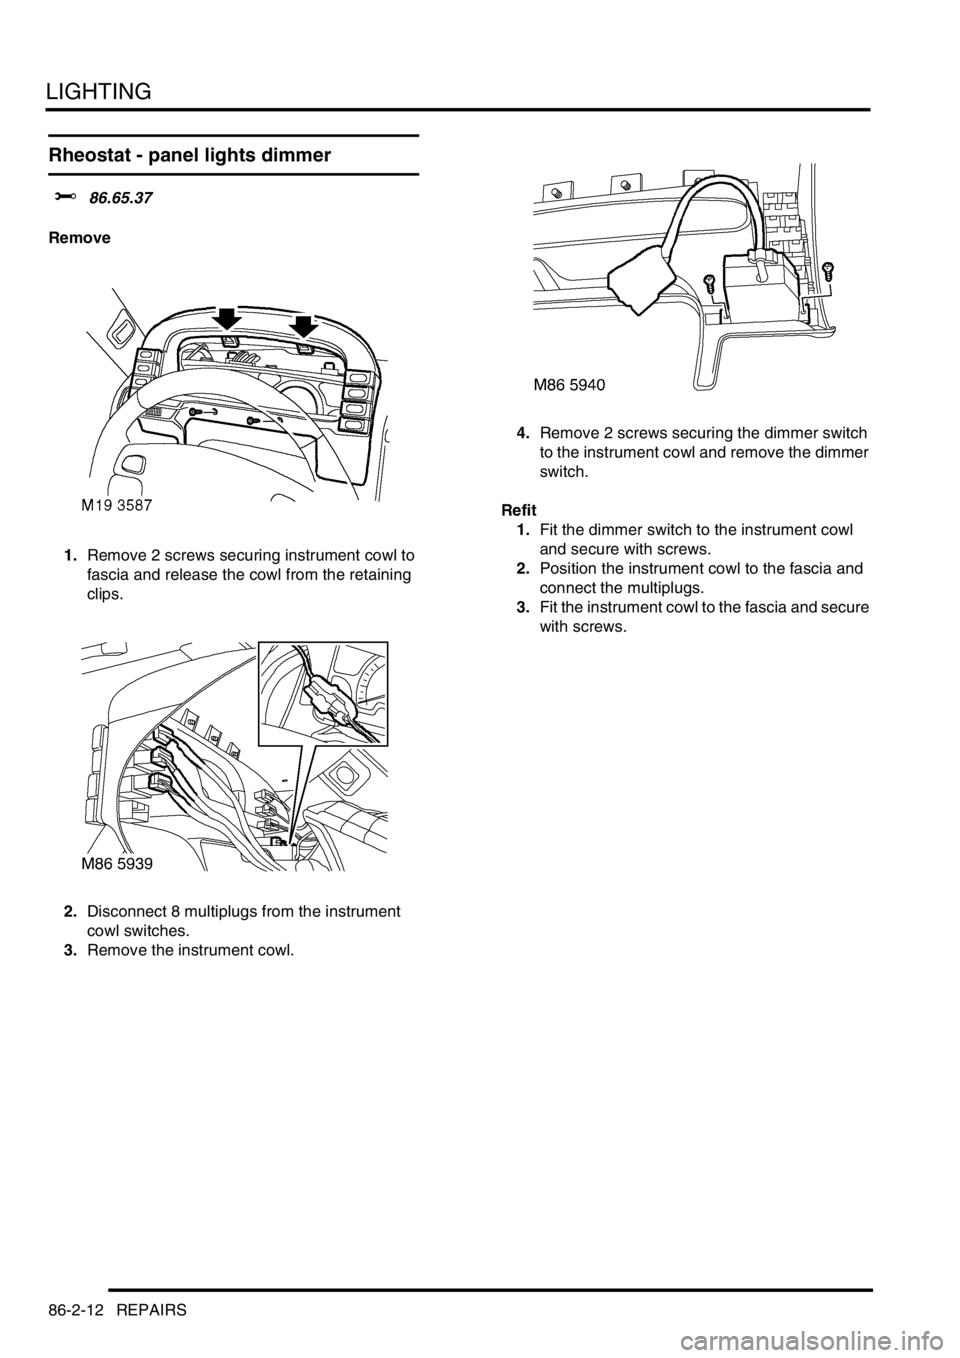
Rheostat - panel lights dimmer
$% 86.65.37
Remove
1.Remove 2 screws securing instrument cowl to
fascia and release the cowl from the retaining
clips.
2.Disconnect 8 multiplugs from the instrument
cowl switches.
3.Remove the instrument cowl.4.Remove 2 screws securing the dimmer switch
to the instrument cowl and remove the dimmer
switch.
Refit
1.Fit the dimmer switch to the instrument cowl
and secure with screws.
2.Position the instrument cowl to the fascia and
connect the multiplugs.
3.Fit the instrument cowl to the fascia and secure
with screws.
Page 1301 of 1529

BODY CONTROL UNIT
86-3-14 DESCRIPTION AND OPERATION
Central Door Locking (CDL)
The BCU carries out the logic control operation for CDL. A CDL switch is mounted on the fascia panel and has two
inputs to the BCU, one for lock and one for unlock.
Door locking and unlocking can be performed using the remote transmitter in the keys and the receiver unit located
above the vehicle's headlining, behind the rear sunroof aperture. The receiver detects the signals sent from the
remote transmitter and sends a decoded signal to the BCU for processing.
Four methods of door locking are available:
lRemote handset locking.
lVehicle key locking.
lCDL switch locking.
lSpeed related locking.
Two security levels of door locking are available, CDL and Superlocking. The anti-theft alarm system works in
conjunction with the CDL system.
Electric windows and sunroof
The BCU controls the logical operations and the timing periods for the electric front windows. The rear windows are
hard-wired and the two electric sunroofs are controlled by a dedicated ECU which is enabled by the BCU.
The front windows are electrically operated using two rocker switches located in the centre console. Electric motors
are located in each of the front doors.
The rear windows are enabled by the IDM controlling the operation of the rear window relay located in the passenger
compartment fuse box.
Wipers and washers
The wiper and washer functions are controlled by the BCU and the IDM.
The front wipers and washers are operated from the switch stalk located on the right hand side of the steering column
and only operate when the ignition switch is in position I or II. The front wipers are operated by a motor located below
the windscreen plenum.
+ WIPERS AND WASHERS, DESCRIPTION AND OPERATION, Description.
The BCU controls the wiper motor frequency of operation via the IDM when intermittent wipe or wash is selected. The
front intermittent wipe option features five different intermittent delay periods. The shortest delay period is 3 seconds
and this is increased by 2 second increments up to a maximum delay of 11 seconds. The desired delay period for the
front wipers is set by the position of the rotary switch located on the wiper column stalk.
The rear wiper switch is located on the instrument pack cowl and is latched when pressed. The rear wiper electric
motor is located in the tail door. The rear wiper operation is controlled according to a programmed strategy via the
BCU and the IDM. The BCU also checks for a signal from either the reverse lamp switch located in the vehicle gearbox
(manual gearbox models) or the gear position switch (automatic gearbox models) for operating the rear wipers when
the vehicle is in reverse. The rear wiper and washer only operate when the ignition switch is in position II.
The front and rear washer pumps and the headlamp powerwash (where fitted) are also controlled through the BCU.
The washers are operated from electric pumps attached to the washer reservoir located in the left hand wheel arch.
The front wash switch is located on the wiper column stalk and is pulled towards the steering wheel to select the
washer function. When the front washers are operated, the wipers are also activated for three full cycles. The rear
wash switch is located on the instrument pack cowl. The BCU programme can be configured in one of two modes of
operation:
lNo wiper operation when the wash switch is pressed.
lWiper action after an initial delay of 400 ms.
Headlamp wash is activated by the BCU via the IDM and operates when the headlamps are on and the front washers
function is selected.
Page 1328 of 1529

ALARM SYSTEM AND HORN
DESCRIPTION AND OPERATION 86-4-5
Description
General
The anti-theft system deters the theft of the vehicle with both active and passive systems. The active systems monitor
the vehicle perimeter and, in some markets the vehicle interior, for intrusion. If the system detects intrusion, an alarm
sounds. The passive systems include a vehicle immobiliser as well as protection against intrusion through super
locking the doors. The vehicle is immobilised whenever the ignition key is removed from the ignition switch. Super
locking prevents the interior door handles from opening the doors. In addition, there are many features and functions
that enhance system operation.
It is possible to perform the various functions associated with the anti-theft system remotely. To accomplish this, the
handset generates a radio frequency when the lock button or unlock button is depressed. This signal is transmitted
to the Body Control Unit (BCU) via a receiver located in front of rear sunroof beneath the headlining. Precise alignment
of the handset to the receiver is not necessary. The approximate operating range between the handset and the
receiver is 10 metres (33 feet).
It is important to understand the configuration of the system on each particular vehicle. There are many
different combinations of features with dedicated operating modes. System configuration for each vehicle
can be determined using TestBook.
The anti-theft system is controlled centrally by the BCU, which is located below and behind the passenger glovebox.
A serial communication link communicates between the Intelligent Driver Module (IDM) located within the fusebox,
the BCU and the LED located in the instrument panel.
The state of the alarm is stored in the BCU. If the battery is disconnected while the alarm is armed, the alarm will be
triggered when the battery is reconnected.
NOTE: Disconnecting the battery while the alarm is armed triggers the alarm. Always disarm the alarm system before
disconnecting the battery.
The BCU also receives inputs from the following components:
lIgnition key in sensor.
lIgnition switch.
lFuel cut off switch.
lFuel flap release switch.
The BCU also interacts with the following components:
lStarter relay.
lVehicle horns.
lDirection indicators.
lFuel flap release actuator.
lCourtesy lamps.
Page 1341 of 1529

ALARM SYSTEM AND HORN
86-4-18 DESCRIPTION AND OPERATION
Internal locking
Internal locking allows the doors to be locked / unlocked from a central position using switches on the instrument
panel. The internal unlock switch will not operate if the vehicle is super locked.
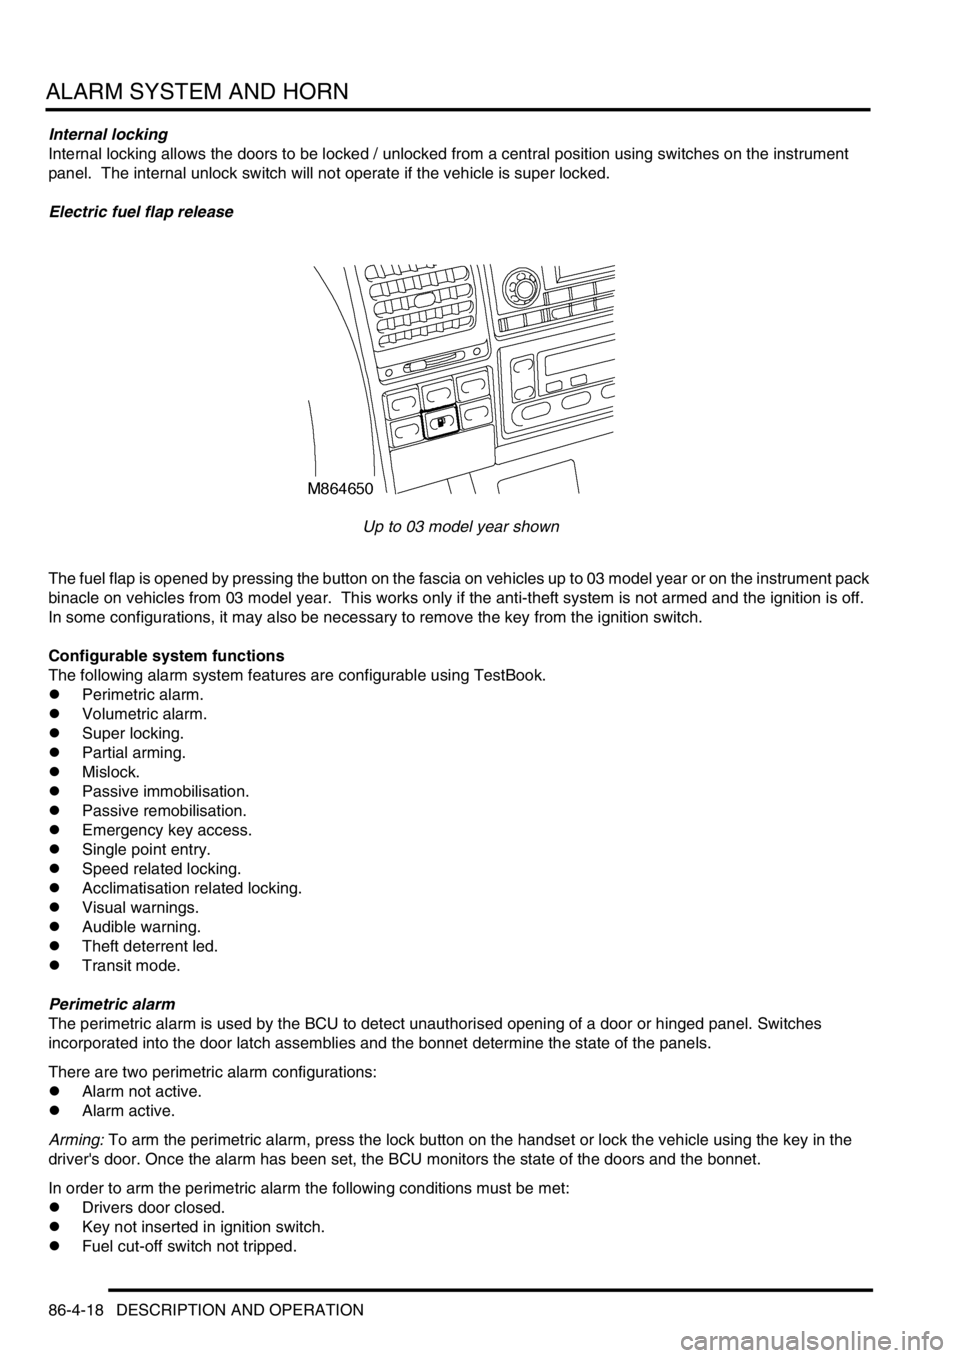
Electric fuel flap release
Up to 03 model year shown
The fuel flap is opened by pressing the button on the fascia on vehicles up to 03 model year or on the instrument pack
binacle on vehicles from 03 model year. This works only if the anti-theft system is not armed and the ignition is off.
In some configurations, it may also be necessary to remove the key from the ignition switch.
Configurable system functions
The following alarm system features are configurable using TestBook.
lPerimetric alarm.
lVolumetric alarm.
lSuper locking.
lPartial arming.
lMislock.
lPassive immobilisation.
lPassive remobilisation.
lEmergency key access.
lSingle point entry.
lSpeed related locking.
lAcclimatisation related locking.
lVisual warnings.
lAudible warning.
lTheft deterrent led.
lTransit mode.
Perimetric alarm
The perimetric alarm is used by the BCU to detect unauthorised opening of a door or hinged panel. Switches
incorporated into the door latch assemblies and the bonnet determine the state of the panels.
There are two perimetric alarm configurations:
lAlarm not active.
lAlarm active.
Arming: To arm the perimetric alarm, press the lock button on the handset or lock the vehicle using the key in the
driver's door. Once the alarm has been set, the BCU monitors the state of the doors and the bonnet.
In order to arm the perimetric alarm the following conditions must be met:
lDrivers door closed.
lKey not inserted in ignition switch.
lFuel cut-off switch not tripped.
Page 1345 of 1529

ALARM SYSTEM AND HORN
86-4-22 DESCRIPTION AND OPERATION
The code is recorded on the security information card and is entered as follows:
1Using the key, turn the driver's door lock to the UNLOCK position and hold in this position for at least 5 seconds.
An audible warning is then emitted to indicate that the body control unit is ready to accept the code. Return the
key to the centre position. It is now possible to use the key to enter the separate numerical values of the four
digits that make up the EKA code.
2Enter the first digit of the code. If the first digit is 4, turn the key to the UNLOCK position 4 times. Ensure the
key is fully returned to the centre position after each turn of the key.
3Enter the second digit of the code. If the second digit is 3, turn the key to the LOCK position 3 times. Ensure
the key is fully returned to the centre position after each turn of the key.
4Enter the third digit of the code. If the third digit is 2, turn the key to the UNLOCK position twice. Ensure the key
is fully returned to the centre position after each turn of the key.
5Enter the fourth digit of the code. If the fourth digit is 1, turn the key to the LOCK position once. Ensure the key
is fully returned to the centre position after each turn of the key.
6Finally, turn the key to the UNLOCK position and back to the centre position, a double bleep will indicate that
the code has been entered correctly. A single bleep indicates that the code has been entered incorrectly.
Then, before opening the door, wait 5 minutes for the alarm and immobiliser to be de-activated. During the 5
minute wait for the alarm and immobiliser to be de-activated, the alarm indicator LED in the instrument pack
continues to flash (one flash every 2 seconds). DO NOT OPEN THE DOOR OR ATTEMPT TO ENTER THE
CAR until the full delay period has elapsed.
When the 5 minute wait has elapsed, the alarm indicator LED stops flashing. Immediately open the door, insert
the key in the ignition switch and turn the switch to position II. If the ignition switch is not turned to position II
within 30 seconds of the end of the 5 minute wait, the engine is automatically immobilised again.
The EKA code will not be recognised if there is an interval of 10 seconds or more between key turns or if the key is
held turned for 5 seconds or more during the procedure.
In some system configurations a successful EKA code entry is indicated by the audible warning device pulsing twice
for a period of 50 ms on, 200 ms off. The theft deterrent LED is switched on for 1 second, all doors unlock, the alarm
disarms and the vehicle is remobilised allowing the engine to start.
If an incorrect code is entered, an audible warning is emitted and the procedure must be repeated. Up to a maximum
of 10 attempts to enter the code is possible. After 10 attempts, the BCU will not allow any further codes to be entered
for a period of 10 minutes.
Single point entry
Single point entry (SPE) allows the driver to unlock the driver's door while leaving all other doors locked.
There are two configurations for single point entry:
lSPE not active.
lSPE active.
To use SPE, press the unlock button on the handset once. Depressing the unlock button a second time in the space
of one minute unlocks the remaining doors. SPE is also possible by turning the key in the driver's door lock to the
unlock position once. Turning the key to the unlock position again within one minute unlocks the remaining doors.
In order for SPE to operate, the following conditions must be met:
lThe ignition is off.
lAll doors are locked.
Speed related locking
For added protection the vehicle doors can automatically lock when the vehicle exceeds a specific road speed.
There are two configurations for speed related locking:
lSpeed related locking not active.
lSpeed related locking active.
Speed related locking causes the doors to automatically lock when the vehicle exceeds a speed of 4 mph (7 km/h).
When the ignition is switched off, the doors are automatically unlocked. Depressing the instrument panel mounted
central door unlocking switch disables the speed related locking for the duration of the journey.
Speed related locking only activates once per ignition cycle. If speed related locking activates and a door is then
unlocked, the door does not automatically re-lock.
Page 1515 of 1529

INSTRUMENTS
88-32 DESCRIPTION AND OPERATION
Transmission high temperature warning lamp
The transmission high temperature warning lamp within the instrument pack utilises a red LED and a clear legend.
On vehicles fitted with automatic gearboxes, the transmission high temperature warning lamp is utilised to provide the
driver with a visible warning that the automatic gearbox oil has exceeded a normal operating temperature. The
warning lamp will extinguish if the gearbox oil returns back to normal operating temperature.
When the ignition is switched on, the instrument pack illuminates the LED to provide a self-check, providing there is
no fault it will remain illuminated for 3 seconds or until the ignition is switched off.
The power input for the LED is supplied by the instrument pack via fuse 13. The temperature sensor provides the
earth path to illuminate the transmission high temperature warning lamp.
The transmission high temperature warning lamp is controlled according to the voltage present on the temperature
sensor to instrument panel earth path:
l< 1.8 volts = warning lamp on.
l> 7.7 volts = warning lamp off.